当前位置:网站首页>【keras入门】MNIST数据集分类
【keras入门】MNIST数据集分类
2022-04-22 12:00:00 【Michael_Lzy】
目录
一、分步流程
0.导入所需库
import numpy as np
from keras.datasets import mnist
from keras.utils import np_utils
from keras.models import Sequential
from keras.layers import Dense
from keras.optimizers import SGD
1.载入数据
(x_train,y_train), (x_test,y_test) = mnist.load_data()  #第一次需要下载,不过很快
# x_train 60000张28*28的图片,图片上为0-9的数字   y_train:60000个标签,对应于x_train
#x_test:10000张28*28的图片  y_test:10000个标签,对应于x_test
print('x_shape: ',x_train.shape) # (60000, 28, 28)
print('y_shape: ',y_train.shape) # (60000,)
print('x_test_shape: ',x_test.shape) # (10000, 28, 28)
print('y_test_shape: ',y_test.shape) # (10000,)
# 60000, 28, 28)->(60000, 784)
x_train = x_train.reshape(x_train.shape[0],-1)/255.0
# x_train.shape是(60000, 28, 28), x_train.shape[0]就是60000
# -1表示不自己设置具体维度,自动寻找合适值给设置,这里自动设成28*28,也就是784
# 除255是为了归一化
x_test = x_test.reshape(x_test.shape[0],-1)/255.0
# 转换为one_hot格式
y_train = np_utils.to_categorical(y_train,num_classes=10)  # 标签转换为独热向量表示
y_test = np_utils.to_categorical(y_test,num_classes=10)
这里用具体的例子来理解为什么除255.0:
先打印第一张图片并且没有/255的图片看看:
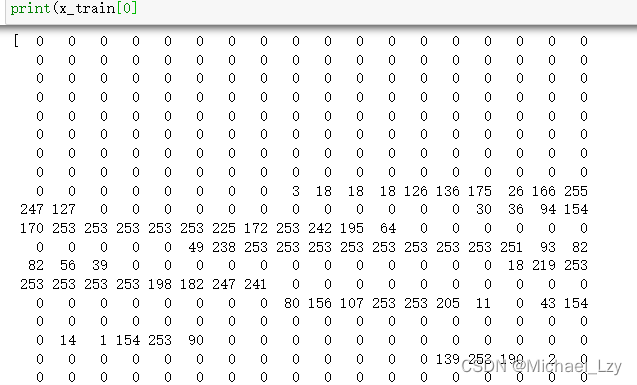
可以看到一些像素点是以整数表示。
归一化后,对应的整数都变为了[0,1]的数字:

3.创建模型
# 输入层784个神经元,输出层10个神经元
model = Sequential([
        Dense(units=10,input_dim=784,bias_initializer='one',activation='softmax')
    ])                              # 偏置设为1              激活函数用softmax

# 定义优化器
sgd = SGD(lr=0.2)  #学习率设置为0.2,可以自己看着调

# 定义优化器, loss function, 训练过程中计算准确率
model.compile(
        optimizer = sgd,
        loss = 'mse',            # 损失函数用均方误差
        metrics = ['accuracy'],
)
4.训练模型
# 训练模型
model.fit(x_train, y_train,batch_size=32,epochs=10)
# batch_size是一次把32条数据投进去训练,每次训练32条,训练60000/32次,
# 这60000/32次训练一遍为一个epoch,一共训练10个epoch

# 评估模型
loss, accuracy = model.evaluate(x_test,y_test)
print('\ntest loss: ',loss)
print('accuracy:',accuracy)
5.完整代码
import numpy as np
from keras.datasets import mnist
from keras.utils import np_utils
from keras.models import Sequential
from keras.layers import Dense
from keras.optimizers import SGD

# 载入数据
# x_train 60000个28*28的数字 y_train:60000个标签,对应于x_train
(x_train,y_train), (x_test,y_test) = mnist.load_data()

# 60000, 28, 28)->(60000, 784)
x_train = x_train.reshape(x_train.shape[0],-1)/255.0
# x_train.shape是(60000, 28, 28), x_train.shape[0]就是60000
# -1表示不自己设置具体维度,自动寻找合适值给设置,这里自动设成28*28,也就是784
# 除255是为了归一化,把一张图片上
x_test = x_test.reshape(x_test.shape[0],-1)/255.0
# 换one_hot格式
y_train = np_utils.to_categorical(y_train,num_classes=10)  # 标签转换为独热向量表示
y_test = np_utils.to_categorical(y_test,num_classes=10)


# 创建模型
model = Sequential([
        Dense(units=10,input_dim=784,bias_initializer='one',activation='softmax')
    ])

# 定义优化器
sgd = SGD(lr=0.2)

# 定义优化器, loss function, 训练过程中计算准确率
model.compile(
        optimizer = sgd,
        loss = 'mse',
        metrics = ['accuracy'],
)

#训练模型
model.fit(x_train, y_train,batch_size=32,epochs=10)
#batch_size是一次把32条数据投进去训练,每次训练32条,训练60000/32次,这60000/32次训练一遍为一个epoch,一共训练10个epoch

# 评估模型
loss, accuracy = model.evaluate(x_test,y_test)
print('\ntest loss: ',loss)
print('accuracy:',accuracy)
二、需要用到的keras函数
1.np_utils.to_categorical()
对数据的label进行one-hot encoding转换。在深度学习中做分类时,需要将figure的label转化为one-hot encoding。
np_utils.to_categorical(数据的label)
2.keras.optimizers.SGD()
SGD:随机梯度下降法,优化器之一
keras.optimizers.SGD(lr=0.01, momentum=0.0, decay=0.0, nesterov=False)
参数:
lr:大或等于0的浮点数,学习率
momentum:大于或等于0的浮点数,动量参数
decay:大或等于0的浮点数,每次更新后的学习率衰减值
nesterov:布尔值,确定是否使用Nesterov动量
3.model.compile()
model.compile()方法用于在配置训练方法时,告知训练时用的优化器、损失函数和准确率评测标准
model.compile(optimizer = 优化器,
              loss = 损失函数,
              metrics = ["准确率”])

# optimizer和loss可以是字符串形式给出的优化器名字,也可以是函数形式
4.model.fit()
fit( x, y, batch_size=32, epochs=10, verbose=1, callbacks=None,
validation_split=0.0, validation_data=None, shuffle=True,
class_weight=None, sample_weight=None, initial_epoch=0)
x:输入数据。如果模型只有一个输入,那么x的类型是numpy array,如果模型有多个输入,那么x的类型应当为list,list的元素是对应于各个输入的numpy array
y:输入数据对应的标签,numpy array
batch_size:整数,指定进行梯度下降时每个batch包含的样本数。训练时一个batch的样本会被计算一次梯度下降,使目标函数优化一步。
epochs:整数,训练终止时的epoch值,训练将在达到该epoch值时停止,当没有设置initial_epoch时,它就是训练的总轮数,否则训练的总轮数为epochs - inital_epoch
返回值:
fit函数返回一个History的对象,其History.history属性记录了损失函数和其他指标的数值随epoch变化的情况
5.model.evaluate()
输入数据和标签,输出损失和精确度.
# 用来评估模型
loss,accuracy = model.evaluate(X_test,Y_test)
版权声明
本文为[Michael_Lzy]所创,转载请带上原文链接,感谢
https://blog.csdn.net/Michale_L/article/details/124327314
边栏推荐
- 数字藏品系统开发,数藏app系统搭建
- 如何测试 Flutter 应用? ー 单元测试
- Walking in the clouds - all my life
- Stack frame understanding of function
- 2. flddler响应显示乱码问题解决方案
- A note that allows you to capture the offer of a large factory. Come and get it quickly
- 人为什么看不到真相?
- Is it better to use V-IF on the component or use V-IF to control the highest level div in the component? What are the advantages and disadvantages
- 编写最简单的字符设备驱动
- 量化系统开发,量化交易系统APP搭建
猜你喜欢

人为什么看不到真相?

"Open source summer" activity is hot. In the registration, rich bonuses are waiting for you to get!
北汽福田与中国石化、轻程物联网组建中石化销售氢能源(北京)

离散结构及其应用重要知识点总结

The second day of playing 51 single chip microcomputer in 14 days -- thought we were playing LED lights? No, no, no, we're playing with the bottom I / O^-^

How does software spread?

【安全建设】日志监控的极品工具sysmon

A note that allows you to capture the offer of a large factory. Come and get it quickly

2. flddler响应显示乱码问题解决方案

TS中通过变量存储key值读取对象的属性值时报错(TS: 7053)

随机推荐
JDBC realizes the addition, deletion, modification and query of database
How does software spread?
2019-8-8-WPF-非客户区的触摸和鼠标点击响应
Circuit experiment -- Experiment 4 Davinan theorem and Norton theorem
深度报告:异构时代,芯片需集成多个模板
31. 创建两只相同的对象
Kernel pwn 基础教程之 Heap Overflow
C语言小项目----> 推箱子
LeetCode腾讯精选练习50题-104.二叉树的最大深度
1086 tree traversals again (25 points)
2. flddler响应显示乱码问题解决方案
离散结构及其应用重要知识点总结
Open new space for development with digital key
TS中通过变量存储key值读取对象的属性值时报错(TS: 7053)
golang开发:go并发的建议
js 【详解】闭包
Intelligent party building integrated management platform development, digital party building integrated management system
Quantitative system development and quantitative trading system app construction
Wow, it's so rich.
MySQL使用SELECT 语句不加ORDER BY默认是如何排序的?