当前位置:网站首页>Install different versions of MinGW (g++/gcc) and the configuration of the corresponding clion editor under Win
Install different versions of MinGW (g++/gcc) and the configuration of the corresponding clion editor under Win
2022-08-11 05:46:00 【Ah zink wire rope】
1. Download the software package
mingw official website download address
1. The first file is the downloader, and some errors may occur.
2. These two correspond to 64-bit operating systems:
: x86_64-posix-sjlj
: x86_64-posix-she
3. These two correspond to 32-bit operating systems:
:x86_64-win32-sjlj
: x86_64-win32-she
4. DWARF: a package with debugging information (DWARF-2 (DW2) EH), so it is larger than the general package size and only supports 32 bitsSystem;
5. Supplementary instructions:
sjlj: cross-platform, supports 32 and 64-bit systems, the disadvantage is: the running speed is slightly slower, GCC does not support
seh: call the system mechanism to handle exceptions, support 32,64-bit system, the disadvantage is: Gcc does not support (will be supported soon)
posix: C++11 multithreading feature enabled
Second, unzip and install
1. Unzip it to the specified directory after downloading.
Copy the unzipped mingw64 directly to the installation directory and customize it.You can also copy the files in mingw64 to a custom named installation directory
Two versions of mingw are installed here:
2. Environment configuration
Go to the bin directory and copy the hierarchical path in the figure:
Right click on this computer properties:
Click on Advanced system settings:

Select Path and click Edit:
After clicking New on the right, paste the copied bin directory here:

The green arrow is the installation location of my bin directory.
This concludes the environment variable configuration.At this point, you can enter gcc -v in the cmd terminal to check whether the installation is successful and the corresponding gcc version: 
You can restart to make the environment variable configuration take effect before viewing.
Three, clion configuration
1. After clicking file, enter settings: 
2. As shown in the picture, click "Toolchains" under "Bulid, Execution, Deployment": 
3. Click on the upper right of Download... in the Environment item, and select the MinGW installation directory. As shown in the figure, the blogger's installation path is mingw6481, and you can write it at this level:
4. Select gdb.exe in bin directory for Debugger directory:
The rest of the items will be automatically generated, and finally click ok.
5. After the installation is complete, you can check the gcc version in the terminal of clion: 
Supplementary matters:
(1) To view the gcc version, in addition to the above two methods, you can also view it directly in the bin directory of the installation female donkey: 
(2) If you need to change the gcc version, install and modify the environment variables and IDE settings in the same way and then restart,Changes to the gcc version of the IDE will take effect.
边栏推荐
- lspci 命令使用
- (1) Construction of a real-time performance monitoring platform (Grafana+Influxdb+Jmeter)
- 深入理解线程、进程、多线程、线程池
- C语言结构体详解 (2) 结构体内存对齐,默认对齐数
- C语言——程序的编译与执行、宏定义详解
- QT Mat转HObject和HObject转Mat 图像视觉处理
- 家·谱——人脸识别家谱系统
- (1) Docker installs Redis in practice (one master, two slaves, three sentinels)
- flask框架学习:debug与配置项
- CSDN 社区内容创作规范
猜你喜欢
总结:交叉验证

【网站小白】mySQL数据库异常断开

手推卷积神经网络参数(卷积核)求导
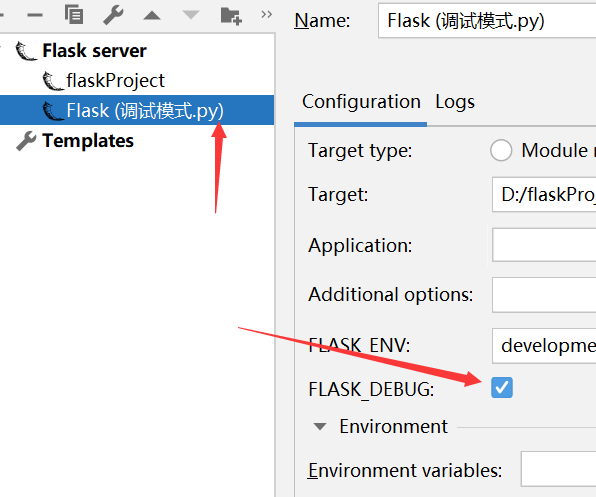
Flask framework to study: the debug and configuration items

Solidrun hummingboard制作SD卡

吃瓜教程task01 第2章 模型评估与选择

(1) Docker installs Redis in practice (one master, two slaves, three sentinels)
我的四核Cortex-A53学习之路

flaks framework learning: adding variables to the URL
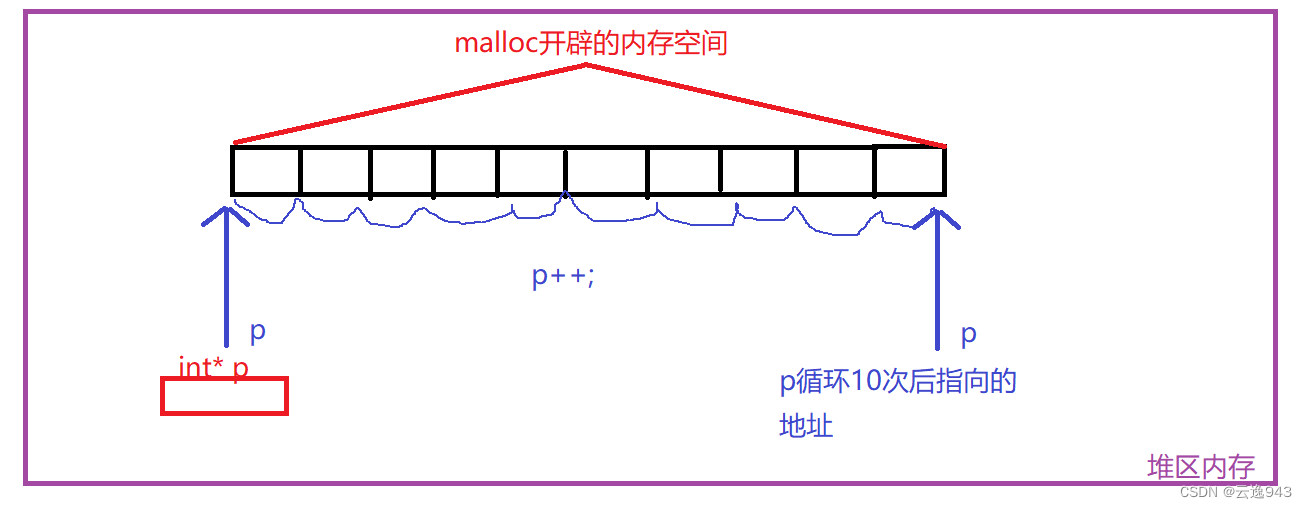
C语言——动态内存分配常见的错误案例
随机推荐
05-Nodejs中的模块加载机制
pytorch中tensor 生成的函数
ClionIDE通过指定编译器编译
[Verilog] I2S Master Test Bench
第9章 内存模型和名称空间
怎么用管理员方式打开压缩包
第5章 循环和关系表达式
基于TF-IDF 文本相似性实战 详细教程
flask框架学习:debug与配置项
全国青少年信息学奥林匹克联赛大纲
QT QLabel控件(使用详解)
【网站小白】Hibernate插入数据成功,不报错,但是数据库中没有值
leetcode21.合并两个有序链表
深入理解线程、进程、多线程、线程池
【转载】CMake 语法 - 详解 CMakeLists.txt
做款好喝的茶饮~
Chapter 5 Loops and Relational Expressions
第4章 复合类型-1
C语言——文件操作详解(1)
LeetCode43.字符串相乘 (大数相乘可用此方法)