当前位置:网站首页>AUTOCAD - reducing spline curve control points, the advanced CAD practice (3)
AUTOCAD - reducing spline curve control points, the advanced CAD practice (3)
2022-08-10 11:09:00 【Dream CAD software】
When the number of control points of the spline curve is too many, it is not easy to modify, how to reduce the number of control points of the spline curve?
Execution method
1. Enter the edit spline command "SPLINEDIT" (shortcut key: SPE), and press the space bar.
Edit Spline Commands
2. Then select the spline curve, and then according to the prompt, enter the option "Fit data F", and then press the space bar.
Select Spline
Fit data F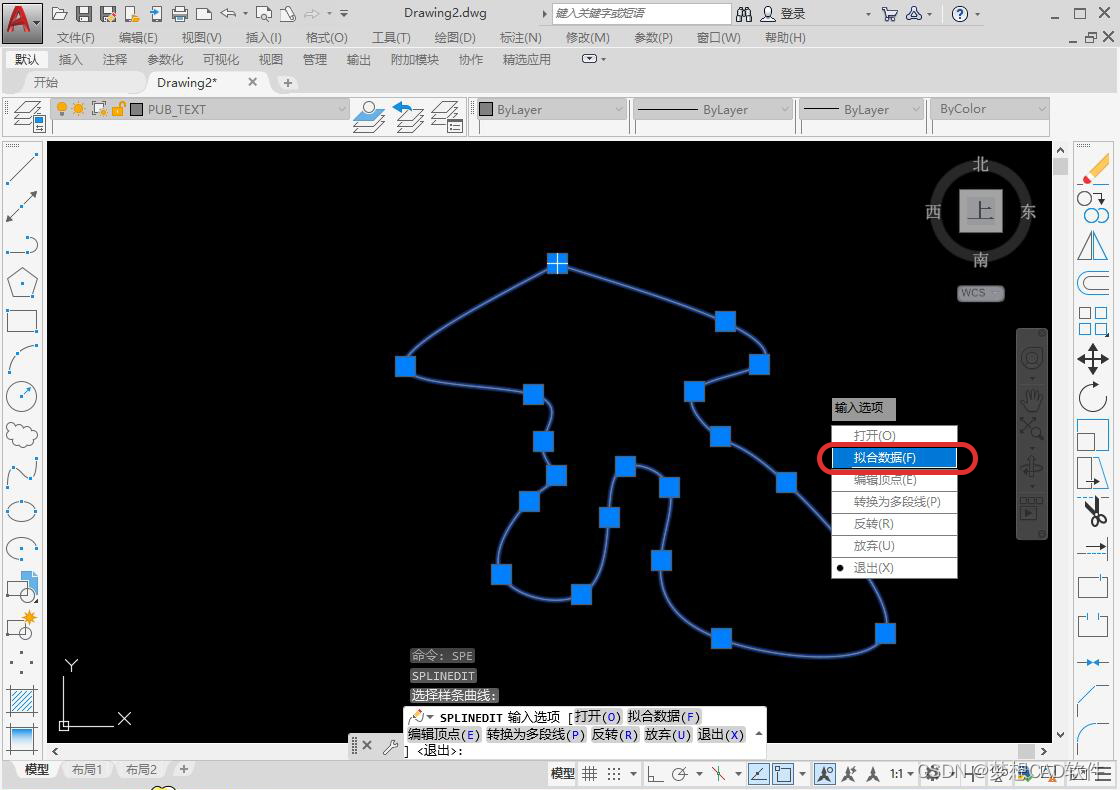
3. Then enterOption "Delete D", after a space, specify the existing fitting point on the spline curve, click the control point to be deleted with the left mouse button, press Enter three times to exit the editing, and the deletion of the control point is completed.
Delete D
Specify existing fit points
Delete control point done
Let's draw an advanced practice problem with CAD Dream Drawing.
Analysis Description
1. You can modify the drawing mode and the line width of objects when drawing with polylines.
2. The "divide" command can "divide" the object by a fixed number.
target object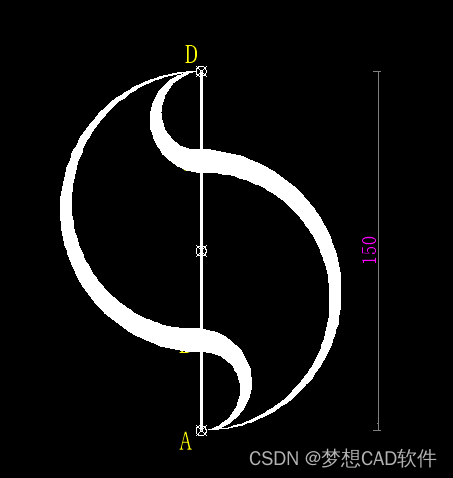
Operating Tools
Operating system: Windows10
CAD Software: CAD Dream Drawing
Steps
1. Click Point Style under the Format menu bar to open the "Point Style" dialog box, as shown below:
Open Point Styles dialog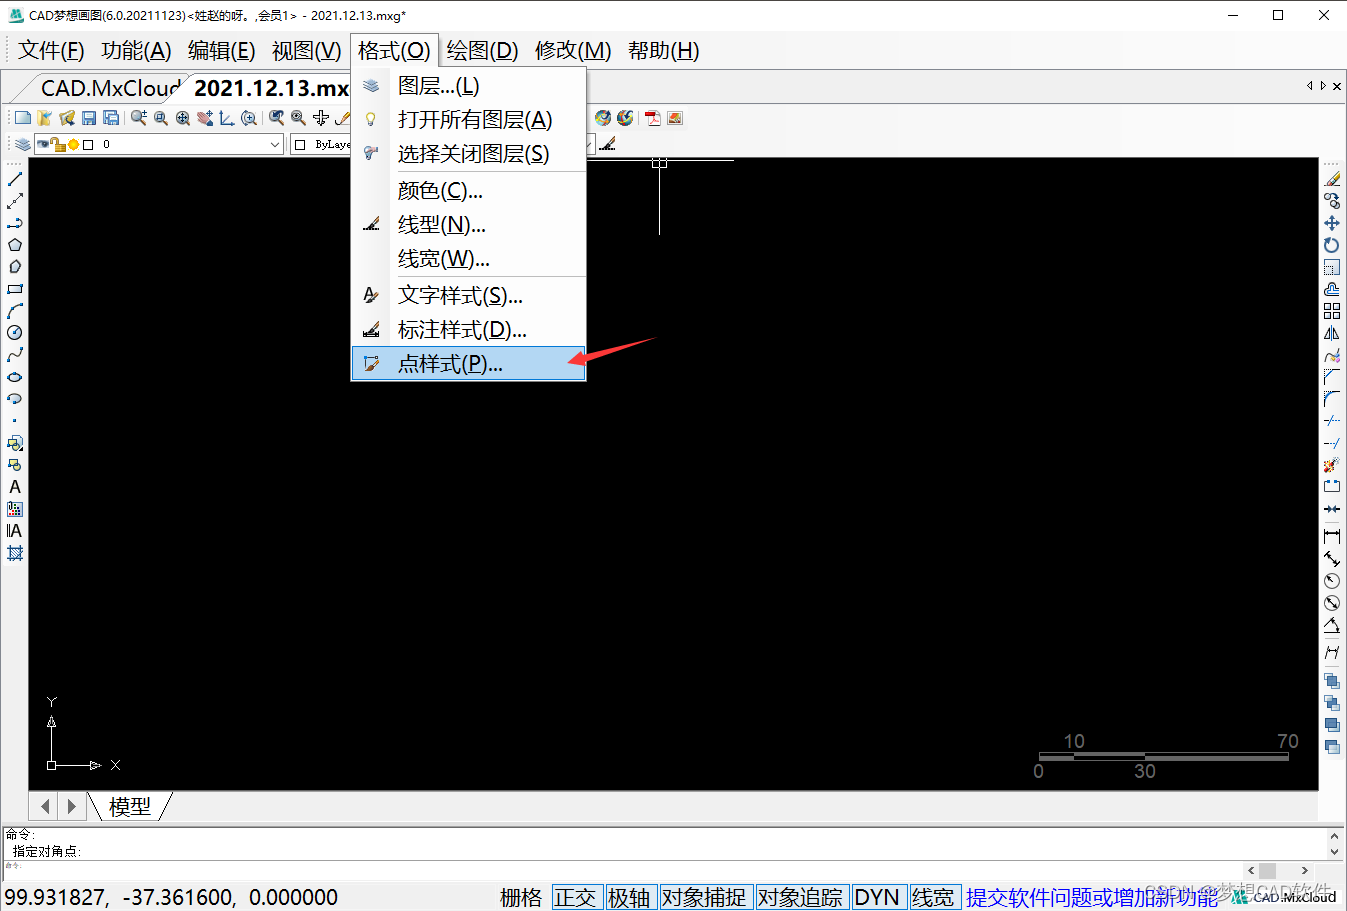
2. Select the display obvious point style and click OK, as shown below:
Select point style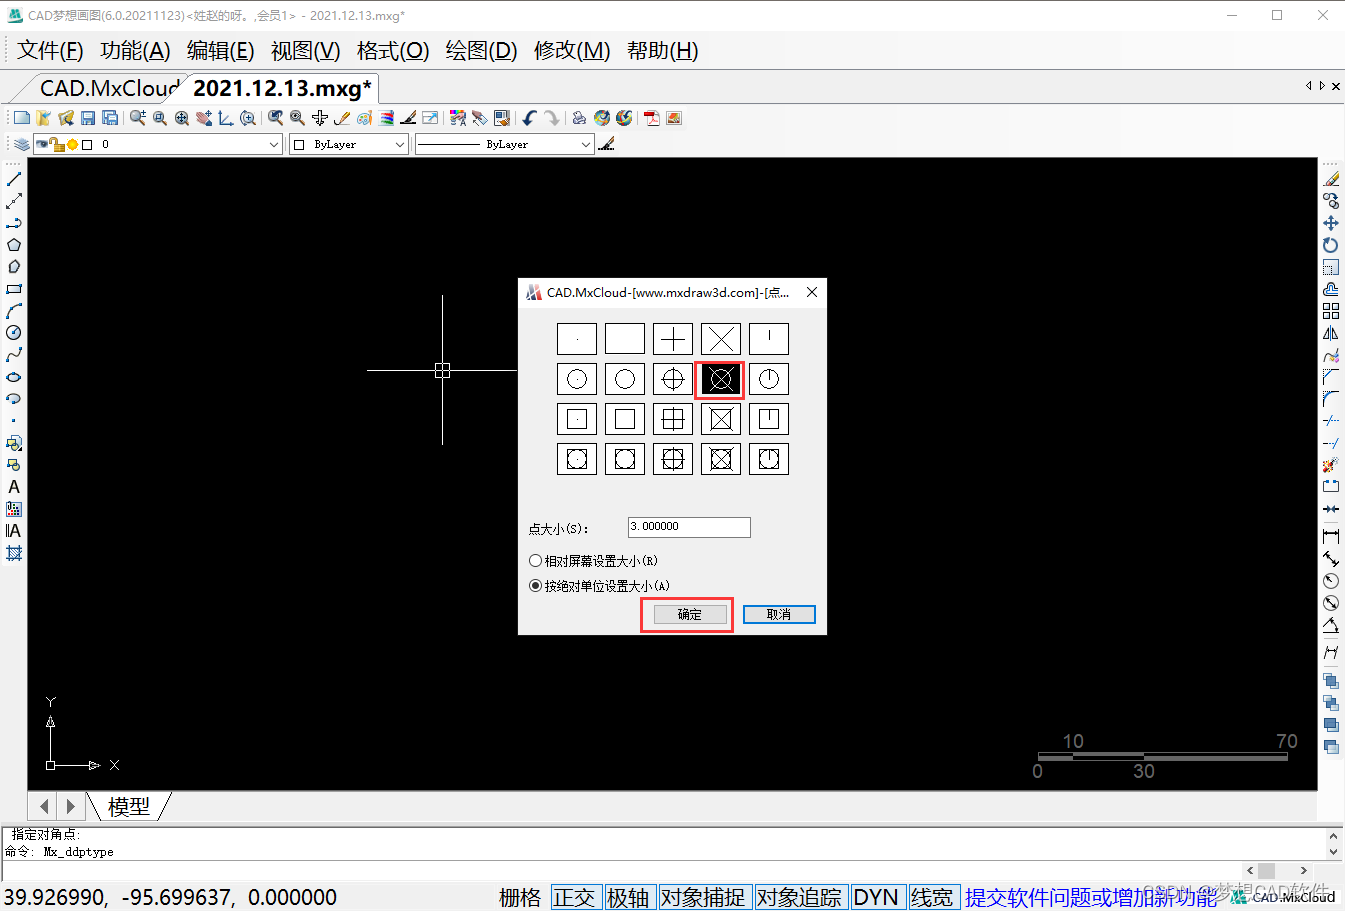
3. Enter the line (L) command on the command line to draw a straight line AD with a length of 150, as shown in the following figure:
Draw a line
4. Enter the DIVIDE command on the command line to divide the straight line AD into four equal line segments, and number the equally divided nodes (except for the middle point) as shown in the following figure:
Equally divided line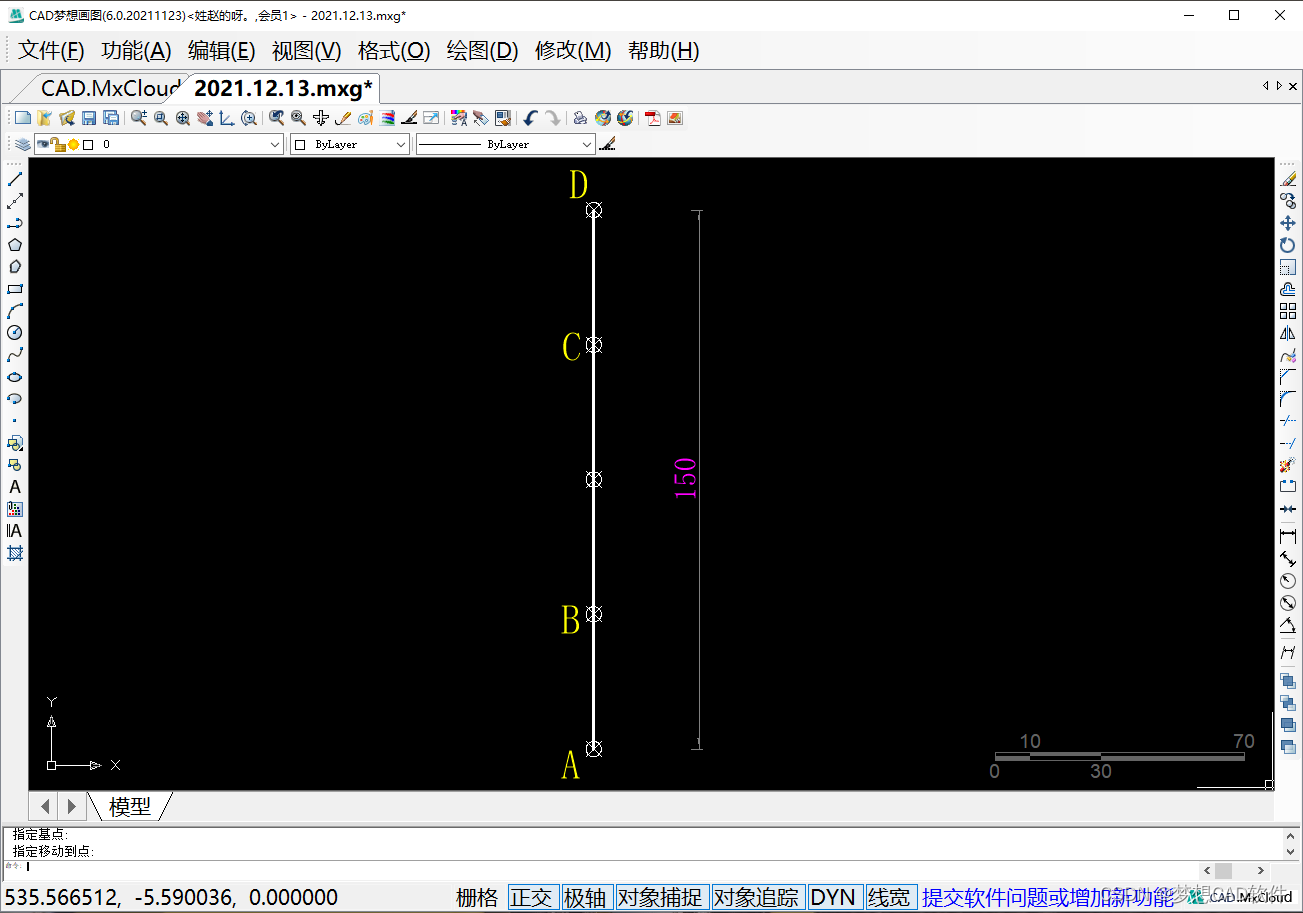
5. Enter the multi-line segment (PL) command on the command line, and enter the arc (A) after a point A is the starting point, as shown in the following figure:
Using the polyline command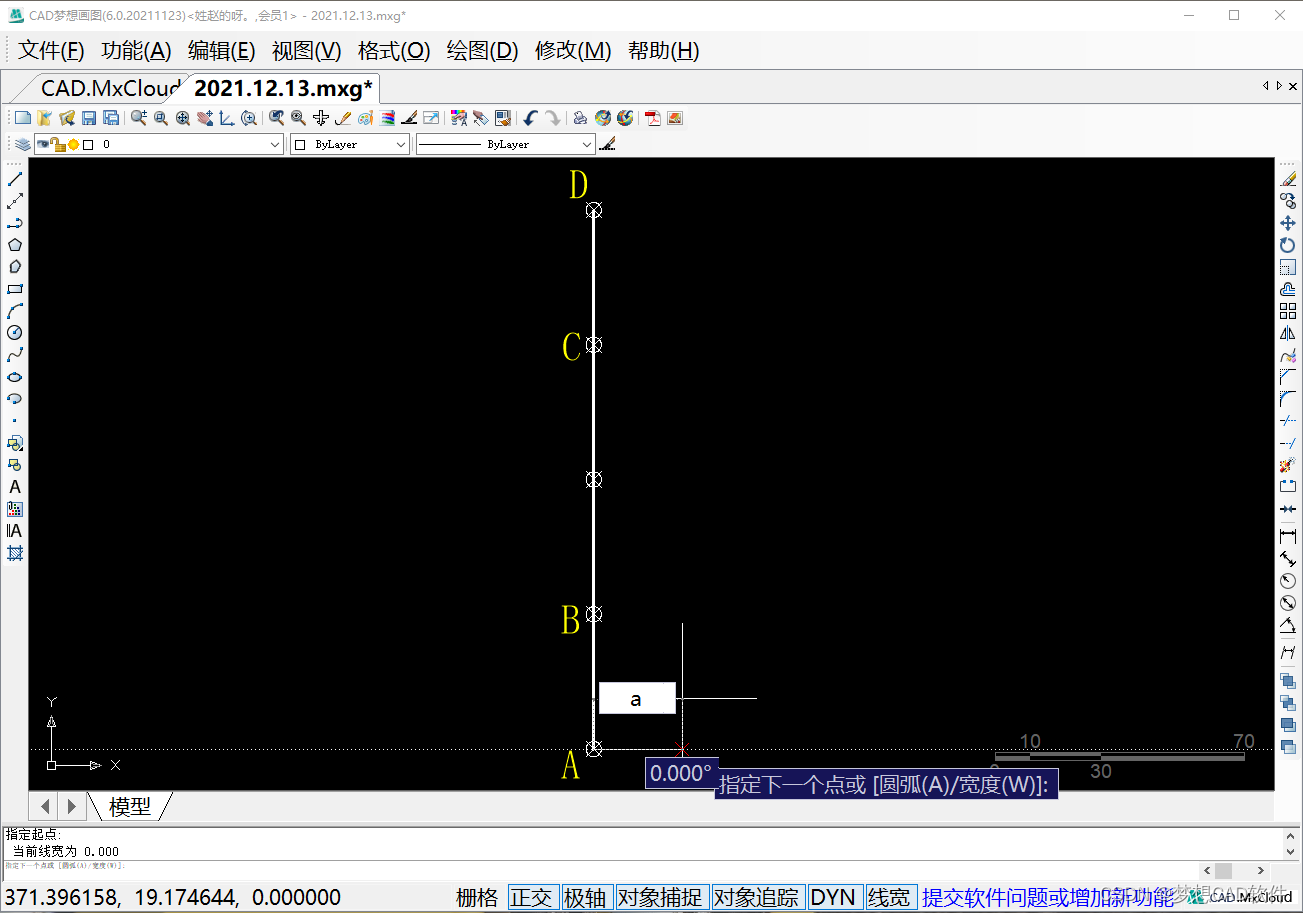
6. Then enter the width (W) option to set the width of the starting point to 0; the width of the endpoint is set to 10, as shown in the following figure:
Set width for the first time
7. After the setting is completed, specify point B as the endpoint of the arc, as shown in the following figure:
Endpoint at point B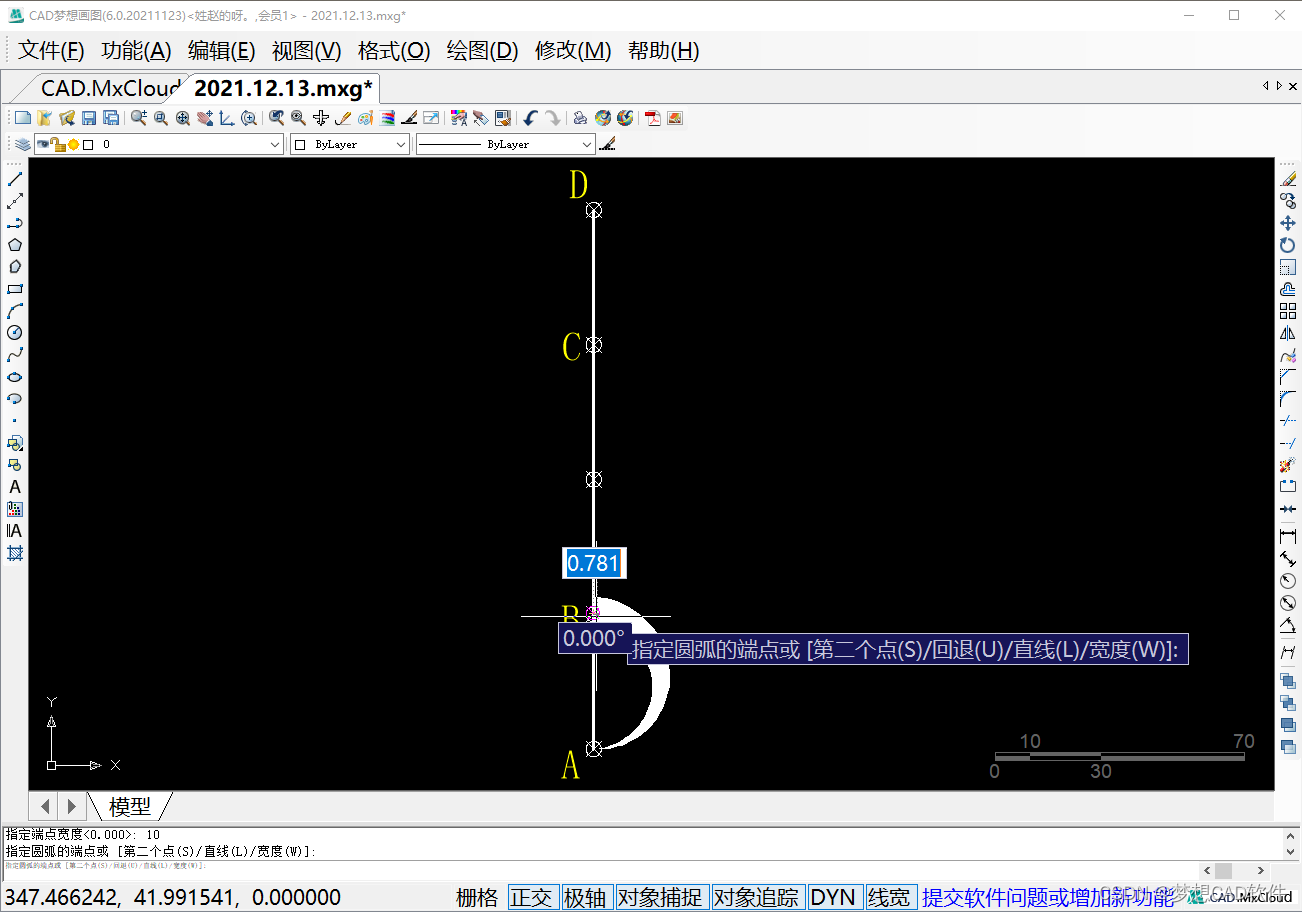
8. At this time, enter the width (W) option to set the width of the starting point to 10; the width of the endpoint is set to 0, as shown in the following figure:
Second modification width
9. Then we connect directly to point D to complete as shown below:
Endpoint at point D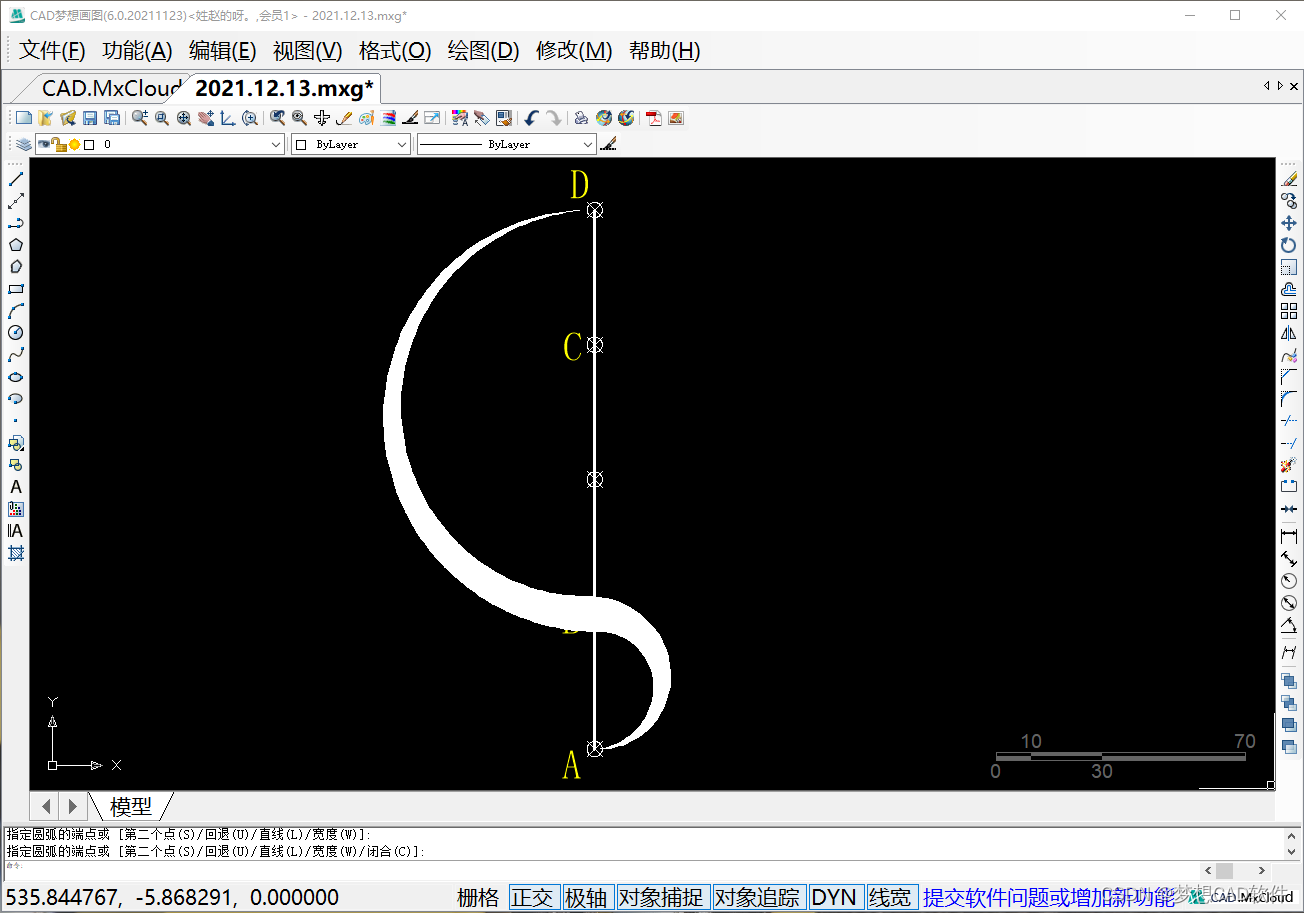
10. When we repeat the above operation to the sixth step, use point A as the starting point of the arc; point C is the endpoint of the arc, as shown in the following figure:
Endpoint at point C
11. At this time, enter the width (W) option to set the width of the starting point to 10; set the width of the end point to 0, and connect to point D, as shown in the following figure:
Drawing completed

边栏推荐
- 3D旋转文本动画js特效
- 谷歌数据中心发生“电力事故”造成 3 人受伤
- 1-IMU参数解析以及选择
- 网络安全笔记6——数字证书与公钥基础设施
- OneFlow source code parsing: operator instructions executed in a virtual machine
- EasyCVR级联时,修改下级平台名称将不同步至上级平台
- Techches Transformer the join wisdom source the author cao, visual basic model study
- 3 injured in 'electrical accident' at Google data center
- 2022.8.7-----leetcode.636
- 第5章相似矩阵及二次型(4)
猜你喜欢

网络安全笔记6——数字证书与公钥基础设施

C#实战:基于ItextSharp技术标签生成小工具

bus事件总线 使用

HCIP ---- VLAN

"MySQL Advanced Chapter" 6. Principles of index creation and design

「时序数据库」使用cassandra进行时间序列数据扫描

什么是抽象类

3D旋转文本动画js特效
3D rotating text animation js special effects

Redis (six) - transaction and lock mechanism of Redis6 (unfinished, to be supplemented)
随机推荐
POJ 2891 Strange Way to Express Integers (扩展欧几里得)
[Microservice Architecture] Microservices and SOA Architecture (2)
组合模式:Swift 实现
《MySQL高级篇》六、索引的创建与设计原则
Taro小程序跨端开发入门实战
Redis (three) - detailed configuration file, publish and subscribe, new data types
「业务架构」介绍BPMN第二部分-泳道
PTA 7-2 Summation and Counting of Diagonal Elements of Square Matrices Solution
"Chief Engineer" Principal (Principal) engineer's way of training
用proteus直接仿真stm32-可以完全丢弃编程器
从产品维度来看 我们为什么不能完全信任Layer2?
String interception function in SQL
Summary of whitespace, space and escape characters in C language
干货!ASSANet:让PointNet++更快更强
第5章相似矩阵及二次型(4)
【FAQ】【Push Kit】 华为怎么设置角标
"Data Strategy" Results-Driven Enterprise Data Strategy: Organization and Governance
蔚来-软件开发工程师一面记录
一文带你搞懂中断按键驱动程序之poll机制
Redis(三)——配置文件详解、发布和订阅、新数据类型