当前位置:网站首页>Practice of industrial defect detection project (III) -- Based on FPN_ PCB defect detection of tensorflow
Practice of industrial defect detection project (III) -- Based on FPN_ PCB defect detection of tensorflow
2022-04-23 02:40:00 【Summer melts the season】
be based on FPN_Tensorflow Of PCB defect detection
This is a practical article , Refer to :
Printed circuit board defect recognition based on deep learning .
Because the preprocessing of the data set introduced is not very detailed , So sort it out again here , By the way, learn a new deep learning network model .
One . principle
Faster R-CNN.
Deep learning network | FPN and fast rcnn And RPN Details of how the network is combined .
Two . Training process
1. Data preparation
You can download datasets from here :http://robotics.pkusz.edu.cn/resources/dataset/
My has allocated training data and verification data , Here, according to the data set downloaded from the official website .
After downloading the original data set , You'll find so many folders :

Annotations Folder :
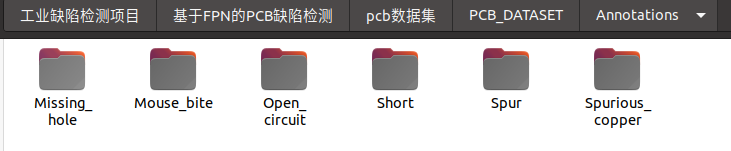
You need to move all the files in each folder to Annotations/, I think so :

Again , Yes images/, That's it :
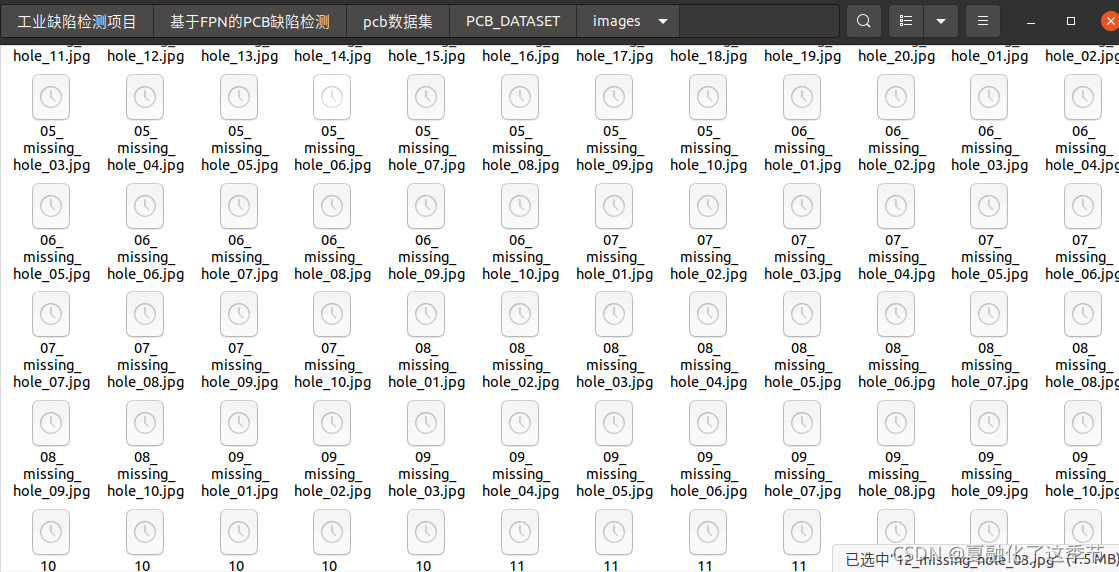
6 Move all the pictures in the folder , Then delete the empty folder .
2. Download source code
Environmental requirements : Note the version match

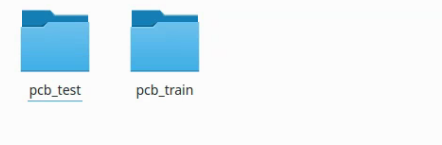
3. Data splitting
Split your data set into training sets 、 Test set :
python /data/io/divide_data.py
Two folders will be generated :
4. Modify the configuration
stay /libs/label_name_dict/label_dict.py Add your own dataset label category . As follows :
# -*- coding: utf-8 -*-
from __future__ import division, print_function, absolute_import

from libs.configs import cfgs

if cfgs.DATASET_NAME == 'ship':
    NAME_LABEL_MAP = {

        'back_ground': 0,
        'ship': 1
    }
elif cfgs.DATASET_NAME == 'aeroplane':
    NAME_LABEL_MAP = {

        'back_ground': 0,
        'aeroplane': 1
    }
elif cfgs.DATASET_NAME == 'WIDER':
    NAME_LABEL_MAP = {

        'back_ground': 0,
        'face': 1
    }
elif cfgs.DATASET_NAME == 'jyzdata':
    NAME_LABEL_MAP = {

        'back_ground': 0,
        'classone': 1,
        'boli': 2,
        'dangeboli': 3,
        'taoci': 4,
        'taoci2': 4
    }
elif cfgs.DATASET_NAME == 'icdar':
    NAME_LABEL_MAP = {

        'back_ground': 0,
        'text': 1
    }
elif cfgs.DATASET_NAME.startswith('DOTA'):
    NAME_LABEL_MAP = {

        'back_ground': 0,
        'roundabout': 1,
        'tennis-court': 2,
        'swimming-pool': 3,
        'storage-tank': 4,
        'soccer-ball-field': 5,
        'small-vehicle': 6,
        'ship': 7,
        'plane': 8,
        'large-vehicle': 9,
        'helicopter': 10,
        'harbor': 11,
        'ground-track-field': 12,
        'bridge': 13,
        'basketball-court': 14,
        'baseball-diamond': 15
    }
elif cfgs.DATASET_NAME == 'pascal':
    NAME_LABEL_MAP = {

        'back_ground': 0,
        'aeroplane': 1,
        'bicycle': 2,
        'bird': 3,
        'boat': 4,
        'bottle': 5,
        'bus': 6,
        'car': 7,
        'cat': 8,
        'chair': 9,
        'cow': 10,
        'diningtable': 11,
        'dog': 12,
        'horse': 13,
        'motorbike': 14,
        'person': 15,
        'pottedplant': 16,
        'sheep': 17,
        'sofa': 18,
        'train': 19,
        'tvmonitor': 20
    }
elif cfgs.DATASET_NAME == 'pcb':
    NAME_LABEL_MAP = {

        'back_ground': 0,
        'missing_hole': 1,
        'mouse_bite': 2,
        'open_circuit': 3,
        'short': 4,
        'spur': 5,
        'spurious_copper': 6
    }
else:
    assert 'please set label dict!'


def get_label_name_map():
    reverse_dict = {
    }
    for name, label in NAME_LABEL_MAP.items():
        reverse_dict[label] = name
    return reverse_dict

LABEl_NAME_MAP = get_label_name_map()
Then you can run convert_data_to_tfrecord.py 了 . Don't forget to fill in four parameters .
python convert_data_to_tfrecord.py --VOC_dir='***/VOCdevkit/VOCdevkit_train/' --save_name='train' --img_format='.jpg' --dataset='ship'
5. Data conversion
next step , The training and test data need to be converted into TFrecord Format . The format is TensorFlow Efficient storage format , Continuous memory binary storage can effectively speed up the reading and writing of data . Like the original folder, each data is stored independently .
python convert_data_to_tfrecord.py --VOC_dir='***/data/pcb_test/' --save_name='test' --img_format='.jpg' --dataset='pcb'
python convert_data_to_tfrecord.py --VOC_dir='***/data/pcb_train/' --save_name='train' --img_format='.jpg' --dataset='pcb'
#  Last training 、 Folder path after test data separation
--VOC_dir=' Your data path '

#tfrecord name . Training data is used 'train' , Test data with 'test'
--save_name='train'

# Your picture format . Yes Png\tif\jpeg
--img_format='.jpg'

# Your dataset name . This needs to be /libs/label_name_dict/label_dict.py Add your own dataset
--dataset='mydataset
6. Parameter setting
Corresponding to the inside model, The pre training model should be downloaded first , Put it in /data/pretrained_weights/ in .
Download address of pre training model :
Res101: resnet_v1_101_2016_08_28.tar.gz.
Res50: resnet_v1_50_2016_08_28.tar.gz.
The data is ready , Then the training needs to adjust some paths . open /libs/configs/cfgs.py.
# -*- coding: utf-8 -*-
from __future__ import division, print_function, absolute_import
import os
import tensorflow as tf
# ------------------------------------------------
VERSION = 'FPN_Res101_0117_OHEM'#----------------- Change
NET_NAME = 'resnet_v1_101'#----------------- Change
ADD_BOX_IN_TENSORBOARD = True

# ---------------------------------------- System_config
ROOT_PATH = os.path.abspath('/home/cg/ Machine vision and machine learning / Industrial defect detection items / be based on FPN Of PCB defect detection /Xia-Detection-for-PCB')# Project file path ----------------- Change
print (20*"++--")
print (ROOT_PATH)
GPU_GROUP = "2"
SHOW_TRAIN_INFO_INTE = 10
SMRY_ITER = 100
SAVE_WEIGHTS_INTE = 10000

SUMMARY_PATH = ROOT_PATH + '/output/summary'
TEST_SAVE_PATH = ROOT_PATH + '/tools/test_result'
INFERENCE_IMAGE_PATH = ROOT_PATH + '/tools/inference_image'
INFERENCE_SAVE_PATH = ROOT_PATH + '/tools/inference_results'

if NET_NAME.startswith("resnet"):
    weights_name = NET_NAME
elif NET_NAME.startswith("MobilenetV2"):
    weights_name = "mobilenet/mobilenet_v2_1.0_224"
else:
    raise NotImplementedError

PRETRAINED_CKPT = ROOT_PATH + '/data/pretrained_weights/' + weights_name + '.ckpt'
TRAINED_CKPT = os.path.join(ROOT_PATH, 'output/trained_weights')

EVALUATE_DIR = ROOT_PATH + '/output/evaluate_result_pickle/'
#test_annotate_path = '/home/yjr/DataSet/VOC/VOC_test/VOC2007/Annotations'
test_annotate_path = '/home/cg/ Machine vision and machine learning / Industrial defect detection items / be based on FPN Of PCB defect detection /pcb Data sets /PCB_DATASET/Annotations/'#----------------- Change

# ------------------------------------------ Train config
RESTORE_FROM_RPN = False
IS_FILTER_OUTSIDE_BOXES = False
FIXED_BLOCKS = 0  # allow 0~3
USE_07_METRIC = False

RPN_LOCATION_LOSS_WEIGHT = 1.
RPN_CLASSIFICATION_LOSS_WEIGHT = 1.0

FAST_RCNN_LOCATION_LOSS_WEIGHT = 1.0
FAST_RCNN_CLASSIFICATION_LOSS_WEIGHT = 1.0
RPN_SIGMA = 3.0
FASTRCNN_SIGMA = 1.0

MUTILPY_BIAS_GRADIENT = None   # 2.0  # if None, will not multipy
GRADIENT_CLIPPING_BY_NORM = None   # 10.0  if None, will not clip

EPSILON = 1e-5
MOMENTUM = 0.9
LR = 0.001  # 0.001  # 0.0003
#DECAY_STEP = [60000, 80000]  # 50000, 70000
DECAY_STEP = [10000, 20000]  # 50000, 70000
#MAX_ITERATION = 150000
MAX_ITERATION = 30000

# ------------------------------------------- Data_preprocess_config
DATASET_NAME = 'pcb'  # 'ship', 'spacenet', 'pascal', 'coco' #----------------- Change
# PIXEL_MEAN = [123.68, 116.779, 103.939]  # R, G, B. In tf, channel is RGB. In openCV, channel is BGR
PIXEL_MEAN = [21.25, 85.936, 28.729]  #----------------- Change
IMG_SHORT_SIDE_LEN =  600  # 600
IMG_MAX_LENGTH =  3000  # 1000
CLASS_NUM = 6 #----------------- Change

# --------------------------------------------- Network_config
BATCH_SIZE = 1
INITIALIZER = tf.random_normal_initializer(mean=0.0, stddev=0.01)
BBOX_INITIALIZER = tf.random_normal_initializer(mean=0.0, stddev=0.001)
WEIGHT_DECAY = 0.00004 if NET_NAME.startswith('Mobilenet') else 0.0001

# ---------------------------------------------Anchor config
USE_CENTER_OFFSET = False

LEVLES = ['P2', 'P3', 'P4', 'P5', 'P6']
# BASE_ANCHOR_SIZE_LIST = [32, 64, 128, 256, 512]  # addjust the base anchor size for voc.
BASE_ANCHOR_SIZE_LIST = [15, 25, 40, 60, 80]  # addjust the base anchor size for voc.
#BASE_ANCHOR_SIZE_LIST = [8, 15, 25, 40, 60]
ANCHOR_STRIDE_LIST = [4, 8, 16, 32, 64]
ANCHOR_SCALES = [2., 3., 4.]
ANCHOR_RATIOS = [2., 3., 4., 5.]
# ANCHOR_SCALES = [1.0]
# ANCHOR_RATIOS = [0.5, 1., 2.0]
ROI_SCALE_FACTORS = [10., 10., 5.0, 5.0]
ANCHOR_SCALE_FACTORS = None

# --------------------------------------------FPN config
SHARE_HEADS = True
KERNEL_SIZE = 3
RPN_IOU_POSITIVE_THRESHOLD = 0.7
RPN_IOU_NEGATIVE_THRESHOLD = 0.3
TRAIN_RPN_CLOOBER_POSITIVES = False

RPN_MINIBATCH_SIZE = 256
RPN_POSITIVE_RATE = 0.5
RPN_NMS_IOU_THRESHOLD = 0.7
RPN_TOP_K_NMS_TRAIN = 12000
#RPN_MAXIMUM_PROPOSAL_TARIN = 2000
RPN_MAXIMUM_PROPOSAL_TARIN = 2000

RPN_TOP_K_NMS_TEST = 6000
RPN_MAXIMUM_PROPOSAL_TEST = 1000

# specific settings for FPN
# FPN_TOP_K_PER_LEVEL_TRAIN = 2000
# FPN_TOP_K_PER_LEVEL_TEST = 1000

# -------------------------------------------Fast-RCNN config
ROI_SIZE = 14
ROI_POOL_KERNEL_SIZE = 2
#USE_DROPOUT = False
USE_DROPOUT = True
KEEP_PROB = 1.0
SHOW_SCORE_THRSHOLD = 0.6  # only show in tensorboard

#FAST_RCNN_NMS_IOU_THRESHOLD = 0.3  # 0.6
FAST_RCNN_NMS_IOU_THRESHOLD = 0.3
FAST_RCNN_NMS_MAX_BOXES_PER_CLASS = 100
FAST_RCNN_IOU_POSITIVE_THRESHOLD = 0.5
FAST_RCNN_IOU_NEGATIVE_THRESHOLD = 0.0   # 0.1 < IOU < 0.5 is negative
FAST_RCNN_MINIBATCH_SIZE = 256  # if is -1, that is train with OHEM
# FAST_RCNN_MINIBATCH_SIZE = -1
FAST_RCNN_POSITIVE_RATE = 0.25

#ADD_GTBOXES_TO_TRAIN = False
ADD_GTBOXES_TO_TRAIN = True
Pay attention to configuring the path , And parameters .
7. Training
python /tools/train.py
Wait for the training to finish .
8. Verification test
cd $PATH_ROOT/tools
python inference.py --data_dir='/PATH/TO/IMAGES/'
                    --save_dir='/PATH/TO/SAVE/RESULTS/'
                    --GPU='0'
After training, I will be in output/summary Folder , Generate

9. effect
It is found that the effect is closely related to the number of iterations of root training , The more iterations , The longer you train , I started training for two days ,30000 Iteration value of .

I need a private letter from the source code package . Looking forward to the next practical project .
版权声明
本文为[Summer melts the season]所创,转载请带上原文链接,感谢
https://yzsam.com/2022/04/202204220748368572.html
边栏推荐
- How to prevent leakage of operation and maintenance data
- After idea is successfully connected to H2 database, there are no sub files
- 001_ Redis set survival time
- 下载正版Origin Pro 2022 教程 及 如何 激 活
- Day18 -- stack queue
- Fashion MNIST dataset classification training
- Go语言web中间件的使用
- 双亲委派模型【理解】
- Deploying sbert model based on torchserve < semantic similarity task >
- 接口请求时间太长,jstack观察锁持有情况
猜你喜欢

Machine learning (Zhou Zhihua) Chapter 14 probability graph model

解决win7 中powershell挖矿占用CPU100%

Arduino esp8266 network upgrade OTA
This is how the power circuit is designed

windows MySQL8 zip安装
十六、异常检测
Fashion MNIST dataset classification training

How to solve the complexity of project document management?
电源电路设计原来是这么回事

Flink stream processing engine system learning (II)
随机推荐
Modify the content of MySQL + PHP drop-down box
leetcode 烹飪料理
011_ Redistemplate operation hash
007_ Redis_ Jedis connection pool
Niuke hand speed monthly race 48 C (I can't understand the difference. It belongs to yes)
字符串去掉空格问题
Leetcode cooking
002_ Redis_ Common operation commands of string type
JVM类加载器
Devil cold rice 𞓜 078 devil answers the market in Shanghai and Nanjing; Communication and guidance; Winning the country and killing and screening; The purpose of making money; Change other people's op
双亲委派模型【理解】
A domestic image segmentation project is heavy and open source!
Fast and robust multi person 3D pose estimation from multiple views
Web learning record (medium)
Talk about current limiting
JSP page nesting
牛客手速月赛 48 C(差分都玩不明白了属于是)
They are all intelligent in the whole house. What's the difference between aqara and homekit?
Latin goat (20204-2022) - daily question 1
Synchronized lock and its expansion