当前位置:网站首页>云原生KubeSphere部署Redis
云原生KubeSphere部署Redis
2022-04-23 12:36:00 【爱上口袋的天空】
1、参考使用docker部署redis的步骤
1.1、准备容器外持久化redis配置文件的路径
mkdir -p /mydata/redis/conf
1.2、准备redis配置文件内容,vim /mydata/redis/conf/redis.conf
##配置示例
appendonly yes
port 6379
bind 0.0.0.0
1.3、docker启动redis
docker run -d -p 6379:6379 --restart=always \
-v /mydata/redis/conf/redis.conf:/etc/redis/redis.conf \
-v  /mydata/redis-01/data:/data \
 --name redis-01 redis:6.2.5 \
 redis-server /etc/redis/redis.conf
2、kubesphere对redis部署分析
1、部署分析
/data: 将redis的数据文件持久化到pvc资源中
/etc/redis: 将这个目录下的redis.conf文件映射到ConfigMap中
redis-server /etc/redis/redis.conf:通过这个命令执行redis启动命令

3、开始部署ConfigMap来映射redis.conf配置信息
1、进入配置中心-》配置
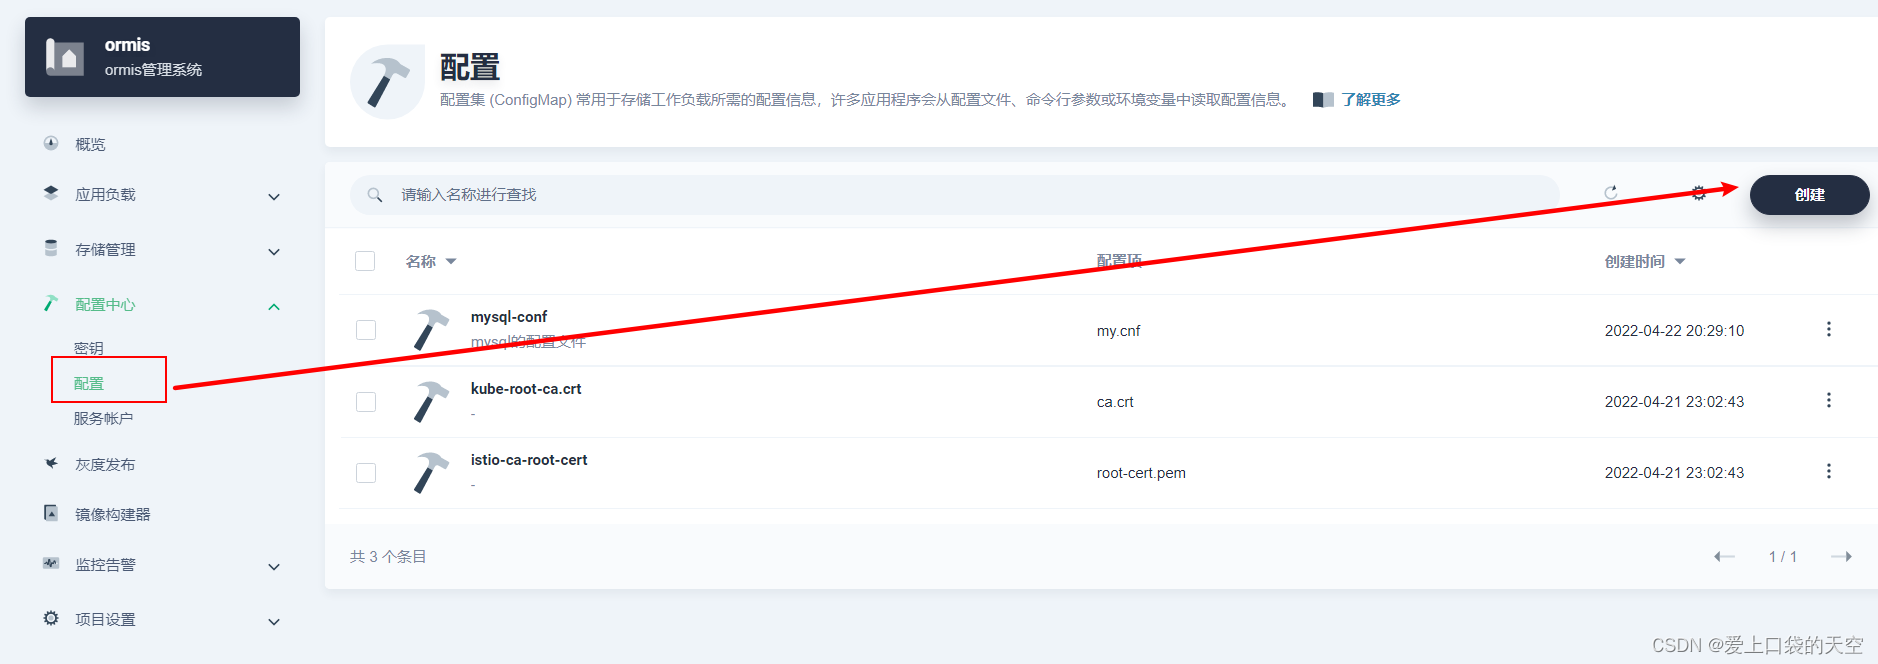
2、开始创建配置文件
点击创建:
ok,配置文件挂载好了!


4、 下面我们开始创建redis的有状态副本集
1、进入创建有状态副本集的路径下
2、开始创建
点击下一步:
继续向下设置redis的资源:
下面配置启动命令:
点击同步主机时区:
保存,然后点击下一步:
点击下一步:

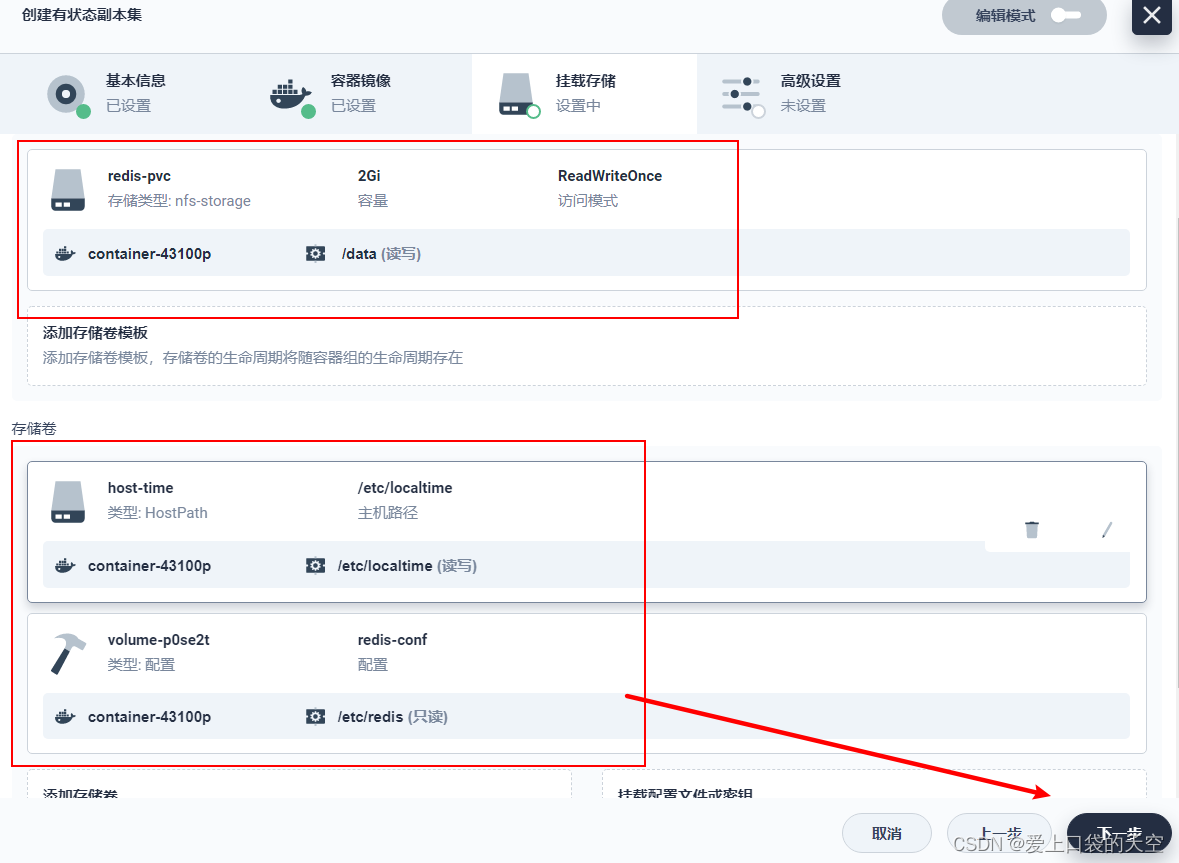
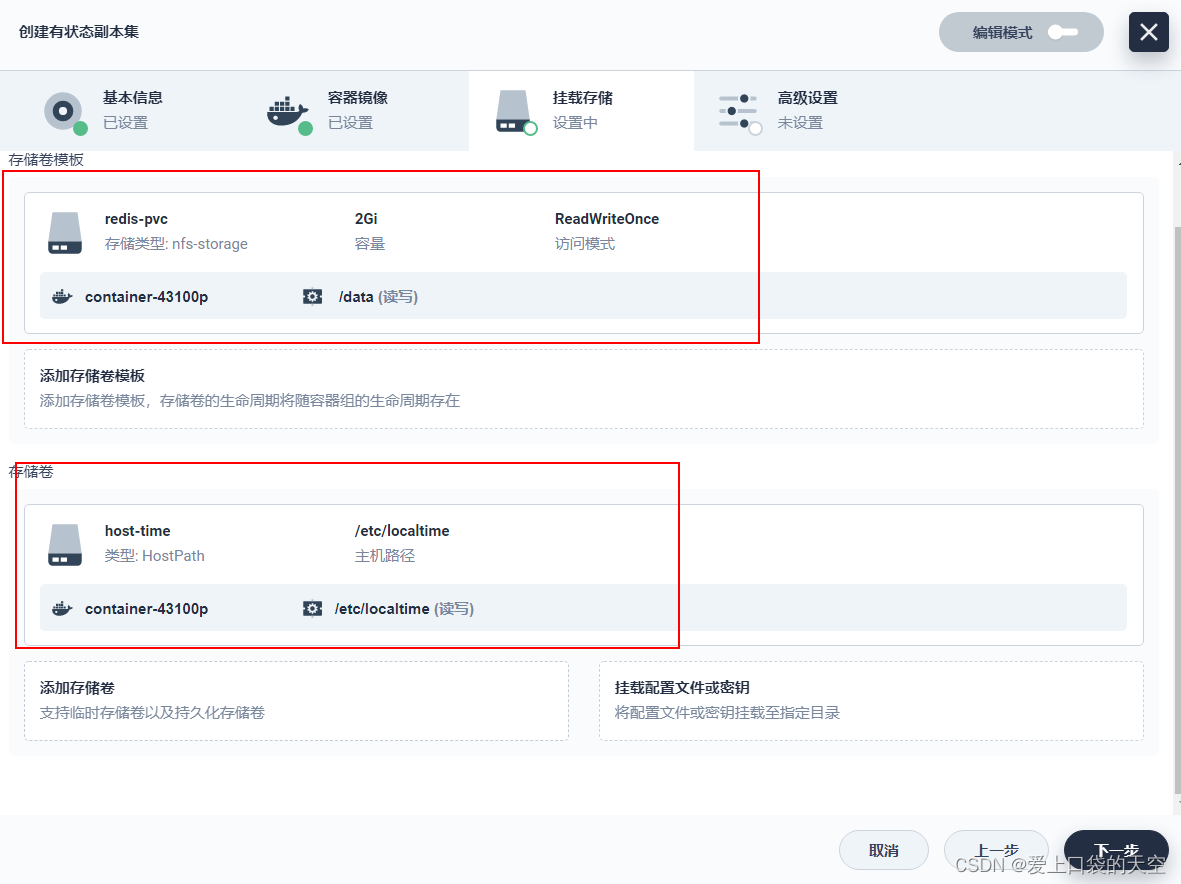
这里我们要添加存储卷模板,因为我们没有提前创建存储卷:
点击保存:
下面开始点击挂载配置文件:
点击保存:
点击创建:
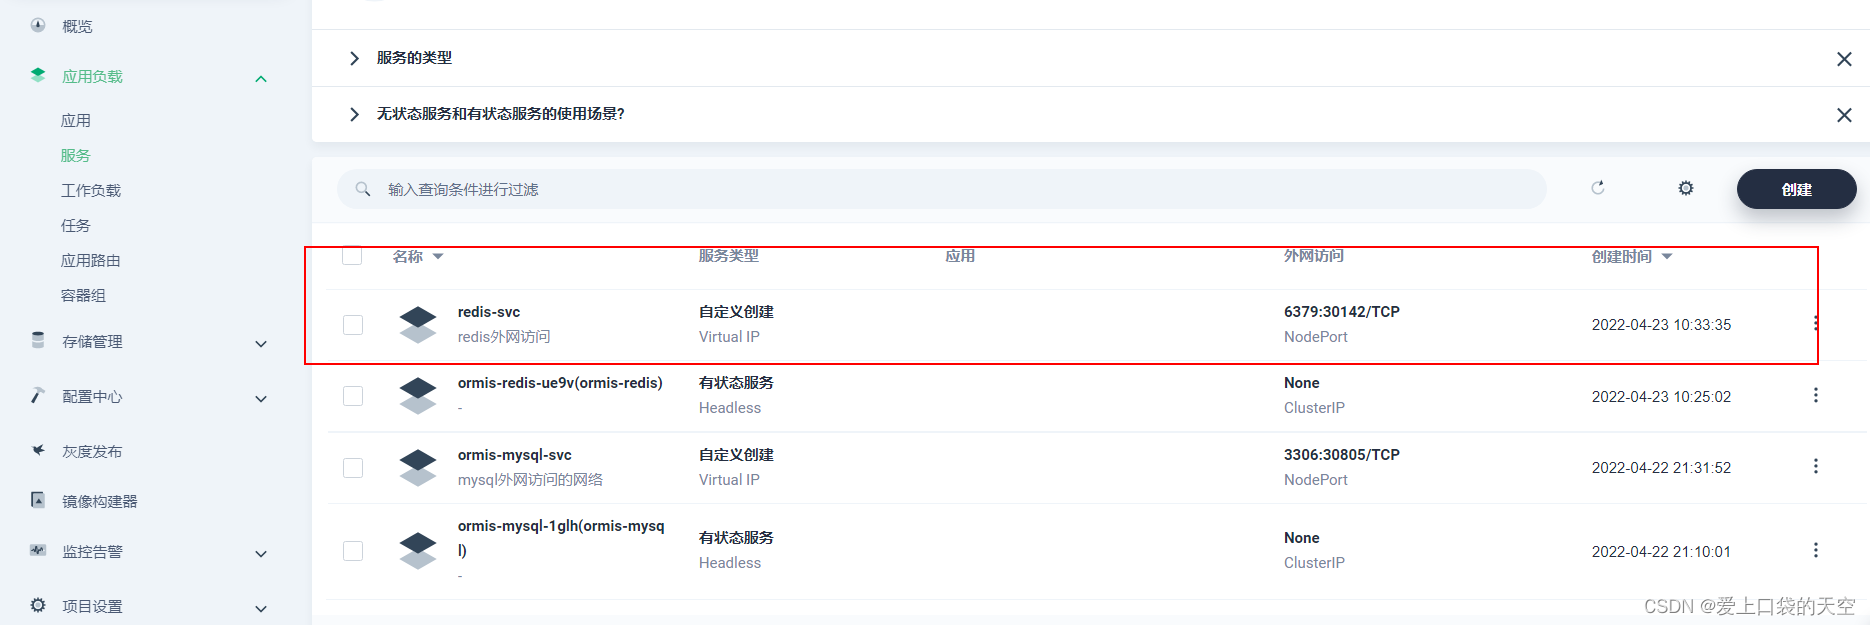
最后效果:


5、访问redis
1、默认是内网访问
首先我们通过终端内网访问查看:
2、可以看到我们使用挂载卷模板,kubesphere默认给我们创建了pvc
3、创建集群外访问

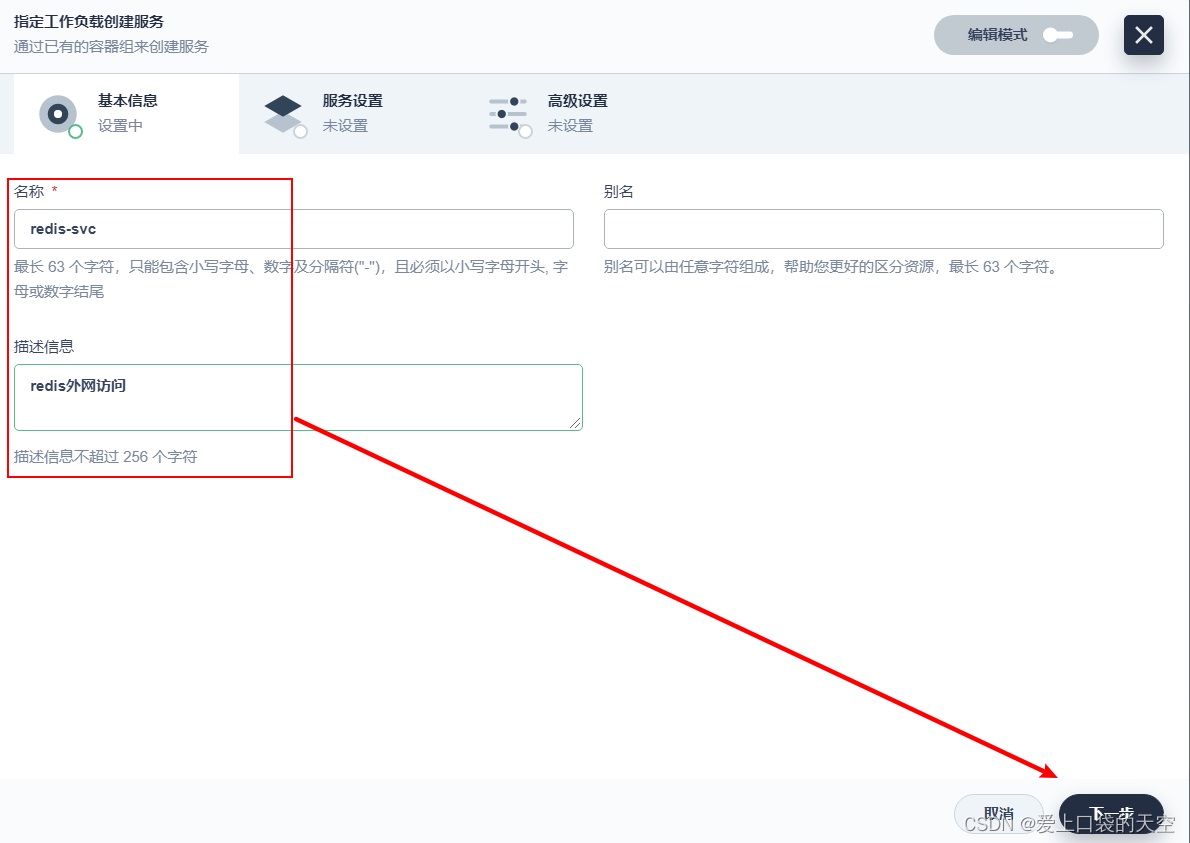

创建完成:
在外网使用客户端访问redis,可以看到上面对外暴露的端口是30142:


6、可以一键动态调整redis副本数
比如我们选择为3个:


版权声明
本文为[爱上口袋的天空]所创,转载请带上原文链接,感谢
https://blog.csdn.net/K_520_W/article/details/124359258
边栏推荐
猜你喜欢


随机推荐
Luogu p3236 [hnoi2014] picture frame solution
程序员如何用130行代码敲定核酸统计
Qt绘制图像
flask项目跨域拦截处理以及dbm数据库学习【包头文创网站开发】
Symmetric encryption, certificate encryption
BUUCTF WEB [BUUCTF 2018]Online Tool
AI video cloud vs narrowband HD, who is the darling of the video era
C set Logo Icon and shortcut icon
万事有你 未来可期 | ONES 2022校园招聘正式开启
Stm32cubeprogrammer basic instructions
QT double buffer drawing
洛谷P3236 [HNOI2014]画框 题解
网站首页文件被攻击篡改的形式有哪些
How do traditional enterprises cope with digital transformation? These books give you the answer
QT draw image
How to switch PHP version in Windows 2008 system
Web17——EL与JSTL的使用
Everything can be expected in the future | one 2022 campus recruitment officially opened
QT redraw events and cuts
Uni app native app local packaging integrated Aurora push (jg-jpush) detailed tutorial