前言
很早以前,我用uiautomator+java实践过Android APP自动化测试,But not todayuiautomator,而是uiautomator2.听起来uiautomator2像是uiautomator的升级版,But the two frameworks are only similar in name,There is actually no connection whatsoever.
一、uiautomator/uiautomator2的前生今世
项目地址:https://github.com/openatx/uiautomator2
1.官方文档介绍

2.Sort out the context
- Google firstuiautomator,但是只支持java;
- Later a namedhexiaocongThe developer is based onuiautomator封装了python版本,支持python代码运行;
- be inspired by it,uiautomator2作者开发了uiautomator2.So their birth order should be:uiautomator(谷歌版)-->uiautomator(python版)-->uiautomator2
3.Comparison of three frames
框架 | 支持语言 | 特点 |
uiautomator | java | 谷歌开源,仅支持Android |
xiaocong/uiautomator | python | 开源,仅支持Android |
uiautomator2 | python | 开源,仅支持Android |
二、uiautomator2简介
1.项目组成
- uiautomator-server:主服务
- minicap:实现Real-time screen casting,以及实时截图
- minitouch:用于Precise real-time control of equipment
- atx-agent:运行在设备上的驻守程序,go开发,用于保活设备上相关的服务
- weditor:类似于uiautomatorviewer,专门为本项目开发的辅助编辑器
2.工作原理
1)Responsibilities of each part
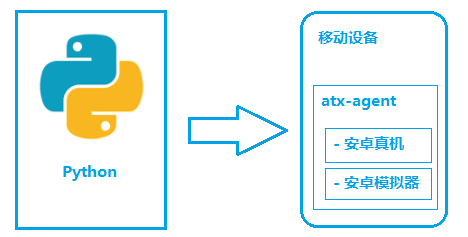
- Python:编写脚本,Initiate to a mobile devicehttp请求;
- 移动设备:Run the packageuiautomator2的http服务,解析python脚本发起的请求,并转化成uiautomator2可识别的代码;
2)运行过程
- 移动设备上运行atx-agent守护进程,随后atx-agent启动uiautomator2服务,默认7912端口进行监听;
- 在PC上编写python脚本并执行(相当于发送 HTTP 请求到移动设备的 server 端);
- 移动设备通过 WIFI 或 USB 接收到 PC 上发来的 HTTP 请求,执行指定的操作,Thereby operating the mobile device;
三、环境搭建
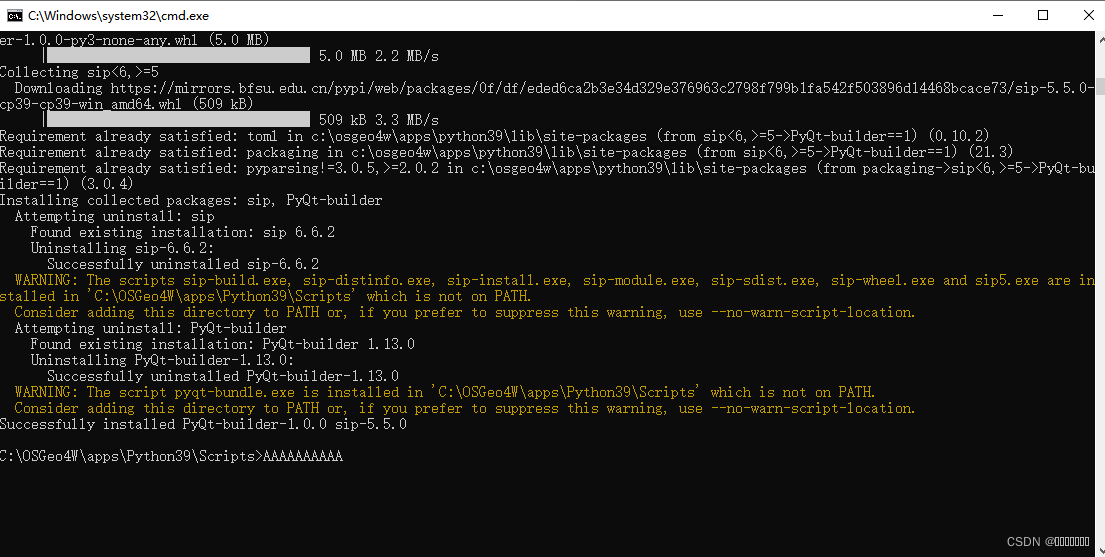
1.安装uiautomator2
pip install uiautomator2
pip install -U weditor  # 安装weditor
2.初始化设备
python -m uiautomator2 init
If the initialization is successful, the following prompt will appear

当PC或LinuxThere are multiple servers connectedadb device的情况下,“python -m uiautomator2 init”All devices are initialized by default,If the specified device is initialized,则需使用“--serial”参数:
python -m uiautomator2 init --serial $SERIAL # $SERIAL为手机序列号,可通过adb devices查看
3.initWhat have you done?
执行“python -m uiautomator2 init”命令,It will automatically install a bunch of stuff on your phone:
- app-uiautomator.apk
- app-uiautomator-test.apk
- atx-agent
- minicap
- minitouch
更多信息详见:https://github.com/openatx/uiautomator2/wiki/Manual-Init

四、基础操作
1.连接设备
uiautomator2提供了3种连接方式
1)通过WiFi连接
import uiautomator2 as u2

d = u2.connect('10.0.0.1') # alias for u2.connect_wifi('10.0.0.1')
print(d.info)
2)通过USB连接
import uiautomator2 as u2

d = u2.connect('123456f') # alias for u2.connect_usb('123456f')
print(d.info)
3)通过ADB WiFi连接
import uiautomator2 as u2

d = u2.connect_adb_wifi("10.0.0.1:5555")

# 等同于
# + Shell: adb connect 10.0.0.1:5555
# + Python: u2.connect_usb("10.0.0.1:5555")
2.命令行工具
1)截图
uiautomator2 screenshot test.jpg
2)获取当前APPregistration andActivity
uiautomator2 current
3)卸载应用
uiautomator2 uninstall <package-name> # 卸载一个包
uiautomator2 uninstall <package-name-1> <package-name-2> # 卸载多个包
uiautomator2 uninstall --all # 全部卸载
4)停止应用
uiautomator2 stop com.example.app # 停止一个app
uiautomator2 stop --all # 停止所有的app
3.元素定位
1)常见定位方式
ui2支持 android 中 UiSelector 类中的所有定位方式,Details can be viewed on the official website:https://developer.android.com/reference/android/support/test/uiautomator/UiSelector,Below are just a few common targeting methods:
定位方式 | 描述 |
text | 通过文本定位 |
textMatches | Locate by text regular matching |
className | 通过类名定位 |
classNameMatches | Locate by regular matching of class names |
description | 通过desc属性定位 |
descriptionMatches | 通过descAttribute regular matching positioning |
resourceId | 通过resourceId定位 |
resourceIdMatches | 通过resourceIdRegular matching positioning |
2)Child element positioning and sibling element positioning
① 子元素定位-child
#查找类名为android.widget.ListView下的Bluetooth元素
d(className="android.widget.ListView").child(text="Bluetooth")
# The following two methods are a bit inaccurate,不建议使用
d(className="android.widget.ListView")\
.child_by_text("Bluetooth",allow_scroll_search=True)
d(className="android.widget.ListView").child_by_description("Bluetooth")
② 兄弟元素定位-sibiling
#查找与google同一级别,类名为android.widget.ImageView的元素
d(text="Google").sibling(className="android.widget.ImageView")
③ 链式调用
d(className="android.widget.ListView", resourceId="android:id/list") \
  .child_by_text("Wi‑Fi", className="android.widget.LinearLayout") \
  .child(className="android.widget.Switch") \
  .click()
3)相对定位
d(A).left(B),# 选择A左边的B
d(A).right(B),# 选择A右边的B
d(A).up(B), #选择A上边的B
d(A).down(B),# 选择A下边的B
#选择 WIFI The switch button on the right
d(text='Wi‑Fi').right(resourceId='android:id/widget_frame')
4) Xpath定位
Java uiautoamtor中默认不支持xpath,这是属于ui2的扩展功能,速度会相比其它定位方式慢一些.在xpath定位中,ui2中的description 定位需要替换为content-desc,resourceId 需要替换为resource-id
# 只会返回一个元素,如果找不到元素,则会报XPathElementNotFoundError错误
# 如果找到多个元素,By default it will return the first0个
d.xpath('//*[@resource-id="com.android.launcher3:id/icon"]')

# If there are multiple elements returned,需要使用all()方法返回列表
# 使用all方法,When the element is not found,不会报错,会返回一个空列表
d.xpath('//*[@resource-id="com.android.launcher3:id/icon"]').all()
4.元素常用API
方法 | 描述 | 返回值 | 备注 |
exists() | 判断元素是否存在 | True,Flase | @property |
info() | 返回元素的所有信息 | 字典 | @property |
get_text() | 返回元素文本 | 字符串 | |
set_text(text) | 设置元素文本 | None | |
clear_text() | 清空元素文本 | None | |
center() | 返回元素的中心点位置 | (x,y) | 基于整个屏幕的点 |
send_keys() | 发送文本 |
用法示例:
d(test="Settings").exists
d.exists(text='Wi‑Fi',timeout=5)
5.设备交互
1)单击/双击
d(text='Settings').click()  # 单击
d.double_click(x, y)
d.double_click(x, y, 0.1) # Double-click the default time interval0.1s
2)长按
d(text='Settings').longclick() # 长按
3)滑动
# "left", "right", "up", "down"
d(text="Settings").swipe("up", steps=20)  # Element slides up,步长20
d(text="Settings").swipe("down", steps=20)  # 元素向下滑动
d(text="Settings").swipe("left", steps=20)  # Element slides to the left
d(text="Settings").swipe("right", steps=20)  # Element slides to the right
4)拖动
d(text="Settings").drag_to(text="Clock", duration=0.25)  # Drag to an element,时长0.25秒
d(text="Settings").drag_to(877,733)  # Drag to a certain coordinate point on the screen,durationThe duration is default0.5秒
5)双指操作(元素放大/缩小)
d(text="Settings").pinch_in()  # 缩小
d(text="Settings").pinch_out()  # 放大
6)等待元素出现/消失
d(text="Settings").wait(timeout=3.0)  # 等待元素出现
d(text='Settings').wait_gone(timeout=20)  # 等待元素消失,返回True False,timout默认为全局设置的等待时间
7)屏幕滚动
# 垂直滚动到页面顶部/横向滚动到最左侧
d(scrollable=True).scroll.toBeginning()
d(scrollable=True).scroll.horiz.toBeginning()
# 垂直滚动到页面最底部/横向滚动到最右侧
d(scrollable=True).scroll.toEnd()
d(scrollable=True).scroll.horiz.toEnd()
# 垂直向后滚动到指定位置/横向向右滚动到指定位置
d(scrollable=True).scroll.to(description="指定位置")
d(scrollable=True).scroll.horiz.to(description="指定位置")
# 垂直向前滚动(横向同理)
d(scrollable=True).scroll.forward()
# 垂直向前滚动到指定位置(横向同理)
d(scrollable=True).scroll.forward.to(description="指定位置")
# 滚动直到System元素出现
d(scrollable=True).scroll.to(text="System")
8)文本框操作
d.send_keys("test")
d.clear_text()  # 清空输入框
9)toast操作
# 获取toast,当没有找到toast消息时,返回default内容
d.toast.get_message(timout=5,default='no toast')
# 清空toast缓存
d.toast.reset()
10)监控操作
# 移除ANR的监控
d.watcher.remove("ANR")

# 移除所有的监控
d.watcher.remove()

# 开始后台监控
d.watcher.start()
d.watcher.start(2.0) # 默认监控间隔2.0s

# 强制运行所有监控
d.watcher.run()

# 停止监控
d.watcher.stop()

# 停止并移除所有的监控,常用于初始化
d.watcher.reset()
更多api详见:https://github.com/openatx/uiautomator2
五、weditor元素定位
1.启动weditor服务
python -m weditor

2.访问weditor
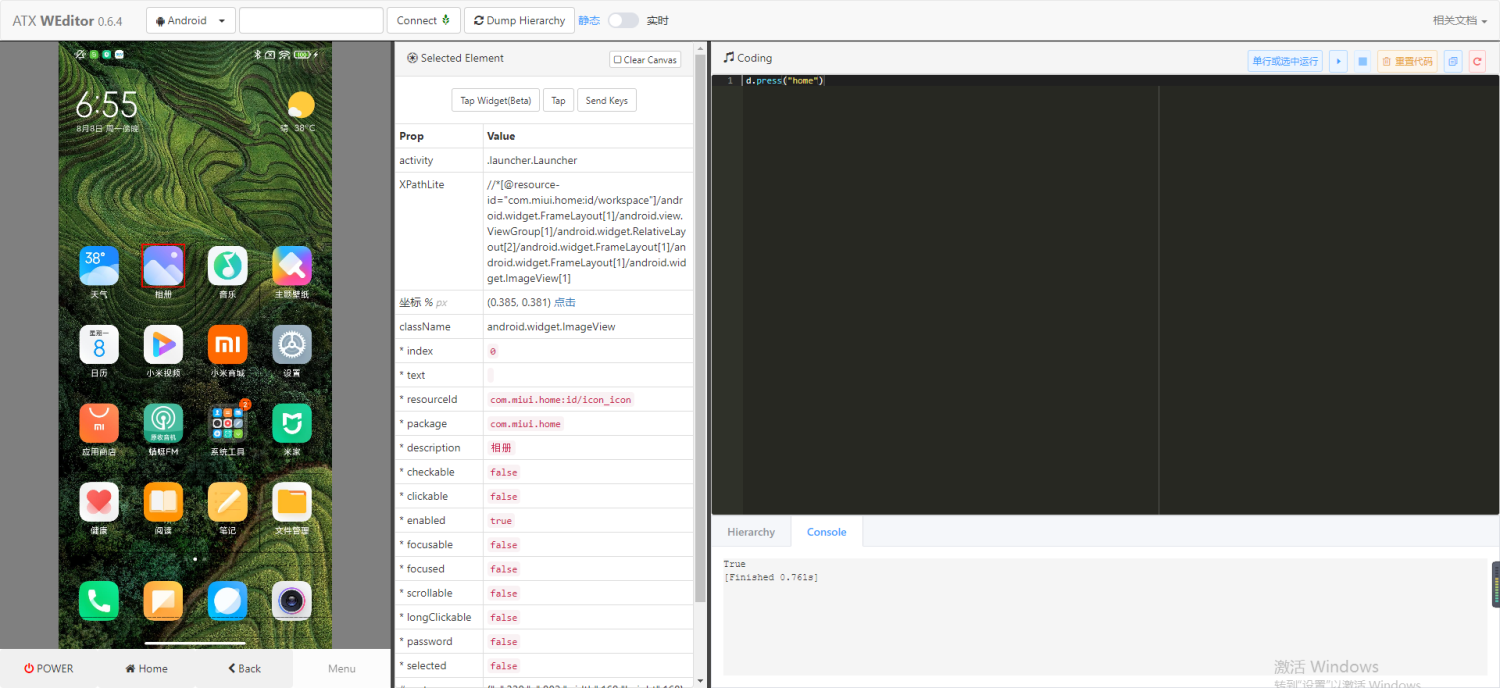
默认端口17310,访问地址:http://localhost:17310/,手机连接PC(Make sure it's turned onUSB调试模式),点击Connect连接设备,当ConnectThe icon turns green to indicate a successful connection.
3.界面调试
weditorProvides an action-as-you-get element positioning method,When double-clicking an icon or button on the screen,weditor界面右侧的CodingThe box will synchronously display the code for the operation of the element,At the same time, the mobile interface will also switch pages synchronously.

感谢
Some of the contents are referred to below:
https://www.cnblogs.com/fnng/p/8486863.html
https://testerhome.com/topics/11357