当前位置:网站首页>Glide监听Activity生命周期源码分析
Glide监听Activity生命周期源码分析
2022-08-10 22:13:00 【AD钙奶-lalala】
为了分析Glide源码,我们需要先引入Glide。新建一个项目,在app.build里面引入:
dependencies {

    implementation 'androidx.appcompat:appcompat:1.3.0'
    implementation 'com.google.android.material:material:1.4.0'
    implementation 'androidx.constraintlayout:constraintlayout:2.0.4'
    testImplementation 'junit:junit:4.13.2'
    androidTestImplementation 'androidx.test.ext:junit:1.1.3'
    androidTestImplementation 'androidx.test.espresso:espresso-core:3.4.0'

    implementation 'com.github.bumptech.glide:glide:3.7.0' //Glide
}
Glide基本用法:
Glide.with(this).load(url).into(imageView);
Glide的基本用法就不讲了,我们先来看Glide.with方法:
public static RequestManager with(Activity activity) {
        RequestManagerRetriever retriever = RequestManagerRetriever.get();
        return retriever.get(activity);
}
RequestManager可以理解为Glide的管理类,而RequestManagerRetriever可以理解为管理RequestManager的类。我们来看下retriever的英文意思:

我们进上面的方法第一个get看下:
public static RequestManagerRetriever get() {
        return INSTANCE;
}
再来看下这个INSTANCE是什么东西?
private static final RequestManagerRetriever
INSTANCE = new RequestManagerRetriever();
很明显,这是一个单例。
我们再进第二个get里面看下实现:
@TargetApi(Build.VERSION_CODES.HONEYCOMB)
    public RequestManager get(Activity activity) {
        if (Util.isOnBackgroundThread() ||
Build.VERSION.SDK_INT < Build.VERSION_CODES.HONEYCOMB) {
            return get(activity.getApplicationContext());
        } else {
            assertNotDestroyed(activity);
            android.app.FragmentManager fm = activity.getFragmentManager();
            return fragmentGet(activity, fm);
        }
    }
if语句里面的判断条件意思是后台线程或者SDK版本号小于11,所以我们关注else里面代码。
断言activity没有被销毁,获取activity的FragmentManager,将activity和fm作为参数传到fragmentGet方法中:
@TargetApi(Build.VERSION_CODES.HONEYCOMB)
    RequestManager fragmentGet(Context context,
android.app.FragmentManager fm) {
        RequestManagerFragment current = getRequestManagerFragment(fm);//1
        RequestManager requestManager = current.getRequestManager();
        if (requestManager == null) {
            requestManager = new RequestManager(context,
current.getLifecycle(), current.getRequestManagerTreeNode());
            current.setRequestManager(requestManager);
        }
        return requestManager;
    }
先来看注释1:
@TargetApi(Build.VERSION_CODES.JELLY_BEAN_MR1)
    RequestManagerFragment getRequestManagerFragment(
final android.app.FragmentManager fm) {
        RequestManagerFragment current =
(RequestManagerFragment) fm.findFragmentByTag(FRAGMENT_TAG);
        if (current == null) {
            current = pendingRequestManagerFragments.get(fm);
            if (current == null) {
                current = new RequestManagerFragment();
                pendingRequestManagerFragments.put(fm, current);
                fm.beginTransaction()
.add(current, FRAGMENT_TAG).commitAllowingStateLoss();
                handler
.obtainMessage(ID_REMOVE_FRAGMENT_MANAGER, fm).sendToTarget();
            }
        }
        return current;
    }
先来通过Tag找这个Fragment,如果没找到,再去pending~里面找(HashMap),如果还没有找到,就创建一个对象,然后加到activity里面。
来看RequestManagerFragment:
@TargetApi(Build.VERSION_CODES.HONEYCOMB)
public class RequestManagerFragment extends Fragment {
    private final ActivityFragmentLifecycle lifecycle;
    private RequestManager requestManager;
    ···

    public RequestManagerFragment() {
        this(new ActivityFragmentLifecycle());
    }

    // For testing only.
    @SuppressLint("ValidFragment")
    RequestManagerFragment(ActivityFragmentLifecycle lifecycle) {
        this.lifecycle = lifecycle;
    }

    /**
     * Sets the current {@link com.bumptech.glide.RequestManager}.
     *
     * @param requestManager The request manager to use.
     */
    public void setRequestManager(RequestManager requestManager) {
        this.requestManager = requestManager;
    }

    ActivityFragmentLifecycle getLifecycle() {
        return lifecycle;
    }

    /**
     * Returns the current {@link com.bumptech.glide.RequestManager} or null if none exists.
     */
    public RequestManager getRequestManager() {
        return requestManager;
    }


    @Override
    public void onStart() {
        super.onStart();
        lifecycle.onStart();
    }

    @Override
    public void onStop() {
        super.onStop();
        lifecycle.onStop();
    }

    @Override
    public void onDestroy() {
        super.onDestroy();
        lifecycle.onDestroy();
    }

    ···


}
只保留了一些核心代码,一起来看下这些核心代码解释。
我们再来重点看RequestManager的构造方法:
new RequestManager(context,
current.getLifecycle(), current.getRequestManagerTreeNode());

public RequestManager(Context context, Lifecycle lifecycle,
 RequestManagerTreeNode treeNode) {
        this(context, lifecycle, treeNode,
new RequestTracker(), new ConnectivityMonitorFactory());
    }

    RequestManager(Context context,
final Lifecycle lifecycle,
RequestManagerTreeNode treeNode,
            RequestTracker requestTracker,
 ConnectivityMonitorFactory factory) {
        this.context = context.getApplicationContext();
        this.lifecycle = lifecycle;
        this.treeNode = treeNode;
        this.requestTracker = requestTracker;
        this.glide = Glide.get(context);
        this.optionsApplier = new OptionsApplier();

        ConnectivityMonitor connectivityMonitor = factory.build(context,
                new RequestManagerConnectivityListener(requestTracker));

        // If we're the application level request manager, we may be created on a background thread. In that case we
        // cannot risk synchronously pausing or resuming requests, so we hack around the issue by delaying adding
        // ourselves as a lifecycle listener by posting to the main thread. This should be entirely safe.
        if (Util.isOnBackgroundThread()) {
            new Handler(Looper.getMainLooper()).post(new Runnable() {
                @Override
                public void run() {
                    lifecycle.addListener(RequestManager.this);
                }
            });
        } else {
            lifecycle.addListener(this);//1
        }
        lifecycle.addListener(connectivityMonitor);
    }
传入了此Fragment的lifecycle,很明显这个lifecycle就是ActivityFragmentLifecycle。
我们再来看下这个类的源码:
class ActivityFragmentLifecycle implements Lifecycle {
    private final Set<LifecycleListener> lifecycleListeners =
            Collections
.newSetFromMap(new WeakHashMap<LifecycleListener, Boolean>());
    private boolean isStarted;
    private boolean isDestroyed;

    @Override
    public void addListener(LifecycleListener listener) {
        lifecycleListeners.add(listener);

        if (isDestroyed) {
            listener.onDestroy();
        } else if (isStarted) {
            listener.onStart();
        } else {
            listener.onStop();
        }
    }

    void onStart() {
        isStarted = true;
        for (LifecycleListener
lifecycleListener : Util.getSnapshot(lifecycleListeners)) {
            lifecycleListener.onStart();
        }
    }

    void onStop() {
        isStarted = false;
        for (LifecycleListener
lifecycleListener : Util.getSnapshot(lifecycleListeners)) {
            lifecycleListener.onStop();
        }
    }

    void onDestroy() {
        isDestroyed = true;
        for (LifecycleListener
lifecycleListener : Util.getSnapshot(lifecycleListeners)) {
            lifecycleListener.onDestroy();
        }
    }
}
我们来理一理:Glide.with()里面传入一个activity,with方法里面先通过单例获取一个RequestManagerRetriever对象,然后通过这个对象的get方法获取一个RequestManager对象。
而RequestManager初始化的时候传入的Lifecycle对象会调用addListener将RequestManager传入。我们来看RequestManagerFragment的生命周期里面调用:
@Override
    public void onStart() {
        super.onStart();
        lifecycle.onStart();
    }

    @Override
    public void onStop() {
        super.onStop();
        lifecycle.onStop();
    }

    @Override
    public void onDestroy() {
        super.onDestroy();
        lifecycle.onDestroy();
    }
每当fragment这几个生命周期触发的时候,就会调用ActivityFragmentLifecycle的对应方法。
void onStart() {
        isStarted = true;
        for (LifecycleListener lifecycleListener : Util.getSnapshot(lifecycleListeners)) {
            lifecycleListener.onStart();
        }
    }

    void onStop() {
        isStarted = false;
        for (LifecycleListener lifecycleListener : Util.getSnapshot(lifecycleListeners)) {
            lifecycleListener.onStop();
        }
    }

    void onDestroy() {
        isDestroyed = true;
        for (LifecycleListener lifecycleListener : Util.getSnapshot(lifecycleListeners)) {
            lifecycleListener.onDestroy();
        }
    }
这里面有调用了LifecycleListener的对应方法,典型的接口回调。Util.getSnapshot代码:
public static <T> List<T> getSnapshot(Collection<T> other) {
        List<T> result = new ArrayList<T>(other.size());
        for (T item : other) {
            result.add(item);
        }
        return result;
    }
将Set转化成集合,其实目前的使用来看这个集合就一个对象,就是RequestManager对象。我们才想RequestManager肯定实现了LifecycleListener接口:
RequestManager implements LifecycleListener

@Override
    public void onStart() {
        resumeRequests();
    }


    @Override
    public void onStop() {
        pauseRequests();
    }


    @Override
    public void onDestroy() {
        requestTracker.clearRequests();
}来做一个总结吧:通过Glide.with(Activity activity)会获取一个RequestManager对象,具体with方法是这样的:先通过单例获取一个RequestManagerRetriever,然后调用这个对象的get方法返回一个RequestManager对象,这个get方法里面又获取了activity的FragmentManager,然后又将activity和这个fm传入fragmentGet方法中,这个fragmentGet里面创建了一个无界面的fragment,然后这个fargment里面持有ActivityFragmentLifecycle,这个lifecycle就监听了无界面fragment的生命周期。fragmentGet里面还做了一件事,就是将这个获取到的fragment再拿到这个fragment的lifecycle,传入RequestManager构造并返回RequestManager对象。RequestManager构造里面有一个lifecycle.addListener方法很重要,将RequestManager对象本身传入。这样fragment生命周期变化->lifecyle对应方法触发->lifecycleListener接口回调->lifecycleListener接口实现类RequestManager对应方法触发。
边栏推荐
- 服务——DNS正向反向域名解析服务
- OneNote 教程,如何在 OneNote 中整理笔记本?
- mmpose关键点(一):评价指标(PCK,OKS,mAP)
- This visual tool artifact is more intuitive and easy to use!love so much
- 文件IO-缓冲区
- What are the concepts, purposes, processes, and testing methods of interface testing?
- 带着昇腾去旅行:一日看尽金陵城里的AI胜景
- CFdiv2-Common Number-(奇偶数二分+规律)
- unusual understanding
- 过滤器
猜你喜欢
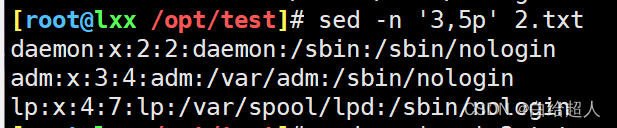
Shell 编程--Sed
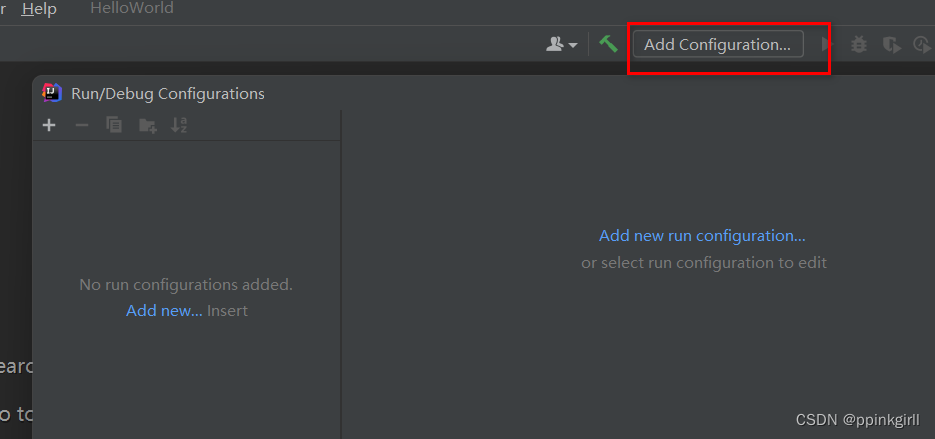
2021IDEA创建web工程
![Research on multi-element N-k fault model of power system based on AC power flow (implemented by Matlab code) [Power System Fault]](/img/d0/13ae2b9987a4fff6f28607a0c01b58.gif)
Research on multi-element N-k fault model of power system based on AC power flow (implemented by Matlab code) [Power System Fault]
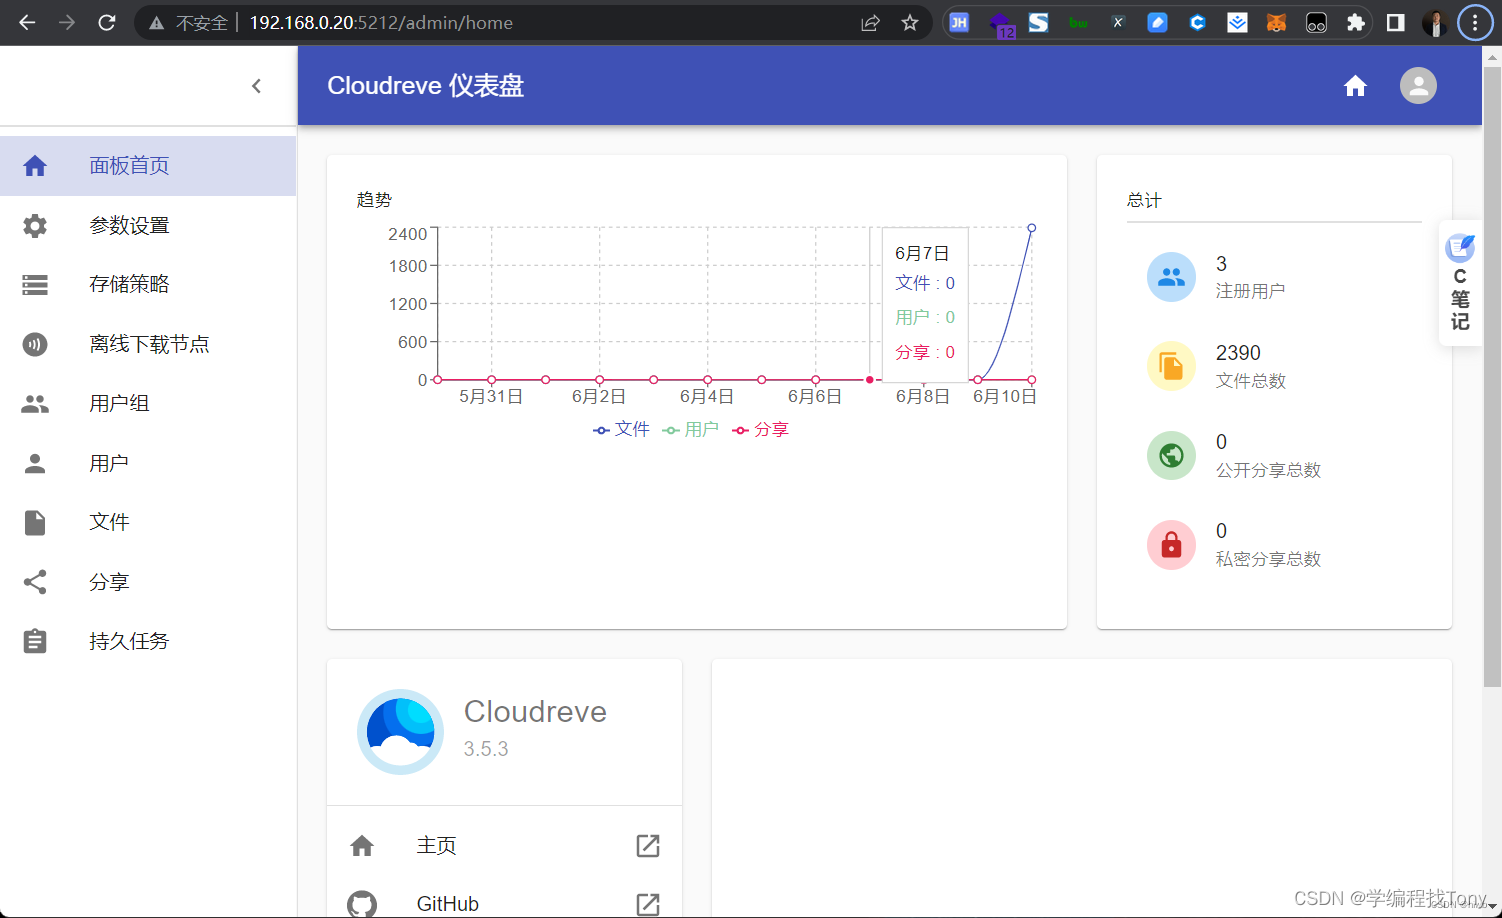
使用 Cloudreve 搭建私有云盘

LeetCode Daily 2 Questions 02: Reverse the words in a string (1200 each)
测试4年感觉和1、2年时没什么不同?这和应届生有什么区别?

Thread State 详解
A shell script the for loop statements, while statement
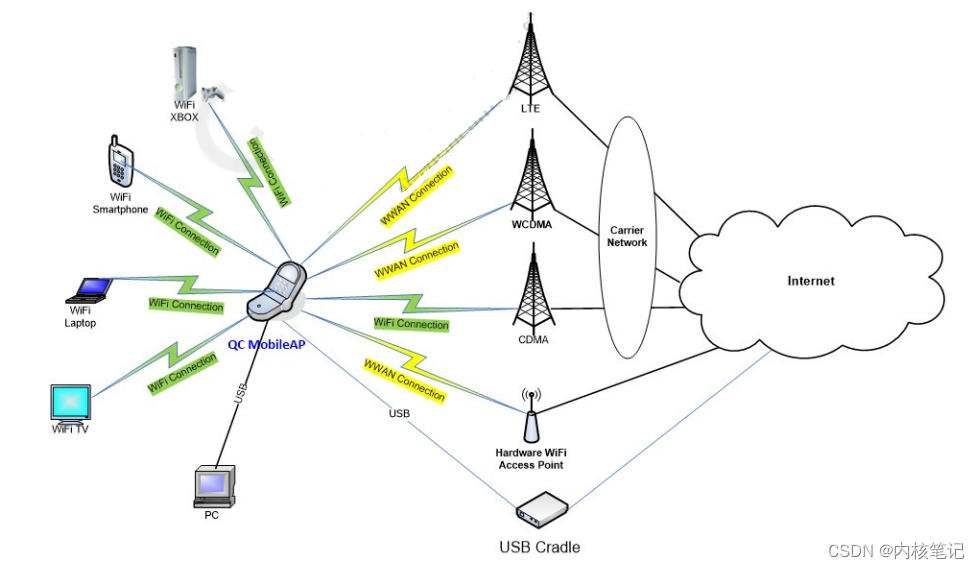
高通平台开发系列讲解(应用篇)QCMAP应用框架介绍
String类的常用方法
随机推荐
“数据引擎”开启前装规模量产新赛道,「智协慧同」崭露头角
TCP连接过程中如果拔掉网线会发生什么?
服务——DNS正向反向域名解析服务
谁是边缘计算服务的采购者?是这六个关键角色
Use Cloudreve to build a private cloud disk
Common interview questions for APP UI automation testing, maybe useful~
华为HCIE云计算之Fusion Access桌面云
BM13 determines whether a linked list is a palindrome
OneNote 教程,如何在 OneNote 中整理笔记本?
uni-app微信小程序——下拉多选框
学会开会|成为有连接感组织的重要技能
基于交流潮流的电力系统多元件N-k故障模型研究(Matlab代码实现)【电力系统故障】
What would happen if disconnecting during the process of TCP connection?
How to translate financial annual report, why choose a professional translation company?
Conditional Statements of Shell Programming (2)
camera预览流程 --- 从HAL到OEM
Translating scientific and technological papers, how to translate from Russian to Chinese
MySQL Advanced Commands
shell编程之正则表达式与文本处理器
企业云存储日常运行维护实践经验分享