当前位置:网站首页>Flutter Getting Started and Advanced Tour (8) Button Widget
Flutter Getting Started and Advanced Tour (8) Button Widget
2022-08-09 13:19:00 【Xie Dong_】
引言
In a blog post we learnedGestureDetector,Learn to useGestureDetectorCan give some itself does not have click callbackwidgetClick on the correction ability,Finish some simple gesture interaction with users and make corresponding logic to handle,We also mentioned somewidget像RaisedButton和FloatingActionButtonThe control itself hasonPressed回调,When the user clicks the control trigger callback.This blog, we took the last blog reference to variousButtonClassified unified explain.
ButtonCollection rendering
上述RaisedButton、FlatButton、OutlineButton、MaterialButton、还有RawMaterialButton、FloationgActionButton,I points three categories to everyone,OutlineButton作为一类,RaisedButton、FlatButton、MaterialButton、RawMaterialButtonWhether from the constructor or using the similar,这几个button分为一类,另外FloatingActionButton作为一类.
1.OutlineButton:
OutlineButtonThe default with a border,We can attribute to specify the normal,With the user clicks on a state border color.
我们来看下OutlineButton的构造方法,And under the instructions of its corresponding attributes do.
const OutlineButton({

    Key key,
    @required VoidCallback onPressed,
    ButtonTextTheme textTheme,  //The button font theme
    Color textColor,  //字体颜色
    Color disabledTextColor, //按钮禁用时候文字的颜色
    Color color,  //按钮背景颜色
    Color highlightColor,//点击或者toch控件高亮的时候显示在控件上面,水波纹下面的颜色
    Color splashColor, //水波纹的颜色
    double highlightElevation,//高亮时候的阴影
    this.borderSide,//按钮边框
    this.disabledBorderColor, //Button is disabled when the color of the frame
    this.highlightedBorderColor,//Position is the color of the frame
    EdgeInsetsGeometry padding,//边距
    ShapeBorder shape, //设置shape
    Clip clipBehavior = Clip.none,
    Widget child,
  })
上述OutlineButtonEffect on the twobutton的具体代码:
Do not specify any style:
 new OutlineButton(onPressed: () {
    }, child: new Text("OutlineButton")),
效果图
设置边框样式
 new OutlineButton(
           textColor: Colors.blue,
           highlightedBorderColor: Colors.deepOrange,
           shape: RoundedRectangleBorder(borderRadius: BorderRadius.circular(20.0)),
           borderSide: new BorderSide(color: Colors.blueAccent),
           onPressed: () {
    },
           child: new Text("OutlineButton")
         ),
效果图
2.FloatingActionButton
FloatingActionButtonDid the native android development of readers should be familiar with this name,在FlutterNot only refers to the native android called,使用方法也大同小异.
构造方法
const FloatingActionButton({

    Key key,
    this.child,
    this.tooltip,
    this.foregroundColor,
    this.backgroundColor,
    this.heroTag = const _DefaultHeroTag(),
    this.elevation = 6.0,
    this.highlightElevation = 12.0,
    @required this.onPressed,
    this.mini = false,
    this.shape = const CircleBorder(),
    this.clipBehavior = Clip.none,
    this.materialTapTargetSize,
    this.isExtended = false,
  })
Due to the use method with native android similar,I will not spread in detail,I'll put all the code on the preliminaries rendering with,You may refer to the facefloatingactionbutton的用法.
3.RaisedButton、FlatButton、OutlineButton、MaterialButton
这几类button十分类似,So I put them in the same class as do explain,But also can have subtle differences,像FlatButtonDoes not support set the color of the finger after raising,Other conventional usage almost unanimously,About the specific nuances,The reader can compare method to construct,自行测试,我拿RaisedButton把代码,贴上代码,Demonstrated under the categories for youButtonThe commonly used attributes configuration instructions.
 new RaisedButton(
            color: Colors.blueAccent,
            //按钮的背景颜色
            padding: EdgeInsets.all(15.0),
            //Button from the content inside the padding
            textColor: Colors.white,
            //文字的颜色
            textTheme: ButtonTextTheme.normal,
            //按钮的主题
            onHighlightChanged: (bool b) {

              //水波纹高亮变化回调
            },
            disabledTextColor: Colors.black54,
            //按钮禁用时候文字的颜色
            disabledColor: Colors.black54,
            //Buttons are disabled when the color of the display
            highlightColor: Colors.green,
            //点击或者toch控件高亮的时候显示在控件上面,水波纹下面的颜色
            splashColor: Colors.amberAccent,
            //水波纹的颜色
            colorBrightness: Brightness.light,
            //按钮主题高亮
            elevation: 10.0,
            //按钮下面的阴影
            highlightElevation: 10.0,
            //高亮时候的阴影
            disabledElevation: 10.0,
            //按下的时候的阴影
            shape: new RoundedRectangleBorder(
                borderRadius: BorderRadius.circular(20.0)),
            //设置形状
            onPressed: () {
    },
            child: new Text("RaisedButton"),
          ),
The explanation of the reader if you have not understand place can reference articles posted in the openingbuttonRendering of the source code for your reference,Leave a message or give me a piece of discussion,The article begins with the post ofbuttonRendering of the source code is as follows.
import 'package:flutter/material.dart';


void main() {

  runApp(new MaterialApp(home: new ButtonPage()));
}
class ButtonPage extends StatelessWidget {

  @override
  Widget build(BuildContext context) {

    return new Scaffold(
      appBar: new AppBar(
        title: new Text("Button Widget"),
      ),
      floatingActionButton: new FloatingActionButton(
          onPressed: () {
    }, child: new Icon(Icons.adb), tooltip: "点击"),
      body: new ListView(
        children: <Widget>[
          new Text("简单样式",
              textAlign: TextAlign.center,
              style: new TextStyle(color: Colors.brown, fontSize: 20.0)),
          new RaisedButton(onPressed: () {
    }, child: new Text("RaisedButton")),
          new FlatButton(onPressed: () {
    }, child: new Text("FlatButton")),
          new MaterialButton(
              onPressed: () {
    }, child: new Text("MaterialButton")),
          new RawMaterialButton(
              onPressed: () {
    }, child: new Text("RawMaterialButton")),
          new OutlineButton(onPressed: () {
    }, child: new Text("OutlineButton")),
          new SizedBox(height: 20),
          new Text("To upgrade the style",
              textAlign: TextAlign.center,
              style: new TextStyle(color: Colors.brown, fontSize: 20.0)),
          new RaisedButton(
            color: Colors.blueAccent,
            //按钮的背景颜色
            padding: EdgeInsets.all(15.0),
            //Button from the content inside the padding
            textColor: Colors.white,
            //文字的颜色
            textTheme: ButtonTextTheme.normal,
            //按钮的主题
            onHighlightChanged: (bool b) {

              //水波纹高亮变化回调
            },
            disabledTextColor: Colors.black54,
            //按钮禁用时候文字的颜色
            disabledColor: Colors.black54,
            //Buttons are disabled when the color of the display
            highlightColor: Colors.green,
            //点击或者toch控件高亮的时候显示在控件上面,水波纹下面的颜色
            splashColor: Colors.amberAccent,
            //水波纹的颜色
            colorBrightness: Brightness.light,
            //按钮主题高亮
            elevation: 10.0,
            //按钮下面的阴影
            highlightElevation: 10.0,
            //高亮时候的阴影
            disabledElevation: 10.0,
            //按下的时候的阴影
            shape: new RoundedRectangleBorder(
                borderRadius: BorderRadius.circular(20.0)),
            //设置形状
            onPressed: () {
    },
            child: new Text("RaisedButton"),
          ),
          new FlatButton(
              color: Colors.lightGreen,
              textColor: Colors.red,
              onPressed: () {
    }, child: new Text("FlatButton")),
          new OutlineButton(
              textColor: Colors.blue,
              highlightedBorderColor: Colors.deepOrange,
              shape: RoundedRectangleBorder(borderRadius: BorderRadius.circular(20.0)),
              borderSide: new BorderSide(color: Colors.blueAccent),
              onPressed: () {
    },
              child: new Text("OutlineButton")
          ),
          MaterialButton(
              color: Colors.yellow,
              textColor: Colors.red,
              onPressed: () {
    },
              child: new Text("MaterialButton")
          ),
          RawMaterialButton(
              fillColor: Colors.deepOrange,
              onPressed: () {
    },
              child: new Text("RawMaterialButton",style: new TextStyle(color: Colors.white),)
          )
        ],
      ),
    );
  }
}
边栏推荐
猜你喜欢
水能自发变成“消毒水”,83岁斯坦福教授:揭示冬天容易得流感的部分原因...
自定义VIEW实现应用内消息提醒上下轮播

MySQL principle and optimization of Group By optimization techniques
Ten minutes to teach you how to use VitePress to build and deploy a personal blog site
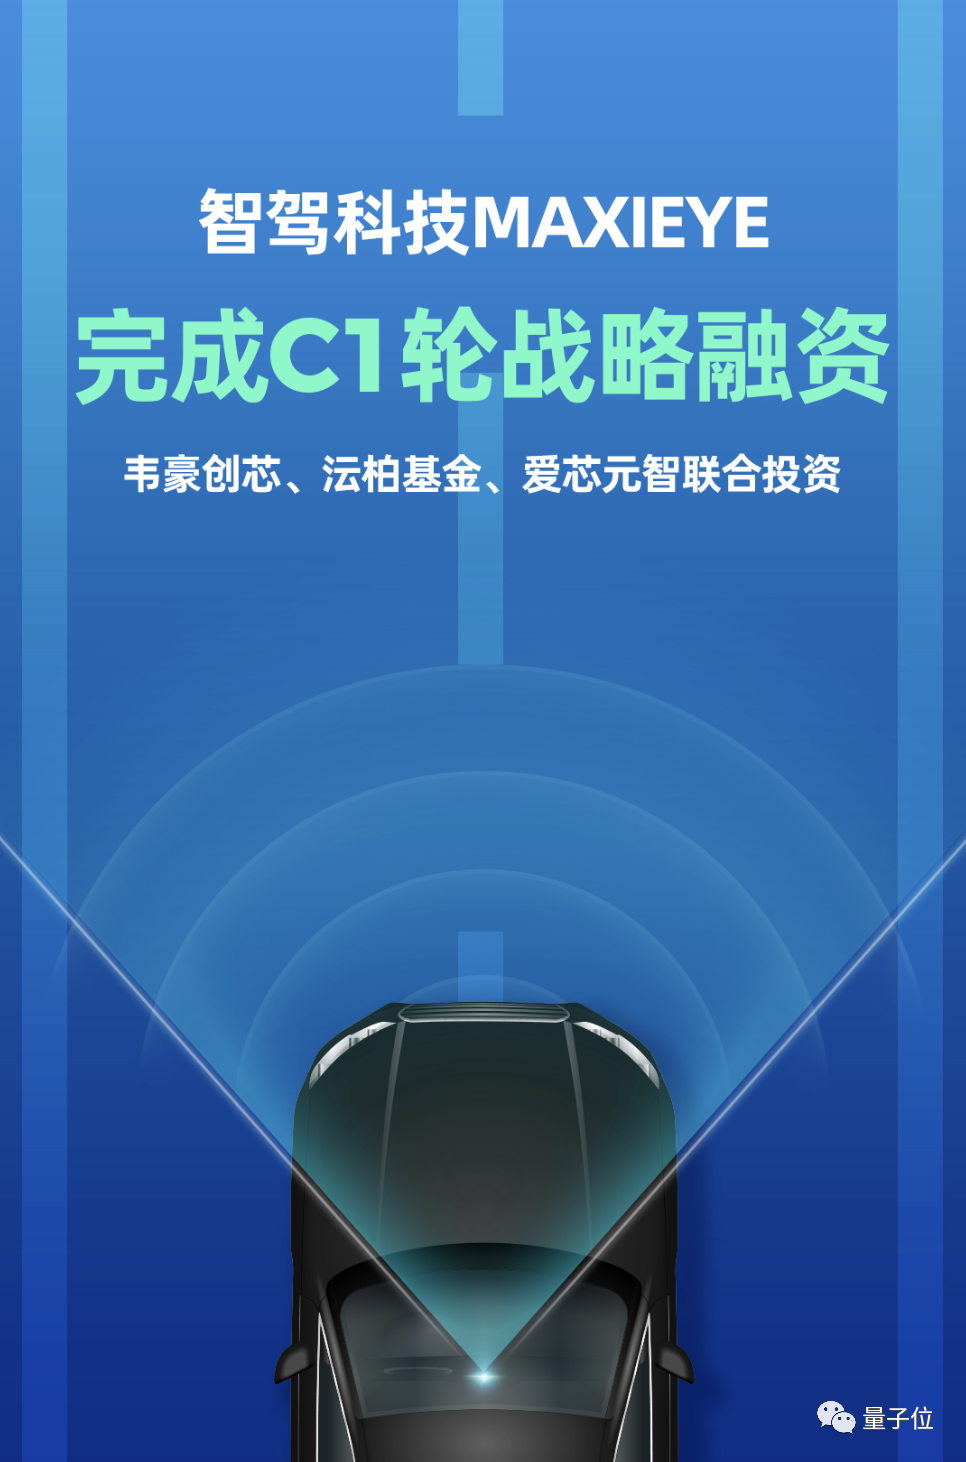
智驾科技完成C1轮融资,此前2轮已融4.5亿元
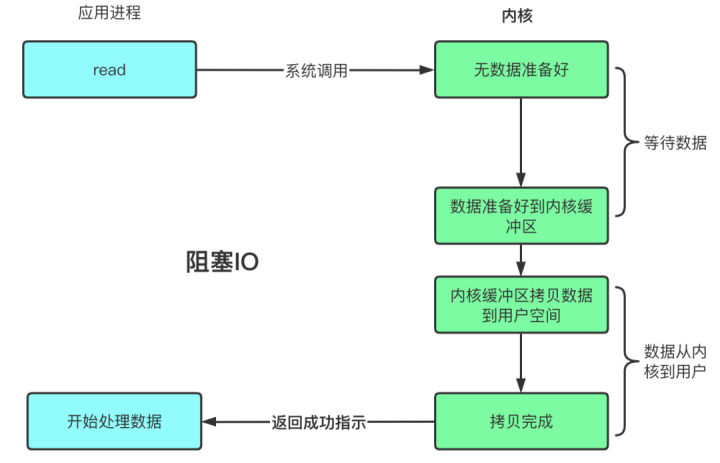
Blocking, non-blocking, multiplexing, synchronous, asynchronous, BIO, NIO, AIO all in one pot

Intranet penetration tool ngrok usage tutorial
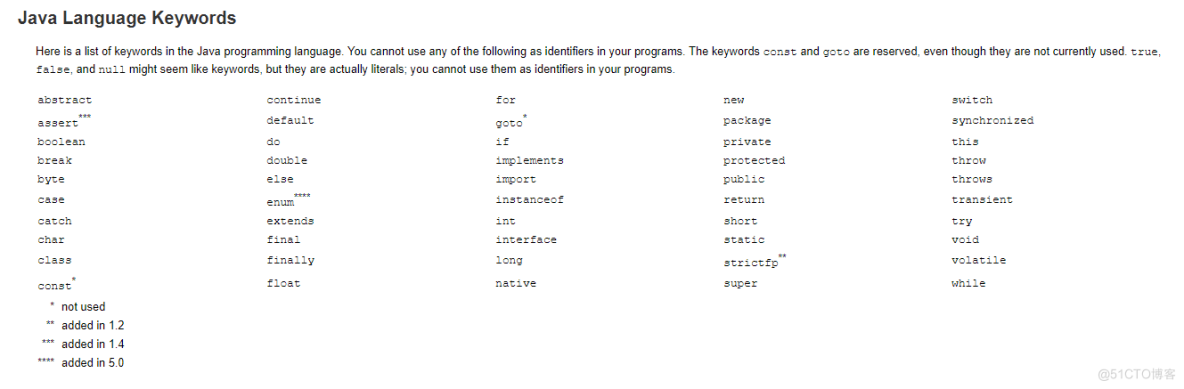
注释、关键字、标识符的区别你知道吗?
两个链表相加
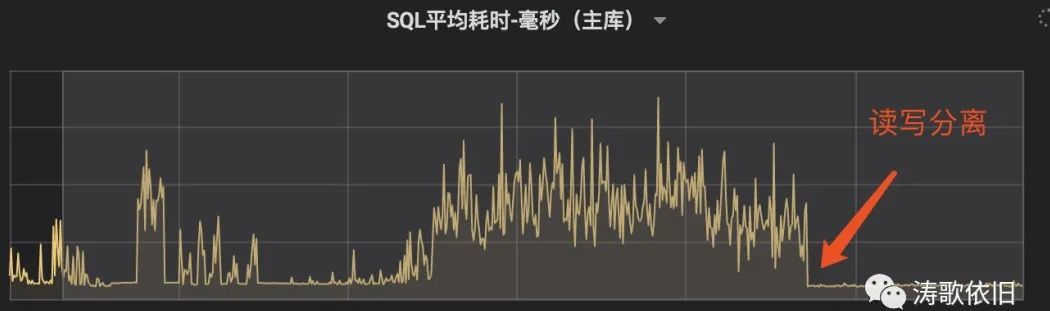
Reading and writing after separation, performance were up 100%
随机推荐
Information system project managers must memorize the core test sites (63) The main process of project portfolio management & DIPP analysis
Apexsqlrecover无法连接数据库
WeChat Mini Program Payment and Refund Overall Process
曼城推出可检测情绪的智能围巾,把球迷给整迷惑了
用 API Factory 产品生成 API 文档
redis库没法引入
ABP 6.0.0-rc.1的新特性
Here comes the question: Can I successfully apply for 8G memory on a machine with 4GB physical memory?
Two minutes recording can pass by second language!The volcano how to practice and become voice tone reproduction technology?
Common gadgets of Shell (sort, uniq, tr, cut)
WebView injects Js code to realize large image adaptive screen click image preview details
无需精子卵子子宫体外培育胚胎,Cell论文作者这番话让网友们炸了
Reading and writing after separation, performance were up 100%
Flutter入门进阶之旅(五)Image Widget
用皮肤“听”音乐,网友戴上这款装备听音乐会:仿佛住在钢琴里
Report: The number of students who want to learn AI has increased by 200%, and there are not enough teachers
曲鸟全栈UI自动化教学(八):框架代码讲解和进一步优化
二叉树的序列化和反序列化
在已打开图片上加水印(文字)
用场景定义硬件,英码科技破解“边缘计算”密码