当前位置:网站首页>uni-app 原生APP-本地打包集成极光推送(JG-JPUSH)详细教程
uni-app 原生APP-本地打包集成极光推送(JG-JPUSH)详细教程
2022-04-23 12:18:00 【华为云】
一、前言
因项目需求,需要uni-app 原生APP-本地打包集成极光推送,现将集成过程梳理得出此文。
二、集成
2.1 uni-app 项目集成至 Android Studio
2.1.1 拷贝HbuilderX uni-app 源码至 AS
hbuilderX中使用本地打包生成android资源如下:
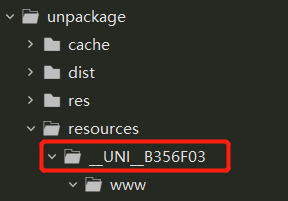
构建空的android项目构建如下文件结构,apps下面放hbuilderX本地打包生成的资源文件。

2.1.2 下载最新 SDK
下载解压后目录如下

其中,
HBuilder-Hello:是HelloH5打包App的示例,可以用AS打包成APK;HBuilder-Integrate-AS:是HBuilder 5+ SDK集成AS的示例;SDK:是HBuilder SDK库文件UniPlugin-Hello-AS:是开发插件并集成到Vue的示例。
2.1.3 复制 HBuilder-Hello 项目 data 到自己项目对应目录中

2.1.4 复制 HBuilder-Hello 项目 libs 下的三个文件到自己项目对应目录中

2.1.5 修改 dcloud_control.xml 配置文件
注意️:appid 为 HbuilderX uni-app项目标识。
<hbuilder><apps> <app appid="__UNI__1DA6F85" appver=""/></apps></hbuilder>2.1.6 androidmanifest.xml 中添加 activity 节点
添加如下内容
<activity android:name="io.dcloud.PandoraEntry" android:configChanges="orientation|keyboardHidden|keyboard|navigation" android:label="@string/app_name" android:launchMode="singleTask" android:hardwareAccelerated="true" android:theme="@style/TranslucentTheme" android:screenOrientation="user" android:windowSoftInputMode="adjustResize" > <intent-filter> <action android:name="android.intent.action.MAIN" /> <category android:name="android.intent.category.LAUNCHER" /> </intent-filter></activity><activity android:name="io.dcloud.PandoraEntryActivity" android:launchMode="singleTask" android:configChanges="orientation|keyboardHidden|screenSize|mcc|mnc|fontScale|keyboard" android:hardwareAccelerated="true" android:permission="com.miui.securitycenter.permission.AppPermissionsEditor" android:screenOrientation="user" android:theme="@style/DCloudTheme" android:windowSoftInputMode="adjustResize"> <intent-filter> <category android:name="android.intent.category.DEFAULT" /> <category android:name="android.intent.category.BROWSABLE" /> <action android:name="android.intent.action.VIEW" /> <data android:scheme="h56131bcf" /> </intent-filter></activity>经过以上配置,可实现hbuilderx本地离线打包android项目,生成APK安装包。
首先下载jpush-hbuilder-demo Demo 应用。
拷贝 ./android/app/src/main/java/io.dcloud.feature.jpush 文件夹至你 Android Studio 工程的 /src/main/java/ 目录下。
拷贝 ./jpush.js 到你 Android Studio 工程的 /assets/apps/HBuilder应用名/js/ 下。
在 /assets/apps/你的应用名/www/manifest.json 文件中添加:
"Push": { "description": "消息推送"}在 /assets/data/dcloud_properties.xml 中添加(如果已存在 Push feature,可以直接修改):
<feature name="Push" value="io.dcloud.feature.jpush.JPushService" ></feature>在 app/build.gradle 中添加:
android { ... defaultConfig { applicationId "com.xxx.xxx" // JPush 上注册的包名. ... ndk { // 选择要添加的对应 cpu 类型的 .so 库。 abiFilters 'armeabi', 'armeabi-v7a', 'arm64-v8a' // 还可以添加 'x86', 'x86_64', 'mips', 'mips64' } manifestPlaceholders = [ JPUSH_PKGNAME : applicationId, JPUSH_APPKEY : "应用的 AppKey", // JPush上注册的包名对应的 appkey JPUSH_CHANNEL : "developer-default", // 暂时填写默认值即可 ] ... } ...}dependencies { ... compile 'cn.jiguang.sdk:jpush:3.3.4' // 此处以JPush 3.3.4 版本为例。 compile 'cn.jiguang.sdk:jcore:2.1.2' // 此处以JCore 2.1.2 版本为例。 ...}在 AndroidManifest.xml 中添加:
<!-- since 3.3.0 Required SDK 核心功能--> <!-- 可配置android:process参数将PushService放在其他进程中 --> <!--User defined. For test only 继承自cn.jpush.android.service.JCommonService--> <service android:name="io.dcloud.feature.jpush.PushService" android:process=":pushcore"> <intent-filter> <action android:name="cn.jiguang.user.service.action" /> </intent-filter> </service> <!-- User defined. For test only 用户自定义接收消息器,3.0.7开始支持,目前新tag/alias接口设置结果会在该广播接收器对应的方法中回调--> <!--since 3.3.0 接收JPush相关事件--> <receiver android:name="io.dcloud.feature.jpush.PushMessageReceiver"> <intent-filter> <action android:name="cn.jpush.android.intent.RECEIVE_MESSAGE" /> <category android:name="${applicationId}"></category> </intent-filter> </receiver><receiver android:name="io.dcloud.feature.jpush.JPushReceiver" android:enabled="true" android:exported="false"> <intent-filter> <action android:name="cn.jpush.android.intent.REGISTRATION" /> <!-- Required 用户注册SDK的 intent --> <action android:name="cn.jpush.android.intent.UNREGISTRATION" /> <action android:name="cn.jpush.android.intent.MESSAGE_RECEIVED" /> <!-- Required 用户接收SDK消息的 intent --> <action android:name="cn.jpush.android.intent.NOTIFICATION_RECEIVED" /> <!-- Required 用户接收SDK通知栏信息的 intent --> <action android:name="cn.jpush.android.intent.NOTIFICATION_OPENED" /> <!-- Required 用户打开自定义通知栏的 intent --> <action android:name="cn.jpush.android.intent.ACTION_RICHPUSH_CALLBACK" /> <!-- Optional 用户接受 Rich Push Javascript 回调函数的intent --> <action android:name="cn.jpush.android.intent.CONNECTION" /> <!-- 接收网络变化 连接/断开 since 1.6.3 --> <category android:name="${JPUSH_PKGNAME}" /> </intent-filter></receiver>三、遇到的问题及解决方案
3.1 libs中sdk版本与app sdk版本不一致
uses-sdk:minSdkVersion 16 cannot be smaller than version 19 declared in library [weex_videoplayer-release.aar] /Users/huaqiangsun/.gradle/caches/transforms-2/files-2.1/22285093409dba775963f444b0533dd8/weex_videoplayer-release/AndroidManifest.xml as the library might be using APIs not available in 16。Suggestion: use a compatible library with a minSdk of at most 16,or increase this project's minSdk version to at least 19,or use tools:overrideLibrary="io.dcloud.feature.weex_media" to force usage (may lead to runtime failures)解决措施:需要在build.gradle(Moudle app)中minSdkVersion改为 19。
3.2 Suggestion: add ‘tools:replace=“android:resource”’ to <meta-data> element at AndroidManifest.xml to override
Attribute meta-data#android.support.FILE_PROVIDER_PATHS@resource value=(@xml/filepaths) from [lib.5plus.base-release.aar] AndroidManifest.xml:243:17-61is also present at [torch-plgdtsdk-5.17.3157.aar] AndroidManifest.xml:48:17-57 value=(@xml/torch_file_paths).Suggestion: add 'tools:replace="android:resource"' to <meta-data> element at AndroidManifest.xml to override.解决措施:在AndroidManifest.xml的根标签下加上 xmlns:tools="http://schemas.android.com/tools",然后在application标签下加入tools:replace="android:name"。
<manifest xmlns:android="http://schemas.android.com/apk/res/android" xmlns:tools="http://schemas.android.com/tools" package="com.**"> <application android:name="com.**.App" android:allowBackup="true" android:icon="@mipmap/app_icon" android:label="@string/app_name" android:supportsRtl="true" android:theme="@style/AppTheme" tools:replace="android:name"> </application></manifest>四、拓展阅读
- 《跨平台应用开发进阶(八) :uni-app 原生APP-云打包集成极光推送(JG-JPUSH)详细教程》
版权声明
本文为[华为云]所创,转载请带上原文链接,感谢
https://bbs.huaweicloud.com/blogs/349198
边栏推荐
- 【微信小程序】z-index失效
- Fastjson 2 is coming, the performance continues to improve, and it can fight for another ten years
- How Im expressions work (5.3)
- SQL exercise (I)
- 为什么hash%length==hash&(length-1)的前提是 length 是 2 的 n 次方
- C# F23. Stringsimilarity Library: String repeatability, text similarity, anti plagiarism
- 5-minute NLP: text to text transfer transformer (T5) unified text to text task model
- 使用连接组优化连接 (IM 6)
- 程序员如何用130行代码敲定核酸统计
- MySQL 的主从复制配置
猜你喜欢

Fastjson 2 来了,性能继续提升,还能再战十年

VMware virtual machines export hard disk vmdk files using esxi

QT draw text

激活函数之relu函数

亿级流量架构,服务器如何扩容?写得太好了!

激活函数之阶跃函数

软银愿景基金进军Web3安全行业 领投CertiK 6000万美元新一轮投资

IDEA 代码质量规范插件SonarLint

Metalama简介4.使用Fabric操作项目或命名空间

The database navigator uses the default MySQL connection prompt: the server time zone value 'Ö Ð¹ ú±ê ×¼ ʱ ¼ ä’ is unrecognized or repres
随机推荐
第二十六课 类的静态成员函数
User interface and im expression (IM 5.6)
Lesson 25 static member variables of classes
The fourth chapter is about enabling and disabling the im column storage of table space for im enabled filling objects (IM 4.5)
Why is the premise of hash% length = = hash & (length-1) that length is the nth power of 2
Lesson 24 analysis of classical problems
Qt双缓冲绘图
第二十五课 类的静态成员变量
外包干了五年,废了...
激活函数之relu函数
Chapter 5 optimizing queries using in memory expressions (IM 5.1)
消息队列概述
Fabric 1.0 source code analysis (33) implementation of peer channel command and subcommand
The fourth chapter is the enable and disable columns of IM enabled fill objects (Part III of im-4.3)
How do programmers finalize nucleic acid statistics with 130 lines of code
Fastjson 2 来了,性能继续提升,还能再战十年
使用连接组优化连接 (IM 6)
How does sqlserver insert or update the number of weeks of the day instead of text
宝塔面板命令行帮助教程(包含重置密码)
论文解读(CGC)《CGC: Contrastive Graph Clustering for Community Detection and Tracking》