当前位置:网站首页>Opencv project 1-ocr recognition
Opencv project 1-ocr recognition
2022-04-22 12:52:00 【Aaron-ywl】
List of articles
Pictures processed by the article :

Project ideas :
Ideas : We don't recognize a picture directly , But do some processing , Remove information we don't need , Keep the information we need , Then do identification .
What we usually have to do is grayscale the picture , refilter , Morphology, etc. remove unwanted information .
Because in the process of processing , We need to view and analyze the pictures after each step of processing , We have to show the picture many times , Therefore, we can encapsulate the function of displaying pictures into a function form to use :
#  display picture
def cv_show(winname, image):
    cv2.imshow(winname, image)
    #  Destruction of the window
    cv2.waitKey(0)
    cv2.destroyAllWindows()
When we got a picture , Sometimes the size of the picture is not easy to handle , For example, the size of the image we processed this time is 3264×2448. Let's deal with the size first .
![[ Failed to transfer the external chain picture , The origin station may have anti-theft chain mechanism , It is suggested to save the pictures and upload them directly (img-7Bc1Ar6u-1650465136824)(D:/Desktop/%E5%A4%A7%E5%AD%A6/MSB/AIoT/python%E6%95%B0%E6%8D%AE%E5%88%86%E6%9E%90/%E6%95%B0%E6%8D%AE%E5%8F%AF%E8%A7%86%E5%8C%96%E5%88%9D%E7%BA%A7%EF%BC%88%E4%B8%80%EF%BC%89/%E4%BB%A3%E7%A0%81/image-20220420211154824.png)]](/img/47/8650cf854a3693bccafdb80f8927e6.png)
The function of modifying the size can be encapsulated into a function :
#  encapsulation resize function .
def resize(image, width=None, height=None, inter=cv2.INTER_AREA):
    dim = None #  Scaled width and height
    (h, w) = image.shape[:2]
    #  Don't deal with it
    if width is None and height is None:
        return image
    #  It specifies resize Of height
    if width is None:
        r = height / float(h) #  Zoom ratio
        dim = (int(w * r), height)
    #  It specifies resize Of width
    else:
        r = width / float(w)
        dim = (width, int(h * r))
    resized = cv2.resize(image, dim, interpolation=inter)
    return resized
We change the height to 500 Size processing pictures :
image = resize(image_copy, height = 500)
1、 graying :
#  graying
gray = cv2.cvtColor(image, cv2.COLOR_BGR2GRAY)
cv_show('gray',gray)
![[ Failed to transfer the external chain picture , The origin station may have anti-theft chain mechanism , It is suggested to save the pictures and upload them directly (img-pMF9TRqT-1650465136825)(D:/Desktop/%E5%A4%A7%E5%AD%A6/MSB/AIoT/python%E6%95%B0%E6%8D%AE%E5%88%86%E6%9E%90/%E6%95%B0%E6%8D%AE%E5%8F%AF%E8%A7%86%E5%8C%96%E5%88%9D%E7%BA%A7%EF%BC%88%E4%B8%80%EF%BC%89/%E4%BB%A3%E7%A0%81/image-20220420212814430.png)]](/img/f2/f6a0f39382102f38042c9530a330bb.png)
2、 Gaussian filter is used for denoising
Reference article :
OpenCV Learning notes 8- Filter principle and code implementation
For subsequent Canny Testing services :
#  Gaussian smoothing
Gaussian = cv2.GaussianBlur(gray, (5, 5), 0)
cv_show('Gaussian',Gaussian)
![[ Failed to transfer the external chain picture , The origin station may have anti-theft chain mechanism , It is suggested to save the pictures and upload them directly (img-6t0WgS7Y-1650465136825)(D:/Desktop/%E5%A4%A7%E5%AD%A6/MSB/AIoT/python%E6%95%B0%E6%8D%AE%E5%88%86%E6%9E%90/%E6%95%B0%E6%8D%AE%E5%8F%AF%E8%A7%86%E5%8C%96%E5%88%9D%E7%BA%A7%EF%BC%88%E4%B8%80%EF%BC%89/%E4%BB%A3%E7%A0%81/image-20220420212856678.png)]](/img/6e/8896adca35a1f5921973a19b36c005.png)
3、 edge detection
Reference article :
OpenCV Learning notes 8- Filter principle and code implementation
We use Canny Find the edge of the information , Prepare for subsequent contour search :
#  edge detection , Look for boundaries
edged = cv2.Canny(Gaussian, 70, 200)
cv_show('edged',edged)
![[ Failed to transfer the external chain picture , The origin station may have anti-theft chain mechanism , It is suggested to save the pictures and upload them directly (img-IdAPQy5S-1650465136826)(D:/Desktop/%E5%A4%A7%E5%AD%A6/MSB/AIoT/python%E6%95%B0%E6%8D%AE%E5%88%86%E6%9E%90/%E6%95%B0%E6%8D%AE%E5%8F%AF%E8%A7%86%E5%8C%96%E5%88%9D%E7%BA%A7%EF%BC%88%E4%B8%80%EF%BC%89/%E4%BB%A3%E7%A0%81/image-20220420212942549.png)]](/img/c0/3a29e608fa4a5b505afe8e61ece8fc.png)
4、 Find contours and sort :
Reference article :
OpenCV Learning notes 10- Image contour related knowledge and code implementation
#  Find the outline
cnts = cv2.findContours(edged, cv2.RETR_TREE, cv2.CHAIN_APPROX_SIMPLE)[0]
Find the outline , Let's sort , Prepare for later perspective transformation and outline drawing :
#  Sort the profiles in descending order of area
cnts = sorted(cnts, key=cv2.contourArea, reverse=True)
5、 Draw all contours
Reference article :
OpenCV Learning notes 10- Image contour related knowledge and code implementation
Note that drawing the outline will draw the original picture , We copy One copy :
#  Draw all contours
image_contours = cv2.drawContours(image.copy(), cnts, -1, (0, 0, 255), 1)
![[ Failed to transfer the external chain picture , The origin station may have anti-theft chain mechanism , It is suggested to save the pictures and upload them directly (img-eDGwj06q-1650465136826)(D:/Desktop/%E5%A4%A7%E5%AD%A6/MSB/AIoT/python%E6%95%B0%E6%8D%AE%E5%88%86%E6%9E%90/%E6%95%B0%E6%8D%AE%E5%8F%AF%E8%A7%86%E5%8C%96%E5%88%9D%E7%BA%A7%EF%BC%88%E4%B8%80%EF%BC%89/%E4%BB%A3%E7%A0%81/image-20220420213949076.png)]](/img/96/0f30c44d8478a7b2bd3656c3f384ce.png)
6、 Polygonal approximation
Reference article :
OpenCV Learning notes 10- Image contour related knowledge and code implementation
The method of drawing the contour may make the contour rough and not smooth , We use polygon approximation to get a smooth contour , Keep only the most useful information , Pay attention to copy Process the pictures of . After approximation , Only the coordinates of the corners of the four vertices are left , So the following len(approx)=4
#  Traverse the contour to find the largest contour .
for c in cnts:
    #  Calculate contour perimeter
    perimeter = cv2.arcLength(c, True)
    #  Polygonal approximation , Get an approximate contour
    approx = cv2.approxPolyDP(c, 0.02 * perimeter, True)
    #  The largest outline
    if len(approx) == 4:
        #  receive approx
        screen_cnt = approx
        break
#  Draw a polygon to approach
image_screen_cnt = cv2.drawContours(image.copy(), [screen_cnt], -1, (0, 0, 255), 1)
cv_show('image_screen_cnt', image_screen_cnt)
7、 Affine transformation
Reference article :
OpenCV Learning notes 7- Basic transformation of image ( With code implementation )
After we preprocess the picture , The approximate contour obtained , Because we just want to deal with the most useful information , Remove other useless backgrounds around it , Therefore, we use affine transformation to correct the image .
Perspective transformation is to find the transformation matrix , Because only the coordinates of four vertices are left after the polygon is approximated , Therefore, we need to find the four coordinates of the original graph and the four coordinates after affine transformation .
Now we have found the original 4 Coordinates of points . You need to know the transformed 4 A coordinate , Therefore, we can sort the four coordinates of the original drawing clockwise or counterclockwise according to the corners , Encapsulate as a function :
#  Sorting function is an independent function , Can be encapsulated into a function
def order_points(pts):
    #  It's all about 0 Matrix ,  To receive what you find out later 4 The coordinates of the angles .
    rect = np.zeros((4, 2), dtype='float32')
    #  Column addition
    s = pts.sum(axis=1)
    #  The upper left coordinate must be x,y The smallest coordinate added up .  The lower right coordinate must be x,y The largest coordinate added up .
    rect[0] = pts[np.argmin(s)]
    rect[2] = pts[np.argmax(s)]
    #  In the top right corner of the x,y The difference of subtraction must be the smallest .
    #  Lower left corner x,y The difference of subtraction ,  Must be the biggest .
    # diff The function of is the difference obtained by subtracting the previous column from the latter column
    diff = np.diff(pts, axis=1)
    rect[1] = pts[np.argmin(diff)]
    rect[3] = pts[np.argmax(diff)]
    return rect
After finding the coordinates of the four corners of the original drawing , Calculate the distance between points , Get new coordinates , Then affine transformation , We encapsulate the affine transformation function into a function :
#  Encapsulate the perspective transformation function into a function
def four_point_transform(image, pts):
    #  For the input 4 Sort by coordinates
    rect = order_points(pts)
    # top_left abbreviation tl, top left corner
    # top_right abbreviation tr, Upper right corner
    # bottom_right abbreviation br, The lower right corner
    # bottom_left abbreviation bl, The lower left corner
    (tl, tr, br, bl) = rect
    #  The distance between two points in space , And take the maximum distance to ensure that all words can be seen
    widthA = np.sqrt((br[0] - bl[0]) ** 2 + (br[1] - bl[1]) ** 2)
    widthB = np.sqrt((tr[0] - tl[0]) ** 2 + (tr[1] - tl[1]) ** 2)
    max_width = max(int(widthA), int(widthB))
    heightA = np.sqrt((tr[0] - br[0]) ** 2 + (tr[1] - br[1]) ** 2)
    heightB = np.sqrt((tl[0] - bl[0]) ** 2 + (tl[1] - bl[1]) ** 2)
    max_height = max(int(heightA), int(heightB))
    #  Construct the corresponding coordinate position after transformation .
    dst = np.array([
        [0, 0],
        [max_width, 0],
        [max_width, max_height],
        [0, max_height]], dtype='float32')
    #  Calculate the transformation matrix
    M = cv2.getPerspectiveTransform(rect, dst)
    #  Perspective transformation
    warped = cv2.warpPerspective(image, M, (max_width, max_height))
    return warped
Call the function of affine transformation :
When the input affine transformation , We need to restore the previous size :
#  Calculation scale .  Limited height 500
#  At this point, the pixels are reduced by a certain proportion , When performing radiation transformation, restore
ratio = image.shape[0] / 500.0
#  Copy a
image_copy = image.copy()
#  Affine transformation , Straighten the picture
warped = four_point_transform(image_copy, cv_show('warped', warped)
![[ Failed to transfer the external chain picture , The origin station may have anti-theft chain mechanism , It is suggested to save the pictures and upload them directly (img-kDLhhmZP-1650465136826)(D:/Desktop/%E5%A4%A7%E5%AD%A6/MSB/AIoT/python%E6%95%B0%E6%8D%AE%E5%88%86%E6%9E%90/%E6%95%B0%E6%8D%AE%E5%8F%AF%E8%A7%86%E5%8C%96%E5%88%9D%E7%BA%A7%EF%BC%88%E4%B8%80%EF%BC%89/%E4%BB%A3%E7%A0%81/image-20220420220024152.png)]](/img/ad/5e18b3f78c4602f89f8ec8dd785f5b.png)
After straightening , We filter information through binary processing , Get useful information , convenient ocr Scanning and extraction of :
#  Binary processing , First convert to grayscale
warped_gray = cv2.cvtColor(warped, cv2.COLOR_BGR2GRAY)
#  Then binarization
ref = cv2.threshold(warped_gray, 150, 255, cv2.THRESH_BINARY)[1]
cv_show('ref', ref)
![[ Failed to transfer the external chain picture , The origin station may have anti-theft chain mechanism , It is suggested to save the pictures and upload them directly (img-qQmwo4AU-1650465136827)(D:/Desktop/%E5%A4%A7%E5%AD%A6/MSB/AIoT/python%E6%95%B0%E6%8D%AE%E5%88%86%E6%9E%90/%E6%95%B0%E6%8D%AE%E5%8F%AF%E8%A7%86%E5%8C%96%E5%88%9D%E7%BA%A7%EF%BC%88%E4%B8%80%EF%BC%89/%E4%BB%A3%E7%A0%81/image-20220420220254980.png)]](/img/d4/ddcf22a896a261d8aa585e3e6231e3.png)
8、 Write picture file
Save the processed files
#  Write the processed picture into the picture file .
_ = cv2.imwrite('./scan.jpg', ref)
9、 Scan read
We need to import pytesseract The toolkit , Scan text :
Let's open it first cmd Download it :
pip install pytesseract
![[ Failed to transfer the external chain picture , The origin station may have anti-theft chain mechanism , It is suggested to save the pictures and upload them directly (img-w53h48MD-1650465136827)(D:/Desktop/%E5%A4%A7%E5%AD%A6/MSB/AIoT/python%E6%95%B0%E6%8D%AE%E5%88%86%E6%9E%90/%E6%95%B0%E6%8D%AE%E5%8F%AF%E8%A7%86%E5%8C%96%E5%88%9D%E7%BA%A7%EF%BC%88%E4%B8%80%EF%BC%89/%E4%BB%A3%E7%A0%81/image-20220420221034913.png)]](/img/57/64d61f660c525a933377853f1f99e4.png)
It doesn't matter if this happens , Let's change the download path :
pip install --target=d:\python3.9\lib\site-packages pytesseract
![[ Failed to transfer the external chain picture , The origin station may have anti-theft chain mechanism , It is suggested to save the pictures and upload them directly (img-ymsdGm2N-1650465136828)(D:/Desktop/%E5%A4%A7%E5%AD%A6/MSB/AIoT/python%E6%95%B0%E6%8D%AE%E5%88%86%E6%9E%90/%E6%95%B0%E6%8D%AE%E5%8F%AF%E8%A7%86%E5%8C%96%E5%88%9D%E7%BA%A7%EF%BC%88%E4%B8%80%EF%BC%89/%E4%BB%A3%E7%A0%81/image-20220420221037404.png)]](/img/38/ec71e5427679df63f5635af2cb96da.png)
I can check this article :
resolved :Requirement already satisfied:xxx
pytesseract Required image No opencv Read in image, It is pillow This package , namely PIL
So we're going to introduce pillow Picture of the bag !
Page separation mode +OCR Engine mode can see my article :
OpenCV Learning notes 11-Tesseract-OCR Installation and use
- pytesseract.image_to_string(Image.open(‘ Picture path ’), lang=' Language pack used ‘, config=‘ Page separation mode +OCR Engine mode ’)
- tesseract5.0 Form a complete set of traineddata Some language versions of the file do not support older versions of the engine ( namely oem=0).
# pytesseract Required image No opencv Read in image,  It is pillow This package ,  namely PIL
text = pytesseract.image_to_string(Image.open('./scan.jpg'), lang='chi_sim+eng', config='--oem 1')
10、 Write local
#  Save to local
with open('output.txt', 'w') as f:
    print(text)
    f.write(str(text))
We can see the saved... In the saved directory scan and output
![[ Failed to transfer the external chain picture , The origin station may have anti-theft chain mechanism , It is suggested to save the pictures and upload them directly (img-gh3l0eRX-1650465136828)(D:/Desktop/%E5%A4%A7%E5%AD%A6/MSB/AIoT/python%E6%95%B0%E6%8D%AE%E5%88%86%E6%9E%90/%E6%95%B0%E6%8D%AE%E5%8F%AF%E8%A7%86%E5%8C%96%E5%88%9D%E7%BA%A7%EF%BC%88%E4%B8%80%EF%BC%89/%E4%BB%A3%E7%A0%81/image-20220420222918250.png)]](/img/8f/ad3b1f453233f7d845a1195439d6f6.png)
View recognition results :
eee ek RK KOK KOR KOK
WHOLE FOODS MARKET - WESTPORT,CT 06880
399 POST RD WEST - (203) 227-6858
365
365
365
365
uexH TAX
BACON LS
BACON LS
BACON LS
BACON LS
BROTH CHIC
FLOUR ALMOND
CHKN BRST BNLSS SK
HEAVY CREAM
BALSMC REDUCT
BEEF GRND 85/15
JUICE COF CASHEW C
.00
DOCS PINT ORGANIC
HNY ALMOND BUTTER
BAL
NP
NP
NP
NP
NP
NP
NP
NP
NP
NP
NP
NP
NP
4.99
4.99
4.99
4.99
2.19
11.99
18.80
3.39
6.49
5.04
8.99
194.49
9.99
101.33
ae Mees es ieee i en
Er, er, er, er , It seems that the accuracy of recognition results is not high , But most of them are still recognized .
Complete code :
import cv2
import numpy as np
import pytesseract
from PIL import Image

#  display picture
def cv_show(winname, image):
    cv2.imshow(winname, image)
    #  Destruction of the window
    cv2.waitKey(0)
    cv2.destroyAllWindows()
#  Some of the original pictures size Not good treatment , We can package it into a function to unify the image size
#  encapsulation resize function .
def resize(image, width=None, height=None, inter=cv2.INTER_AREA):
    dim = None #  Scaled width and height
    (h, w) = image.shape[:2]
    #  Don't deal with it
    if width is None and height is None:
        return image
    #  It specifies resize Of height
    if width is None:
        r = height / float(h) #  Zoom ratio
        dim = (int(w * r), height)
    #  It specifies resize Of width
    else:
        r = width / float(w)
        dim = (width, int(h * r))
    resized = cv2.resize(image, dim, interpolation=inter)
    return resized

#  Do perspective transformation .
#  Perspective transformation is to find the transformation matrix
#  The transformation matrix requires the of the original graph 4 Point coordinates and transformed 4 Coordinates of points
#  Now we have found the original 4 Coordinates of points . You need to know the transformed 4 A coordinate
#  First, check the obtained 4 The corners are in a certain order ( along / Anti-clockwise ) Sort
#  Sorting function is an independent function , Can be encapsulated into a function
def order_points(pts):
    #  It's all about 0 Matrix ,  To receive what you find out later 4 The coordinates of the angles .
    rect = np.zeros((4, 2), dtype='float32')
    #  Column addition
    s = pts.sum(axis=1)
    #  The upper left coordinate must be x,y The smallest coordinate added up .  The lower right coordinate must be x,y The largest coordinate added up .
    rect[0] = pts[np.argmin(s)]
    rect[2] = pts[np.argmax(s)]
    #  In the top right corner of the x,y The difference of subtraction must be the smallest .
    #  Lower left corner x,y The difference of subtraction ,  Must be the biggest .
    # diff The function of is the difference obtained by subtracting the previous column from the latter column
    diff = np.diff(pts, axis=1)
    rect[1] = pts[np.argmin(diff)]
    rect[3] = pts[np.argmax(diff)]
    return rect

#  Encapsulate the perspective transformation function into a function
def four_point_transform(image, pts):
    #  For the input 4 Sort by coordinates
    rect = order_points(pts)
    # top_left abbreviation tl, top left corner
    # top_right abbreviation tr, Upper right corner
    # bottom_right abbreviation br, The lower right corner
    # bottom_left abbreviation bl, The lower left corner
    (tl, tr, br, bl) = rect
    #  The distance between two points in space , And take the maximum distance to ensure that all words can be seen
    widthA = np.sqrt((br[0] - bl[0]) ** 2 + (br[1] - bl[1]) ** 2)
    widthB = np.sqrt((tr[0] - tl[0]) ** 2 + (tr[1] - tl[1]) ** 2)
    max_width = max(int(widthA), int(widthB))
    heightA = np.sqrt((tr[0] - br[0]) ** 2 + (tr[1] - br[1]) ** 2)
    heightB = np.sqrt((tl[0] - bl[0]) ** 2 + (tl[1] - bl[1]) ** 2)
    max_height = max(int(heightA), int(heightB))
    #  Construct the corresponding coordinate position after transformation .
    dst = np.array([
        [0, 0],
        [max_width, 0],
        [max_width, max_height],
        [0, max_height]], dtype='float32')
    #  Calculate the transformation matrix
    M = cv2.getPerspectiveTransform(rect, dst)
    #  Perspective transformation
    warped = cv2.warpPerspective(image, M, (max_width, max_height))
    return warped

#  Encapsulate the function of image preprocessing into a function
def Image_Pretreatment(image):
    #  Image preprocessing
    #  graying
    gray = cv2.cvtColor(image, cv2.COLOR_BGR2GRAY)
    # cv_show('gray',gray)
    #  Gaussian smoothing
    Gaussian = cv2.GaussianBlur(gray, (5, 5), 0)
    # cv_show('Gaussian',Gaussian)
    #  edge detection , Look for boundaries ( Prepare for subsequent contour search )
    edged = cv2.Canny(Gaussian, 70, 200)
    # cv_show('edged',edged)
    #  Find the outline
    cnts = cv2.findContours(edged, cv2.RETR_TREE, cv2.CHAIN_APPROX_SIMPLE)[0]
    #  Sort the profiles in descending order of area
    cnts = sorted(cnts, key=cv2.contourArea, reverse=True)
    #  Draw all contours
    image_contours = cv2.drawContours(image.copy(), cnts, -1, (0, 0, 255), 1)
#     cv_show('image_contours', image_contours)
    #  Traverse the contour to find the largest contour .
    for c in cnts:
        #  Calculate contour perimeter
        perimeter = cv2.arcLength(c, True)
        #  Polygonal approximation , Get an approximate contour
        #  After approximation , Only the coordinates of the corners of the four vertices are left
        approx = cv2.approxPolyDP(c, 0.02 * perimeter, True)
        #  The largest outline
        if len(approx) == 4:
            #  receive approx
            screen_cnt = approx
            break
    #  Draw a polygon to approach
    image_screen_cnt = cv2.drawContours(image.copy(), [screen_cnt], -1, (0, 0, 255), 1)
    # cv_show('image_screen_cnt', image_screen_cnt)
    #  Affine transformation , Straighten the picture
    warped = four_point_transform(image_copy, screen_cnt.reshape(4, 2) * ratio)
    # cv_show('warped', warped)
    #  Binary processing , First convert to grayscale
    warped_gray = cv2.cvtColor(warped, cv2.COLOR_BGR2GRAY)
    #  Then binarization
    ref = cv2.threshold(warped_gray, 150, 255, cv2.THRESH_BINARY)[1]
    cv_show('ref', ref)
    #  Rotation straightening
    # dst = cv2.rotate(ref, cv2.ROTATE_90_COUNTERCLOCKWISE)
    # cv_show('dst', dst)
    return ref

if __name__ == "__main__":
    #  Read the picture
    image = cv2.imread('D:/Desktop/daxue/shiyanshi/Project/OCR/images/receipt.jpg')
    #  Calculation scale .  Limited height 500
    #  At this point, the pixels are reduced by a certain proportion , When performing radiation transformation, restore
    ratio = image.shape[0] / 500.0
    #  Copy a
    image_copy = image.copy()
    #  Modify dimensions
    image = resize(image_copy, height=500)
    # cv_show('image', image)
    #  Returns the result of the perspective transformation
    ref = Image_Pretreatment(image)
    #  Write the processed picture into the picture file .
    _ = cv2.imwrite('./scan.jpg', ref)
    # pytesseract Required image No opencv Read in image,  It is pillow This package ,  namely PIL
    text = pytesseract.image_to_string(Image.open('./scan.jpg'), lang='chi_sim+eng', config='--oem 1')
    #  Save to local
    with open('output.txt', 'w') as f:
        print(text)
        f.write(str(text))
attach OpenCV Catalog :OpenCV General catalog learning notes
Zhike professional Xiaobai , It's not easy to write a blog , If you like, you can like it !

版权声明
本文为[Aaron-ywl]所创,转载请带上原文链接,感谢
https://yzsam.com/2022/04/202204221249504568.html
边栏推荐
- 钢箱梁顶推作用下底板腹板局部应力 abaqus模型
- C语言预处理详解
- 51单片机案例(1)——利用DS1302实现实时时钟和可调时钟的功能
- 每日一题系列:公共子串计算
- node. JS database error failed to lookup view "list" in views directory
- R语言使用write_xlsx函数导出、写入dataframe数据到excel文件实战
- MySQL 5.0 installation tutorial illustration detailed tutorial
- 给自己成功的可能性
- let与var的区别,几个经典的小面试题
- Ros2 learning notes (6) learn ros2 actions from turnlesim
猜你喜欢

11. 盛最多水的容器

Select the appropriate span combination for one span in MATLAB Bridge
今日睡眠质量记录76分
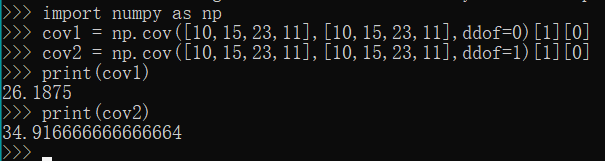
数学——协方差

ROS2学习笔记(七)从turtlesim学习ROS2的工具
JS基础8

可执行文件的生成过程

使用PHPstudy开启MySQL服务,并创建一个数据库

2022年四月21号S S M 框架整合@第一课 S S M 环境配置&重在实操。实操中总结。这里不展示结果。

Matlab bridge span combination problem GUI Graphical interface is completed
随机推荐
Give yourself the possibility of success
分享一个最近遇到的标签<iframe>
嵌入式开发:在嵌入式系统中验证传感器和通信数据的3个技巧
node. JS database error failed to lookup view "list" in views directory
Interpreting closures from structured context
诺瓦星云更新招股书,继续上市进程,“学术派”的步步为盈?
抛物线型压力作用下悬臂梁的abaqus py命令流
VR panorama truly restores the driving school environment, and VR live shows the hard power of the driving school
396. 旋转函数
VR全景婚礼给你别样的浪漫,记录婚礼的甜蜜瞬间
Thread related issues
R语言ggplot2可视化固定图像的纵横比aspect ratio实战:coord_fixed()函数
【生活杂谈】中体平台教你如何提高彩票中奖率
IDE导入项目
每日一题系列:公共子串计算
Five ways to get database connection: have you really got it?
JS基础8
Select the appropriate span combination for one span in MATLAB Bridge
分享一下自己最近写项目遇到的小问题
Generation process of executable file