当前位置:网站首页>kaggle-房价预测实战
kaggle-房价预测实战
2022-04-23 06:19:00 【什么时候才能像大佬一样厉害】
本次kaggle实战还在进行中
定义比赛用来评价模型的对数均方根误差。给定预测值 y ^ 1 , … , y ^ n \hat y_1, \ldots, \hat y_n y^1,…,y^n和对应的真实标签 y 1 , … , y n y_1,\ldots, y_n y1,…,yn,它的定义为
1 n ∑ i = 1 n ( log ( y i ) − log ( y ^ i ) ) 2 . \sqrt{\frac{1}{n}\sum_{i=1}^n\left(\log(y_i)-\log(\hat y_i)\right)^2}. n1i=1∑n(log(yi)−log(y^i))2.
对数均方根误差的实现如下面的log_rmse(net, features, labels) 函数。
# This Python 3 environment comes with many helpful analytics libraries installed
# It is defined by the kaggle/python docker image: https://github.com/kaggle/docker-python
# For example, here's several helpful packages to load in

import numpy as np # linear algebra
import pandas as pd # data processing, CSV file I/O (e.g. pd.read_csv)
import torch
from torch import nn

# Input data files are available in the "../input/" directory.
# For example, running this (by clicking run or pressing Shift+Enter) will list all files under the input directory

import os
# for dirname, _, filenames in os.walk('/kaggle/input'):
# for filename in filenames:
# print(os.path.join(dirname, filename))

# Any results you write to the current directory are saved as output.


train_data = pd.read_csv("../input/house-prices-advanced-regression-techniques/train.csv")
test_data = pd.read_csv("../input/house-prices-advanced-regression-techniques/test.csv")

print(test_data.iloc[0:4, [0, 1, 2, 3, -3, -2, -1]])
print("\n")
print(train_data.iloc[0:4, [0, 1, 2, 3, -3, -2, -1]])
# print(train_data.iloc[0])
print(train_data.shape, test_data.shape)

all_features = pd.concat((train_data.iloc[:, 1:-1], test_data.iloc[:, 1:]))

numeric_features = all_features.dtypes[all_features.dtypes != 'object'].index

all_features[numeric_features] = all_features[numeric_features].apply(lambda x: (x - x.mean()) / (x.std()))

all_features[numeric_features] = all_features[numeric_features].fillna(0)

all_features = pd.get_dummies(all_features, dummy_na=True)
# print(all_features.shape)

n_train = train_data.shape[0]

# get data tensor
train_features = torch.tensor(all_features[:n_train].values, dtype=torch.float)
test_features = torch.tensor(all_features[n_train:].values, dtype=torch.float)
train_lables = torch.tensor(train_data.SalePrice.values, dtype=torch.float)
# test_lables = torch.tensor(test_data.SalePrice.values, dtype=torch.float)

# print(train_features.shape)

class Net(nn.Module):
    def __init__(self):
        super(Net, self).__init__()
        self.fc1 = nn.Linear(331, 1)
        self.relu = nn.ReLU(True)

    def forward(self,input):
        output = self.fc1(input)
        output = self.relu(output)
        return output

net = Net()
for param in net.parameters():
    nn.init.normal_(param, mean=0, std=0.01)

loss_fn = nn.MSELoss()

def log_rmse(net, features, labels):
    with torch.no_grad():
        # 将小于1的值设成1,使得取对数时数值更稳定
        clipped_preds = torch.max(net(features), torch.tensor(1.0))
        rmse = torch.sqrt(2 * loss_fn(clipped_preds.log(), labels.log()).mean())
    return rmse.item()

def train(net, train_data, train_lables, num_epochs, learning_rate, weight_decay, batch_size):
    dataset = torch.utils.data.TensorDataset(train_features, train_lables)
    train_iter = torch.utils.data.DataLoader(dataset, batch_size, shuffle=True)
    optimizer = torch.optim.Adam(params=net.parameters(), lr=learning_rate, weight_decay=weight_decay)
    net = net.float()
    for epoch in range(num_epochs):
        for X, y in dataset:
            net.train()
            X = net(X.float())
            l = loss_fn(X, y.float())
            optimizer.zero_grad()
            l.backward()
            optimizer.step()
        train_ls.append(log_rmse(net, train_features, train_lables))
# if test_labels is not None:
# test_ls.append(log_rmse(net, test_features, test_labels))
    return train_ls

num_epochs = 50
learning_rate = 0.01
weight_decay = 0
batch_size = 64
train_ls = []

train(net, train_data, train_lables, num_epochs, learning_rate, weight_decay, batch_size)

print(train_ls[40:])
K折交叉验证
我们在模型选择、欠拟合和过拟合中介绍了 K K K折交叉验证。它将被用来选择模型设计并调节超参数。下面实现了一个函数,它返回第i折交叉验证时所需要的训练和验证数据。
def get_k_fold_data(k, i, X, y):
    # 返回第i折交叉验证时所需要的训练和验证数据
    assert k > 1
    fold_size = X.shape[0] // k
    X_train, y_train = None, None
    for j in range(k):
        idx = slice(j * fold_size, (j + 1) * fold_size)
        X_part, y_part = X[idx, :], y[idx]
        if j == i:
            X_valid, y_valid = X_part, y_part
        elif X_train is None:
            X_train, y_train = X_part, y_part
        else:
            X_train = torch.cat((X_train, X_part), dim=0)
            y_train = torch.cat((y_train, y_part), dim=0)
    return X_train, y_train, X_valid, y_valid
在 K K K折交叉验证中我们训练 K K K次并返回训练和验证的平均误差
def k_fold(k, X_train, y_train, num_epochs,
           learning_rate, weight_decay, batch_size):
    train_l_sum, valid_l_sum = 0, 0
    for i in range(k):
        data = get_k_fold_data(k, i, X_train, y_train)
        net = get_net(X_train.shape[1])
        train_ls, valid_ls = train(net, *data, num_epochs, learning_rate,
                                   weight_decay, batch_size)
        train_l_sum += train_ls[-1]
        valid_l_sum += valid_ls[-1]
        if i == 0:
            d2l.semilogy(range(1, num_epochs + 1), train_ls, 'epochs', 'rmse',
                         range(1, num_epochs + 1), valid_ls,
                         ['train', 'valid'])
        print('fold %d, train rmse %f, valid rmse %f' % (i, train_ls[-1], valid_ls[-1]))
    return train_l_sum / k, valid_l_sum / k
模型选择
我们使用一组未经调优的超参数并计算交叉验证误差。可以改动这些超参数来尽可能减小平均测试误差。
有时候你会发现一组参数的训练误差可以达到很低,但是在 K K K折交叉验证上的误差可能反而较高。这种现象很可能是由过拟合造成的。因此,当训练误差降低时,我们要观察 K K K折交叉验证上的误差是否也相应降低。
k, num_epochs, lr, weight_decay, batch_size = 5, 100, 5, 0, 64
train_l, valid_l = k_fold(k, train_features, train_labels, num_epochs, lr, weight_decay, batch_size)
print('%d-fold validation: avg train rmse %f, avg valid rmse %f' % (k, train_l, valid_l))
预测并在Kaggle中提交结果
下面定义预测函数。在预测之前,我们会使用完整的训练数据集来重新训练模型,并将预测结果存成提交所需要的格式。
def train_and_pred(train_features, test_features, train_labels, test_data,
                   num_epochs, lr, weight_decay, batch_size):
    net = get_net(train_features.shape[1])
    train_ls, _ = train(net, train_features, train_labels, None, None,
                        num_epochs, lr, weight_decay, batch_size)
    d2l.semilogy(range(1, num_epochs + 1), train_ls, 'epochs', 'rmse')
    print('train rmse %f' % train_ls[-1])
    preds = net(test_features).detach().numpy()
    test_data['SalePrice'] = pd.Series(preds.reshape(1, -1)[0])
    submission = pd.concat([test_data['Id'], test_data['SalePrice']], axis=1)
    submission.to_csv('./submission.csv', index=False)
    # sample_submission_data = pd.read_csv("../input/house-prices-advanced-regression-techniques/sample_submission.csv")
版权声明
本文为[什么时候才能像大佬一样厉害]所创,转载请带上原文链接,感谢
https://blog.csdn.net/qq_36016038/article/details/104362953
边栏推荐
猜你喜欢

不需要破解markdown编辑工具Typora

Us photo cloud editing helps BiliBili upgrade its experience

Lead the industry trend with intelligent production! American camera intelligent video production platform unveiled at 2021 world Ultra HD Video Industry Development Conference
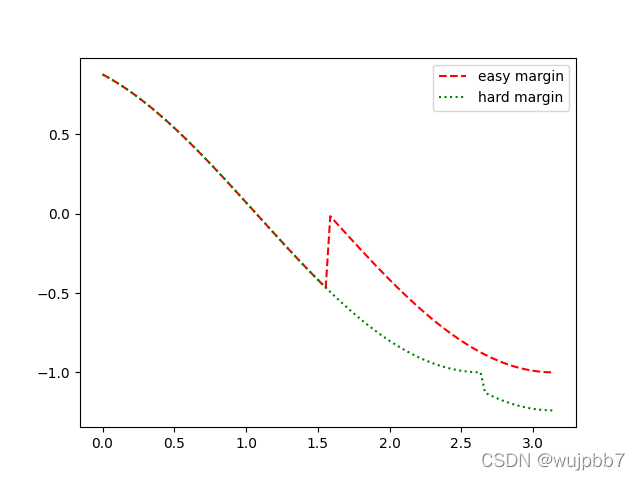
Draw margin curve in arcface
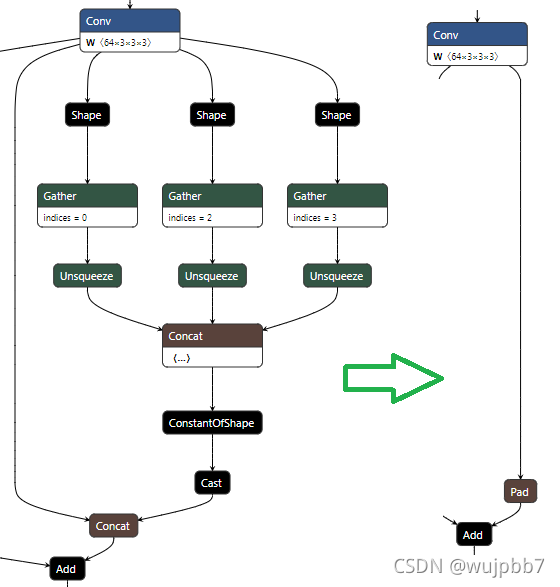
F. The wonderful use of pad

Emergency air space integrated communication system scheme of Guangxi Power Grid

记录一下使用v-print中遇到的问题

Metro wireless intercom system

电力行业巡检对讲通信系统

北峰通信助力湛江市消防支队构建PDT无线通信系统
随机推荐
通用型冒泡、选择、插入、希尔、快速排序的代码实现
presto日期函数的使用
HuggingFace
remote: Support for password authentication was removed on August 13, 2021.
pytorch:关于GradReverseLayer实现的一个坑
unhandled system error, NCCL version 2.7.8
自定义钉钉机器人进行报警
PyTorch 18. torch. backends. cudnn
利用mysql-binlog恢复数据
PyTorch 22. Pytorch common code snippet collection
PyTorch 10. Learning rate
免费开源农业物联网云平台(Version:3.0.1)
javscript获取文件真实后缀名
字节数仓实习生面试sql题
获取字符格式的当前时间
F. The wonderful use of pad
城市应急管理|城市突发事故应急通信指挥调度系统
江宁医院DMR系统解决方案
Solution of wireless intercom system in Commercial Plaza
Typora语法详解(一)