当前位置:网站首页>Web请求原理
Web请求原理
2022-08-09 09:11:00 【止语---】
目录
1.web请求/响应解析
web的原理,服务端处理监听状态,监听到该ip端口有请求了,根据请求信息返回对应的响应,比如在百度中搜索python教程,百度会无端监听到之后,进行响应。常用的socket编程就是这样的过程
web浏览器(socket客户端):
- 创建socket对象
- 连接
- 发送请求
- 接收请求
- 断开连接
百度服务器(socket服务端):
- 监听断开和ip
- while Trure:
等待用户连接
收到用户请求
响应
断开连接
当然实际的过程要比这个复杂很多,但是基本的过程原理是这样,因此先模拟以上的过程
#encoding:utf-8
import socket
sock = socket.socket()
sock.bind(('127.0.0.1',8080))
sock.listen(5)
while True:
conn, addr = sock.accept();
# 获取用户发送的数据
data = conn.recv(8096)
print(data)
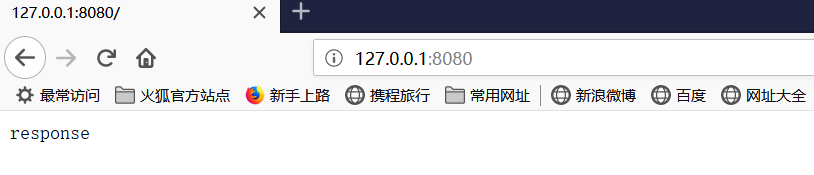
conn.send(b'response')
conn.close()运行之后打开浏览器,输入127.0.0.1:8080展示结果如下:
因为是http请求,知道请求包括三个部分:请求行,请求头,body三个部分,那按照http请求那样发送/响应按照http个要求来处理消息的请求和响应。在上面的代码中打印出来了客户的请求消息如下:
GET / HTTP/1.1
Host: 127.0.0.1:8080
User-Agent: Mozilla/5.0 (Windows NT 10.0; Win64; x64; rv:66.0) Gecko/20100101 Firefox/66.0
Accept: text/html,application/xhtml+xml,application/xml;q=0.9,*/*;q=0.8
Accept-Language: zh-CN,zh;q=0.8,zh-TW;q=0.7,zh-HK;q=0.5,en-US;q=0.3,en;q=0.2
Accept-Encoding: gzip, deflate
DNT: 1
Connection: keep-alive
Upgrade-Insecure-Requests: 1
Cache-Control: max-age=0
抓包看一下实际的请求和响应的格式如下:
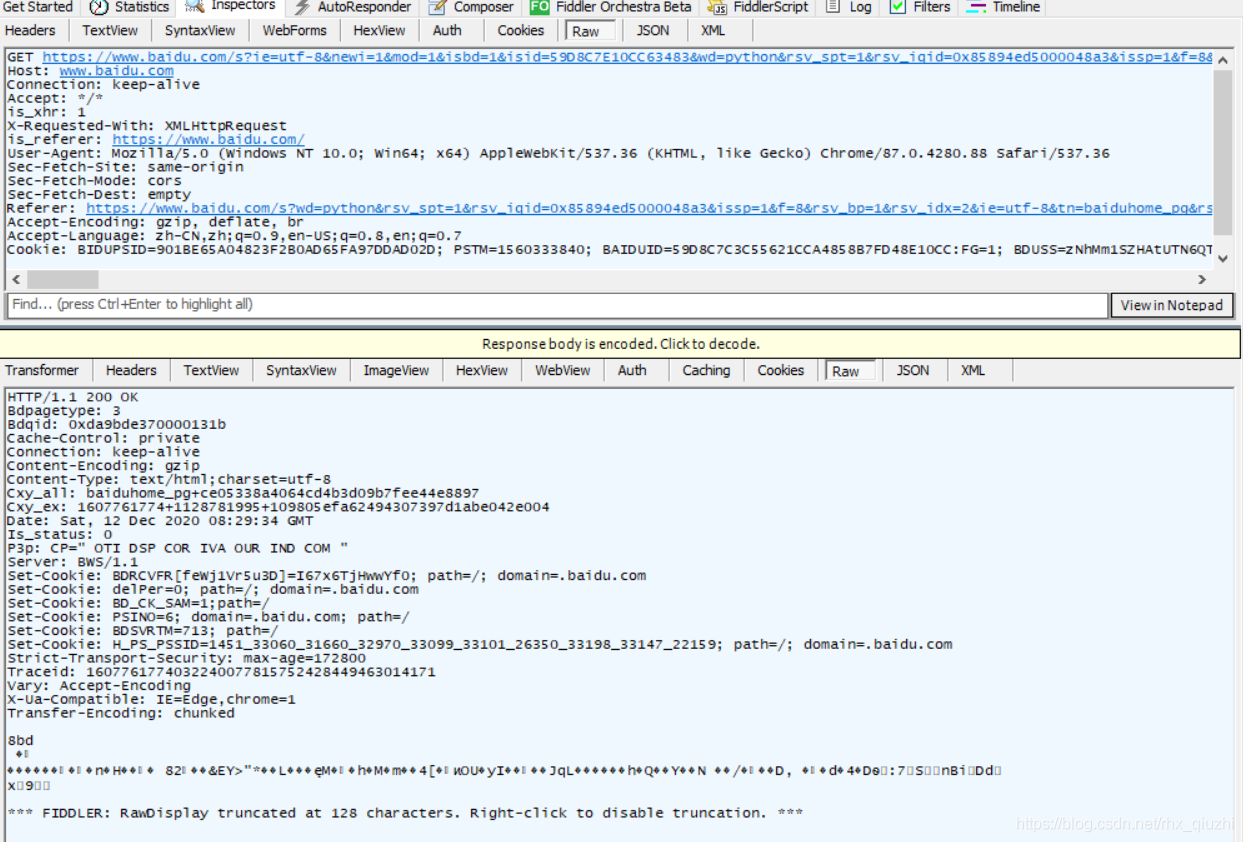
响应这里:响应行,响应头,响应体。响应体这里是一个html的字符串,因为浏览器认识这个html字符串并把它变成对普通人更友好的界面进行了展示
注意:请求头和请求体,响应头和响应体之间均有一个空白行作为分隔

因为在上述的脚本中只响应了response字符串,没有按照人家的这个规则进行回复,所以写的这个东西不规范。因此模拟上述的格式进行请求和响应
#encoding:utf-8

import socket

sock = socket.socket()
sock.bind(('127.0.0.1',8080))
sock.listen(5)

while True:
    conn, addr = sock.accept();

    # 获取用户发送的数据
    data = conn.recv(8096)
    print(data)
    # 返回一个响应头
    conn.send(b'HTTP/1.1 200 OK\r\n\r\n')
    conn.send(b'response')
    conn.close()
那现在在响应的格式上已经逐步靠近实际的web请求
2.url静态响应
url的全称是统一资源定位符,就是通俗的理解像是在自己的PC上的找文件的路径,得到路径之后在搜索栏位输入就会定位到对应的资源,那web也是一样,访问不同的url得到不同的响应
响应的报文格式如下:

那这里的请求的路径就是/,所以可以先获取到请求的路径,再根据路径去响应,因为不同的请求路径意味着客户端请求的内容不同,因此如何获取url是现在的工作重点
注意:请求行使用空格进行分割,请求头中使用:进行分割,请求头和请求体使用空白行进行分割
#encoding:utf-8

import socket

sock = socket.socket()
sock.bind(('127.0.0.1',8080))
sock.listen(5)

while True:
    conn, addr = sock.accept();

    # 获取用户发送的数据
    data = conn.recv(8096)
    data = str(data)
    headers, bodys = data.split('\r\n\r\n')
    temp_list = headers.split("\r\n")
    method, url, protocal = temp_list[0].split(' ')

    # 返回一个响应头
    conn.send(b'HTTP/1.1 200 OK\r\n\r\n')
    if url == "/xxx":
        conn.send(b'response')
    else:
        conn.send(b'404 not found')
    conn.close()
运行之后,在浏览器中重写请求

如果是/xxx会判断等于url,则返回响应response,如果是其他请求,则返回404。因为url有无数个对应着有无数个响应,因此将url提出来。因此做如下改动:
- 不同的url给出不同的响应结果,
- 将上述代码放在一个函数中,方便管理,因为可能越写越长
#encoding:utf-8
import  socket

def f1():
    return  "f1"
def f2():
    return b"f2"

routers = [
    ('/xxx',f1),
    ('/ooo',f2)
]

def run():
    # 创建socket对象
    sock = socket.socket();
    sock.bind(('127.0.0.1',8080))
    sock.listen(5)

    while True:
        conn,addr = sock.accept();

        # 获取用户发送的数据
        data= conn.recv(8096)
        data = str(data)
        headers,bodys = data.split('\r\n\r\n')
        temp_list = headers.split("\r\n")
        method,url,protocal = temp_list[0].split(' ')

        conn.send(b'HTTP/1.1 200 OK\r\n\r\n')

        func_Name = None
        for item in routers:
            if item[0] == url:
                func_Name = item[1]
                break

        if func_Name:
            response = func_Name()
        else:
            response = b'404'

        conn.send(response)

        conn.close()

if __name__ == '__main__':
    run()
运行查看结果

现在是不是有点像平时访问的web请求的了,不同的请求给出不同的响应。但是这个界面太丑了,能不能像平时一样展示的稍微好看点,在之前提到说普通的响应返回的是html字符串,那这里也模仿返回一个html字符串,那最常见的就是登陆界面,对应的还是在f1和f2给不同的html响应
index.html
<!DOCTYPE html>
<html lang="en">
<head>
    <meta charset="UTF-8">
    <title>Title</title>
</head>
<body>
    <h1>用户登录</h1>
    <form>
        <p><input type="text" placeholder="用户名" /></p>
        <p><input type="password" placeholder="密码" /></p>
    </form>
</body>
</html>
table.html
<!DOCTYPE html>
<html lang="en">
<head>
    <meta charset="UTF-8">
    <title>Title</title>
</head>
<body>
    <table border="1">
        <thead>
            <tr>
                <th>ID</th>
                <th>用户名</th>
                <th>邮箱</th>
            </tr>
        </thead>
        <tbody>
            <tr>
                <th>admin</th>
                <th>root</th>
                <th>[email protected]</th>
            </tr>
        </tbody>
    </table>
</body>
</html>
对应的将之前的f1和f2中返回的结果用这个文件替代,因为浏览器认识html,看看浏览器给最终展示的结果如何
#encoding:utf-8
import  socket

def f1(request):
    """
    处理用户的请求并返回相应的内容
    :request:用户请求的所有信息
    :return:
    """
    f = open('index.html','rb')
    data = f.read()
    f.close()
    return  data
    # return  "f1"
def f2(request):
    """
    处理用户的请求并返回相应的内容
    :request
    :return:
    """
    f = open('table.html','rb')
    data = f.read()
    f.close()
    return  data
    # return b"f2"

routers = [
    ('/xxx',f1),
    ('/ooo',f2)
]

def run():
    # 创建socket对象
    sock = socket.socket();
    sock.bind(('127.0.0.1',8080))
    sock.listen(5)

    while True:
        conn,addr = sock.accept();

        # 获取用户发送的数据
        data= conn.recv(8096)
        data = str(data)
        headers,bodys = data.split('\r\n\r\n')
        temp_list = headers.split("\r\n")
        method,url,protocal = temp_list[0].split(' ')

        conn.send(b'HTTP/1.1 200 OK\r\n\r\n')

        func_Name = None
        for item in routers:
            if item[0] == url:
                func_Name = item[1]
                break

        if func_Name:
            response = func_Name(data)
        else:
            response = b'404'

        conn.send(response)

        conn.close()

if __name__ == '__main__':
    run()
重新运行代码,并在浏览器上进行范围

这个网站只有两个地址,/xxx和/ooo,所以这个网站就写完了,就这样像普通的其他的网站一样访问。那因为从界面还是底层代码中不难发现,这个界面展示一直是不变的,即所谓的“静态网站”,但实际上我们常常访问的是动态的网站,那数据动态数据当然是从数据库中获取的。在上面的index和table的读取过程中,定义的是html类型,因为是读取自己定义的文件,所以当然也可以是txt格式,或者任意其他格式了。
3.url动态响应
比如在上述的table中用户名root定义为位当前时间,这样的话时间一直持续变化的,不断的刷新就会返回不同的响应的结果,这样就简单的实现了动态响应
def f2(request):
    """
    处理用户的请求并返回相应的内容
    :request
    :return:
    """
    f = open('table.html','r')
    data = f.read()
    f.close()
    import  time
    ctime = time.time()
    data = data.replace("root",str(ctime))
    data = bytes(data)
    return  data
    # return b"f2"
输出结果如下:

这是不是就是使用table这个模板展示了不同的“用户”信息。所以这个html的角色:模板
那如果这里的用户名不使用这个时间戳,而是使用数据库中的数据这样就是真正的实际使用,那假设现在数据库有10个数据,需要从数据库中读取出来这10个数据进行展示。关于本地mysql的安装可以在官方网站下载。
4.连接数据库
本地安装pymsyql,并创建数据库/表,本地如下所示

现在接着第3节中的显示的信息,这里使用mysql数据库中的数据进行展示
同样创建一个userlist.html
<!DOCTYPE html>
<html lang="en">
<head>
    <meta charset="UTF-8">
    <title>Title</title>
</head>
<body>
    <table border="1">
        <thead>
            <tr>
                <th>ID</th>
                <th>username</th>
                <th>mail</th>
            </tr>
        </thead>
        <tbody>
            @@[email protected]@
        </tbody>
    </table>
</body>
</html>要做的就是把tbody中的@@[email protected]@替换为数据库中的数据
def f3(request):
    import pymysql

    # 创建连接
    conn = pymysql.connect(host='127.0.0.1', port=3306, user='root', passwd='123456', db='pgtuser')
    # 创建游标
    # 游标设置为字典类型
    cursor = conn.cursor(cursor=pymysql.cursors.DictCursor)
    # 执行SQL,并返回收影响行数
    effect_row = cursor.execute("select id,username,password from userinfo")

    userlist = cursor.fetchall()

    # 关闭游标
    cursor.close()
    # 关闭连接
    conn.close()
    # print(userlist)

    contentlist = []
    for row in userlist:
        tp ="<tr><th>%s</th><th>%s</th><th>%s</th></tr>" %(row['id'],row['username'],row['password'])
        contentlist.append(tp)
    content = "".join(contentlist)

    f = open('userlist.html','r',encoding='utf-8')
    template = f.read()
    f.close()

    data = template.replace('@@[email protected]@',content)
    return  bytes(data,encoding='utf-8')

routers = [
    ('/xxx',f1),
    ('/ooo',f2),
    ('/userlist.htm',f3),
]
展示的结果如下

那这里的语句,将数据库中的数据在userlist.html中替换的过程就是渲染,即数据+模板,所谓的模板就是这里的html
data = template.replace('@@[email protected]@',content)5.使用jinja2优化
在第4章中使用字符串替换非常麻烦,字符串写一堆处理,其实这个还有一个别人写好的东西可以直接操作就是jina2
在jinja2中,存在三种语法:
- 控制结构 {% %}
- 变量取值 { { }}
- 注释 {# #}
{%foruser in users %}<li>{ { user.username|title }}</li>{% endfor %}
这里新增一个host.html,如下
<!DOCTYPE html>
<html lang="en">
<head>
    <meta charset="UTF-8">
    <title>Title</title>
</head>
<body>
    <table border="1">
        <thead>
            <tr>
                <th>ID</th>
                <th>username</th>
                <th>mail</th>
            </tr>
        </thead>
        <tbody>
            {% for row in user_list %}
            <tr>
                <td>{row.id}</td>
                <td>{row.username}</td>
                <td>{row.password}</td>
            </tr>
            {% endfo %}
        </tbody>
    </table>
</body>
</html>
新增一个f4的函数
def f4(request):
    import pymysql

    # 创建连接
    conn = pymysql.connect(host='127.0.0.1', port=3306, user='root', passwd='123456', db='pgtuser')
    # 创建游标
    # 游标设置为字典类型
    cursor = conn.cursor(cursor=pymysql.cursors.DictCursor)
    # 执行SQL,并返回收影响行数
    effect_row = cursor.execute("select id,username,password from userinfo")

    userlist = cursor.fetchall()

    # 关闭游标
    cursor.close()
    # 关闭连接
    conn.close()

    f = open('hostlist.html','r',encoding='utf-8')
    data = f.read()
    f.close()

    from  jinja2 import  Template
    template = Template(data)
    data = template.render(user_list=userlist)

    print(data)
    return  data.encode('utf-8')

routers = [
    ('/xxx',f1),
    ('/ooo',f2),
    ('/userlist.htm',f3),
    ('/host.html',f4)
]那这里jinjia2所做的事情就是使用第三方工具做的渲染
结合刚在我们开发的这个“网站”总结归纳下:
- socket服务端
- 根据Url不同返回不同的响应 (即所谓的路由系统,utl -> 函数)
- 字符串返回给用户(模板引擎渲染,HTML充当模板)
针对以上的流程,常见的web框架种类有:
- 1,2,3 ------->Tornado
- [使用第三方的a],b,c -------> [wsgiref] ->Django
- [使用第三方的a],b,[使用第三方的c] -------> flask
边栏推荐
猜你喜欢

营养与健康(HIT2021秋)
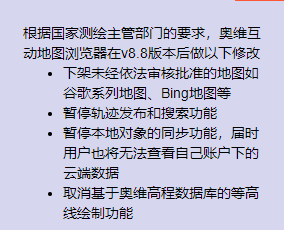
奥维地图电脑端手机端不能用了,有没有可替代的地图工具

Venture DAO 行业研报:宏观和经典案例分析、模式总结、未来建议
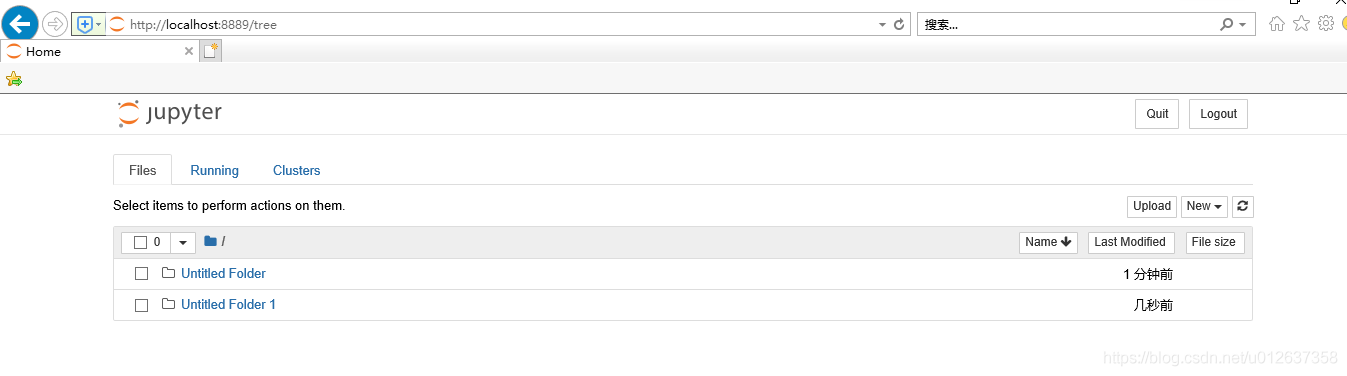
Anaconda4.8.3介绍、安装及使用教程安装(win10)并修改Jupyter默认工作目录

MySQL lock
The era of Google Maps is over, how to view high-definition satellite image maps?

【场景化解决方案】OA审批与金智CRM数据同步
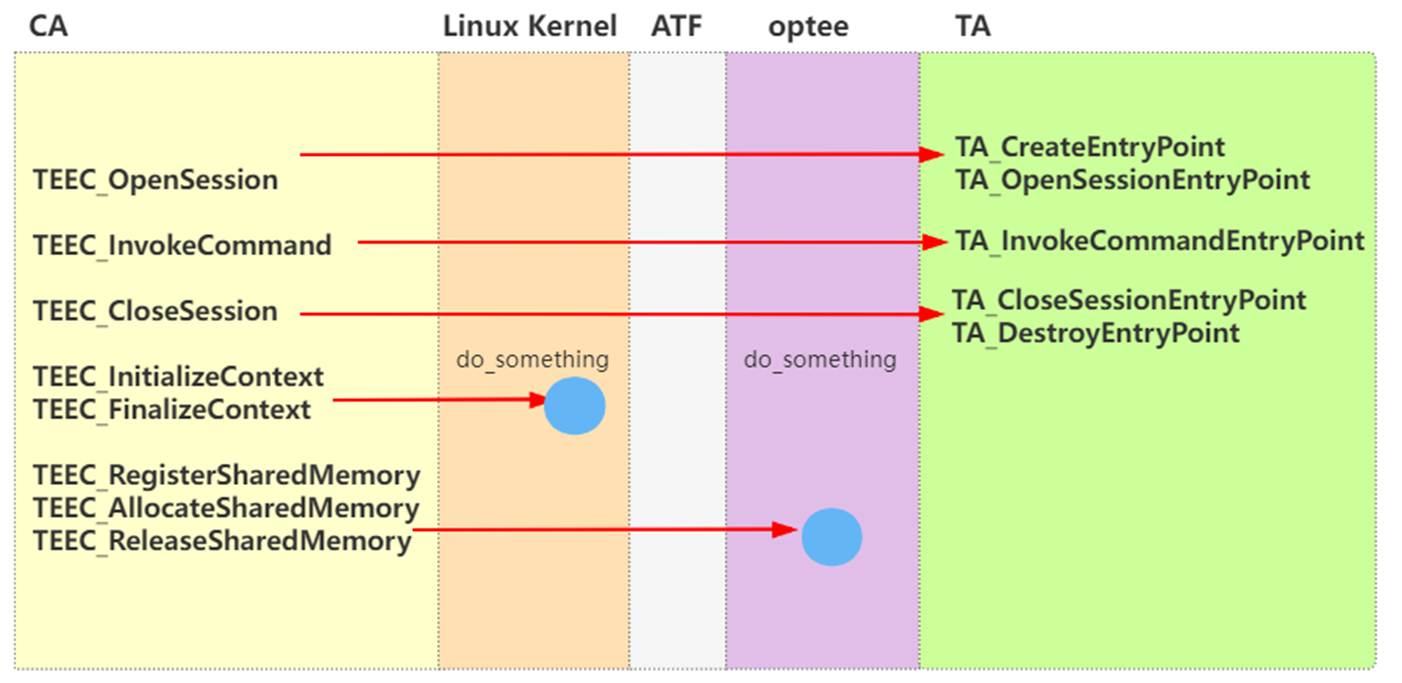
【培训课程专用】CA/TA调用模型-代码导读
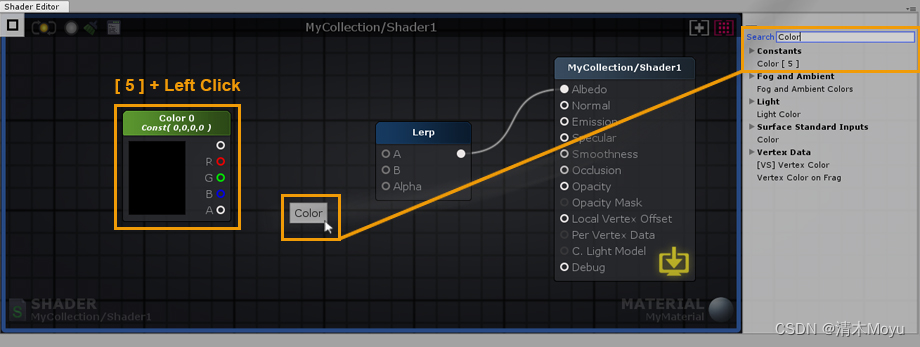
Amplify Shader Editor手册 Unity ASE(中文版)
![[Vulnerability reproduction] CVE-2018-7490 (path traversal)](/img/0f/652869001b3e3b683192e6558d81fb.png)
[Vulnerability reproduction] CVE-2018-7490 (path traversal)
随机推荐
MySQL查漏补缺(三) 计算字段
vim 按了Ctrl+S后 卡死
sizeof 结构体问题
不支持关键字: 'Provider'
SQL Server2000 各个版本之间的区别
SQL server中的数据类型
C#学习笔记
These 12 GIS software are better than the other
Max Flow P
MySQL事务隔离
MySQL Leak Check (4) Stored Procedures and Cursors
没有对象的可以进来看看, 这里有对象介绍
MySQL lock
小程序/app触底加载更多数据
Es6连续解构赋值+重命名
MySQL创建索引的技巧
Getting started with ctfshow-web Part of the file upload part solution
这下你知道为什么程序员要和产品干架了吧?
ARMv8/ARMv9视频课程-Trustzone/TEE/安全视频课程
BUUCTF MISC Writing Notes (1)