当前位置:网站首页>rebbitMQ的简单搭建
rebbitMQ的简单搭建
2022-04-23 11:20:00 【黄昏后的田野】
安装rebbitMQ的简单使用:
第一步docker安装rebbitMQ
一、获取镜像
使用docker search rabbitMq命令获取镜像列表

2.使用docker pull docker.io/rabbitmq:3.8-management 拉取镜像

我们选择了STARS数最多的官方镜像,此处需要注意,默认rabbitmq镜像是不带web端管理插件的,所以指定了镜像tag为3.8-management,表示下载包含web管理插件版本镜像,其它Tag版本可以访问DockerHub查询
二、创建rabbitMq容器
1.使用docker images获取查看rabbitMQ镜像ID,我的是 d5458fa6a2bf

2.执行docker run --name rabbitmq -d -p 15672:15672 -p 5672:5672 d5458fa6a2bf 命令创建rabbitMq容器,关于其中的参数含义如下:
–name指定了容器名称
-d 指定容器以后台守护进程方式运行
-p指定容器内部端口号与宿主机之间的映射,rabbitMq默认要使用15672为其web端界面访问时端口,5672为数据通信端口
命令执行完毕后,docker会使用ID为 d5458fa6a2bf 的镜像创建容器,创建完成后返回容器ID为ed77b4a651e84377bcf9a0a46564472eed39f85ca…
(太长省略)
执行docker ps可以查看正在运行的容器,我们能看到rabbitMq已经运行
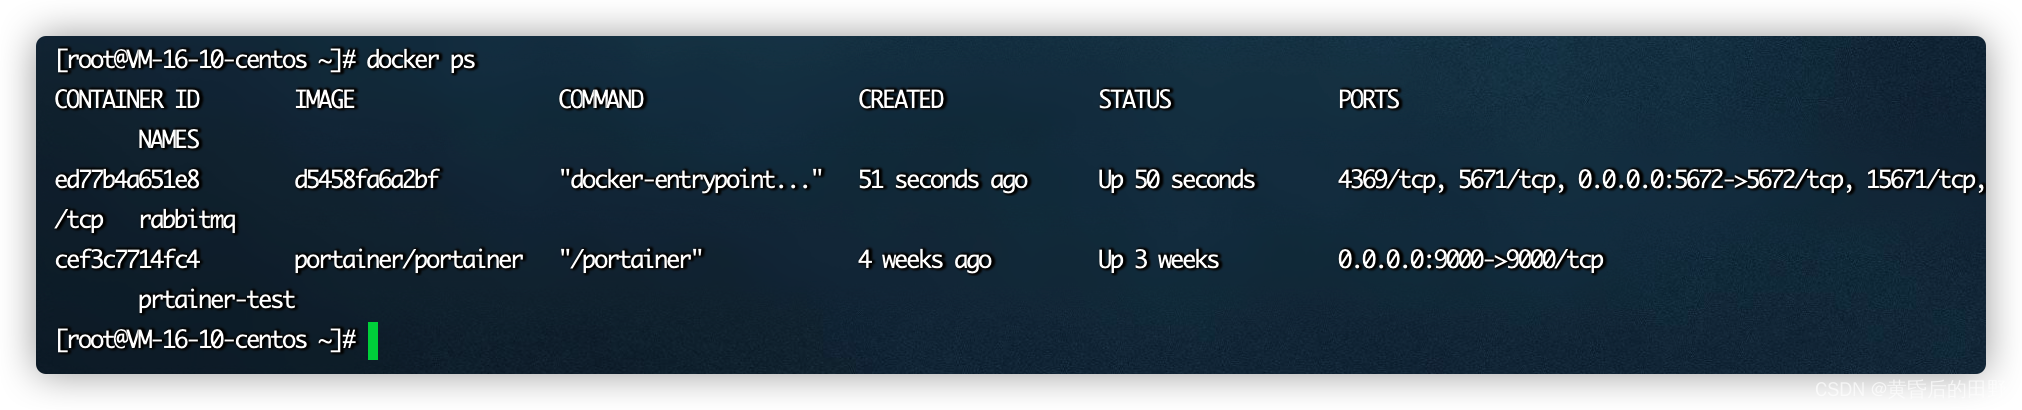
3.查看容器日志 使用docker logs -f 容器ID命令可以查看容器日志,我们执行docker logs -f ed7命令查看rabbitMq在启动过程中日志,ed7是容器ID的简写——容器ID太长,使用时其写前几位即可

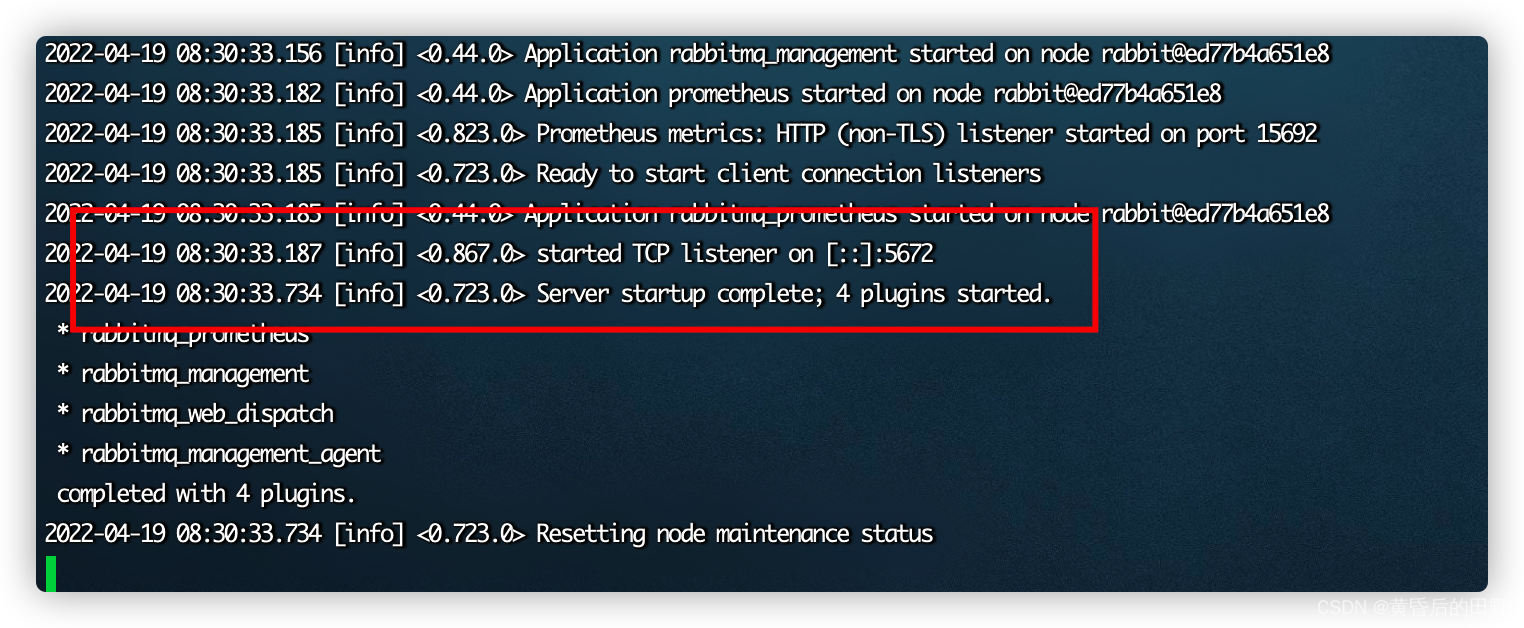
从日志可以看出,rabbitMq默认创建了guest用户,并且赋予administr
ator角色权限,同时服务监听5672端口TCP连接和15672端口的HTTP连接,至此说明安装成功。
三、访问rabbitMq
1.访问web界面
在浏览器 输入你的主机Ip:15672回车即可访问rabbitMq的Web端管理界面,默认用户名和密码都是guest,如图出现如下界面代表已经成功了。

2.新添加一个账户
默认的guest 账户有访问限制,默认只能通过本地网络(如 localhost) 访问,远程网络访问受限,所以在使用时我们一般另外添加用户,例如我们添加一个root用户:
①执行docker exec -i -t ed7 bin/bash进入到rabbitMq容器内部
[root@localhost docker]# docker exec -i -t ed7 bin/bash
root@3ae75edc48e2:/#
执行rabbitmqctl add_user root 123456 添加用户,用户名为root,密码为123456
root@3ae75edc48e2:/# rabbitmqctl add_user root 123456
Adding user "root" ...
③执行abbitmqctl set_permissions -p / root ".*" ".*" ".*" 赋予root用户所有权限
root@3ae75edc48e2:/# rabbitmqctl set_permissions -p / root ".*" ".*" ".*"
Setting permissions for user "root" in vhost "/" ...
④执行rabbitmqctl set_user_tags root administrator赋予root用户
administrator角色
root@3ae75edc48e2:/# rabbitmqctl set_user_tags root administrator
Setting tags for user "root" to [adminstrator] ...
⑤执行rabbitmqctl list_users查看所有用户即可看到root用户已经添加成功
root@3ae75edc48e2:/# rabbitmqctl list_users
Listing users ...
user	tags
guest	[administrator]
root	[administrator]
复制代码执行exit命令,从容器内部退出即可。这时我们使用root账户登录web界面也是可以的。到此,rabbitMq的安装就结束了,接下里就实际代码开发。

作者:补天队长
链接:https://juejin.cn/post/6844903970545090574
来源:稀土掘金
版权声明
本文为[黄昏后的田野]所创,转载请带上原文链接,感谢
https://blog.csdn.net/m0_50593634/article/details/124276392
边栏推荐
猜你喜欢


随机推荐
MySQL8.0升级的踩坑历险记
汇编语言 运行环境设置等教程链接整理
赛微微电科创板上市破发:跌幅达26% 公司市值44亿
MySQL数据库事务transaction示例讲解教程
VM set up static virtual machine
PlatoFarm推出正式版游戏经济模型的特点分析
GPU, CUDA,cuDNN三者的關系總結
CUMCM 2021-B:乙醇偶合制備C4烯烴(2)
Learn go language 0x03: understand the dependency between variables and initialization order
laravel-admin表单验证
解析性能良好的机器人使用守则
Canvas详解
Using Baidu PaddlePaddle EasyDL to accomplish specified target recognition
R-Drop:更强大的Dropout正则方法
Common parameters of ffmpeg command line
How to use JDBC callablestatement The wasnull () method is called to check whether the value of the last out parameter is SQL null
解读机器人编程课程的生物认知度
MySQL Router重装后重新连接集群进行引导出现的——此主机中之前已配置过的问题
解读机器人创造出来的艺术
Mysql8. 0 installation guide