当前位置:网站首页>Jetpack Compose——Image(图片)的使用
Jetpack Compose——Image(图片)的使用
2022-08-09 13:12:00 【lplj717】
首先来看看基本的参数:
@Composable
fun Image(
    painter: Painter,
    contentDescription: String?,
    modifier: Modifier = Modifier,
    alignment: Alignment = Alignment.Center,
    contentScale: ContentScale = ContentScale.Fit,
    alpha: Float = DefaultAlpha,
    colorFilter: ColorFilter? = null
)基础的参数这里就不再做描述了,大体上和Icon的基本使用类似,不清楚的可以去看看Icon的而是用,这里主要记录一下其他参数:
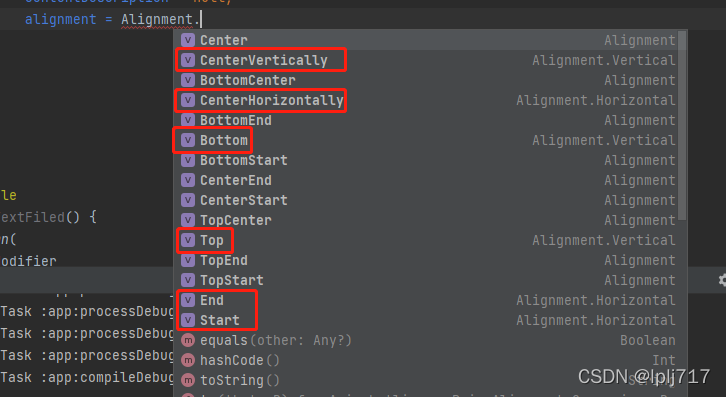
1,alignment:对齐方向
使用alignment前提是Image设置了宽高,alignment取值为Alignment的枚举:
(注意他们的返回值类型并不是Alignment,所以使用的时候会报错)
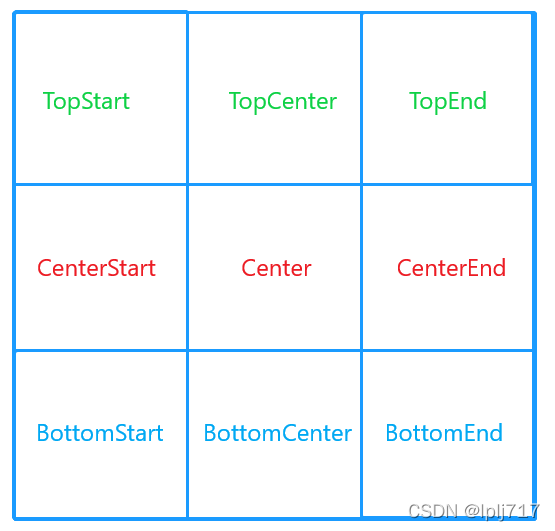
除去上面几种类型剩下的九种对其方式大致如下图:
        Image(
            modifier = Modifier.size(100.dp,200.dp)
                .background(Color.Green),//增加绿色背景
            painter = painterResource(id = R.mipmap.icon_pic),
            contentDescription = null,
            alignment = Alignment.Center,
        )
效果如图:(这里只展示了居中对其,至于其他对其方式这里就不多做演示了)

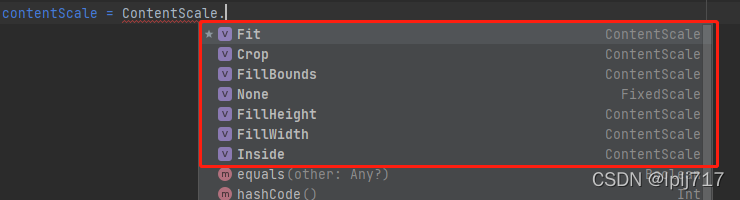
2,contentScale:缩放设置
相当于ImageView的scaleType属性,取值是ContentScale的枚举,默认是ContentScale.Fit
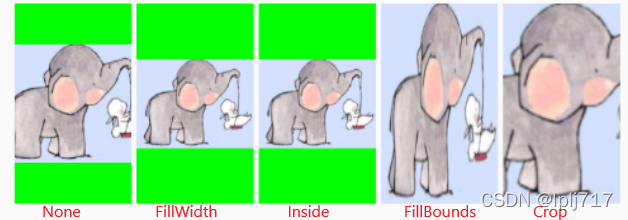
 ContentScale.Crop 裁剪
ContentScale.FillBounds 拉伸图片宽高填满形状
ContentScale.FillHeight 拉伸图片高度填满高度
ContentScale.FillWidth 拉伸图片宽度填满宽度
ContentScale.Fit 均匀缩放源(保持源的长宽比),以便源的两个维度(宽度和高度)都等于或小于目标的相应维度
ContentScale.Inside 如果源大于目标,则缩放源以保持长宽比在目标边界内。 如果源在两个维度中都小于或等于目标,则此行为类似于None
ContentScale.None 不缩放
        Row {
            Image(
                modifier = Modifier
                    .size(50.dp, 80.dp)
                    .background(Color.Green),//增加绿色背景
                painter = painterResource(id = R.mipmap.icon_pic),
                contentDescription = null,
                alignment = Alignment.Center,
                contentScale = ContentScale.None
            )
            Spacer(modifier = Modifier.padding(1.dp))
            Image(
                modifier = Modifier
                    .size(50.dp, 80.dp)
                    .background(Color.Green),//增加绿色背景
                painter = painterResource(id = R.mipmap.icon_pic),
                contentDescription = null,
                alignment = Alignment.Center,
                contentScale = ContentScale.FillWidth
            )
            Spacer(modifier = Modifier.padding(1.dp))
            Image(
                modifier = Modifier
                    .size(50.dp, 80.dp)
                    .background(Color.Green),//增加绿色背景
                painter = painterResource(id = R.mipmap.icon_pic),
                contentDescription = null,
                alignment = Alignment.Center,
                contentScale = ContentScale.Inside
            )
            Spacer(modifier = Modifier.padding(1.dp))
            Image(
                modifier = Modifier
                    .size(50.dp, 80.dp)
                    .background(Color.Green),//增加绿色背景
                painter = painterResource(id = R.mipmap.icon_pic),
                contentDescription = null,
                alignment = Alignment.Center,
                contentScale = ContentScale.FillBounds
            )
            Spacer(modifier = Modifier.padding(1.dp))
            Image(
                modifier = Modifier
                    .size(50.dp, 80.dp)
                    .background(Color.Green),//增加绿色背景
                painter = painterResource(id = R.mipmap.icon_pic),
                contentDescription = null,
                alignment = Alignment.Center,
                contentScale = ContentScale.Crop
            )

        }
效果如图:
3.alpha透明度
数值类型为float,数值范围为0f-1f之间,默认是1f
        Row {
            Image(
                modifier = Modifier
                    .size(50.dp, 80.dp)
                    .background(Color.Green),//增加绿色背景
                painter = painterResource(id = R.mipmap.icon_pic),
                contentDescription = null,
                alignment = Alignment.Center,
                contentScale = ContentScale.None,
                alpha = 1f
            )
            Spacer(modifier = Modifier.padding(5.dp))
            Image(
                modifier = Modifier
                    .size(50.dp, 80.dp)
                    .background(Color.Green),//增加绿色背景
                painter = painterResource(id = R.mipmap.icon_pic),
                contentDescription = null,
                alignment = Alignment.Center,
                contentScale = ContentScale.None,
                alpha = 0.5f
            )
        }
效果如图:
4,colorFilter:着色效果
可以使用颜色对图片进行混合加工,有下面三种方法进行设置
ColorFilter.tint(Color, BlendMode) 着色效果
ColorFilter.lighting(Color,Color)
ColorFilter.colorMatrix(colorMatrix)
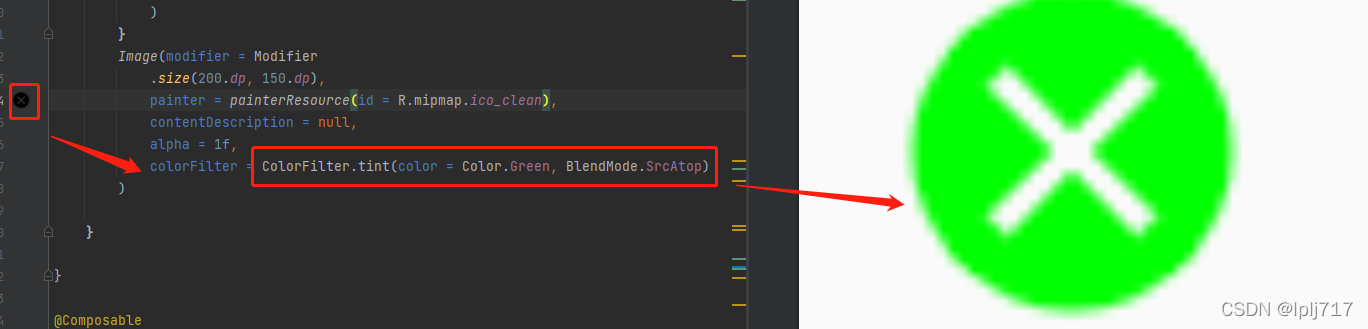
对于一些单一颜色的图片可以通过ColorFilter.tint改变图标颜色,从而不用UI再次切图(这里只有一个例子,其他的还没怎么去研究,这里需要注意:这种方法只适合那种单一颜色的图片)
Image(modifier = Modifier
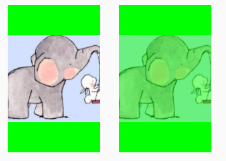
.size(200.dp, 150.dp),
painter = painterResource(id = R.mipmap.ico_clean),
contentDescription = null,
alpha = 1f,
colorFilter = ColorFilter.tint(color = Color.Green, BlendMode.SrcAtop)
)效果如图:
到这里Image的基本属性就差不多了,下一篇准备记录一下Image加载网络图片的第三方库
边栏推荐
猜你喜欢

随机推荐
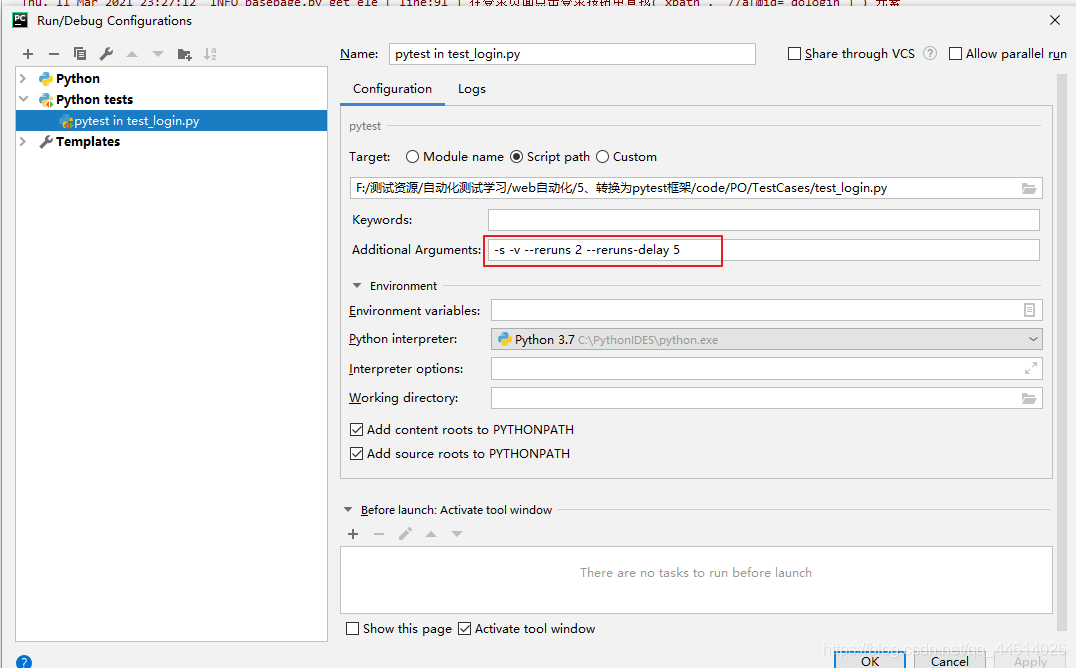
pytest 筛选用例
IDEA Gradle 常遇问题(二)(持续更新)
CutefishOS系统默认自动桌面壁纸
FFmpeg相机花屏花图问题解决方法
皮肤资料整理
JS轮播图实现
Q_07 词汇表
问题系列-如何修改或更新localhost里的值
Process/Thread Related in Sandbox - 2
【面试高频题】可逐步优化的链表高频题
缓存和数据库一致性问题
激光器如何养护才能远离结露没烦恼
易语言获取cookie
RobotFramework 之 用户关键字
常用函数
Map mixed density function and quantile added line
Professor Chen Qiang's "Machine Learning and R Application" course Chapter 16 Assignment
RobotFramework 之 资源文件
pytest 与 unittest 的区别
RobotFramework 之 Setup和Teardown