当前位置:网站首页>Harbor Enterprise Mirror Warehouse Construction
Harbor Enterprise Mirror Warehouse Construction
2022-08-09 05:53:00 【MssGuo】
前言
环境:centos 7.9 harbor-offline-installer-v2.4.3.tgz
下载harbor版本
harbor的官网:https://goharbor.io/,Click the download button to actually jump togithub上,https://github.com/goharbor/harbor/releases/ Just download the version you need. It can also be directly on the virtual machinewget https://github.com/goharbor/harbor/releases/download/v2.4.3/harbor-offline-installer-v2.4.3.tgz 联网下载.
Check the environment and create the certificate
查看官方安装文档:https://goharbor.io/docs/2.4.0/
Review installation prerequisites:https://goharbor.io/docs/2.4.0/install-config/installation-prereqs/,需要Docker engine Version 17.06.0-ce+ or higher 、
Docker Compose Version 1.18.0 or higher、Openssl Latest is preferred.
需要先安装docker、docker-compose,It is not reflected here,默认你已经安装好了docker和docker-compose,如果不会安装docker和docker-compose,请参考https://blog.csdn.net/MssGuo/article/details/122694156.
[[email protected] ~]# mkdir /data #创建一个data目录,用作harbor的数据存储目录
[[email protected] ~]# mkdir /data/harbor/ssl/ -p #创建一个ssl目录,Used to store key files

#默认情况下,harbor如果要使用https登陆,需要有证书,可以自签证书
[[email protected] ~]#cd /data/harbor/ssl/ #进入/data/harbor/ssl/Directory to create certificates
[[email protected] ssl]# openssl genrsa -out ca.key 4096
[[email protected] ssl]# openssl req -x509 -new -nodes -sha512 -days 3650 \
 -subj "/C=CN/ST=Beijing/L=Beijing/O=example/OU=Personal/CN=xiaoming.com" \		#这里的xiaoming.com写上你的域名,No domain name is writtenip地址也可以
 -key ca.key \
 -out ca.crt

[[email protected] ~]# tar zxvf harbor-offline-installer-v2.4.3.tgz #Upload the installation package to the server and decompress the installation package
[[email protected] ~]# cd harbor #进入到解压后的目录
[[email protected] harbor]# cp harbor.yml.tmpl harbor.yml #将官方的harborMake a copy of the profile template asharbor的配置文件
harbor配置文件讲解
[[email protected] ~]# vim harbor.yml #编辑harbor.yml,具体修改如下所示
# Configuration file of Harbor
# The IP address or hostname to access admin UI and registry service.
# DO NOT use localhost or 127.0.0.1, because Harbor needs to be accessed by external clients.
hostname: 192.168.118.129 #这里配置ip地址或域名,The official recommendation is not to use itlocalhost or 127.0.0.1
# http related config
http:
# port for http, default is 80. If https enabled, this port will redirect to https port
port: 80 #这是http端口,默认80端口
# https related config
https:
# https port for harbor, default is 443
port: 443 #这是https端口,默认443端口,启动https需要有证书
# The path of cert and key files for nginx
certificate: /data/harbor/ssl/ca.crt #访问harbor的证书,Here you need to change to the certificate generated above
private_key: /data/harbor/ssl/ca.key #访问harbor的私钥,Here you need to change to the certificate generated above
# # Uncomment following will enable tls communication between all harbor components
# internal_tls: #是否启用Harbor组件之间的tls通信,默认禁用状态
# # set enabled to true means internal tls is enabled
# enabled: true
# # put your cert and key files on dir
# dir: /etc/harbor/tls/internal
# Uncomment external_url if you want to enable external proxy #是否启用外部代理
# And when it enabled the hostname will no longer used #如果启用,那么主机名将不再使用,默认禁用,值为外部代理的地址
# external_url: https://reg.mydomain.com:8433
# The initial password of Harbor admin #管理员admin的初始密码,默认为Harbor12345
# It only works in first time to install harbor #This initial password is only installed for the first timeharbor时起作用
# Remember Change the admin password from UI after launching Harbor.#登录Harbor UI管理界面后,为保证密码安全,强烈建议修改admin密码
harbor_admin_password: Harbor12345
# Harbor DB configuration #harbor数据库配置部分,harbor使用postgresql作为数据库
database:
# The password for the root user of Harbor DB. Change this before any production use.
password: root123 #数据库root用户的密码,生产环境建议修改
# The maximum number of connections in the idle connection pool. If it <=0, no idle connections are retained.
max_idle_conns: 100 #空闲连接池中的最大连接数,如果小于等于0,则不保留空闲连接
# The maximum number of open connections to the database. If it <= 0, then there is no limit on the number of open connections.
# Note: the default number of connections is 1024 for postgres of harbor.
max_open_conns: 900 #The maximum number of connections to open a database,如果小于等于0,则对打开的连接数没有限制
# The default data volume
data_volume: /data #数据存储目录,harbor中的每个组件的数据都存储在该指定路径下的子目录中
# Harbor Storage settings by default is using /data dir on local filesystem #HarborThe storage defaults to the local file system/data目录
# Uncomment storage_service setting If you want to using external storage #如果需要使用外部存储,则将该部分的注释去掉,生产环境建议使用外部存储
# storage_service:
# # ca_bundle is the path to the custom root ca certificate, which will be injected into the truststore
# # of registry's and chart repository's containers. This is usually needed when the user hosts a internal storage with self signed certificate.
# ca_bundle: #自定义根ca证书的路径,该证书将被注入信任库
# # storage backend, default is filesystem, options include filesystem, azure, gcs, s3, swift and oss
# # for more info about this configuration please refer https://docs.docker.com/registry/configuration/
# filesystem: #存储后端,默认为文件系统,选项包括文件系统、azure、gcs、s3、swift、NFS和oss存储
# maxthreads: 100
# # set disable to true when you want to disable registry redirect
# redirect: #是否启用重定向
# disabled: false
# Trivy configuration
#
# Trivy DB contains vulnerability information from NVD, Red Hat, and many other upstream vulnerability databases.
# It is downloaded by Trivy from the GitHub release page https://github.com/aquasecurity/trivy-db/releases and cached
# in the local file system. In addition, the database contains the update timestamp so Trivy can detect whether it
# should download a newer version from the Internet or use the cached one. Currently, the database is updated every
# 12 hours and published as a new release to GitHub.
trivy:
# ignoreUnfixed The flag to display only fixed vulnerabilities
ignore_unfixed: false
# skipUpdate The flag to enable or disable Trivy DB downloads from GitHub
#
# You might want to enable this flag in test or CI/CD environments to avoid GitHub rate limiting issues.
# If the flag is enabled you have to download the `trivy-offline.tar.gz` archive manually, extract `trivy.db` and
# `metadata.json` files and mount them in the `/home/scanner/.cache/trivy/db` path.
skip_update: false
#
# The offline_scan option prevents Trivy from sending API requests to identify dependencies.
# Scanning JAR files and pom.xml may require Internet access for better detection, but this option tries to avoid it.
# For example, the offline mode will not try to resolve transitive dependencies in pom.xml when the dependency doesn't
# exist in the local repositories. It means a number of detected vulnerabilities might be fewer in offline mode.
# It would work if all the dependencies are in local.
# This option doesn’t affect DB download. You need to specify "skip-update" as well as "offline-scan" in an air-gapped environment.
offline_scan: false
#
# insecure The flag to skip verifying registry certificate
insecure: false
# github_token The GitHub access token to download Trivy DB
#
# Anonymous downloads from GitHub are subject to the limit of 60 requests per hour. Normally such rate limit is enough
# for production operations. If, for any reason, it's not enough, you could increase the rate limit to 5000
# requests per hour by specifying the GitHub access token. For more details on GitHub rate limiting please consult
# https://developer.github.com/v3/#rate-limiting
#
# You can create a GitHub token by following the instructions in
# https://help.github.com/en/github/authenticating-to-github/creating-a-personal-access-token-for-the-command-line
#
# github_token: xxx
jobservice:
# Maximum number of job workers in job service
max_job_workers: 10 #job服务的最大数量
notification:
# Maximum retry count for webhook job
webhook_job_max_retry: 10 # webhook job的最大重试次数
chart: #harbor不仅可以存储镜像,还可以存Chart,当helm服务器使用
# Change the value of absolute_url to enabled can enable absolute url in chart
absolute_url: disabled #是否启用
# Log configurations
log: #日志相关配置
# options are debug, info, warning, error, fatal
level: info #日志级别
# configs for logs in local storage
local:
# Log files are rotated log_rotate_count times before being removed. If count is 0, old versions are removed rather than rotated.
rotate_count: 50
# Log files are rotated only if they grow bigger than log_rotate_size bytes. If size is followed by k, the size is assumed to be in kilobytes.
# If the M is used, the size is in megabytes, and if G is used, the size is in gigabytes. So size 100, size 100k, size 100M and size 100G
# are all valid.
rotate_size: 200M
# The directory on your host that store log
location: /var/log/harbor #日志存放位置
# Uncomment following lines to enable external syslog endpoint. #是否启用外部系统日志
# external_endpoint:
# # protocol used to transmit log to external endpoint, options is tcp or udp
# protocol: tcp #用于将日志传输到外部端点的协议,选项为tcp或udp
# # The host of external endpoint
# host: localhost #外部主机的地址(主机IP)
# # Port of external endpoint
# port: 5140 #外部主机的端口号
#This attribute is for migrator to detect the version of the .cfg file, DO NOT MODIFY!
_version: 2.4.0
# Uncomment external_database if using external database. #是否使用外部数据库,To use please uncomment below
# external_database: #外部数据库配置
# harbor:
# host: harbor_db_host #外部数据库ip地址
# port: harbor_db_port #External database port
# db_name: harbor_db_name #数据库名
# username: harbor_db_username #用户名
# password: harbor_db_password #密码
# ssl_mode: disable #是否启用SSL模式
# max_idle_conns: 2 #最大空闲连接数
# max_open_conns: 0 #最大连接数,0表不限制
# notary_signer:
# host: notary_signer_db_host
# port: notary_signer_db_port
# db_name: notary_signer_db_name
# username: notary_signer_db_username
# password: notary_signer_db_password
# ssl_mode: disable
# notary_server:
# host: notary_server_db_host
# port: notary_server_db_port
# db_name: notary_server_db_name
# username: notary_server_db_username
# password: notary_server_db_password
# ssl_mode: disable
# Uncomment external_redis if using external Redis server #启用外部redisThe cache server is uncommented below
# external_redis:
# # support redis, redis+sentinel
# # host for redis: <host_redis>:<port_redis>
# # host for redis+sentinel:
# # <host_sentinel1>:<port_sentinel1>,<host_sentinel2>:<port_sentinel2>,<host_sentinel3>:<port_sentinel3>
# host: redis:6379 # redis的地址:端口
# password: # 连接外部redis服务的密码
# # sentinel_master_set must be set to support redis+sentinel
# #sentinel_master_set:
# # db_index 0 is for core, it's unchangeable
# registry_db_index: 1
# jobservice_db_index: 2
# chartmuseum_db_index: 3
# trivy_db_index: 5
# idle_timeout_seconds: 30
# Uncomment uaa for trusting the certificate of uaa instance that is hosted via self-signed cert.
# uaa:
# ca_file: /path/to/ca
# Global proxy
# Config http proxy for components, e.g. http://my.proxy.com:3128
# Components doesn't need to connect to each others via http proxy.
# Remove component from `components` array if want disable proxy
# for it. If you want use proxy for replication, MUST enable proxy
# for core and jobservice, and set `http_proxy` and `https_proxy`.
# Add domain to the `no_proxy` field, when you want disable proxy
# for some special registry.
proxy:
http_proxy:
https_proxy:
no_proxy:
components:
- core
- jobservice
- trivy
# metric:
# enabled: false
# port: 9090
# path: /metrics
# Trace related config
# only can enable one trace provider(jaeger or otel) at the same time,
# and when using jaeger as provider, can only enable it with agent mode or collector mode.
# if using jaeger collector mode, uncomment endpoint and uncomment username, password if needed
# if using jaeger agetn mode uncomment agent_host and agent_port
# trace:
# enabled: true
# # set sample_rate to 1 if you wanna sampling 100% of trace data; set 0.5 if you wanna sampling 50% of trace data, and so forth
# sample_rate: 1
# # # namespace used to differenciate different harbor services
# # namespace:
# # # attributes is a key value dict contains user defined attributes used to initialize trace provider
# # attributes:
# # application: harbor
# # # jaeger should be 1.26 or newer.
# # jaeger:
# # endpoint: http://hostname:14268/api/traces
# # username:
# # password:
# # agent_host: hostname
# # # export trace data by jaeger.thrift in compact mode
# # agent_port: 6831
# # otel:
# # endpoint: hostname:4318
# # url_path: /v1/traces
# # compression: false
# # insecure: true
# # timeout: 10s
安装harbor
配置文件修改完成,我们开始安装harbor,如下所示:
[[email protected] harbor]# ./prepare #先执行./prepare检查一下,看看有没有报错,If there is an error, it will be resolved
prepare base dir is set to /root/harbor
Unable to find image 'goharbor/prepare:v2.4.3' locally
v2.4.3: Pulling from goharbor/prepare
9fc3011f8f61: Pull complete
eb8eda8a9731: Pull complete
77da97ebcff1: Pull complete
8f78fd5a419a: Pull complete
5fef0d95753f: Pull complete
36dec2a7f11d: Pull complete
1d33225e2038: Pull complete
6421e1da01ae: Pull complete
Digest: sha256:a34acf3f79ac5b1b31b695435f6eb948eb3c50bc967c020058c31bcf1425be08
Status: Downloaded newer image for goharbor/prepare:v2.4.3
Generated configuration file: /config/portal/nginx.conf
Generated configuration file: /config/log/logrotate.conf
Generated configuration file: /config/log/rsyslog_docker.conf
Generated configuration file: /config/nginx/nginx.conf
Generated configuration file: /config/core/env
Generated configuration file: /config/core/app.conf
Generated configuration file: /config/registry/config.yml
Generated configuration file: /config/registryctl/env
Generated configuration file: /config/registryctl/config.yml
Generated configuration file: /config/db/env
Generated configuration file: /config/jobservice/env
Generated configuration file: /config/jobservice/config.yml
Generated and saved secret to file: /data/secret/keys/secretkey
Successfully called func: create_root_cert
Generated configuration file: /compose_location/docker-compose.yml
Clean up the input dir
[[email protected] harbor]# ./install.sh #The above check gives no error,Just start the installation

[Step 0]: checking if docker is installed ...

Note: docker version: 20.10.9

[Step 1]: checking docker-compose is installed ...

Note: docker-compose version: 1.18.0

[Step 2]: loading Harbor images ...
................................
Loaded image: goharbor/chartmuseum-photon:v2.4.3


[Step 3]: preparing environment ...

[Step 4]: preparing harbor configs ...
prepare base dir is set to /root/harbor
Clearing the configuration file: /config/portal/nginx.conf
Clearing the configuration file: /config/log/logrotate.conf
Clearing the configuration file: /config/log/rsyslog_docker.conf
Clearing the configuration file: /config/nginx/nginx.conf
Clearing the configuration file: /config/core/env
Clearing the configuration file: /config/core/app.conf
Clearing the configuration file: /config/registry/passwd
Clearing the configuration file: /config/registry/config.yml
Clearing the configuration file: /config/registryctl/env
Clearing the configuration file: /config/registryctl/config.yml
Clearing the configuration file: /config/db/env
Clearing the configuration file: /config/jobservice/env
Clearing the configuration file: /config/jobservice/config.yml
Generated configuration file: /config/portal/nginx.conf
Generated configuration file: /config/log/logrotate.conf
Generated configuration file: /config/log/rsyslog_docker.conf
Generated configuration file: /config/nginx/nginx.conf
Generated configuration file: /config/core/env
Generated configuration file: /config/core/app.conf
Generated configuration file: /config/registry/config.yml
Generated configuration file: /config/registryctl/env
Generated configuration file: /config/registryctl/config.yml
Generated configuration file: /config/db/env
Generated configuration file: /config/jobservice/env
Generated configuration file: /config/jobservice/config.yml
Creating harbor-log ... done
Generated configuration file: /compose_location/docker-compose.yml
Clean up the input dir


Creating redis ... done
Creating harbor-core ... done
Creating network "harbor_harbor" with the default driver
Creating nginx ... done
Creating registryctl ...
Creating harbor-db ...
Creating registry ...
Creating harbor-portal ...
Creating redis ...
Creating harbor-core ...
Creating nginx ...
Creating harbor-jobservice ...
 ----Harbor has been installed and started successfully.----				#Finally see this one shows that the installation is complete,表示harbor安装成功
网页登录
网页输入https://ip地址,Select Continue below
输入账号密码即可登录,账号是admin ,密码是harbor.ymlThe initial password configured in the file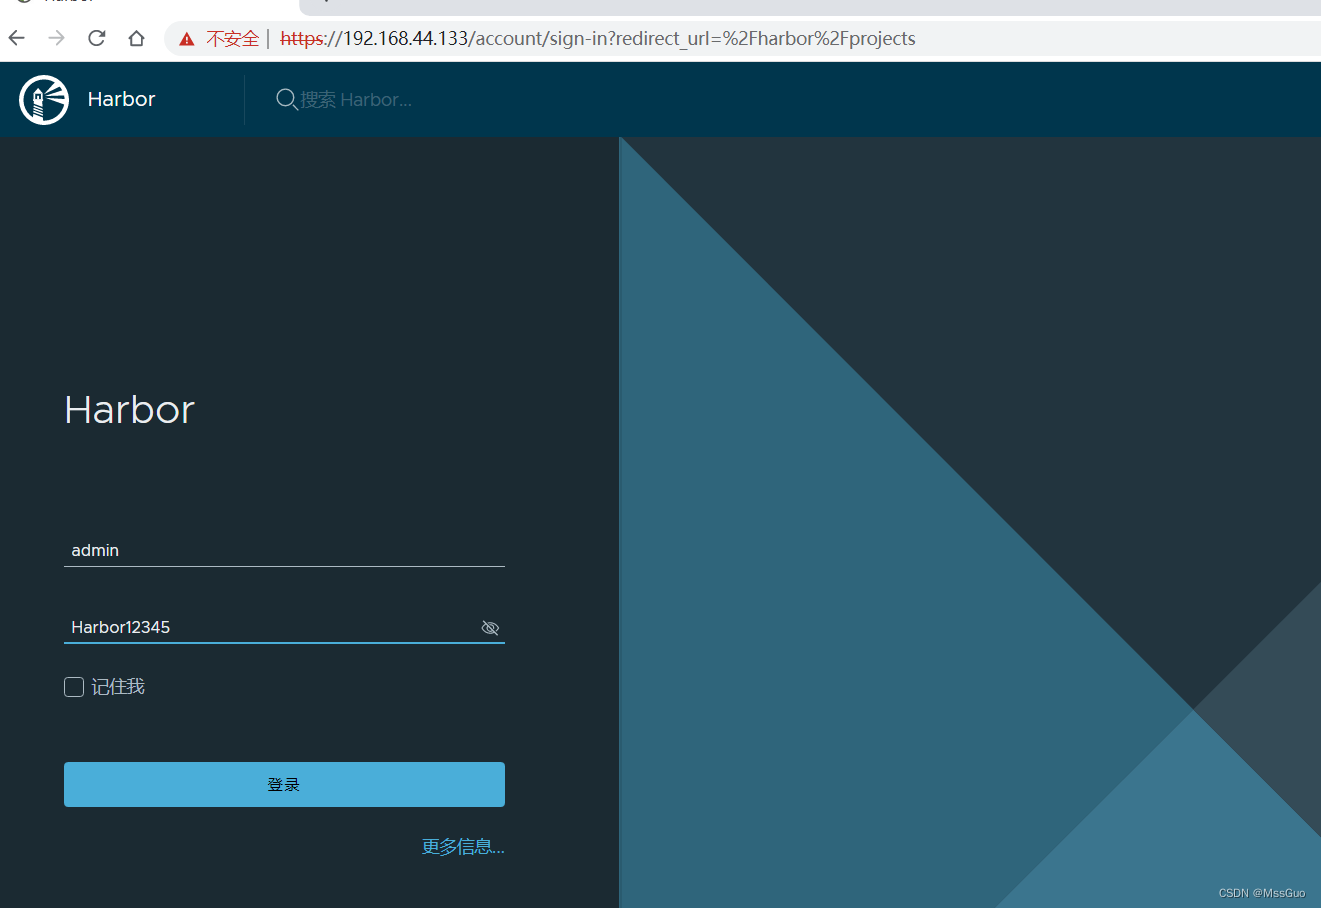
It is strongly recommended to change the default password immediately,Otherwise it is vulnerable to attack
启动、停止harbor
#harborAlso started using a container,如下所示,查看harbor的容器
[[email protected] ~]# docker ps -a #查看harbor的容器,显示启动了9个容器
CONTAINER ID   IMAGE                                COMMAND                  CREATED          STATUS                    PORTS                                                                            NAMES
97841cf6c2d9   goharbor/harbor-jobservice:v2.4.3    "/harbor/entrypoint.…"   42 minutes ago   Up 42 minutes (healthy)                                                                                    harbor-jobservice
dee0a10dd2a9   goharbor/nginx-photon:v2.4.3         "nginx -g 'daemon of…"   42 minutes ago   Up 42 minutes (healthy)   0.0.0.0:80->8080/tcp, :::80->8080/tcp, 0.0.0.0:443->8443/tcp, :::443->8443/tcp   nginx
358552731a7c   goharbor/harbor-core:v2.4.3          "/harbor/entrypoint.…"   42 minutes ago   Up 42 minutes (healthy)                                                                                    harbor-core
576686126dba   goharbor/redis-photon:v2.4.3         "redis-server /etc/r…"   42 minutes ago   Up 42 minutes (healthy)                                                                                    redis
67be92debee1   goharbor/harbor-portal:v2.4.3        "nginx -g 'daemon of…"   42 minutes ago   Up 42 minutes (healthy)                                                                                    harbor-portal
e507864c7150   goharbor/registry-photon:v2.4.3      "/home/harbor/entryp…"   42 minutes ago   Up 42 minutes (healthy)                                                                                    registry
1836823f54c8   goharbor/harbor-registryctl:v2.4.3   "/home/harbor/start.…"   42 minutes ago   Up 42 minutes (healthy)                                                                                    registryctl
54ae00f87d97   goharbor/harbor-db:v2.4.3            "/docker-entrypoint.…"   42 minutes ago   Up 42 minutes (healthy)                                                                                    harbor-db
97639626f2fe   goharbor/harbor-log:v2.4.3           "/bin/sh -c /usr/loc…"   42 minutes ago   Up 42 minutes (healthy)   127.0.0.1:1514->10514/tcp                                                        harbor-log
[[email protected] ~]#

#停止harbor
[[email protected] ~]# cd /root/harbor #进入到harborthe installation directory to start and stop,有一个docker-compose.yml文件
[[email protected] harbor]# docker-compose down -v #停止harbor
Stopping harbor-jobservice ... done
Stopping nginx             ... done
Stopping harbor-core       ... done
Stopping redis             ... done
Stopping harbor-portal     ... done
Stopping registry          ... done
Stopping registryctl       ... done
Stopping harbor-db         ... done
Stopping harbor-log        ... done
Removing harbor-jobservice ... done
Removing nginx             ... done
Removing harbor-core       ... done
Removing redis             ... done
Removing harbor-portal     ... done
Removing registry          ... done
Removing registryctl       ... done
Removing harbor-db         ... done
Removing harbor-log        ... done
Removing network harbor_harbor
[[email protected] harbor]#

#启动harbor
[[email protected] ~]# cd /root/harbor #进入到harborthe installation directory to start and stop,有一个docker-compose.yml文件
[[email protected] harbor]# docker-compose up -d #启动harbor
Creating harbor-log ... done
Creating network "harbor_harbor" with the default driver
Creating harbor-log ...
Creating harbor-db ... done
Creating harbor-core ... done
Creating nginx ... done
Creating registryctl ...
Creating harbor-portal ...
Creating registry ...
Creating redis ...
Creating harbor-db ...
Creating harbor-core ...
Creating nginx ...
Creating harbor-jobservice ...
[[email protected] harbor]#
docker推送镜像到harbor镜像仓库、docker从harbor镜像仓库下载镜像
下面来验证docker推送镜像到harbor镜像仓库、docker从harbor镜像仓库下载镜像,如下:
First create our own private repository on the page(默认有一个library公开仓库),Here a call is createdmy_harbor的私有仓库.
1、添加仓库地址、重启docker
Do the following on a server that needs to upload images to the mirror repository or download images from the mirror repository,This server is also to be installeddocker的.
#在/etc/docker/daemon.jsonThe file adds the mirror warehouse address
[[email protected] ~]# cat /etc/docker/daemon.json
{

    "registry-mirrors": ["https://b9pmyelo.mirror.aliyuncs.com"],
    "exec-opts": ["native.cgroupdriver=systemd"],
    "insecure-registries": ["192.168.44.133:443"]						#添加这一句,Add the mirror repository address port to docker daemon
}
[[email protected] ~]#
[[email protected] ~]# systemctl restart docker #要重启docker服务
2、登录镜像仓库、退出镜像仓库
[[email protected] ~]# docker login -u admin 192.168.44.133:443 #使用docker loginCommand login create view,Specify the repository address port
Password: 																#输入账号密码
WARNING! Your password will be stored unencrypted in /root/.docker/config.json.
Configure a credential helper to remove this warning. See
https://docs.docker.com/engine/reference/commandline/login/#credentials-store

Login Succeeded															#Shows that the login was successful
#We can see from the above successful login information,Account passwords are stored in  /root/.docker/config.json下
[[email protected] ~]# cat /root/.docker/config.json #查看config.json,It saves our login account password information
{

	"auths": {

		"192.168.44.133:443": {
    											#This is our warehouse address account password,This encryption method is actually usedbase64加密的,不安全
			"auth": "YWRtaW46SGFyYm9yMTIzNDU="
		}
	}
}
[[email protected] ~]# echo "YWRtaW46SGFyYm9yMTIzNDU=" | base64 -d #使用base64Decryption can clearly see the account password
admin:Harbor12345[[email protected] ~]#

#为了安全,We need to log out in time
[[email protected] ~]# docker logout 192.168.44.133:443 #Log out of our mirror repository
Removing login credentials for 192.168.44.133:443
[[email protected] ~]# cat /root/.docker/config.json #查看/root/.docker/config.json,No login information
{

	"auths": {
    }
}
[[email protected] ~]#
3、推送镜像到远程harbor仓库
#There is one on this machinebusybox:latest的镜像,We're going to push it to oursharbor镜像仓库
#First we have to label the image,标签格式为:镜像仓库域名/仓库名/镜像:tag ,这种格式是固定的,Because we will use it laterdocker pushWhen the default is to push
# Sent to such a warehouse address
[[email protected] ~]# docker tag busybox:latest 192.168.44.133:443/my_harbor/busybox:1.0.2 #为镜像打标签

[[email protected] ~]# docker images #View tagged images
REPOSITORY                                                        TAG        IMAGE ID       CREATED         SIZE
192.168.44.133:443/my_harbor/busybox                              1.0.2      beae173ccac6   7 months ago    1.24MB
[[email protected] ~]#

#推送镜像到harbor镜像仓库,The premise is that you have logged in to the mirror warehouse
[[email protected] ~]# docker push 192.168.44.133:443/my_harbor/busybox:1.0.2 #推送镜像到harbor镜像仓库
The push refers to repository [192.168.44.133:443/my_harbor/busybox]
01fd6df81c8e: Pushed
1.0.2: digest: sha256:62ffc2ed7554e4c6d360bce40bbcf196573dd27c4ce080641a2c59867e732dee size: 527
4、下载镜像,从harborDownload mirrors from remote mirror repositories
[[email protected] ~]# docker rmi 192.168.44.133:443/my_harbor/busybox:1.0.2 #先删除busybox:1.0.2镜像
Untagged: 192.168.44.133:443/my_harbor/busybox:1.0.2
[[email protected] ~]# docker images 192.168.44.133:443/my_harbor/busybox:1.0.2 #现在已经没有busybox:1.0.2这个镜像了
REPOSITORY   TAG       IMAGE ID   CREATED   SIZE
[[email protected] ~]#
[[email protected] ~]#
[[email protected] ~]# docker pull 192.168.44.133:443/my_harbor/busybox:1.0.2 #下载busybox:1.0.2镜像,It has been successfully downloaded
1.0.2: Pulling from my_harbor/busybox
Digest: sha256:62ffc2ed7554e4c6d360bce40bbcf196573dd27c4ce080641a2c59867e732dee
Status: Downloaded newer image for 192.168.44.133:443/my_harbor/busybox:1.0.2
192.168.44.133:443/my_harbor/busybox:1.0.2
[[email protected] ~]# docker images 192.168.44.133:443/my_harbor/busybox:1.0.2 #It has been successfully downloadedbusybox:1.0.2镜像
REPOSITORY                             TAG       IMAGE ID       CREATED        SIZE
192.168.44.133:443/my_harbor/busybox   1.0.2     beae173ccac6   7 months ago   1.24MB
[[email protected] ~]#
总结
1、前提条件:安装好docker、docker-compose
[[email protected] ~]# mkdir /data #创建一个data目录,用作harbor的数据存储目录
[[email protected] ~]# mkdir /data/harbor/ssl/ -p #在data目录下创建一个ssl目录,Used to store key files

#默认情况下,harbor如果要使用https登陆,需要有证书,可以自签证书
[[email protected] ~]# cd /data/harbor/ssl/ #切换目录
[[email protected] ssl]# openssl genrsa -out ca.key 4096
[[email protected] ssl]# openssl req -x509 -new -nodes -sha512 -days 3650 \
 -subj "/C=CN/ST=Beijing/L=Beijing/O=example/OU=Personal/CN=xiaoming.com" \		#这里的xiaoming.com写上你的域名,No domain name is writtenip地址也可以
 -key ca.key \
 -out ca.crt
[[email protected] ~]# tar zxvf harbor-offline-installer-v2.4.3.tgz #Upload the installation package to the server and decompress the installation package
[[email protected] ~]# cd harbor #进入到解压后的目录
[[email protected] harbor]# cp harbor.yml.tmpl harbor.yml #将官方的harborMake a copy of the profile template asharbor的配置文件
2、编辑harbor.yml配置文件
# Mainly modify the following nodes,Other parameters are modified according to the actual situation:
hostname: 192.168.118.129						#这里配置ip地址或域名,The official recommendation is not to use itlocalhost or 127.0.0.1
certificate: /data/harbor/ssl/ca.crt			#访问harbor的证书,Here you need to change to the certificate generated above
private_key: /data/harbor/ssl/ca.key			#访问harbor的私钥,Here you need to change to the certificate generated above
3、安装harbor
[[email protected] ~]# cd harbor #进入到解压后的harbor目录
[[email protected] harbor]# ./prepare #先执行./prepare检查一下,看看有没有报错,If there is an error, it will be resolved
[[email protected] harbor]# ./install.sh #The above check gives no error,Just start the installation
4、网页登录
网页输入https://ip地址,The default account isadmin,初始密码是harbor.ymlThe initial password set in the file
Create your own private mirror repository
5、启动、停止harbor
#harborAlso started using a container,如下所示,查看harbor的容器
[[email protected] ~]# docker ps -a #查看harbor的容器,显示启动了9个容器

#启动停止harborhave to enterharbor的安装目录,因为里面有一个docker-compose.yml文件

#停止harbor
[[email protected] ~]# cd /root/harbor
[[email protected] harbor]# docker-compose down -v #停止harbor

#启动harbor
[[email protected] ~]# cd /root/harbor
[[email protected] harbor]# docker-compose up -d #启动harbor
6、推送镜像到harbor远程仓库、从harborDownload mirrors from remote mirror repositories
(1)、添加仓库地址、重启docker
Do the following on a server that needs to upload images to the mirror repository or download images from the mirror repository,This server is also to be installeddocker的
#在/etc/docker/daemon.jsonThe file adds the mirror warehouse address
[[email protected] ~]# vim /etc/docker/daemon.json
{

    "registry-mirrors": ["https://b9pmyelo.mirror.aliyuncs.com"],
    "exec-opts": ["native.cgroupdriver=systemd"],
    "insecure-registries": ["192.168.44.133:443"]			#添加这一句,Add the mirror repository address port to docker daemon
}
[[email protected] ~]# systemctl restart docker #要重启docker服务

(2)、登录镜像仓库、退出镜像仓库
[[email protected] ~]# docker login -u admin 192.168.44.133:443 #使用docker loginCommand login create view,Specify the repository address port
[[email protected] ~]# docker logout 192.168.44.133:443 #Log out of our mirror repository

(3)、推送镜像到远程harbor仓库
#There is one on this machinebusybox:latest的镜像,We're going to push it to oursharbor镜像仓库
#First we have to label the image,标签格式为:镜像仓库域名/仓库名/镜像:tag ,这种格式是固定的,Because we will use it laterdocker pushWhen the default is to push
# Sent to such a warehouse address
[[email protected] ~]# docker tag busybox:latest 192.168.44.133:443/my_harbor/busybox:1.0.2 #为镜像打标签
#推送镜像到harbor镜像仓库,The premise is that you have logged in to the mirror warehouse
[[email protected] ~]# docker push 192.168.44.133:443/my_harbor/busybox:1.0.2 #推送镜像到harbor镜像仓库
The push refers to repository [192.168.44.133:443/my_harbor/busybox]
01fd6df81c8e: Pushed
1.0.2: digest: sha256:62ffc2ed7554e4c6d360bce40bbcf196573dd27c4ce080641a2c59867e732dee size: 527

(4)、下载镜像,从harborDownload mirrors from remote mirror repositories
[[email protected] ~]# docker pull 192.168.44.133:443/my_harbor/busybox:1.0.2 #下载busybox:1.0.2镜像,It has been successfully downloaded
1.0.2: Pulling from my_harbor/busybox
Digest: sha256:62ffc2ed7554e4c6d360bce40bbcf196573dd27c4ce080641a2c59867e732dee
Status: Downloaded newer image for 192.168.44.133:443/my_harbor/busybox:1.0.2
192.168.44.133:443/my_harbor/busybox:1.0.2
边栏推荐
猜你喜欢


随机推荐
2022-08-08 顾宇佳 学习笔记
JVM:(六)运行时数据区之本地方法栈
bean的生命周期
进程和计划任务管理
2022/08/08 学习笔记 (day25)File类
多字段关联校验
硅光电池采集用于植物叶片农残检测
el与data的
2022-08-08:给定一个数组arr,表示从早到晚,依次会出现的导弹的高度。 大炮打导弹的时候,如果一旦大炮定了某个高度去打,那么这个大炮每次打的高度都必须下降一点。 1) 如果只有一个大炮,返回
打开数字时代的门槛,元宇宙NFT商城开发解决方案
5G对物流行业的积极影响
什么是SIP请求和SIP响应?
deploy发布的jar包中文乱码
kubernetes apparmor 简介
四氧化三铁/硫化铋纳米复合材料([email protected]@BSABiS纳米颗粒)|树状大分子稳定的硫化铋纳米颗粒|科研试剂
2022牛客多校联赛第七场 题解
明明加了唯一索引,为什么还是产生重复数据?
qt发送邮件程序
JDBC_PreparedStatement预编译对象
获取开发版安全码SHA1时遇到的报错