当前位置:网站首页>三、zygote启动流程
三、zygote启动流程
2022-04-23 22:03:00 【笑三少_Creat】
zygote被app_main.cpp里面的AppRuntime对象的start()方法启动之后做了以下事情
找到\frameworks\base\core\java\com\android\internal\os\ZygoteInit.java打开main()函数在里面看到如下代码
1、创建ZygoteServer
ZygoteServer zygoteServer = new ZygoteServer();2、提前加载类,加载系统资源,加载其它
// In some configurations, we avoid preloading resources and classes eagerly.
// In such cases, we will preload things prior to our first fork.
if (!enableLazyPreload) {
   bootTimingsTraceLog.traceBegin("ZygotePreload");
   EventLog.writeEvent(LOG_BOOT_PROGRESS_PRELOAD_START,
   SystemClock.uptimeMillis());

   preload(bootTimingsTraceLog);//预加载核心方法

   EventLog.writeEvent(LOG_BOOT_PROGRESS_PRELOAD_END,
   SystemClock.uptimeMillis());
   bootTimingsTraceLog.traceEnd(); // ZygotePreload
}
preload()方法代码:
static void preload(TimingsTraceLog bootTimingsTraceLog) {
        preloadClasses();

        preloadResources();

        nativePreloadAppProcessHALs();

        preloadOpenGL();

        preloadSharedLibraries();
        preloadTextResources();
}
3、启动SystemServer
if (startSystemServer) {
     Runnable r = forkSystemServer(abiList, socketName, zygoteServer);
     if (r != null) {
         r.run();//通过反射机制执行SystemServer.java的main()函数
         return;
     }
}
4、循环接收子进程消息
// The select loop returns early in the child process after a fork and
// loops forever in the zygote.
caller = zygoteServer.runSelectLoop(abiList);
大爷,赏个铜板呗

版权声明
本文为[笑三少_Creat]所创,转载请带上原文链接,感谢
https://blog.csdn.net/u011337503/article/details/124366488
边栏推荐
- 构造函数 & 析构函数
- A method of asynchronous response of application service through load balancing
- Detectron2 usage model
- ERP function_ Financial management_ Basic concepts of Finance
- 从严从重从快 上海全面加强疫情期间食品安全监管
- 在线Excel转CSV工具
- 世界读书日,腾讯安全推荐一份充电书单
- consul server 服务注册中心安装
- Database Experiment 5 Security Language Experiment
- What if Jenkins forgot his password
猜你喜欢
![[leetcode sword finger offer 58 - I. flip word order (simple)]](/img/25/e000531faeaee2eac18d9a634e203b.png)
[leetcode sword finger offer 58 - I. flip word order (simple)]
Error message: b04access.00f eve'. Read of address 000001B4
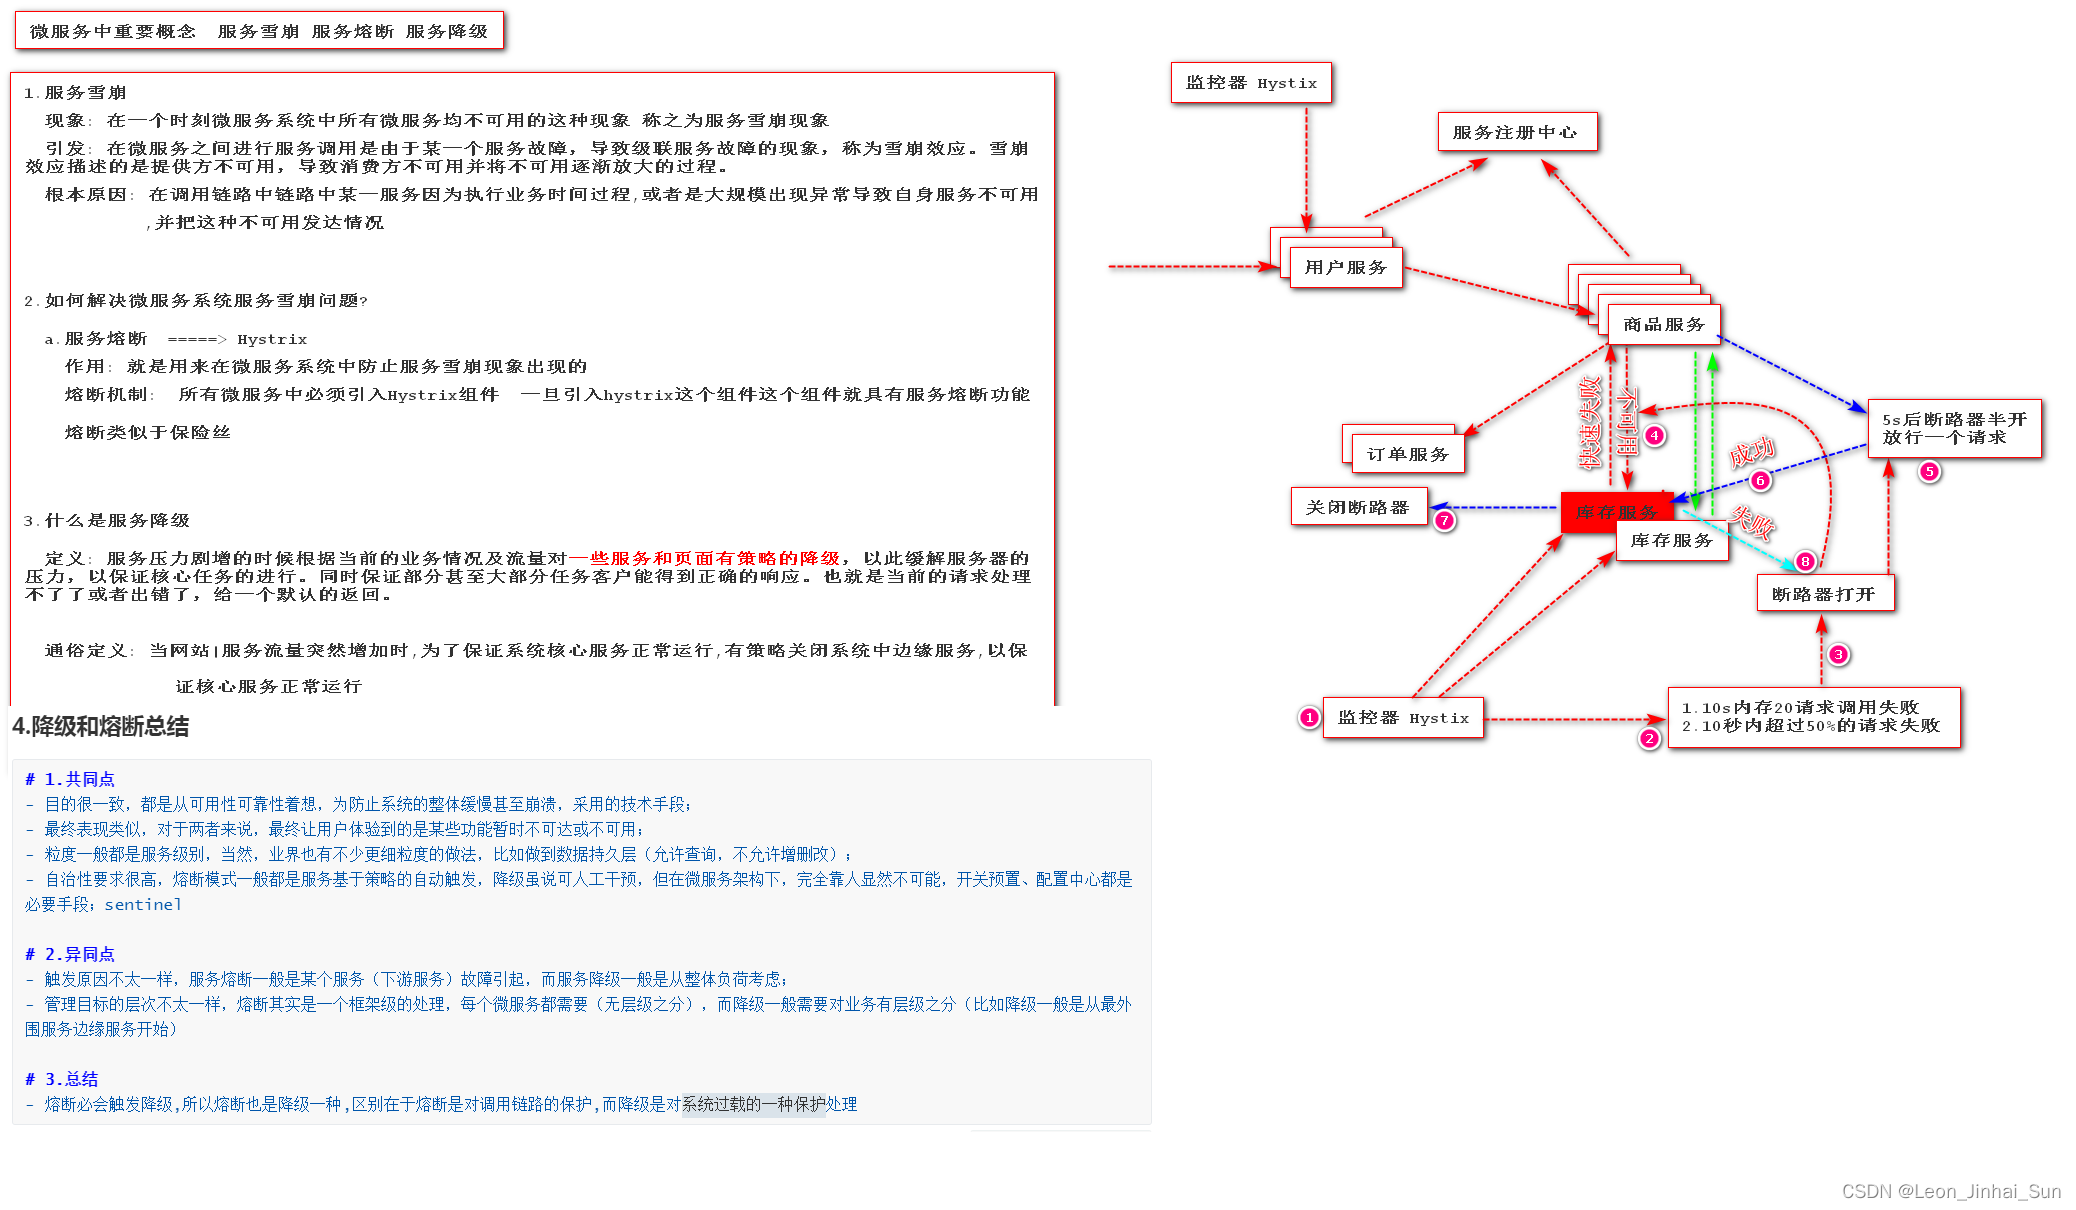
服务雪崩、服务熔断、服务降级

服务间通信方式
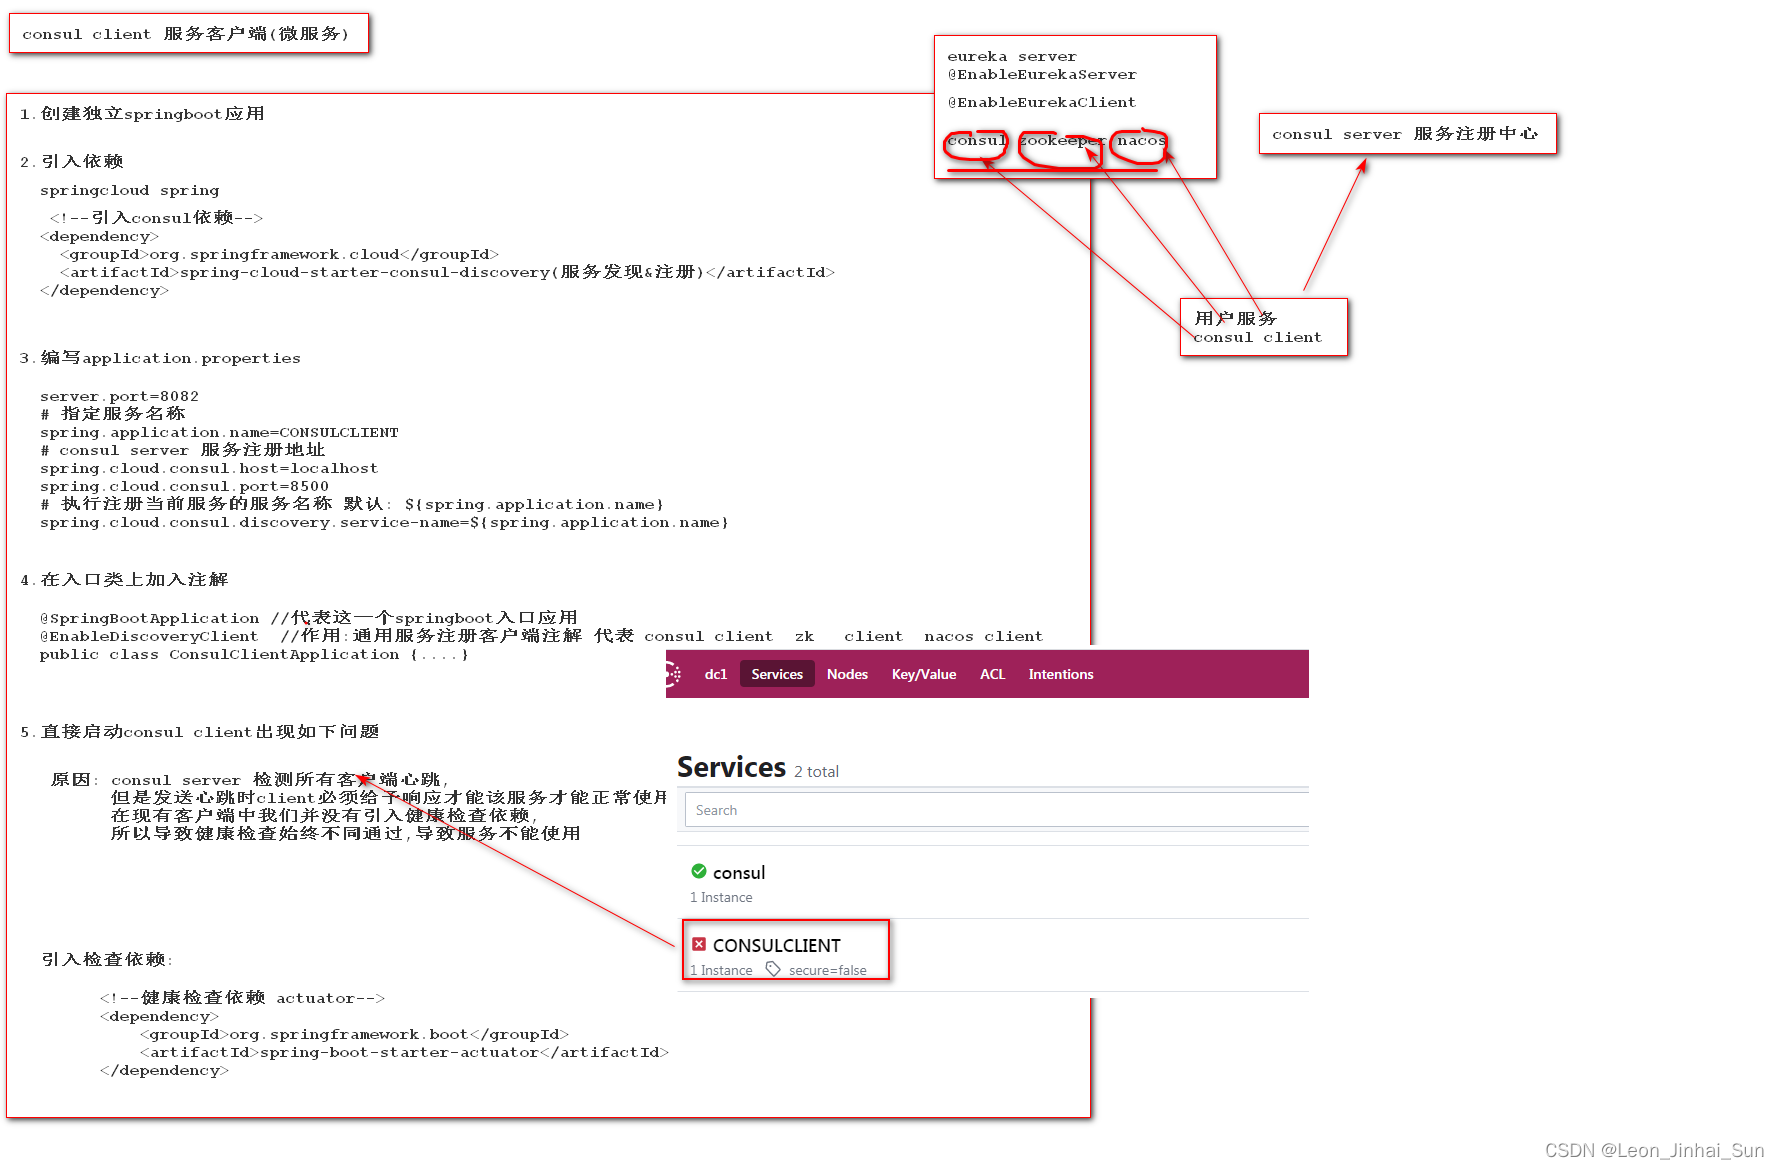
consul client客户端开发
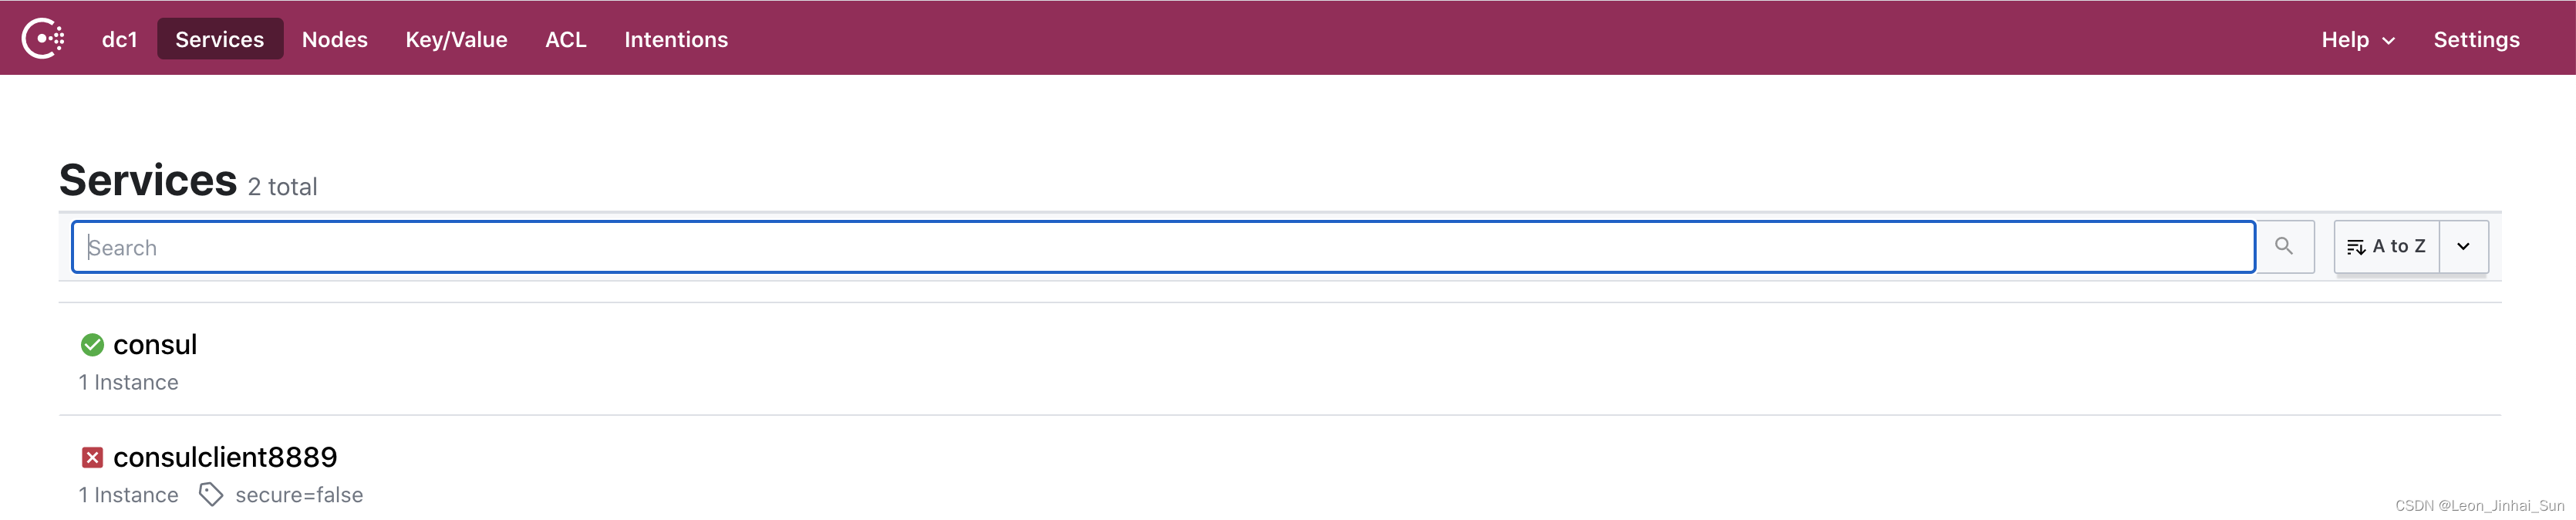
开发consul 客户端即微服务

Deep understanding of modern mobile GPU (continuously updating)
![[leetcode refers to offer 42. Maximum sum of continuous subarrays (simple)]](/img/e9/497a31cd70b9b21e4cb7845b688d18.png)
[leetcode refers to offer 42. Maximum sum of continuous subarrays (simple)]
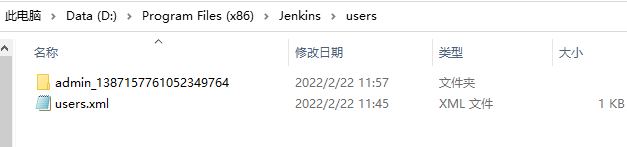
What if Jenkins forgot his password
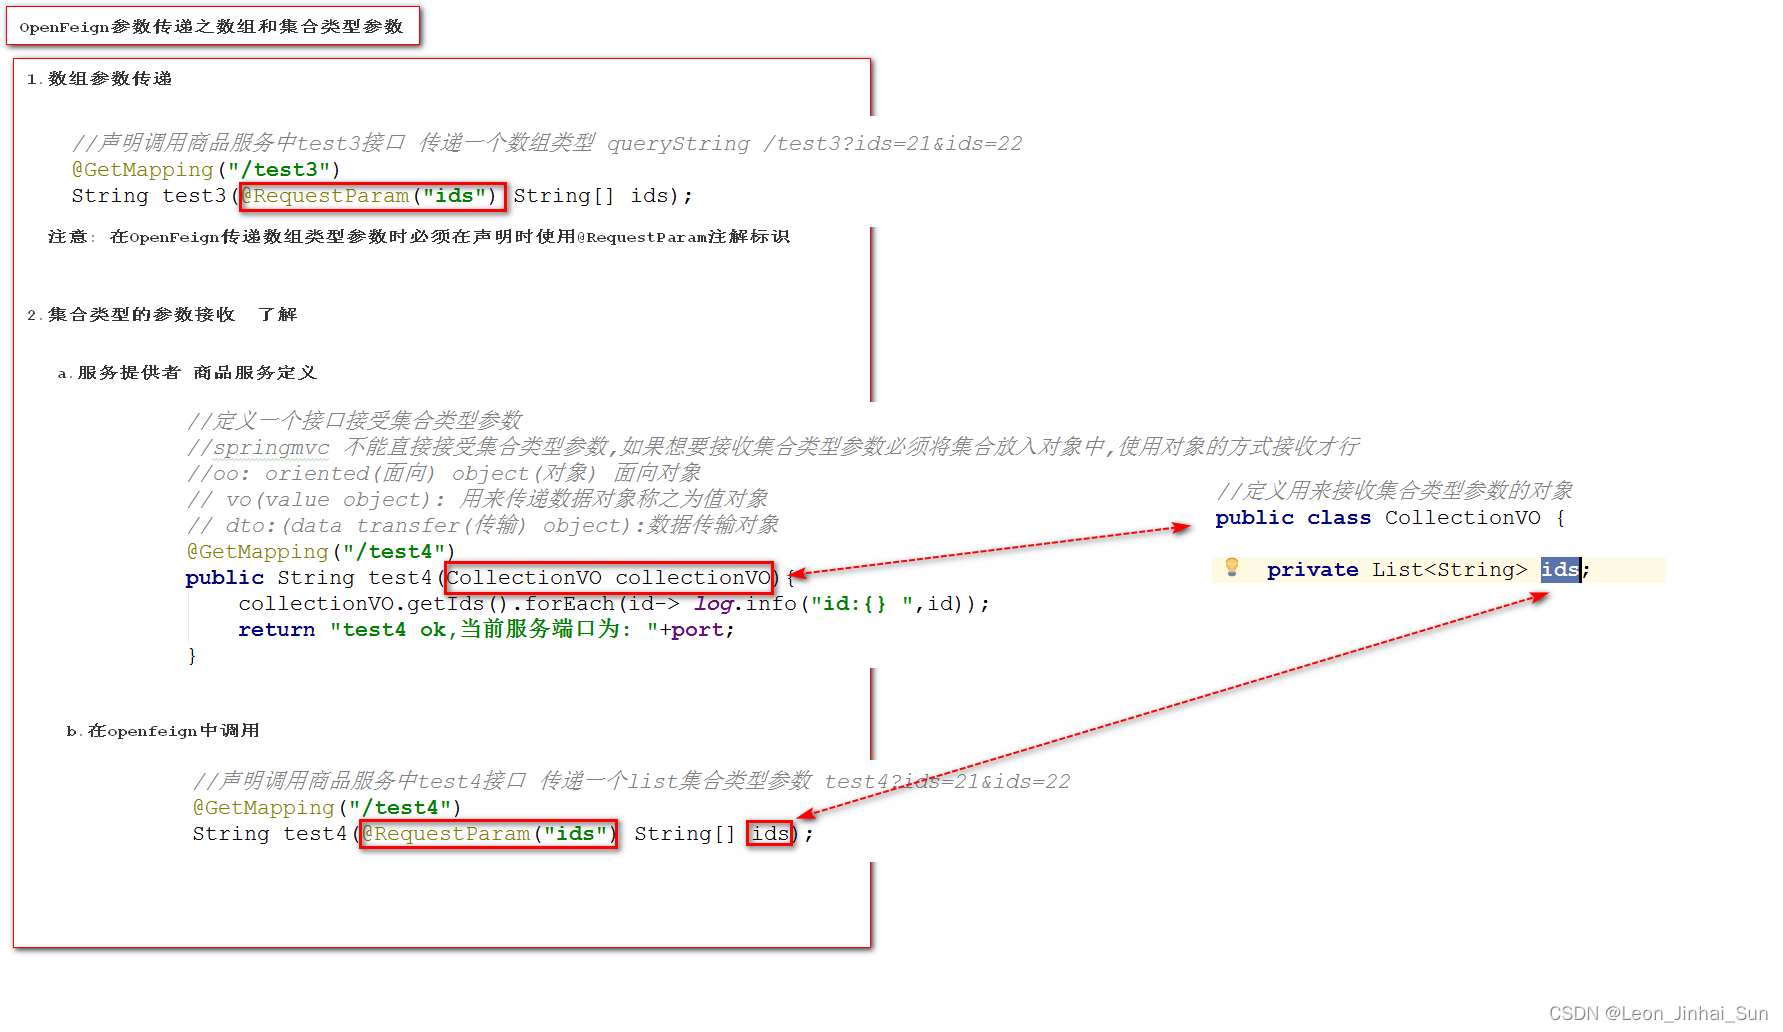
OpenFeign的参数传递之数组和集合类型
随机推荐
Plato farm is one of the four largest online IEOS in metauniverse, and the transaction on the chain is quite high
Database Experiment 5 Security Language Experiment
Pipes and xargs
Yolov5 NMS source code understanding
Database Experiment 2 data query
consul client客户端开发
Subcontracting of wechat applet based on uni app
leetcode 2223 — 构造字符串的总得分和
FAILURE: Build failed with an exception. * What went wrong: Execution failed for task ‘:app:stripDe
在线时序流程图制作工具
Two Stage Detection
基于Ribbon的服务调用
Database Experiment 7 stored procedure experiment
Strictly, severely and quickly strengthen food safety supervision during the epidemic in Shanghai
Common scenes of vector product in image
Tear the Google SRE book by hand
Keras. Layers introduction to various layers
C language programming based on loop structure (PTA)
Oracle updates the data of different table structures and fields to another table, and then inserts it into the new table
Getting started with detectron2