当前位置:网站首页>Validate the execution flow of the interceptor
Validate the execution flow of the interceptor
2022-08-11 09:22:00 【worry-free#】
活动地址:CSDN21天学习挑战赛
目录
应用案例——User login authentication
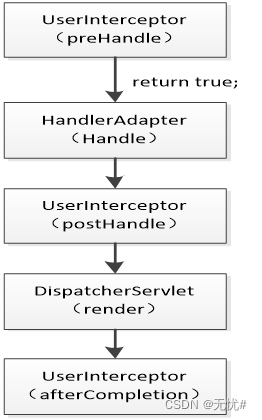
单个拦截器的执行流程
如果在项目中只定义了一个拦截器,Then the interceptor in program implementation process as shown in the.
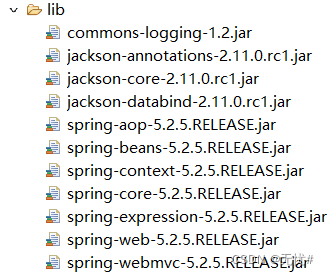
1.在eclipse中创建动态web项目,将Spring MVCCopy of the required dependencies tolib目录下,如下图:
2.在web.xml中配置Spring MVC的前端过滤器和初始化加载配置文件等信息
<?xml version="1.0" encoding="UTF-8"?>
<web-app xmlns="http://xmlns.jcp.org/xml/ns/javaee"
		 xmlns:xsi="http://www.w3.org/2001/XMLSchema-instance"
		 xsi:schemaLocation="http://xmlns.jcp.org/xml/ns/javaee
		 http://xmlns.jcp.org/xml/ns/javaee/web-app_4_0.xsd"
		 id="WebApp_ID" version="4.0">
	<!-- 配置前端控制器 -->
	<servlet>
		<!-- 配置前端过滤器 -->
		<servlet-name>springmvc</servlet-name>
		<servlet-class>org.springframework.web.servlet.DispatcherServlet</servlet-class>
		<!-- 初始化时加载配置文件 -->
		<init-param>
			<param-name>contextConfigLocation</param-name>
			<param-value>classpath:springmvc-config.xml</param-value>
		</init-param>
		<!-- 表示容器在启动时立即加载Servlet -->
		<load-on-startup>1</load-on-startup>
	</servlet>
	<servlet-mapping>
		<servlet-name>springmvc</servlet-name>
		<url-pattern>/</url-pattern>
	</servlet-mapping>
</web-app>
3.在src目录下创建一个controller包,并在包中创建控制器类HelloController类
package controller;
import org.springframework.stereotype.Controller;
import org.springframework.web.bind.annotation.RequestMapping;
@Controller
public class HelloController {
	@RequestMapping("/hello")
	public String hello(){
		System.out.println("Hello");
		return "success";
	}
}
4.在src目录下创建interceptor包,Create interceptor class in packageUserInterceptor类.该类要实现HandlerInterceptor接口,And you need to write in implementation method output statements to output information.
package interceptor;
import javax.servlet.http.HttpServletRequest;
import javax.servlet.http.HttpServletResponse;
import org.springframework.web.servlet.HandlerInterceptor;
import org.springframework.web.servlet.ModelAndView;
public class UserInterceptor implements HandlerInterceptor{
	@Override
	public boolean preHandle(HttpServletRequest arg0, HttpServletResponse arg1, Object arg2) throws Exception {
		System.out.println("UserInterceptor...preHandle");
		//To intercept the request of the customs processing
		return true;
	}
	@Override
	public void postHandle(HttpServletRequest arg0, HttpServletResponse arg1, Object arg2, ModelAndView arg3)
			throws Exception {
		System.out.println("UserInterceptor...postHandle");
	}
	@Override
	public void afterCompletion(HttpServletRequest arg0, HttpServletResponse arg1, Object arg2, Exception arg3)
			throws Exception {
		System.out.println("UserInterceptor...afterCompletion");
	}
}
5.在src目录下创建并配置springmvc-config.xml
<?xml version="1.0" encoding="UTF-8"?>
<beans xmlns="http://www.springframework.org/schema/beans"
xmlns:xsi="http://www.w3.org/2001/XMLSchema-instance"
xmlns:mvc="http://www.springframework.org/schema/mvc"
xmlns:context="http://www.springframework.org/schema/context"
xsi:schemaLocation="http://www.springframework.org/schema/beans
http://www.springframework.org/schema/beans/spring-beans.xsd
http://www.springframework.org/schema/mvc
http://www.springframework.org/schema/mvc/spring-mvc.xsd
http://www.springframework.org/schema/context
http://www.springframework.org/schema/context/spring-context.xsd">
<!--指定需要扫描的包 -->
<context:component-scan base-package="controller" />
<!-- 定义视图解析器 -->
<bean id="viewResoler"
class="org.springframework.web.servlet.view.InternalResourceViewResolver">
<!-- 设置前缀 -->
<property name="prefix" value="/" />
<!-- 设置后缀 -->
<property name="suffix" value=".jsp" />
</bean>
<!-- 配置拦截器 -->
<mvc:interceptors>
<!-- 使用bean直接定义在<mvc:interceptors>下面的Interceptor将拦截所有请求 -->
<bean class="interceptor.UserInterceptor" />
</mvc:interceptors>
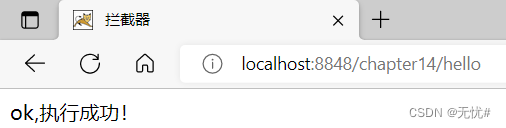
</beans>6.在webapp目录下创建success.jsp用于显示信息.
<%@ page language="java" contentType="text/html; charset=UTF-8"
pageEncoding="UTF-8"%>
<!DOCTYPE html>
<html>
<head>
<meta http-equiv="Content-Type" content="text/html; charset=UTF-8">
<title>拦截器</title>
</head>
<body>
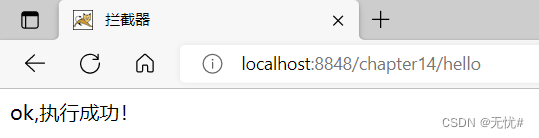
ok,执行成功!
</body>
</html>7.运行结果:
访问:localhost:8848/chapter14/hello
控制台消息:
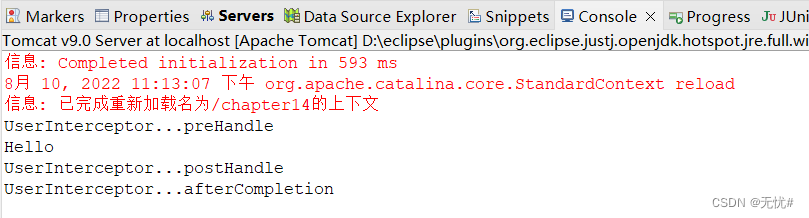
由此可以看出,程序先执行了preHandle()方法,And then performed in the controllerhello()方法,The execution of the interceptor classpostHandle()方法和afterCompletion()方法,And the above description is consistent.
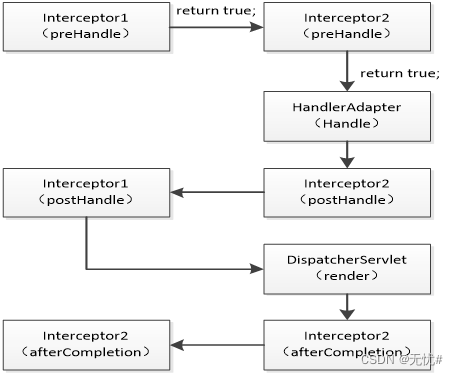
多个拦截器的执行流程
在大型项目中,Usually define many interceptors to achieve different functions.Multiple interceptors execution sequence as shown.
1.在interceptor包中创建两个拦截器类Interceptor1和Interceptor2类,In these two classes are achievedHandlerInterceptor接口.
package interceptor;
import javax.servlet.http.HttpServletRequest;
import javax.servlet.http.HttpServletResponse;
import org.springframework.web.servlet.HandlerInterceptor;
import org.springframework.web.servlet.ModelAndView;
public class Interceptor1 implements HandlerInterceptor{
	@Override
	public boolean preHandle(HttpServletRequest arg0, HttpServletResponse arg1, Object arg2) throws Exception {
		System.out.println("UserInterceptor1...preHandle");
		return true;
	}
	@Override
	public void postHandle(HttpServletRequest arg0, HttpServletResponse arg1, Object arg2, ModelAndView arg3)
			throws Exception {
		System.out.println("UserInterceptor1...postHandle");
	}
	@Override
	public void afterCompletion(HttpServletRequest arg0, HttpServletResponse arg1, Object arg2, Exception arg3)
			throws Exception {
		System.out.println("UserInterceptor1...afterCompletion");
	}
}
package interceptor;
import javax.servlet.http.HttpServletRequest;
import javax.servlet.http.HttpServletResponse;
import org.springframework.web.servlet.HandlerInterceptor;
import org.springframework.web.servlet.ModelAndView;
public class Interceptor2 implements HandlerInterceptor{
@Override
public boolean preHandle(HttpServletRequest arg0, HttpServletResponse arg1, Object arg2) throws Exception {
System.out.println("UserInterceptor2...preHandle");
return true;
}
@Override
public void postHandle(HttpServletRequest arg0, HttpServletResponse arg1, Object arg2, ModelAndView arg3)
throws Exception {
System.out.println("UserInterceptor2...postHandle");
}
@Override
public void afterCompletion(HttpServletRequest arg0, HttpServletResponse arg1, Object arg2, Exception arg3)
throws Exception {
System.out.println("UserInterceptor2...afterCompletion");
}
}
2.在配置文件springmvc-config.xmlFile configuration defined above two interceptors
		<!-- 拦截器1 -->
		<mvc:interceptor>
			<mvc:mapping path="/**" />
			<bean class="interceptor.Interceptor1" />
		</mvc:interceptor>
		<!-- 拦截器2 -->
		<mvc:interceptor>
			<mvc:mapping path="/hello" />
			<bean class="interceptor.Interceptor2" />
		</mvc:interceptor>
3.运行结果:
访问:localhost:8848/chapter14/hello
控制台消息:
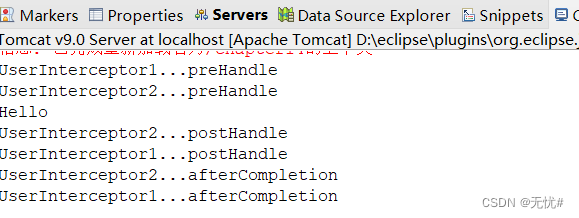
可以看出,Program to perform the first two interceptorspreHandle()方法,These two methods of execution order and configuration files are defined in the same order;And then perform the controllerhello()方法,And then perform the interceptorpostHandle()和afterCompletion()方法,And the execution order of the two methods defined in the configuration file interceptor order instead.
应用案例——User login authentication
Through the interceptor to complete a user login authentication case.The case of the implementation process as shown.
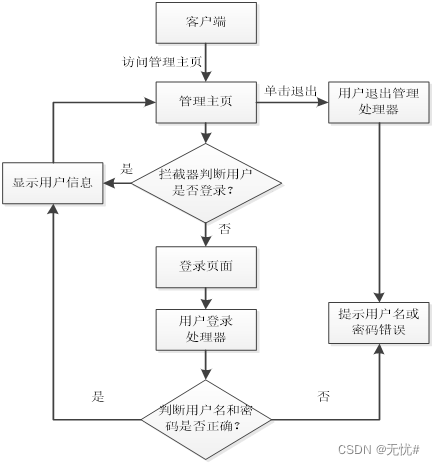
See from the flow chart,Only after the user login to access management main page,If there is no login and direct access to the home page,则拦截器会将请求拦截,并转发到登录页面,同时在登录页面中给出提示信息.如果用户名或密码错误,也会在登录页面给出相应的提示信息.When users click in the page“退出”链接时,Will also return to the login page.
1.在src目录下创建po包,在包内创建User类
package po;
public class User {
	private Integer id;
	private String username;
	private String password;
	public Integer getId() {
		return id;
	}
	public void setId(Integer id) {
		this.id = id;
	}
	public String getUsername() {
		return username;
	}
	public void setUsername(String username) {
		this.username = username;
	}
	public String getPassword() {
		return password;
	}
	public void setPassword(String password) {
		this.password = password;
	}
}
2.在controller包中创建控制器类UserController,And in the class definition to jump to the home page,To jump landing page.Perform user login operation methods, such as
package controller;
import javax.servlet.http.HttpSession;
import org.springframework.stereotype.Controller;
import org.springframework.ui.Model;
import org.springframework.web.bind.annotation.RequestMapping;
import org.springframework.web.bind.annotation.RequestMethod;
import po.User;
@Controller
public class UserController {
/*
* 向用户登陆页面跳转
*/
@RequestMapping(value="/toLogin",method=RequestMethod.GET)
public String toLogin(){
return "login";
}
/*
* 用户登录
*/
@RequestMapping(value="/login",method=RequestMethod.POST)
public String login(User user,Model model,HttpSession session){
String username=user.getUsername();
String password=user.getPassword();
//Simulation of retrieved from the database user name and password to judge
if(username!=null && username.equals("zyy")){
if(password!=null && password.equals("123456")){
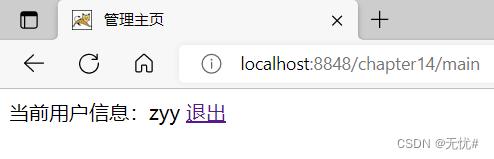
//用户存在,将用户信息保存到session中,And reset to the home page
session.setAttribute("user_session", user);
return "redirect:main";
}
}
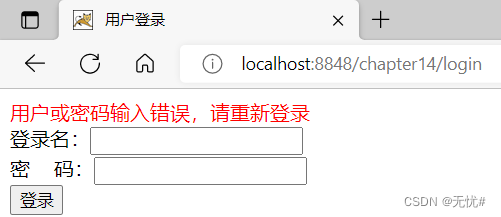
//User does not exist the error information tomodel中,并跳转到登陆页面
model.addAttribute("msg","用户或密码输入错误,请重新登录");
return "login";
}
/*
* To the management page jump
*/
@RequestMapping(value="/main")
public String toMain(){
return "main";
}
/*
* 退出
*/
@RequestMapping(value="/logout")
public String logout(HttpSession session){
session.invalidate();
return "redirect:toLogin";
}
}3.在interceptor包中创建拦截器类LoginInterceptor
package interceptor;
import javax.servlet.http.HttpServletRequest;
import javax.servlet.http.HttpServletResponse;
import javax.servlet.http.HttpSession;
import org.springframework.web.servlet.HandlerInterceptor;
import org.springframework.web.servlet.ModelAndView;
import po.User;
public class LoginInterceptor implements HandlerInterceptor{
@Override
public boolean preHandle(HttpServletRequest request, HttpServletResponse response, Object handler) throws Exception {
//获取请求的URL
String url=request.getRequestURI();
//Allow public access"/toLogin"
if(url.indexOf("/toLogin")>=0){
return true;
}
//Allow public access"/Login"
if(url.indexOf("/login")>=0){
return true;
}
//获取session
HttpSession session=request.getSession();
User user=(User)session.getAttribute("user_session");
//如果user不为空,表示已经登录
if(user!=null){
return true;
}
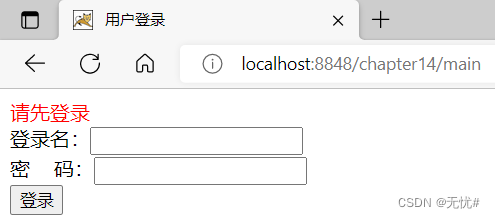
request.setAttribute("msg","请先登录");
request.getRequestDispatcher("/login.jsp").forward(request, response);
return false;
}
@Override
public void postHandle(HttpServletRequest arg0, HttpServletResponse arg1, Object arg2, ModelAndView arg3)
throws Exception {
}
@Override
public void afterCompletion(HttpServletRequest arg0, HttpServletResponse arg1, Object arg2, Exception arg3)
throws Exception {
}
}
4.In the configuration file configuration custom login interceptor information
		<mvc:interceptor>
			<!-- 配置拦截器作用的路径 -->
			<mvc:mapping path="/**" />
			<!-- 定义在<mvc:interceptor下面的,表示对匹配路径的请求才进行拦截 -->
			<bean class="interceptor.LoginInterceptor" />
		</mvc:interceptor>
5.在webappCreate the directory management main pagemain.jsp
<%@ page language="java" contentType="text/html; charset=UTF-8"
    pageEncoding="UTF-8"%>
<!DOCTYPE html>
<html>
<head>
<meta http-equiv="Content-Type" content="text/html; charset=UTF-8">
<title>管理主页</title>
</head>
<body>
	当前用户信息:${user_session.username}
	<a href="${pageContext.request.contextPath}/logout">退出</a>
</body>
</html>
6.在webapp目录下创建登陆页面login.jsp
<%@ page language="java" contentType="text/html; charset=UTF-8"
pageEncoding="UTF-8"%>
<!DOCTYPE html>
<html>
<head>
<meta http-equiv="Content-Type" content="text/html; charset=UTF-8">
<title>用户登录</title>
</head>
<body>
<font style="color:Red;">${msg }</font>
<form action="${pageContext.request.contextPath}/login" method="post">
登录名:<input type="text" name="username" id="username" /> <br />
密 码:<input type="password" name="password" id="password" /> <br />
<input type="submit" value="登录" />
</form>
</body>
</html>
7.运行结果
运行localhost:8848/chapter14/main
输入正确的账号密码(zyy,123456)After will jump to management main page
如果输入错误,Will remind user or password input error
项目源码:
链接:https://pan.baidu.com/s/1-J6eiunkWVG7NxqSxRgO4A?pwd=r5za
提取码:r5za
边栏推荐
猜你喜欢
Inventorying Four Entry-Level SSL Certificates
pycharm中绘图,显示不了figure窗口的问题
代码签名证书可以解决软件被杀毒软件报毒提醒吗?
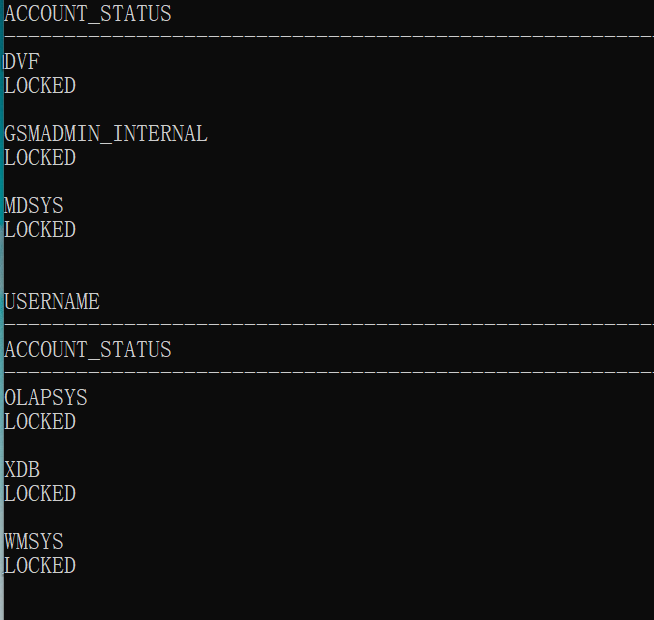
Oacle数据库使用问题
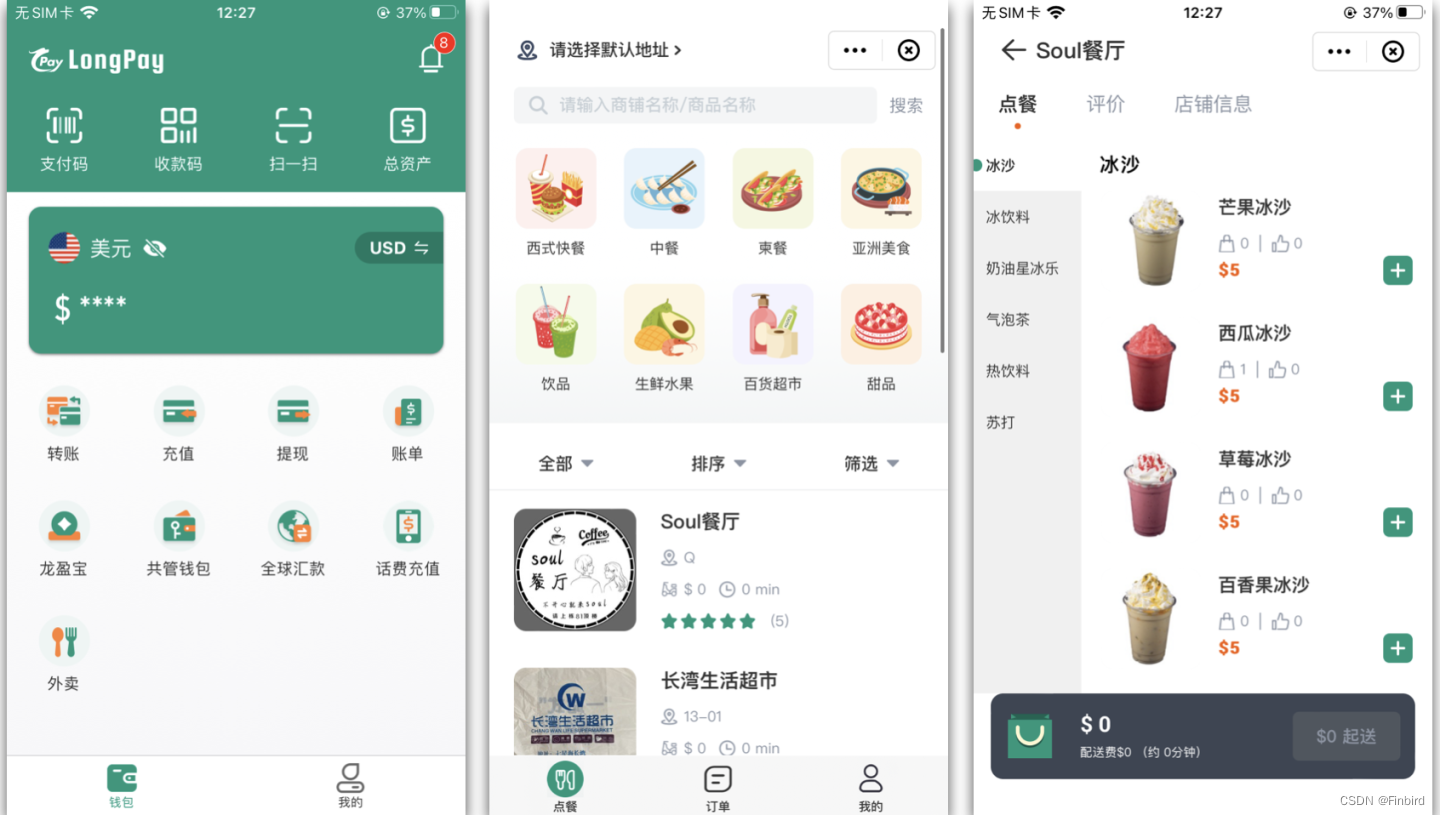
如何在移动钱包中搭建一个小程序应用商店

基于 VIVADO 的 AM 调制解调(3)仿真验证

Software custom development - the advantages of enterprise custom development of app software
Typescript基本类型---上篇
基于C#通过PLCSIM ADV仿真软件实现与西门子1500PLC的S7通信方法演示

wordpress插件开发03-简单的all in one seo 插件开发
随机推荐
jenkins 流水线脚本详细解析Pipeline
mysql中查询多个表中的数据量
For the first time, I suspect that there is a bug in selenium4 because the iframe element is not found?
SQL语句
当你领导问你“还有其他的么”
Initial use of IDEA
基础SQL——DDL
1002 A+B for Polynomials
深度学习100例 —— 卷积神经网络(CNN)识别眼睛状态
mysql数据查询因为查询的时间跨度过大导致cup爆满应该怎么办
tar 命令使用
数据库事务
Kali penetration test environment set up
Filesystem Hierarchy Standard
canvas图像阴影处理
1.3版本自定义TrainOneStepCell报错
Typescrip编译选项
无代码平台助力中山医院搭建“智慧化管理体系”,实现智慧医疗
在软件工程领域,搞科研的这十年!
磁盘管理:磁盘结构