当前位置:网站首页>pytorch安装笔记——Pytorch在conda+CUDA10.2环境安装task01
pytorch安装笔记——Pytorch在conda+CUDA10.2环境安装task01
2022-08-11 05:15:00 【雾切凉宫】
Pytorch在conda+CUDA10.2环境安装
前言
由于之前电脑里安装的CUDA是10.2版本的,paddlepaddle什么的也装的是CUDA10.2的版本,不想再去重装CUDA。
如图:官方已经不支持CUDA10.2的版本了。官网地址:PyTorch
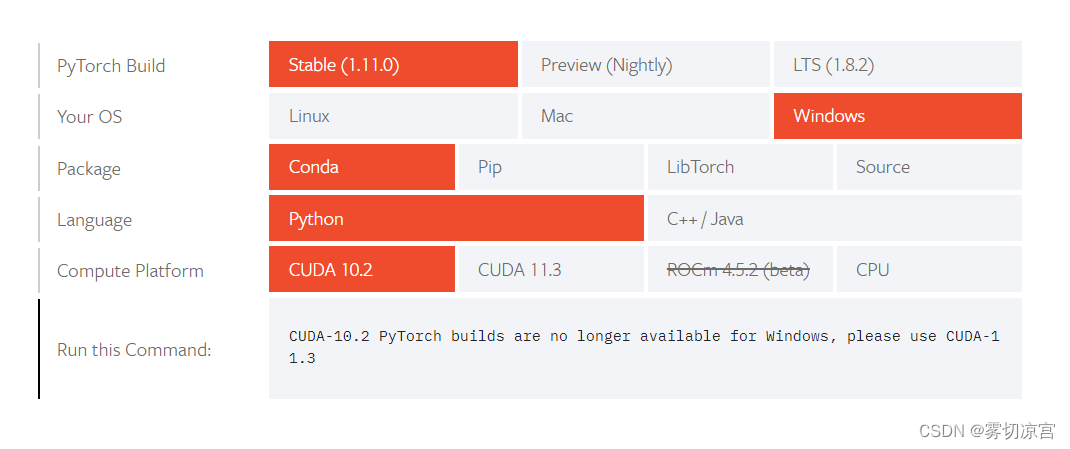
解决
安装过去的版本,点击上面的Previous PyTorch Versions,这里直接给个网址:Previous PyTorch Versions | PyTorch
可以看见有许多过去的版本,也有支持cuda10.2的,大家可以按需找自己要的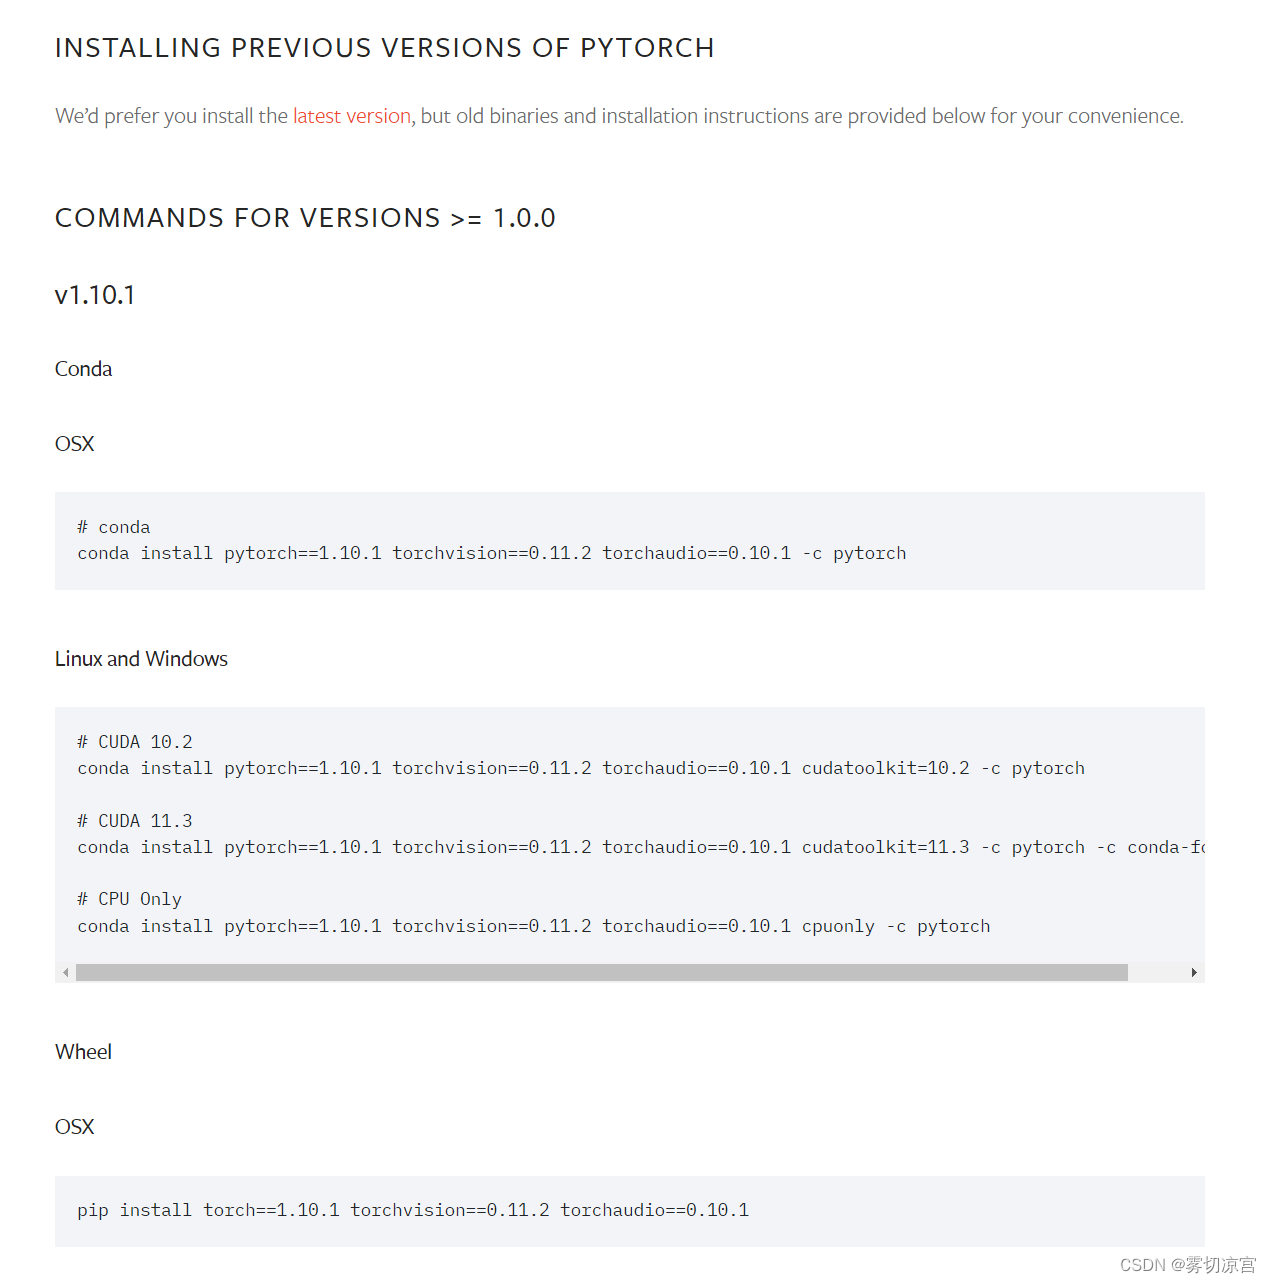
完整过程
创建conda虚拟环境
conda create -n env_name python==3.7
激活环境
conda activate env_name
conda换源
方式一 命令行(比较方便)
conda config --add channels https://mirrors.tuna.tsinghua.edu.cn/anaconda/cloud/pytorch
conda config --add channels https://mirrors.tuna.tsinghua.edu.cn/anaconda/cloud/msys2/
conda config --add channels https://mirrors.tuna.tsinghua.edu.cn/anaconda/cloud/conda-forge
conda config --add channels https://mirrors.tuna.tsinghua.edu.cn/anaconda/pkgs/free/
建议把上面那些跑两遍
第一遍只能加channel,第二遍能把他们优先级提到默认源的前面(亲测被坑)
方式二 改文件
TUNA 提供了 Anaconda 仓库与第三方源的镜像,各系统都可以通过修改用户目录下的 .condarc 文件。Windows 用户无法直接创建名为 .condarc 的文件,可先执行conda config --set show_channel_urls yes生成该文件之后再修改。
完成这一步后,我们需要修改C:\Users\User_name\.condarc这个文件,打开后将文件里原始内容删除,将下面的内容复制进去并保存。
channels:
  - defaults
show_channel_urls: true
default_channels:
  - https://mirrors.tuna.tsinghua.edu.cn/anaconda/pkgs/main
  - https://mirrors.tuna.tsinghua.edu.cn/anaconda/pkgs/r
  - https://mirrors.tuna.tsinghua.edu.cn/anaconda/pkgs/msys2
custom_channels:
  conda-forge: https://mirrors.tuna.tsinghua.edu.cn/anaconda/cloud
  msys2: https://mirrors.tuna.tsinghua.edu.cn/anaconda/cloud
  bioconda: https://mirrors.tuna.tsinghua.edu.cn/anaconda/cloud
  menpo: https://mirrors.tuna.tsinghua.edu.cn/anaconda/cloud
  pytorch: https://mirrors.tuna.tsinghua.edu.cn/anaconda/cloud
  simpleitk: https://mirrors.tuna.tsinghua.edu.cn/anaconda/cloud
这一步完成后,我们需要打开Anaconda Prompt 运行 conda clean -i 清除索引缓存,保证用的是镜像站提供的索引。
安装pytorch
根据前面在官网找的支持cuda10.2的安装代码直接安装就好
#conda安装
conda install pytorch==1.10.1 torchvision==0.11.2 torchaudio==0.10.1 cudatoolkit=10.2 -c pytorch
#pip安装
pip install torch==1.10.1+cu102 torchvision==0.11.2+cu102 torchaudio==0.10.1 -f https://download.pytorch.org/whl/torch_stable.html
可以看到变成了清华源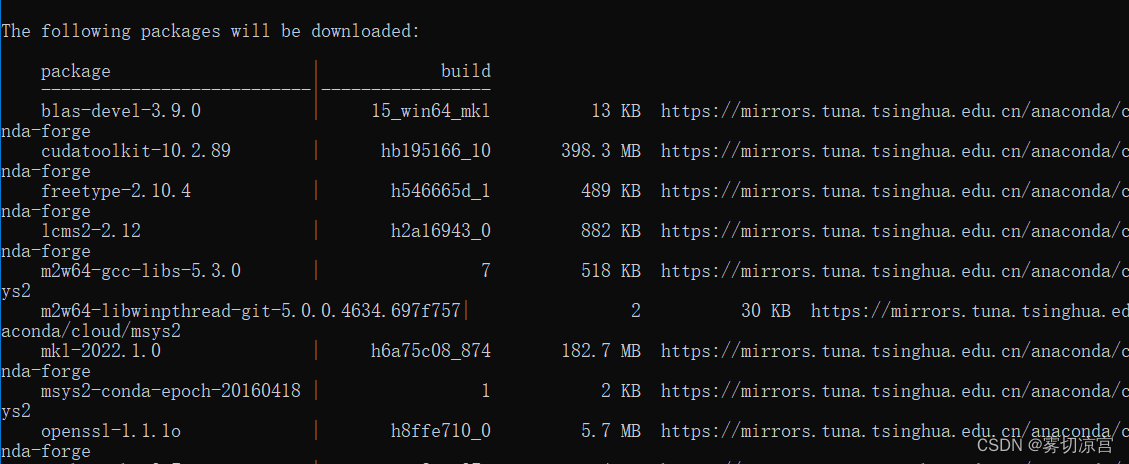
然而我自己试下来清华源下pytorch也是300k/s小水管,建议pip
可以看到变成了清华源
[外链图片转存中…(img-5JDl2Wns-1655178124349)]
然而我自己试下来清华源下pytorch也是300k/s小水管,建议pip

成功!
边栏推荐
- StarUML使用心得
- 代码在线审查(添加网页批注)的实现
- Flask框架学习:模板渲染与Get,Post请求
- [Embedded open source library] The use of MultiButton, an easy-to-use event-driven button driver module
- (一)性能实时监控平台搭建(Grafana+Influxdb+Jmeter)
- selenuim使用cookie登录京东
- 滴滴出行 nlp算法工程师面试经验分享 带offer截图真实
- [No 2022 Shanghai Security Officer A Certificate Exam Question Bank and Mock Exam
- tensorflow代码翻译成pytorch代码 -详细教程+案例
- PCIe 接口 引脚定义 一览表
猜你喜欢


随机推荐
基础数据之double和float区别
Use Adobe genuine software for prostitution to reduce the slow employment and non-employment of fresh graduates
博客目录管理 :机器学习 深度学习 nlp
imx6 yocto编译备忘
ARM结构体系4:嵌入式硬件平台接口开发
普林斯顿微积分读本05第四章--求解多项式的极限问题
MySQL数据库管理
【win10+cuda7.5+cudnn6.0安装caffe④】安装pycaffe
【Cron】学习:cron 表达式
C语言——函数的使用
Solidrun hummingboard制作SD卡
【Redis】Redis 的安装及图形化界面 Redis DeskTop Manager 的安装与使用
pytorch基础之 pytorch 模型开发模板
guava RateLimiter uniform current limit
IDEA中配置checkstyle
什么是三次握手和四次挥手(清晰易懂)
Django--20 implements Redis support, context, and interaction of context and interface
Redis-使用jedis连接linux中redis服务器失败的解决方案
【动态代理】CGLIB 动态代理的使用及原理
redis分布式锁