当前位置:网站首页>ansible各个模块的详解和使用
ansible各个模块的详解和使用
2022-08-10 20:28:00 【小陈爱锻炼】
blockinfile模块使用:
在node1上文件ansible_text文件中写入内容 ansible
[[email protected] ~]# echo "ansible" > ansible_text

[[email protected] ~]# more ansible_text
ansible
[[email protected] ~]#
然后使用blockinfile模块,在文件中插入内容 blockinfile insert content
[[email protected] ~]# ansible node -m blockinfile -a "path=/root/ansible_text block='blockinfile insert content' insertafter=EOF"
node1.example.com | CHANGED => {
    "ansible_facts": {
        "discovered_interpreter_python": "/usr/libexec/platform-python"
    },
    "changed": true,
    "msg": "Block inserted"
}
[[email protected] ~]#
然后插入内容 blockinfile with marker 且使用指定标记: marker=#{mark}test
[[email protected] ~]# ansible node -m blockinfile -a "path=/root/ansible_text block='blockinfile with marker' marker=#{mark}test"
node1.example.com | CHANGED => {
    "ansible_facts": {
        "discovered_interpreter_python": "/usr/libexec/platform-python"
    },
    "changed": true,
    "msg": "Block inserted"
}
[[email protected] ~]#
在blockinfile insert content之前插入 insertbefore
[[email protected] ~]# ansible node -m blockinfile -a "path=/root/ansible_text block='insertbefore' insertbefore='blockinfile insert content'marker=#{mark}test"
node1.example.com | CHANGED => {
    "ansible_facts": {
        "discovered_interpreter_python": "/usr/libexec/platform-python"
    },
    "changed": true,
    "msg": "Block inserted"
}
在blockinfile insert content之后插入 insertafter
[[email protected] ~]# ansible node -m blockinfile -a "path=/root/ansible_text block='insertafter' insertafter='blockinfile insert content'marker=#{mark}test"
node1.example.com | CHANGED => {
    "ansible_facts": {
        "discovered_interpreter_python": "/usr/libexec/platform-python"
    },
    "changed": true,
    "msg": "Block inserted"
}
删除其中一行内容
[[email protected] ~]# ansible node -m blockinfile -a "path=/root/ansible_text block='insertafter' insertafter='blockinfile insert content'marker=#{mark}test state=absent"
node1.example.com | CHANGED => {
    "ansible_facts": {
        "discovered_interpreter_python": "/usr/libexec/platform-python"
    },
    "changed": true,
    "msg": "Block removed"
}
[ro
lineinfile模块使用
向node节点上文件 ansible_text2文件如插入内容 lineinfile insert content
[[email protected] ~]# ansible node -m lineinfile -a "path=/root/ansible_text2 line='lineinfile insert content' create=yes"
node1.example.com | CHANGED => {
    "ansible_facts": {
        "discovered_interpreter_python": "/usr/libexec/platform-python"
    },
    "backup": "",
    "changed": true,
    "msg": "line added"
}
删除lineinfile insert content
[[email protected] ~]# ansible node -m lineinfile -a "path=/root/ansible_text2 line='lineinfile insert content' state=absent"
node1.example.com | CHANGED => {
    "ansible_facts": {
        "discovered_interpreter_python": "/usr/libexec/platform-python"
    },
    "backup": "",
    "changed": true,
    "found": 1,
    "msg": "1 line(s) removed"
}
重新插入lineinfile insert content
在之前插入: insertbefore
[[email protected] ~]# ansible node -m lineinfile -a "path=/root/ansible_text2 line='insertbefore' insertbefore='lineinfile insert content'"
node1.example.com | CHANGED => {
    "ansible_facts": {
        "discovered_interpreter_python": "/usr/libexec/platform-python"
    },
    "backup": "",
    "changed": true,
    "msg": "line added"
}
在它之后插入: insertafter
[[email protected] ~]# ansible node -m lineinfile -a "path=/root/ansible_text2 line='insertafter' insertafter='lineinfile insert content'"
node1.example.com | CHANGED => {
    "ansible_facts": {
        "discovered_interpreter_python": "/usr/libexec/platform-python"
    },
    "backup": "",
    "changed": true,
    "msg": "line added"
}
插入:Hello ansible,Hiiii
[[email protected] ~]# ansible node -m lineinfile -a "path=/root/ansible_text2 line='Hello ansible,Hiiii'"
node1.example.com | CHANGED => {
    "ansible_facts": {
        "discovered_interpreter_python": "/usr/libexec/platform-python"
    },
    "backup": "",
    "changed": true,
    "msg": "line added"
}
文件中的"Hello ansible,Hiiii"替换成"Hiiii"(使用正则表达式和backrefs)
[[email protected] ~]# ansible node -m lineinfile -a "path=/root/ansible_text2 regexp='(H.{4}).*(H.{4})' line='Hiiii'"
node1.example.com | CHANGED => {
    "ansible_facts": {
        "discovered_interpreter_python": "/usr/libexec/platform-python"
    },
    "backup": "",
    "changed": true,
    "msg": "line replaced"
}
unarchive模块使用
将node主机上的包解压
[[email protected] ~]# ansible node -m unarchive -a "src=/root/apr-1.6.5.tar.gz copy=no dest=/home/student"
node1.example.com | CHANGED => {
    "ansible_facts": {
        "discovered_interpreter_python": "/usr/libexec/platform-python"
    },
    "changed": true,
    "dest": "/home/student",
    "extract_results": {
        "cmd": [
            "/bin/gtar",
            "--extract",
            "-C",
            "/home/student",
            "-z",
            "-f",
            "/root/apr-1.6.5.tar.gz"
        ],
        "err": "",
        "out": "",
        "rc": 0
    },
    "gid": 1006,
    "group": "student",
    "handler": "TgzArchive",
    "mode": "0700",
    "owner": "student",
    "secontext": "unconfined_u:object_r:user_home_dir_t:s0",
    "size": 210,
    "src": "/root/apr-1.6.5.tar.gz",
    "state": "directory",
    "uid": 1006
}
将server主机上的包解压到node主机且设置权限为644
[[email protected] ~]# ansible node -m unarchive -a "src=/root/httpd-2.4.53.tar.gz dest=/home/student mode=644"
archive模块使用
将node上的目录进行压缩
[[email protected] ~]# ansible node -m archive -a "path=/home/student/httpd-2.4.53 dest=/home/student/httpd-2.4.53.tar.gz"
cron模块
在node上为student用户设置周一到周五早上的9:00输出闹钟到/root/alarm_cron
[[email protected] ~]# ansible node -m cron -a "hour=9 minute=0 weekday=1-5 name="闹钟" job=/root/alarm_cron user=student"
node1.example.com | CHANGED => {
    "ansible_facts": {
        "discovered_interpreter_python": "/usr/libexec/platform-python"
    },
    "changed": true,
    "envs": [],
    "jobs": [
        "闹钟"
    ]
}
[[email protected] ~]#
user模块
创建用户
删除用户
[[email protected] ~]# ansible node -m user -a "name=chen"
node1.example.com | CHANGED => {
    "ansible_facts": {
        "discovered_interpreter_python": "/usr/libexec/platform-python"
    },
    "changed": true,
    "comment": "",
    "create_home": true,
    "group": 1008,
    "home": "/home/chen",
    "name": "chen",
    "shell": "/bin/bash",
    "state": "present",
    "system": false,
    "uid": 1008
}
[[email protected] ~]# ansible node -m user -a "name=chen state=absent"
node1.example.com | CHANGED => {
    "ansible_facts": {
        "discovered_interpreter_python": "/usr/libexec/platform-python"
    },
    "changed": true,
    "force": false,
    "name": "chen",
    "remove": false,
    "state": "absent"
}
[[email protected] ~]#
group模块
创建组
删除组
[[email protected] ~]# ansible node -m group -a "name=chen"
node1.example.com | CHANGED => {
    "ansible_facts": {
        "discovered_interpreter_python": "/usr/libexec/platform-python"
    },
    "changed": true,
    "gid": 1008,
    "name": "chen",
    "state": "present",
    "system": false
}
[[email protected] ~]# ansible node -m group -a "name=chen state=absent"
node1.example.com | CHANGED => {
    "ansible_facts": {
        "discovered_interpreter_python": "/usr/libexec/platform-python"
    },
    "changed": true,
    "name": "chen",
    "state": "absent"
}
[[email protected] ~]#
yum_repository
设置两个软件仓库BaseOS和APPStream(本地yum源的配置)到文件my.repo
[[email protected] ~]# ansible node -m yum_repository -a "name=BaseOS baseurl=file:///mnt/cdrom/BaseOS gpgcheck=0 enabled=1 file=my.repo description=BaseOS"
node1.example.com | CHANGED => {
    "ansible_facts": {
        "discovered_interpreter_python": "/usr/libexec/platform-python"
    },
    "changed": true,
    "repo": "BaseOS",
    "state": "present"
}

[[email protected] ~]# ansible node -m yum_repository -a "name=APPStream baseurl=file:///mnt/cdrom/AppStream gpgcheck=0 enabled=1 file=my.repo description=APPStream"
node1.example.com | CHANGED => {
    "ansible_facts": {
        "discovered_interpreter_python": "/usr/libexec/platform-python"
    },
    "changed": true,
    "repo": "APPStream",
    "state": "present"
}
yum/dnf模块
安装软件 lrzsz
[[email protected] ~]# ansible node -m yum -a "name=lrzsz"
node1.example.com | CHANGED => {
    "ansible_facts": {
        "discovered_interpreter_python": "/usr/libexec/platform-python"
    },
    "changed": true,
    "msg": "",
    "rc": 0,
    "results": [
        "Installed: lrzsz-0.12.20-43.el8.x86_64"
    ]
}
service/systemd模块
关闭防火墙
重启防火墙
禁用防火墙
[[email protected] ~]# ansible node -m service -a "name=firewalld state=stopped"
[[email protected] ~]# ansible node -m service -a "name=firewalld state=restarted
[[email protected] ~]# ansible node -m service -a "name=firewalld state=stopped enable=no
firewalld模块
添加端口22, 添加服务 http


添加富规则:允许192.168.xxx.0/24来访问http的80端口
[[email protected] ~]# ansible node -m firewalld -a 'rich_rule="rule family=ipv4 source address=192.168.40.0/24 service name=http accept" permanent=true immediate=true state=enabled'
node1.example.com | CHANGED => {
    "ansible_facts": {
        "discovered_interpreter_python": "/usr/libexec/platform-python"
    },
    "changed": true,
    "msg": "Permanent and Non-Permanent(immediate) operation, Changed rich_rule rule family=ipv4 source address=192.168.40.0/24 service name=http accept to enabled"
}
删除富规则
[[email protected] ~]# ansible node -m firewalld -a 'rich_rule="rule family=ipv4 source address=192.168.40.0/24 service name=http accept" permanent=true immediate=true state=disabled'
node1.example.com | CHANGED => {
    "ansible_facts": {
        "discovered_interpreter_python": "/usr/libexec/platform-python"
    },
    "changed": true,
    "msg": "Permanent and Non-Permanent(immediate) operation, Changed rich_rule rule family=ipv4 source address=192.168.40.0/24 service name=http accept to disabled"
}
selinux模块
设置selinux工作模式为permissive
[[email protected] ~]# ansible node -m selinux -a "state=permissive policy=targeted"
node1.example.com | CHANGED => {
    "ansible_facts": {
        "discovered_interpreter_python": "/usr/libexec/platform-python"
    },
    "changed": true,
    "configfile": "/etc/selinux/config",
    "msg": "SELinux state changed from 'enforcing' to 'permissive', Config SELinux state changed from 'enforcing' to 'permissive'",
    "policy": "targeted",
    "reboot_required": false,
    "state": "permissive"
}
nmcli模块
在node上添加一块网卡,设置IP,gw, method, dns,type,和自动连接
[[email protected] ~]# ansible node -m nmcli -a "conn_name=ens160 ip4=192.168.38.138/24 gw4=192.168.38.1 dns4=8.8.8.8 type=ethernet state=present"
node1.example.com | CHANGED => {
    "Exists": "Connections do exist so we are modifying them",
    "ansible_facts": {
        "discovered_interpreter_python": "/usr/libexec/platform-python"
    },
    "changed": true,
    "conn_name": "ens160",
    "state": "present"
}
get_url模块
去梨视频找个视频下载下来
[[email protected] ~]# ansible node -m get_url -a "url=https://video.pearvideo.com/mp4/adshort/20180504/cont-1337568-12007359_adpkg-ad_hd.mp4 dest=/root"
node1.example.com | CHANGED => {
    "ansible_facts": {
        "discovered_interpreter_python": "/usr/libexec/platform-python"
    },
    "changed": true,
    "checksum_dest": null,
    "checksum_src": "c8c67c158b16ce84172273cc14dcc1c9f9403ef8",
    "dest": "/root/cont-1337568-12007359_adpkg-ad_hd.mp4",
    "elapsed": 12,
    "gid": 0,
    "group": "root",
    "md5sum": "dee2f423b48d0ce9d6e8ca6f6e78e443",
    "mode": "0644",
    "msg": "OK (11510845 bytes)",
    "owner": "root",
    "secontext": "system_u:object_r:admin_home_t:s0",
    "size": 11510845,
    "src": "/home/student/.ansible/tmp/ansible-tmp-1659969705.7804847-4367-206052075680831/tmp0lko5_0p",
    "state": "file",
    "status_code": 200,
    "uid": 0,
    "url": "https://video.pearvideo.com/mp4/adshort/20180504/cont-1337568-12007359_adpkg-ad_hd.mp4"
}
uri模块
访问百度,并能获取到百度源码
[[email protected] ~]# ansible node -m uri -a "url=https://www.baidu.com"
node1.example.com | SUCCESS => {
    "accept_ranges": "bytes",
    "ansible_facts": {
        "discovered_interpreter_python": "/usr/libexec/platform-python"
    },
    "cache_control": "no-cache",
    "changed": false,
    "connection": "close",
    "content_length": "227",
    "content_type": "text/html",
    "cookies": {
        "BAIDUID": "BC8D9B2B9B942FEECC4C3CD013E50975:FG=1",
        "BD_NOT_HTTPS": "1",
        "BIDUPSID": "BC8D9B2B9B942FEE6D7DDEDD17DC8AD3",
        "PSTM": "1659969767"
    },
    "cookies_string": "BAIDUID=BC8D9B2B9B942FEECC4C3CD013E50975:FG=1; BIDUPSID=BC8D9B2B9B942FEE6D7DDEDD17DC8AD3; PSTM=1659969767; BD_NOT_HTTPS=1",
    "date": "Mon, 08 Aug 2022 14:42:47 GMT",
    "elapsed": 0,
    "msg": "OK (227 bytes)",
    "p3p": "CP=\" OTI DSP COR IVA OUR IND COM \", CP=\" OTI DSP COR IVA OUR IND COM \"",
    "pragma": "no-cache",
    "redirected": false,
    "server": "BWS/1.1",
    "set_cookie": "BD_NOT_HTTPS=1; path=/; Max-Age=300, BIDUPSID=BC8D9B2B9B942FEE6D7DDEDD17DC8AD3; expires=Thu, 31-Dec-37 23:55:55 GMT; max-age=2147483647; path=/; domain=.baidu.com, PSTM=1659969767; expires=Thu, 31-Dec-37 23:55:55 GMT; max-age=2147483647; path=/; domain=.baidu.com, BAIDUID=BC8D9B2B9B942FEECC4C3CD013E50975:FG=1; max-age=31536000; expires=Tue, 08-Aug-23 14:42:47 GMT; domain=.baidu.com; path=/; version=1; comment=bd",
    "status": 200,
    "strict_transport_security": "max-age=0",
    "traceid": "1659969767278206132216850300533603587923",
    "url": "https://www.baidu.com",
    "x_frame_options": "sameorigin",
    "x_ua_compatible": "IE=Edge,chrome=1"
}
parted模块
新增一块儿1GB的磁盘

然后对磁盘进行分区: 分区1: 400,分区2: 200M, 分区3:200M,且设置分区1和分区2类型为LVM
[[email protected] ~]# ansible node -m parted -a "device=/dev/nvme0n3 number=1 part_end=400MB state=present flags=lvm"
node1.example.com | CHANGED => {
    "ansible_facts": {
        "discovered_interpreter_python": "/usr/libexec/platform-python"
    },
    "changed": true,
    "disk": {
        "dev": "/dev/nvme0n3",
        "logical_block": 512,
        "model": "NVMe Device",
        "physical_block": 512,
        "size": 1048576.0,
        "table": "msdos",
        "unit": "kib"
    },
    "partitions": [
        {
            "begin": 1024.0,
            "end": 390144.0,
            "flags": [
                "lvm"
            ],
            "fstype": "",
            "name": "",
            "num": 1,
            "size": 389120.0,
            "unit": "kib"
        }
    ],
    "script": "unit KiB mklabel msdos mkpart primary 0% 400MB unit KiB set 1 lvm on"
}
[[email protected] ~]# ansible node -m parted -a "device=/dev/nvme0n3 number=2 part_start=400MB part_end=600MB state=present flags=lvm"
node1.example.com | CHANGED => {
    "ansible_facts": {
        "discovered_interpreter_python": "/usr/libexec/platform-python"
    },
    "changed": true,
    "disk": {
        "dev": "/dev/nvme0n3",
        "logical_block": 512,
        "model": "NVMe Device",
        "physical_block": 512,
        "size": 1048576.0,
        "table": "msdos",
        "unit": "kib"
    },
    "partitions": [
        {
            "begin": 1024.0,
            "end": 390144.0,
            "flags": [
                "lvm"
            ],
            "fstype": "",
            "name": "",
            "num": 1,
            "size": 389120.0,
            "unit": "kib"
        },
        {
            "begin": 390144.0,
            "end": 585728.0,
            "flags": [
                "lvm"
            ],
            "fstype": "",
            "name": "",
            "num": 2,
            "size": 195584.0,
            "unit": "kib"
        }
    ],
    "script": "unit KiB mkpart primary 400MB 600MB unit KiB set 2 lvm on"
}
[[email protected] ~]# ansible node -m parted -a "device=/dev/nvme0n3 number=3 part_start=600MB part_end=800MB state=present"
node1.example.com | CHANGED => {
    "ansible_facts": {
        "discovered_interpreter_python": "/usr/libexec/platform-python"
    },
    "changed": true,
    "disk": {
        "dev": "/dev/nvme0n3",
        "logical_block": 512,
        "model": "NVMe Device",
        "physical_block": 512,
        "size": 1048576.0,
        "table": "msdos",
        "unit": "kib"
    },
    "partitions": [
        {
            "begin": 1024.0,
            "end": 390144.0,
            "flags": [
                "lvm"
            ],
            "fstype": "",
            "name": "",
            "num": 1,
            "size": 389120.0,
            "unit": "kib"
        },
        {
            "begin": 390144.0,
            "end": 585728.0,
            "flags": [
                "lvm"
            ],
            "fstype": "",
            "name": "",
            "num": 2,
            "size": 195584.0,
            "unit": "kib"
        },
        {
            "begin": 585728.0,
            "end": 781312.0,
            "flags": [],
            "fstype": "",
            "name": "",
            "num": 3,
            "size": 195584.0,
            "unit": "kib"
        }
    ],
    "script": "unit KiB mkpart primary 600MB 800MB"
}
lvg模块:用上面parted建立的分区: 创建卷组
[[email protected] ~]# ansible node -m lvg -a "pvs=/dev/nvme0n3p1 vg=myvg1"
node1.example.com | CHANGED => {
    "ansible_facts": {
        "discovered_interpreter_python": "/usr/libexec/platform-python"
    },
    "changed": true
}
lvol模块:在上面卷组的基础上创建逻辑卷:500M
[[email protected] ~]# ansible node -m lvol -a 'vg=myvg1 lv=lv1 size=500'
node1.example.com | CHANGED => {
    "ansible_facts": {
        "discovered_interpreter_python": "/usr/libexec/platform-python"
    },
    "changed": true,
    "msg": ""
}
filesystem模块:为逻辑卷和分区3设置文件系统类型为 xfs
[[email protected] ~]# ansible node -m filesystem -a 'dev=/dev/myvg1/lv1 fstype=xfs force=yes'
node1.example.com | CHANGED => {
    "ansible_facts": {
        "discovered_interpreter_python": "/usr/libexec/platform-python"
    },
    "changed": true
}
[[email protected] ~]# ansible node -m filesystem -a 'dev=/dev/nvme0n3p3 fstype=xfs force=yes'
node1.example.com | CHANGED => {
    "ansible_facts": {
        "discovered_interpreter_python": "/usr/libexec/platform-python"
    },
    "changed": true
}
mount模块:
为上面的逻辑卷和分区3进行挂载(分别使用mounted和present)
[[email protected] ~]# ansible node -m mount -a "path=/mnt/test fstype=xfs src=/dev/myvg1 state=present"
node1.example.com | CHANGED => {
    "ansible_facts": {
        "discovered_interpreter_python": "/usr/libexec/platform-python"
    },
    "backup_file": "",
    "boot": "yes",
    "changed": true,
    "dump": "0",
    "fstab": "/etc/fstab",
    "fstype": "xfs",
    "name": "/mnt/test",
    "opts": "defaults",
    "passno": "0",
    "src": "/dev/myvg1"
}
[[email protected] ~]# ansible node -m mount -a "path=/mnt/test1 fstype=xfs src=/dev/nvme0n3p3 state=present"
node1.example.com | CHANGED => {
    "ansible_facts": {
        "discovered_interpreter_python": "/usr/libexec/platform-python"
    },
    "backup_file": "",
    "boot": "yes",
    "changed": true,
    "dump": "0",
    "fstab": "/etc/fstab",
    "fstype": "xfs",
    "name": "/mnt/test1",
    "opts": "defaults",
    "passno": "0",
    "src": "/dev/nvme0n3p3"
}
边栏推荐
- idea汉化教程[通俗易懂]
- Transferrin-modified osthole long-circulating liposomes/PEG-PLGA nanoparticles loaded with notoginsenoside R1 ([email prot
- 一维数组动态和问题答记
- 【毕业设计】基于STM32的天气预报盒子 - 嵌入式 单片机 物联网
- 《分布式微服务电商》专题(一)-项目简介
- 【语义分割】2015-UNet MICCAI
- 苹果字体查找
- Linux服务器安装Redis,详细步骤。
- 多功能纳米酶Ag/PANI|柔性衬底纳米ZnO酶|铑片纳米酶|Ag-Rh合金纳米颗粒纳米酶|铱钌合金/氧化铱仿生纳米酶
- 洛谷 P1629 邮递员送信 (三种最短路)
猜你喜欢
每日一R「03」Borrow 语义与引用

leetcode 85.最大矩形 单调栈应用

Apache DolphinScheduler 3.0.0 正式版发布!
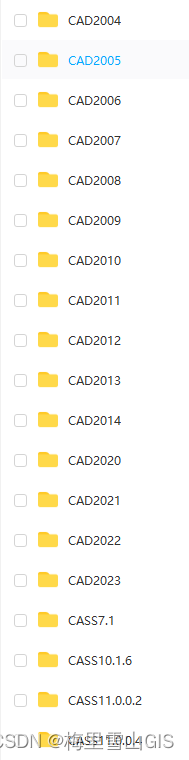
史上最全GIS相关软件(CAD、FME、Arcgis、ArcgisPro)
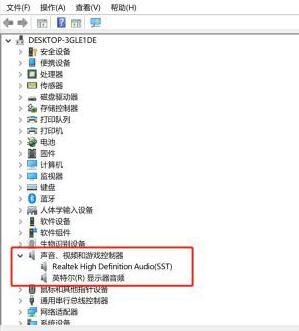
win10 xbox录屏功能不能录声音怎么办
@Autowired annotation --required a single bean, but 2 were found causes and solutions

机器学习笔记:t-SNE

苹果字体查找
 [email protected] nanomimetic e"/>
Water-soluble alloy quantum dot nanozymes|CuMoS nanozymes|porous silicon-based Pt(Au) nanozymes|[email protected] nanomimetic e

转铁蛋白Tf功能化β-榄香烯-雷公藤红素/紫杉醇PLGA纳米粒/雷公藤甲素脂质体(化学试剂)
随机推荐
"POJ 3666" Making the Grade problem solution (two methods)
【一致性hash】负载均衡器分发请求
多功能纳米酶Ag/PANI|柔性衬底纳米ZnO酶|铑片纳米酶|Ag-Rh合金纳米颗粒纳米酶|铱钌合金/氧化铱仿生纳米酶
The servlet mapping path matching resolution
Pt/CeO2 monatomic nanoparticles enzyme | H - rGO - Pt @ Pd NPs enzyme | carbon nanotube load platinum nanoparticles peptide modified nano enzyme | leukemia antagonism FeOPtPEG composite nano enzyme
Multifunctional Nanozyme Ag/PANI | Flexible Substrate Nano ZnO Enzyme | Rhodium Sheet Nanozyme | Ag-Rh Alloy Nanoparticle Nanozyme | Iridium Ruthenium Alloy/Iridium Oxide Biomimetic Nanozyme
opengrok搭建[通俗易懂]
Tf铁蛋白颗粒包载顺铂/奥沙利铂/阿霉素/甲氨蝶呤MTX/紫杉醇PTX等药物
电脑重装系统Win11格式化硬盘的详细方法
实施MES管理系统前,这三个问题要考虑好
Redis命令手册
servlet映射路径匹配解析
你不知道的浏览器页面渲染机制
(十二)STM32——NVIC中断优先级管理
leetcode 85.最大矩形 单调栈应用
Kyligence 通过 SOC 2 Type II 审计,以可信赖的企业级产品服务全球客户
铁蛋白颗粒Tf包载多肽/凝集素/细胞色素C/超氧化物歧化酶/多柔比星(定制服务)
史上最全GIS相关软件(CAD、FME、Arcgis、ArcgisPro)
win7开机有画面进系统黑屏怎么办
重载和重写