当前位置:网站首页>Redis cluster 原理
Redis cluster 原理
2022-04-23 14:11:00 【Mrpre】
Redis cluster 原理
Redis cluster 设计文档可见:
https://redis.io/topics/cluster-spec#configuration-handling-propagation-and-failovers
相关资料
https://chanjarster.github.io/post/redis-cluster-config-propagation/
在当前Redis6.0的版本中,可以使用 redis-cli --cluster create命令来规划一个集群,如下面的命令(前提是你已经启动了7001 7002…这些Redis服务并且cluster_enable开启)
redis-cli --cluster create 11.158.133.251:7001 11.158.133.251:7002 11.158.133.251:7003 11.158.133.251:7004 11.158.133.251:7005 11.158.133.251:7006 --cluster-replicas 1
实际上,这个--cluster create在背后执行了诸多Redis的命令来完成集群的构建,这也是我们本文需要剖析的地方。
如何感知集群
首先, 假设你启动了3台redis机器A B C,期望构建Redis集群,构建Redis集群的前提条件是ABC三台机器要互相知道对方的存在。那如何快速的让其中一台机器,感知到另外两台机器?拍拍脑袋想当然的,那就是告诉A存在B、C ,告诉B存在A、C,告诉C存在A、B,逻辑上没问题,单Redis并没有这么做。Redis 是这么做的:
Redis 给B和C分别发送CLUSTER MEET A,B收到CLUSTER MEET A后,会和A进行交互,这样A、B就能互相知道对方的存在(cluster nodes命令就能看到),我们用"A.集群:A+B"表示A知道的集群信息,自然B的集群信息是"B.集群:A+B"。
接着C收到CLUSTER MEET A后,C和A交互交换信息,因为A的信息里面包含了B,所以C就能知道A以及B,同样A也知道C的存在,此时A 和 C的状态就是"A.集群:A+B+C"、“C.集群:A+B+C”;剩下就是B了,A会定时广播自己的信息给B,所以在一段时间后,B也知道了A里面的集群信息新增了C,于是B更新自己的集群信息为"B.集群:A+B+C",最终达到一个稳定状态。
B收到CLUSTER MEET A流程
    ....
    } else if (!strcasecmp(c->argv[1]->ptr,"meet") && (c->argc == 4 || c->argc == 5)) {

        /* CLUSTER MEET <ip> <port> [cport] */
        long long port, cport;

        if (getLongLongFromObject(c->argv[3], &port) != C_OK) {

            addReplyErrorFormat(c,"Invalid TCP base port specified: %s",
                                (char*)c->argv[3]->ptr);
            return;
        }

        if (c->argc == 5) {

            if (getLongLongFromObject(c->argv[4], &cport) != C_OK) {

                addReplyErrorFormat(c,"Invalid TCP bus port specified: %s",
                                    (char*)c->argv[4]->ptr);
                return;
            }
        } else {

            cport = port + CLUSTER_PORT_INCR;
        }

        //核心是这个函数 他将 当前 需要meet的节点,加入到全局server.cluster->nodes 中
        if (clusterStartHandshake(c->argv[2]->ptr,port,cport) == 0 &&
            errno == EINVAL)
        {

            addReplyErrorFormat(c,"Invalid node address specified: %s:%s",
                            (char*)c->argv[2]->ptr, (char*)c->argv[3]->ptr);
        } else {

            addReply(c,shared.ok);
        }
    }
B 和 A交互 是在 Redis后台线程中执行的
//clusterCron 函数

    di = dictGetSafeIterator(server.cluster->nodes);
    server.cluster->stats_pfail_nodes = 0;
    //循环遍历本redis节点的 cluster node
    while((de = dictNext(di)) != NULL) {

        clusterNode *node = dictGetVal(de);

        //对为建立连接的集群其他node进行建立连接
        if (node->link == NULL) {

            clusterLink *link = createClusterLink(node);
            link->conn = server.tls_cluster ? connCreateTLS() : connCreateSocket();
            connSetPrivateData(link->conn, link);

            //核心函数是 连接建立完成后的回调函数 clusterLinkConnectHandler
            if (connConnect(link->conn, node->ip, node->cport, NET_FIRST_BIND_ADDR,
                        clusterLinkConnectHandler) == -1) {

                /* We got a synchronous error from connect before * clusterSendPing() had a chance to be called. * If node->ping_sent is zero, failure detection can't work, * so we claim we actually sent a ping now (that will * be really sent as soon as the link is obtained). */
                if (node->ping_sent == 0) node->ping_sent = mstime();
                serverLog(LL_DEBUG, "Unable to connect to "
                    "Cluster Node [%s]:%d -> %s", node->ip,
                    node->cport, server.neterr);

                freeClusterLink(link);
                continue;
            }
            node->link = link;
        }
    }
回调函数 clusterLinkConnectHandler
void clusterLinkConnectHandler(connection *conn) {

    clusterLink *link = connGetPrivateData(conn);
    clusterNode *node = link->node;

    if (connGetState(conn) != CONN_STATE_CONNECTED) {

        serverLog(LL_VERBOSE, "Connection with Node %.40s at %s:%d failed: %s",
                node->name, node->ip, node->cport,
                connGetLastError(conn));
        freeClusterLink(link);
        return;
    }

    connSetReadHandler(conn, clusterReadHandler);

    mstime_t old_ping_sent = node->ping_sent;
    //发送 meet类型的ping信息,所谓的ping信息,就是包含本节已知点的其他节点信息
    clusterSendPing(link, node->flags & CLUSTER_NODE_MEET ?
            CLUSTERMSG_TYPE_MEET : CLUSTERMSG_TYPE_PING);
    if (old_ping_sent) {

        /* If there was an active ping before the link was * disconnected, we want to restore the ping time, otherwise * replaced by the clusterSendPing() call. */
        node->ping_sent = old_ping_sent;
    }
    /* We can clear the flag after the first packet is sent. * If we'll never receive a PONG, we'll never send new packets * to this node. Instead after the PONG is received and we * are no longer in meet/handshake status, we want to send * normal PING packets. */
    node->flags &= ~CLUSTER_NODE_MEET;

    serverLog(LL_DEBUG,"Connecting with Node %.40s at %s:%d",
            node->name, node->ip, node->cport);
}
总结下,如果B收到CLUSTER MEET A消息,就会保存A的地址,然后在后台线程中,和A建立连接并且给A发送PING消息,PING中的类型的meet。然后再看 A收到 B发来的PING消息如何处理。
clusterReadHandler->clusterProcessPacket
        /* Add this node if it is new for us and the msg type is MEET.
         * In this stage we don't try to add the node with the right
         * flags, slaveof pointer, and so forth, as this details will be
         * resolved when we'll receive PONGs from the node. */

        //将发送方加为集群的node,很好解释,因为发送meet的人本身就是集群的节点
        if (!sender && type == CLUSTERMSG_TYPE_MEET) {
            clusterNode *node;

            node = createClusterNode(NULL,CLUSTER_NODE_HANDSHAKE);
            nodeIp2String(node->ip,link,hdr->myip);
            node->port = ntohs(hdr->port);
            node->cport = ntohs(hdr->cport);
            clusterAddNode(node);
            clusterDoBeforeSleep(CLUSTER_TODO_SAVE_CONFIG);
        }

        //meet消息中携带了发送方中已经存在的节点,此时自己也需要更新这些节点到本地。
        if (!sender && type == CLUSTERMSG_TYPE_MEET)
            clusterProcessGossipSection(hdr,link);

        /* Anyway reply with a PONG */
        //回复pong,注意pong中也有当前自己本节点中已知的其他节点信息
        clusterSendPing(link,CLUSTERMSG_TYPE_PONG);
至此,A和B同步了各自的节点信息,加入其他节点,同样的道理。
几个容易混淆的概念
1、PING PONG 有歧义,不是简单的心跳,而是包含了各自节点已知的集群信息。
2、CLUSTER_NODE_MEET 类的PING和普通的没多大区别,收到带有MEET标的PING的node强制认为sender是集群中的一部分。
版权声明
本文为[Mrpre]所创,转载请带上原文链接,感谢
https://wonderful.blog.csdn.net/article/details/109338757
边栏推荐
- 使用开源调研工具Prophet是一种什么体验?
- mysql锁数据库锁
- VMware 15pro mounts the hard disk of the real computer in the deepin system
- GFS分布式文件系统(理论)
- 解决ssh配置文件优化以及连接慢的问题
- OpenStack如何跨版本升级
- JS recursion (1)
- Operation instructions of star boundary text automatic translator
- HyperBDR云容灾V3.3.0版本发布|容灾功能升级,资源组管理功能优化
- How to do a project easily
猜你喜欢
VMware 15pro mounts the hard disk of the real computer in the deepin system
After entering the new company, the operation and maintenance engineer can understand the deployment of the system from the following items
openstack理论知识

教育行业云迁移最佳实践:海云捷迅使用HyperMotion云迁移产品为北京某大学实施渐进式迁移,成功率100%
微信小程序客服接入,实现发送和接收消息

困扰多年的系统调研问题有自动化采集工具了,还是开源免费的
线程组ThreadGroup使用介绍+自定义线程工厂类实现ThreadFactory接口

Gartner预测云迁移规模大幅增长;云迁移的优势是什么?
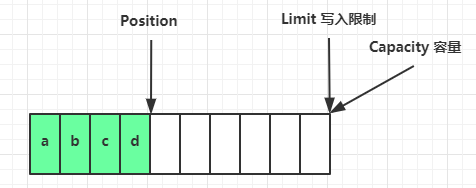
01-nio basic ByteBuffer and filechannel
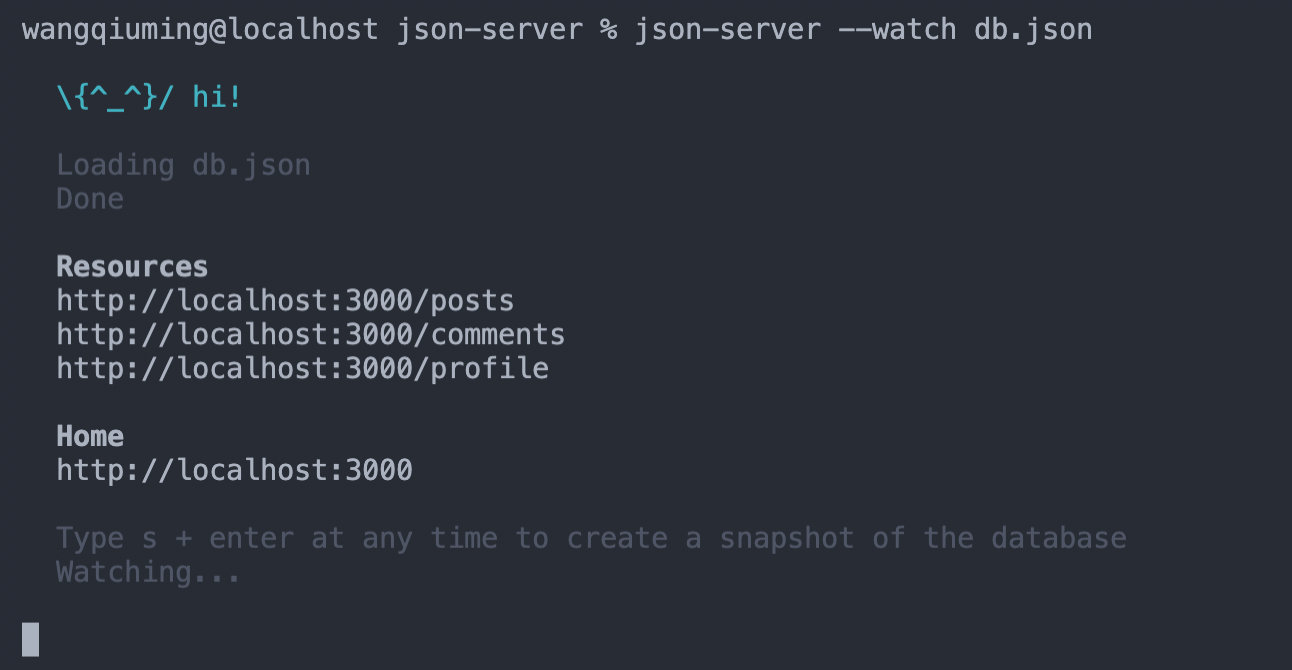
利用json-server在本地创建服务器请求
随机推荐
Installation and use of postman pit
js 格式化时间
Operation instructions of star boundary text automatic translator
IE8 browser prompts whether to block access to JS script
回顾2021:如何帮助客户扫清上云最后一公里的障碍?
FBS (fman build system) packaging
预览CSV文件
MySQL数据库讲解(七)
elk安装
某政务云项目业务系统迁移调研实践
mysql锁数据库锁
线程间控制之Semaphore使用介绍
mysql 5.1升级到5.68
Flop effect
MySQL同步Could not find first log file name in binary log index file错误
教育行业云迁移最佳实践:海云捷迅使用HyperMotion云迁移产品为北京某大学实施渐进式迁移,成功率100%
MySQL数据库讲解(十)
js 键值判断
剑指offer刷题(2)--面向华为
Visio画拓扑图随记