当前位置:网站首页>ansible及常用模块的使用
ansible及常用模块的使用
2022-04-23 14:10:00 【小灰墩墩】
ansible
实验环境
| 主机名 | IP | 系统 |
|---|---|---|
| ansible_center | 192.168.75.185 | CentOS Linux release 8.1.1911 (Core) |
| host_node1 | 192.168.75.186 | CentOS Linux release 8.1.1911 (Core) |
| host_node2 | 192.168.75.187 | CentOS Linux release 8.1.1911 (Core) |
| host_node3 | 192.168.75.188 | CentOS Linux release 8.1.1911 (Core) |
一、ansible安装
1.1 pip安装
通过pip安装的ansible版本相对yum来说,要新一些
[root@centos7 ~]# yum install python-pip python-devel
[root@centos7 ~]# yum install gcc glibc-devel zibl-devel rpm-bulid openssl-devel
[root@centos7 ~]# curl https://bootstrap.pypa.io/pip/2.7/get-pip.py -o get-pip.py
[root@centos7 ~]# python get-pip.py
[root@centos7 ~]# pip --version
pip 20.3.4 from /usr/lib/python2.7/site-packages/pip (python 2.7)
[root@centos7 ~]# pip install ansible
[root@centos7 ~]# ansible --version
[DEPRECATION WARNING]: Ansible will require Python 3.8 or newer on the controller starting with Ansible 2.12. Current version: 2.7.5 (default, Nov 16 2020,
22:23:17) [GCC 4.8.5 20150623 (Red Hat 4.8.5-44)]. This feature will be removed from ansible-core in version 2.12. Deprecation warnings can be disabled by
setting deprecation_warnings=False in ansible.cfg.
/usr/lib/python2.7/site-packages/ansible/parsing/vault/__init__.py:44: CryptographyDeprecationWarning: Python 2 is no longer supported by the Python core team. Support for it is now deprecated in cryptography, and will be removed in the next release.
  from cryptography.exceptions import InvalidSignature
ansible [core 2.11.1]
  config file = None
  configured module search path = [u'/root/.ansible/plugins/modules', u'/usr/share/ansible/plugins/modules']
  ansible python module location = /usr/lib/python2.7/site-packages/ansible
  ansible collection location = /root/.ansible/collections:/usr/share/ansible/collections
  executable location = /usr/bin/ansible
  python version = 2.7.5 (default, Nov 16 2020, 22:23:17) [GCC 4.8.5 20150623 (Red Hat 4.8.5-44)]
  jinja version = 2.11.3
  libyaml = True
1.2 yum安装
在ansible_center上操作(yum安装)
[root@ansible_center ~]# yum install ansible

[root@ansible_center ~]# ansible --version
ansible 2.9.21
  config file = /etc/ansible/ansible.cfg
  configured module search path = ['/root/.ansible/plugins/modules', '/usr/share/ansible/plugins/modules']
  ansible python module location = /usr/lib/python3.6/site-packages/ansible
  executable location = /usr/bin/ansible
  python version = 3.6.8 (default, Nov 21 2019, 19:31:34) [GCC 8.3.1 20190507 (Red Hat 8.3.1-4)]
二 ansible配置文件详解
[root@ansible_center ~]# rpm -ql ansible |head -15
/etc/ansible
/etc/ansible/ansible.cfg    #主配置文件
/etc/ansible/hosts          #主机清单
/etc/ansible/roles   #存放角色的目录
/usr/bin/ansible
/usr/bin/ansible-config
/usr/bin/ansible-connection
/usr/bin/ansible-console
/usr/bin/ansible-doc
/usr/bin/ansible-galaxy
/usr/bin/ansible-inventory
/usr/bin/ansible-playbook
/usr/bin/ansible-pull
/usr/bin/ansible-vault
/usr/lib/python3.6/site-packages/ansible
......
主配置文件/etc/ansible/ansible.cfg详解
[defaults]
#inventory = /etc/ansible/hosts # 主机列表配置文件
#library = /usr/share/my_modules/ # 库文件存放目录
#remote_tmp = $HOME/.ansible/tmp #临时py命令文件存放在远程主机目录
#local_tmp = $HOME/.ansible/tmp # 本机的临时命令执行目录
#forks = 5 # 默认并发数
#sudo_user = root # 默认sudo 用户
#ask_sudo_pass = True #每次执行ansible命令是否询问ssh密码
#ask_pass = True
#remote_port = 22
#host_key_checking = False # 检查对应服务器的host_key,建议取消注释
#log_path=/var/log/ansible.log #日志文件,建议启用
#module_name = command #默认模块,可以修改为shell模块
默认的inventory file为 /etc/ansible/hosts
inventory file可以有多个,且也可以通过Dynamic Inventory来动态生成
[root@ansible_center ~]# grep "^##" /etc/ansible/hosts
## green.example.com
## blue.example.com
## 192.168.100.1
## 192.168.100.10
## [webservers]
## alpha.example.org
## beta.example.org
## 192.168.1.100
## 192.168.1.110
## www[001:006].example.com
## [dbservers]
##
## db01.intranet.mydomain.net
## db02.intranet.mydomain.net
## 10.25.1.56
## 10.25.1.57
## db-[99:101]-node.example.com
ansiable相关工具
# ansible 主程序,临时命令执行工具
# ansible-doc 查看配置文档,模块功能查看工具
# ansible-galaxy 下载/上传优秀代码或Roles模块的官网平台
# ansible-playbook 定制自动化任务,编排剧本工具
# ansible-pull 远程执行命令的工具
# ansible-vault 文件加密工具
# ansible-console 基于Console界面与用户交互的执行工具
利用ansible实现管理的主要方式:
Ad-Hoc 即利用ansible命令,主要用于临时命令使用场景
Ansible-playbook 主要用于长期规划好的,大型项目的场景,需要有前期的规划过程
2.1 ansible配置
此工具通过ssh协议,实现对远程主机的配置管理、应用部署、任务执行等功能
建议:使用此工具前,先配置ansible主控端能基于密钥认证的方式联系各个被管理节点
# cat ssh_key1.sh
#!/bin/bash
PASS="linux_123"
NET=192.168.75
rpm -q expect &> /dev/null || yum -y install expect &> /dev/null
ssh-keygen  -t rsa -P "" -f /root/.ssh/id_rsa &> /dev/null && echo "ssh key is created"
for IP in {
    186..188};do
expect  <<EOF set timeout 20 spawn ssh-copy-id -i /root/.ssh/id_rsa.pub root@$NET.$IP expect { "yes/no" { send "yes\n";exp_continue } "password" { send "$PASS\n" } } expect eof EOF
echo $IP is ready
done
格式:
# ansible <host-pattern> [-m module_name] [-a args]
选项:
--version #显示版本
-m module   #指定模块,默认为command
-v #详细过程 –vv -vvv更详细
--list-hosts #显示主机列表,可简写 --list
-k, --ask-pass     #提示输入ssh连接密码,默认Key验证
-C, --check   #检查,并不执行
-T, --timeout=TIMEOUT #执行命令的超时时间,默认10s
-u, --user=REMOTE_USER #执行远程执行的用户
-b, --become #代替旧版的sudo 切换
--become-user=USERNAME  #指定sudo的runas用户,默认为root
-K, --ask-become-pass  #提示输入sudo时的口令
host-pattern
用于匹配被控制的主机的列表
All :表示所有Inventory中的所有主机
范例:
[root@ansible_center ~]# ansible-inventory --list
{

    "_meta": {

        "hostvars": {
    }
    },
    "all": {

        "children": [
            "dbservers",
            "ungrouped",
            "webservers"
        ]
    },
    "dbservers": {

        "hosts": [
            "192.168.75.187",
            "192.168.75.188"
        ]
    },
    "webservers": {

        "hosts": [
            "192.168.75.186"
        ]
    }
}
范例:
ansible all –m ping
*:通配符
ansible “*” -m ping
ansible 192.168.1.* -m ping
ansible “srvs” -m ping
或关系:
ansible “websrvs:appsrvs” -m ping
ansible “192.168.1.10:192.168.1.20” -m ping
逻辑与
#在websrvs组并且在dbsrvs组中的主机
ansible “websrvs:&dbsrvs” –m ping
逻辑非
#在websrvs组,但不在dbsrvs组中的主机
#注意:此处为单引号
ansible ‘websrvs:!dbsrvs’ –m ping
综合逻辑
ansible ‘websrvs:dbsrvs:&appsrvs:!ftpsrvs’ –m ping
正则表达式
ansible “websrvs:dbsrvs” –m ping
ansible “~(web|db).*\.magedu\.com” –m ping
ansible命令执行过程
1、加载自己的配置文件 默认/etc/ansible/ansible.cfg
2、加载自己对应的模块文件,如:command
3、通过ansible将模块或命令生成对应的临时py文件,并将该文件传输至远程服务器的对应执行用户$HOME/.ansible/tmp/ansible-tmp-数字/XXX.PY文件
4、给文件+x执行
5、执行并返回结果
6、删除临时的py文件,退出
三 ansible常用模块
https://docs.ansible.com/ansible/latest/modules/modules_by_category.html
3.1 command模块
功能:在远程主机执行命令,此为默认模块,可忽略-m选项
注意:此命令不支持 $VARNAME < > | ; &等,用shell模块实现
范例:
[root@ansible_center ~]# ansible dbservers -m command -a 'chdir=/etc cat centos-release'
192.168.75.188 | CHANGED | rc=0 >>
CentOS Linux release 8.1.1911 (Core)
192.168.75.187 | CHANGED | rc=0 >>
CentOS Linux release 8.1.1911 (Core)

[root@ansible_center ~]# ansible all -m command -a 'hostname'
192.168.75.187 | CHANGED | rc=0 >>
host_node2
192.168.75.188 | CHANGED | rc=0 >>
host_node3
192.168.75.186 | CHANGED | rc=0 >>
host_node1
3.2 shell模块
功能:和command相似,用shell执行命令
范例:
[root@ansible_center ~]# ansible dbservers -m shell -a "echo $HOSTNAME"
192.168.75.187 | CHANGED | rc=0 >>
ansible_center
192.168.75.188 | CHANGED | rc=0 >>
ansible_center
[root@ansible_center ~]# ansible dbservers -m shell -a 'echo $HOSTNAME'
192.168.75.188 | CHANGED | rc=0 >>
host_node3
192.168.75.187 | CHANGED | rc=0 >>
host_node2
[root@ansible_center ~]#
注意:调用bash执行命令 类似 cat /tmp/test.md | awk -F‘|’ ‘{print 2}’ &> /tmp/example.txt 这些复
杂命令,即使使用shell也可能会失败,解决办法:写到脚本时,copy到远程,执行,再把需要的结果
拉回执行命令的机器
如何修改默认模块代替command
#把command修改为shell即可
[root@ansible_center ~]# grep -n '^#module_name' /etc/ansible/ansible.cfg
114:#module_name = command
3.3 script模块
功能:在远程主机上运行ansible服务器上的脚本
范例:
ansible websrvs -m script -a /data/test.sh
3.4 copy模块
功能:从ansible服务器主控端复制文件到远程主机
#如目标存在,默认覆盖,此处指定先备份
[root@ansible_center ~]# ansible dbservers -m copy -a "src=/root/test.sh dest=/tmp/test1.sh mode=600 backup=yes"
192.168.75.188 | CHANGED => {

    "ansible_facts": {

        "discovered_interpreter_python": "/usr/libexec/platform-python"
    },
    "changed": true,
    "checksum": "5387fb90b0500b6671858d1d6eddb61f7743a91e",
    "dest": "/tmp/test1.sh",
    "gid": 0,
    "group": "root",
    "md5sum": "8733baf69fd1d36449790f6dd410d486",
    "mode": "0600",
    "owner": "root",
    "size": 189,
    "src": "/root/.ansible/tmp/ansible-tmp-1624092791.491265-2524-170538428062380/source",
    "state": "file",
    "uid": 0
}
192.168.75.187 | CHANGED => {

    "ansible_facts": {

        "discovered_interpreter_python": "/usr/libexec/platform-python"
    },
    "changed": true,
    "checksum": "5387fb90b0500b6671858d1d6eddb61f7743a91e",
    "dest": "/tmp/test1.sh",
    "gid": 0,
    "group": "root",
    "md5sum": "8733baf69fd1d36449790f6dd410d486",
    "mode": "0600",
    "owner": "root",
    "size": 189,
    "src": "/root/.ansible/tmp/ansible-tmp-1624092791.4955103-2522-209554212434124/source",
    "state": "file",
    "uid": 0
}
[root@ansible_center ~]# ansible dbservers -a 'ls -l /tmp/test1.sh'
192.168.75.188 | CHANGED | rc=0 >>
-rw------- 1 root root 189 Jun 19 16:53 /tmp/test1.sh
192.168.75.187 | CHANGED | rc=0 >>
-rw------- 1 root root 189 Jun 19 16:53 /tmp/test1.sh

#指定内容,直接生成目标文件
[root@ansible_center ~]# ansible dbservers -m copy -a "content='test line1\ntest line2' dest=/tmp/test.txt"
192.168.75.187 | CHANGED => {

    "ansible_facts": {

        "discovered_interpreter_python": "/usr/libexec/platform-python"
    },
    "changed": true,
    "checksum": "43791ccbbcf72774b2bbbe6fe8d7ab488359b922",
    "dest": "/tmp/test.txt",
    "gid": 0,
    "group": "root",
    "md5sum": "f0e596e1a1a3ef7d278f2dda4d4e6ec8",
    "mode": "0644",
    "owner": "root",
    "size": 21,
    "src": "/root/.ansible/tmp/ansible-tmp-1624093082.1497128-2627-271928500573999/source",
    "state": "file",
    "uid": 0
}
192.168.75.188 | CHANGED => {

    "ansible_facts": {

        "discovered_interpreter_python": "/usr/libexec/platform-python"
    },
    "changed": true,
    "checksum": "43791ccbbcf72774b2bbbe6fe8d7ab488359b922",
    "dest": "/tmp/test.txt",
    "gid": 0,
    "group": "root",
    "md5sum": "f0e596e1a1a3ef7d278f2dda4d4e6ec8",
    "mode": "0644",
    "owner": "root",
    "size": 21,
    "src": "/root/.ansible/tmp/ansible-tmp-1624093082.183581-2629-19983508277514/source",
    "state": "file",
    "uid": 0
}
[root@ansible_center ~]# ansible dbservers -a 'cat /tmp/test.txt'
192.168.75.188 | CHANGED | rc=0 >>
test line1
test line2
192.168.75.187 | CHANGED | rc=0 >>
test line1
test line2

#复制/etc/下的文件,不包括/etc/目录自身
[root@ansible_center ~]# ansible dbservers -m copy -a “src=/etc/ dest=/backup”
3.5 fetch模块
功能:从远程主机提取文件至ansible的主控端,copy相反,目前不支持目录
[root@ansible_center ~]# ansible dbservers -m fetch -a 'src=/etc/redhat-release dest=/data/os'

[root@ansible_center ~]# tree /data/os/
/data/os/
├── 192.168.75.187
│   └── etc
│       └── redhat-release
└── 192.168.75.188
    └── etc
        └── redhat-release

4 directories, 2 files
3.6 file模块
功能:设置文件属性
范例:
#创建文件
ansible all -m file  -a 'path=/data/test.txt state=touch'

#删除文件
ansible all -m file  -a 'path=/data/test.txt state=absent'

[root@ansible_center ~]# ansible dbservers -m file -a 'path=/data/test.txt owner=song mode=777 state=touch'
[root@ansible_center ~]# ansible dbservers -m shell -a 'ls -l /data/test.txt'
192.168.75.188 | CHANGED | rc=0 >>
-rwxrwxrwx 1 song root 0 Jun 19 17:26 /data/test.txt
192.168.75.187 | CHANGED | rc=0 >>
-rwxrwxrwx 1 song root 0 Jun 19 17:26 /data/test.txt

#创建目录
[root@ansible_center ~]# ansible dbservers -m file -a "path=/data/mysql state=directory owner=song group=song"
[root@ansible_center ~]# ansible dbservers -m shell -a 'ls -ld /data/mysql'
192.168.75.188 | CHANGED | rc=0 >>
drwxr-xr-x 2 song song 6 Jun 19 17:33 /data/mysql
192.168.75.187 | CHANGED | rc=0 >>
drwxr-xr-x 2 song song 6 Jun 19 17:33 /data/mysql

#创建软链接
[root@ansible_center ~]# ansible dbservers -m file -a 'src=/data/mysql dest=/data/mysql-link state=link'
[root@ansible_center ~]# ansible dbservers -m shell -a 'ls -l /data/'
192.168.75.188 | CHANGED | rc=0 >>
total 0
drwxr-xr-x 2 song song  6 Jun 19 17:33 mysql
lrwxrwxrwx 1 root root 11 Jun 19 17:36 mysql-link -> /data/mysql
-rwxrwxrwx 1 song root  0 Jun 19 17:26 test.txt
192.168.75.187 | CHANGED | rc=0 >>
total 0
drwxr-xr-x 2 song song  6 Jun 19 17:33 mysql
lrwxrwxrwx 1 root root 11 Jun 19 17:36 mysql-link -> /data/mysql
-rwxrwxrwx 1 song root  0 Jun 19 17:26 test.txt
3.7 unarchive模块
功能:解包解压缩
实现有两种用法:
1、将ansible主机上的压缩包传到远程主机后解压缩至特定目录,设置copy=yes
2、将远程主机上的某个压缩包解压缩到指定路径下,设置copy=no
常见参数:
copy:默认为yes,当copy=yes,拷贝的文件是从ansible主机复制到远程主机上,如果设置为copy=no,会在远程主机上寻找src源文件
remote_src:和copy功能一样且互斥,yes表示在远程主机,不在ansible主机,no表示文件在ansible主机上
src:源路径,可以是ansible主机上的路径,也可以是远程主机上的路径,如果是远程主机上的路径,则需要设置copy=no
dest:远程主机上的目标路径
mode:设置解压缩后的文件权限
范例:
#从ansible主机上拷贝压缩包到远程主机并解压
[root@ansible_center ~]# ansible all -m unarchive -a 'src=/root/test.tar.gz dest=/data/'

#从远程主机上拷贝压缩包并解压到远程主机目标点上
[root@ansible_center ~]# ansible all -m unarchive -a 'src=/root/test.tar.gz dest=/tmp/ copy=no'
3.8 archive模块
功能:打包压缩
其中format包括以下几种:bz2, gz, tar, xz, zip
范例:
[root@ansible_center ~]# ansible all -m archive -a 'path=/var/log/ dest=/data/os-log.tar.gz format=gz owner=song mode=0600'
3.9 hostname模块
功能:管理主机名
范例:
[root@ansible_center ~]# ansible webservers -m hostname -a 'name=nginx.swyer.local'
3.10 cron模板
功能:计划任务
支持时间:分(minute) 时(hour) 日(day) 月(month) 周(weekday)
范例:
[root@centos8 ~]#cat mysql_backup.sh
mysqldump -A -F --single-transaction --master-data=2 -q -uroot |gzip > /data/mysql_`date +%F_%T`.sql.gz
#创建任务
ansible 10.0.0.8 -m cron -a 'hour=2 minute=30 weekday=1-5 name="backup mysql" job=/root/mysql_backup.sh'
ansible websrvs   -m cron -a "minute=*/5 job='/usr/sbin/ntpdate 172.20.0.1 &>/dev/null' name=Synctime"
#禁用计划任务
ansible websrvs   -m cron -a "minute=*/5 job='/usr/sbin/ntpdate 172.20.0.1 &>/dev/null' name=Synctime disabled=yes"
#启用计划任务
ansible websrvs   -m cron -a "minute=*/5 job='/usr/sbin/ntpdate 172.20.0.1 &>/dev/null' name=Synctime disabled=no"
#删除任务
ansible websrvs -m cron -a "name='backup mysql' state=absent"
ansible websrvs -m cron -a 'state=absent name=Synctime'
3.11 yum模块
功能:管理软件包,只支持RHEL,CentOS,fedora,不支持ubuntu其它版本
范例:
#安装
[root@ansible_center ~]# ansible webservers -m yum -a 'name=vsftpd state=present'
#删除
[root@ansible_center ~]# ansible webservers -m yum -a 'name=vsftpd state=absent'
3.12 service模块
功能:管理服务
范例
[root@ansible_center ~]# ansible webservers -m yum -a 'name=httpd state=present'
[root@ansible_center ~]# ansible webservers -m service -a 'name=httpd state=started enabled=yes'
[root@ansible_center ~]# ansible webservers -m service -a 'name=httpd state=stopped'
[root@ansible_center ~]# ansible webservers -m service -a 'name=httpd state=reloaded’
[root@ansible_center ~]# ansible webservers -m shell -a "sed -i 's/^Listen 80/Listen 8080/' /etc/httpd/conf/httpd.conf"
[root@ansible_center ~]# ansible webservers -m service -a 'name=httpd state=restarted'
[root@ansible_center ~]# ansible webservers -m shell -a 'ss -ntl|grep 8080'
192.168.75.186 | CHANGED | rc=0 >>
LISTEN   0         128                       *:8080                   *:*
3.13 user模块
功能:管理用户
范例
#创建用户
# ansible all -m user -a 'name=user1 comment=“test user” uid=2048 home=/app/user1
group=root' # ansible all -m user -a 'name=nginx comment=nginx uid=88 group=nginx
groups="root,daemon" shell=/sbin/nologin system=yes create_home=no home=/data/nginx non_unique=yes' #删除用户及家目录等数据 # ansible all -m user -a 'name=nginx state=absent remove=yes'
3.14 group模块
功能:管理组
范例
#创建组
[root@ansible_center ~]# ansible webservers -m group -a 'name=nginx gid=88 system=yes'
192.168.75.186 | CHANGED => {

    "ansible_facts": {

        "discovered_interpreter_python": "/usr/libexec/platform-python"
    },
    "changed": true,
    "gid": 88,
    "name": "nginx",
    "state": "present",
    "system": true
}
[root@ansible_center ~]# ansible webservers -m shell -a 'getent group |grep nginx'
192.168.75.186 | CHANGED | rc=0 >>
nginx:x:88:

#删除组
[root@ansible_center ~]# ansible webservers -m group -a 'name=nginx state=absent'
3.15 lineinfile模块
ansible在使用sed进行替换时,经常会遇到需要转义的问题,而且ansible在遇到特殊符号进行替换时,
存在问题,无法正常进行替换 。其实在ansible自身提供了两个模块:lineinfifile模块和replace模块,可
以方便的进行替换
功能:相当于sed,可以修改文件内容
范例:
[root@ansible_center ~]# ansible all -m lineinfile -a "path=/etc/selinux/config regexp='^SELINUX=' line='SELINUX=enforcing'"
[root@ansible_center ~]# ansible all -m shell -a "grep '^SELINUX=' /etc/selinux/config"
192.168.75.186 | CHANGED | rc=0 >>
SELINUX=enforcing
192.168.75.187 | CHANGED | rc=0 >>
SELINUX=enforcing
192.168.75.188 | CHANGED | rc=0 >>
SELINUX=enforcing

[root@ansible_center ~]# ansible all -m lineinfile -a "dest=/etc/fstab state=absent regexp='^#'"
[root@ansible_center ~]# ansible 192.168.75.186 -m shell -a "cat /etc/fstab"
192.168.75.186 | CHANGED | rc=0 >>

UUID=e34719ca-ec48-4795-b0b0-a8145ae9b5cb /                       xfs     defaults        0 0
UUID=5b713de2-b746-4036-a1ce-24e148c165b6 /boot                   ext4    defaults        1 2
UUID=7ff39b9b-efb1-44b8-9291-1b23e4551a0f /data                   xfs     defaults        0 0
UUID=f1240d0a-0db4-4ac4-b9b8-acc4f41fc9f1 swap                    swap    defaults        0
3.16 replace模块
该模块有点类似于sed命令,主要也是基于正则进行匹配和替换
范例:
ansible all -m replace -a "path=/etc/fstab regexp='^(UUID.*)' replace='#\1'"
ansible all -m replace -a "path=/etc/fstab regexp='^#(.*)' replace='\1'"
3.17 setup模块
功能:setup模块来收集主机的系统信息,这些facts信息可以直接以变量的形式使用,但是如果主机较多,会影响执行速度
filter参数:用于进行条件过滤。如果设置,仅返回匹配过滤条件的信息。
ansible_all_ipv4_addresses:仅显示ipv4的信息。
ansible_devices:仅显示磁盘设备信息。
ansible_distribution:显示是什么系统,例:centos,suse等。
ansible_distribution_major_version:显示是系统主版本。
ansible_distribution_version:仅显示系统版本。
ansible_machine:显示系统类型,例:32位,还是64位。
ansible_eth0:仅显示eth0的信息。
ansible_hostname:仅显示主机名。
ansible_kernel:仅显示内核版本。
ansible_lvm:显示lvm相关信息。
ansible_memtotal_mb:显示系统总内存。
ansible_memfree_mb:显示可用系统内存。
ansible_memory_mb:详细显示内存情况。
ansible_swaptotal_mb:显示总的swap内存。
ansible_swapfree_mb:显示swap内存的可用内存。
ansible_mounts:显示系统磁盘挂载情况。
ansible_processor:显示cpu个数(具体显示每个cpu的型号)。
ansible_processor_vcpus:显示cpu个数(只显示总的个数)
ansible all -m setup
ansible all -m setup -a "filter=ansible_nodename"
ansible all -m setup -a "filter=ansible_hostname"
ansible all -m setup -a "filter=ansible_domain"
ansible all -m setup -a "filter=ansible_memtotal_mb"
ansible all -m setup -a "filter=ansible_memory_mb"
ansible all -m setup -a "filter=ansible_memfree_mb"
ansible all -m setup -a "filter=ansible_os_family"
ansible all -m setup -a "filter=ansible_distribution_major_version"
ansible all -m setup -a "filter=ansible_distribution_version"
ansible all -m setup -a "filter=ansible_processor_vcpus"
ansible all -m setup -a "filter=ansible_all_ipv4_addresses"
ansible all -m setup -a "filter=ansible_architecture"
ansible all -m setup  -a "filter=ansible_processor*"
版权声明
本文为[小灰墩墩]所创,转载请带上原文链接,感谢
https://blog.csdn.net/swyer_66/article/details/118060654
边栏推荐
- 倒计时1天~2022云容灾产品线上发布会即将开始
- redis数据库讲解(四)主从复制、哨兵、Cluster群集
- ie8 浏览器提示是否 阻止访问js脚本
- ThreadGroup ThreadGroup implémente l'interface threadfactory en utilisant la classe Introduction + Custom thread Factory
- 云迁移的六大场景
- 线程间控制之CountDownLatch和CyclicBarrier使用介绍
- xx项目架构随记
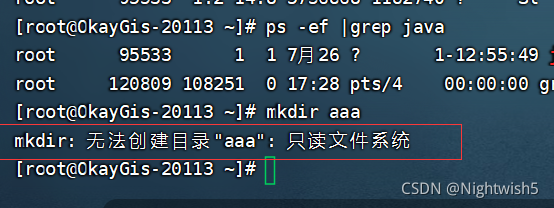
- 处理 mkdir:无法创建目录“aaa“:只读文件系统
- RecyclerView细节研究-RecyclerView点击错位问题的探讨与修复
- void*是怎样的存在?
猜你喜欢


随机推荐
js 格式化时间
困扰多年的系统调研问题有自动化采集工具了,还是开源免费的
使用Executors类快速创建线程池
MySQL数据库讲解(七)
正则表达式
Introduction to the use of countdownlatch and cyclicbarrier for inter thread control
统信UOS PHP7.2.3升级至PHP7.2.24
政务云迁移实践 北明数科使用HyperMotion云迁移产品为某政府单位实施上云迁移项目,15天内完成近百套主机迁移
教育行业云迁移最佳实践:海云捷迅使用HyperMotion云迁移产品为北京某大学实施渐进式迁移,成功率100%
Installation and use of postman pit
Research on recyclerview details - Discussion and repair of recyclerview click dislocation
redis数据库讲解(三)redis数据类型
Logback logger and root
xx项目架构随记
DP - [noip2000] grid access
krpano全景之vtour文件夹和tour
MySQL数据库讲解(九)
std::map 和 std::vector 内存释放
JDBC详解
金融行业云迁移实践 平安金融云整合HyperMotion云迁移解决方案,为金融行业客户提供迁移服务