当前位置:网站首页>detectron2,手把手教你训练mask_rcnn
detectron2,手把手教你训练mask_rcnn
2022-08-11 05:33:00 【我是无名的我】
弄了好几个月,现在终于能训练自己的数据了。
首先
cuda 10.2
PyTorch 1.3.1
labelme 3.18.0
安装PyTorch和labelme 直接 anaconda下面pip就好,之所以不用conda,是因为使用pip会帮你安装cudatoolkit=10.2。
1、使用labelme整理数据
1.1
使用下面代码重命名图片文件,显得专业点。
# -*- coding: utf-8 -*-
""" Spyder Editor HGH """
import os
import cv2
path_img = r'/images'
dirs = os.listdir(path_img)
os.chdir(path_img)
try:
    os.mkdir('rename')
except:
    pass
count = 0
for img in dirs:
    img = cv2.imread(img, 1)
    Str = "%06d" % count
    path = os.path.join('rename', Str + '.jpg')
    cv2.imwrite(path, img)
    count +=1
可以得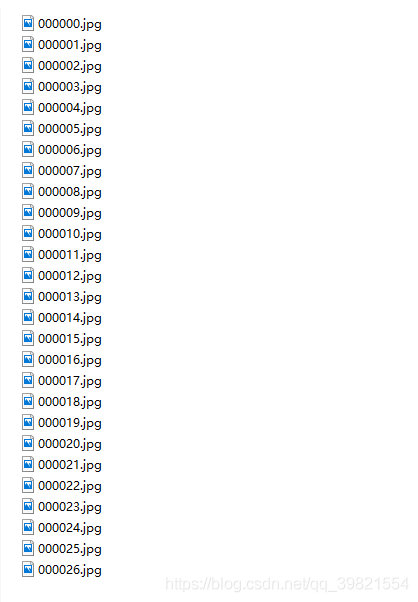
打开lableme标记,使用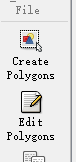
在生成的json文件下面运行下面的代码
注意,修改self.categories成自己的类别
# -*- coding:utf-8 -*-
# !/usr/bin/env python

import argparse
import json
import matplotlib.pyplot as plt
import skimage.io as io
import cv2
from labelme import utils
import numpy as np
import glob
import PIL.Image
from shapely.geometry import Polygon

class labelme2coco(object):
    def __init__(self,labelme_json=[],save_json_path='./new.json'):
        ''' :param labelme_json: 所有labelme的json文件路径组成的列表 :param save_json_path: json保存位置 '''
        self.labelme_json=labelme_json
        self.save_json_path=save_json_path
        self.images=[]
        #self.categories=[]
        # self.categories = [{'supercategory': 'column', 'id': 1, 'name': 'column'}, {'supercategory': 'box', 'id': 2, 'name': 'box'}, {'supercategory': 'fruit', 'id': 3, 'name': 'fruit'}, {'supercategory': 'package', 'id': 4, 'name': 'package'}]
        self.categories = [{
    'supercategory': 'A', 'id': 1, 'name': 'A'},
                           {
    'supercategory': 'B', 'id': 2, 'name': 'B'},
                           {
    'supercategory': 'C', 'id': 3, 'name': 'C'},
                           {
    'supercategory': 'D', 'id': 4, 'name': 'D'}]

        self.annotations=[]
        # self.data_coco = {}
        self.label=[]
        self.annID=1
        self.height=0
        self.width=0

        self.save_json()


    def data_transfer(self):
        for num,json_file in enumerate(self.labelme_json):
            with open(json_file,'r') as fp:
                data = json.load(fp)  # 加载json文件
                self.images.append(self.image(data,num))
                for shapes in data['shapes']:
                    #label=shapes['label'].split('_')
                    label=shapes['label']
                    # print(shapes['label'])
                    # print(label)
# if label not in self.label:
# self.categories.append(self.categorie(label))
# self.label.append(label)
                    points=shapes['points']
                    self.annotations.append(self.annotation(points,label,num))
                    self.annID+=1
        print(self.categories)

    def image(self,data,num):
        image={
    }
        img = utils.img_b64_to_arr(data['imageData'])  # 解析原图片数据
        # img=io.imread(data['imagePath']) # 通过图片路径打开图片
        # img = cv2.imread(data['imagePath'], 0)
        height, width = img.shape[:2]
        img = None
        image['height']=height
        image['width'] = width
        image['id']=num+1
        image['file_name'] = data['imagePath'].split('/')[-1]

        self.height=height
        self.width=width

        return image

    def categorie(self,label):
        categorie={
    }
        categorie['supercategory'] = label
        categorie['id']=len(self.label)+1 # 0 默认为背景
        categorie['name'] = label
        # print(categorie)
        return categorie

    def annotation(self,points,label,num):
        annotation={
    }
        annotation['segmentation']=[list(np.asarray(points).flatten())]
        poly = Polygon(points)
        area_ = round(poly.area,6)
        annotation['area'] = area_
        annotation['iscrowd'] = 0
        annotation['image_id'] = num+1
        # annotation['bbox'] = str(self.getbbox(points)) # 使用list保存json文件时报错(不知道为什么)
        # list(map(int,a[1:-1].split(','))) a=annotation['bbox'] 使用该方式转成list
        annotation['bbox'] = list(map(float,self.getbbox(points)))

        annotation['category_id'] = self.getcatid(label)
        # print(label)
        # annotation['category_id'] = len(self.label) + 1
        # print(self.getcatid(label))
        annotation['id'] = self.annID
        return annotation

    def getcatid(self,label):
        for categorie in self.categories:
            if label == categorie['name']:
                return categorie['id']
        return -1

    def getbbox(self,points):
        # img = np.zeros([self.height,self.width],np.uint8)
        # cv2.polylines(img, [np.asarray(points)], True, 1, lineType=cv2.LINE_AA) # 画边界线
        # cv2.fillPoly(img, [np.asarray(points)], 1) # 画多边形 内部像素值为1
        polygons = points
        mask = self.polygons_to_mask([self.height,self.width], polygons)
        return self.mask2box(mask)

    def mask2box(self, mask):
        '''从mask反算出其边框 mask:[h,w] 0、1组成的图片 1对应对象,只需计算1对应的行列号(左上角行列号,右下角行列号,就可以算出其边框) '''
        # np.where(mask==1)
        index = np.argwhere(mask == 1)
        rows = index[:, 0]
        clos = index[:, 1]
        # 解析左上角行列号
        left_top_r = np.min(rows)  # y
        left_top_c = np.min(clos)  # x

        # 解析右下角行列号
        right_bottom_r = np.max(rows)
        right_bottom_c = np.max(clos)

        # return [(left_top_r,left_top_c),(right_bottom_r,right_bottom_c)]
        # return [(left_top_c, left_top_r), (right_bottom_c, right_bottom_r)]
        # return [left_top_c, left_top_r, right_bottom_c, right_bottom_r] # [x1,y1,x2,y2]
        return [left_top_c, left_top_r, right_bottom_c-left_top_c, right_bottom_r-left_top_r]  # [x1,y1,w,h] 对应COCO的bbox格式

    def polygons_to_mask(self,img_shape, polygons):
        mask = np.zeros(img_shape, dtype=np.uint8)
        mask = PIL.Image.fromarray(mask)
        xy = list(map(tuple, polygons))
        PIL.ImageDraw.Draw(mask).polygon(xy=xy, outline=1, fill=1)
        mask = np.array(mask, dtype=bool)
        return mask

    def data2coco(self):
        data_coco={
    }
        data_coco['images']=self.images
        data_coco['categories']=self.categories
        data_coco['annotations']=self.annotations
        return data_coco

    def save_json(self):
        self.data_transfer()
        self.data_coco = self.data2coco()
        # 保存json文件
        json.dump(self.data_coco, open(self.save_json_path, 'w'), indent=4)  # indent=4 更加美观显示

labelme_json=glob.glob('./*.json')
# labelme_json=['./1.json']

labelme2coco(labelme_json,'./trainval.json')
2、使用detectron2
1、框架
detectron2不能运行在win10,刚开始写的时候用了第三方的detectron2,基于ubuntu18.04LTS下,官方的detectron2也测试过。
2、 代码
#-*- coding:utf-8 -*-
import detectron2
from detectron2.utils.logger import setup_logger
setup_logger()

# import some common libraries
import os
import cv2
import random
import matplotlib.pyplot as plt
import numpy as np

from detectron2.engine import DefaultTrainer
from detectron2.engine import DefaultPredictor
from detectron2.config import get_cfg
from detectron2.utils.visualizer import Visualizer
from detectron2.data import MetadataCatalog, DatasetCatalog
from detectron2.data.datasets import register_coco_instances

detectron2_repo_path = r"./detectron2-master" #自己的detectron2所在
img_path = r"./data/images"
json_path = r"./ata/trainval.json"


register_coco_instances("mydata", {
    }, json_path, img_path)
mydata_metadata = MetadataCatalog.get("mydata")
dataset_dicts = DatasetCatalog.get("mydata")


cfg = get_cfg()
cfg.merge_from_file(
    os.path.join(detectron2_repo_path, "configs/COCO-InstanceSegmentation/mask_rcnn_R_50_FPN_3x.yaml")
)
#跟下面的cfg.MODEL.WEIGHTS对应,在https://github.com/facebookresearch/detectron2/blob/master/MODEL_ZOO.md下面找自己所需要的模型,
cfg.DATASETS.TRAIN = ("mydata",)
cfg.DATASETS.TEST = ()  # no metrics implemented for this dataset
cfg.DATALOADER.NUM_WORKERS = 0
cfg.MODEL.WEIGHTS = r"./model/model_final_f10217.pkl"  # initialize from model zoo
# cfg.MODEL.WEIGHTS = "detectron2://COCO-InstanceSegmentation/mask_rcnn_R_50_FPN_3x/137849600/model_final_f10217.pkl"
#使用这个下载会很慢
cfg.SOLVER.IMS_PER_BATCH = 1
cfg.SOLVER.BASE_LR = 0.02
cfg.SOLVER.MAX_ITER = (300)  # 300 iterations seems good enough, but you can certainly train longer

cfg.MODEL.ROI_HEADS.NUM_CLASSES = 4 # 总共4个类别,不含背景

os.makedirs(cfg.OUTPUT_DIR, exist_ok=True)

trainer = DefaultTrainer(cfg)

trainer.resume_or_load(resume=False)
# trainer.train()

cfg.MODEL.WEIGHTS = os.path.join(cfg.OUTPUT_DIR, "model_final.pth")
cfg.MODEL.ROI_HEADS.SCORE_THRESH_TEST = 0.5   # set the testing threshold for this model
cfg.DATASETS.TEST = ("data", )
predictor = DefaultPredictor(cfg)

from detectron2.utils.visualizer import ColorMode
from PIL import Image

''' 测试 '''
d = {
    'file_name': r'./17.jpg'}
im = cv2.imread(d["file_name"])
outputs = predictor(im)
v = Visualizer(im[:, :, ::-1], metadata=mydata_metadata,  scale=1, instance_mode=ColorMode.IMAGE_BW)
v = v.draw_instance_predictions(outputs["instances"].to("cpu"))
Image.fromarray(v.get_image()[:, :, ::-1])

''' fps '''
import time
times = []
for i in range(20):
start_time = time.time()
outputs = predictor(im)
delta = time.time() - start_time
times.append(delta)
mean_delta = np.array(times).mean()
fps = 1 / mean_delta
print("Average(sec):{:.2f},fps:{:.2f}".format(mean_delta, fps))
win10下比ubuntu每张图片慢0.07秒
边栏推荐
猜你喜欢


随机推荐
无胁科技-TVD每日漏洞情报-2022-7-22
本地yum源搭建
升级到Window11体验
HPC platform building
Apache Flink jobmanager/logs 目录穿越漏洞复现
分布式事物学习
Two hundred questions in C language (0 basic continuous update) (1~5)
xx is not recognized as internal or external command
Threatless Technology-TVD Daily Vulnerability Intelligence-2022-7-26
Solve the problem that port 8080 is occupied
内存调试工具Electric Fence
Threatless Technology-TVD Daily Vulnerability Intelligence-2022-7-19
中国移动通信集团有限公司:业务委托书
Threatless Technology-TVD Daily Vulnerability Intelligence-2022-7-30
无胁科技-TVD每日漏洞情报-2022-7-29
CLUSTER DAY03( Ceph概述 、 部署Ceph集群 、 Ceph块存储)
查看CPU和其他硬件温度的软件
SECURITY DAY03(一键部署zabbix)
FusionCompute8.0.0 实验(2)虚拟机创建
无胁科技-TVD每日漏洞情报-2022-7-21