当前位置:网站首页>微信小程序云开发项目wx-store代码详解
微信小程序云开发项目wx-store代码详解
2022-08-11 05:29:00 【wendZzz】
这篇文章会很长,非常长,特别长,无敌长。
真的是挤牙膏般的项目进度,差不多是8月底有开始这个项目的想法,时至今日都1个多月了,抛去频繁的加班时间,王者时间,羽毛球时间...见缝插针的写这个项目,我竟然写完了,我竟然没有半途放弃,可真把我自己感动坏了。
好吧,主要是这个小程序很简单,本文会讲解一下这个小程序的代码,所有代码几乎是我一个个敲出来的,所有逻辑也是自己构思梳理的,因此很多实现方式并不是很好,冗余代码很多,代码质量堪忧,但我也在学习中,随着技术提升,会不断来重构代码,如果大家有任何建议欢迎私信我哦,特别感谢。

该小程序采用的云开发,没有自己搭建后端,我心目中,只要没有后端的内容我就觉得很简单。但其实我还是想有朝一日能自己独立完成前后端所有工作,写一个更棒的作品。
之前有写过几篇文章,可以回顾一下。你可能需要的文章:
天啦噜,看了半天代码发现还挺多,一时间不晓得该从哪里开始。那还是按照tab页使用逻辑顺序来吧。
启动页
之前文章也有过如何写一个启动页面。至于为什么需要个启动页呢?
我觉得主要也就两点,一个是好看,还有个就是添加获取用户信息类型按钮,间接引导用户授权获取用户信息。
至于为啥要获取用户信息?
曾真有段时间,我纠结了好久,因为我自己这个程序中,除了展示,好像也没啥需要用到这个数据的地方。
但我还是写了。
当前登陆用户的用户名和头像图片,通过 open-data 标签可以无需授权直接获取,只要指定相应类型userNickName和userAvatarUrl即可,样式只需要用view容器包裹起来进行设置。button按钮指定open-type为getUserInfo,在点击事件中就可以拿到授权之后的用户公开信息数据。
拿到用户信息需要保存到数据库中,也只需要首次登录的用户在授权之后才需要入库,所以加个判断当前登陆用户是否是首次登录,判断条件是每个用户的唯一值openId。
通过这个逻辑,那需要处理的可以分为如下几个:
1、获取当前登录用户的openId。
getOpenID() {
    let that = this;
    wx.cloud.callFunction({
        name: 'login',
        complete: res => {
            const openId = res.result.event.userInfo.openId;
            that.setData({
                openId
            })
        }
    })
},
这个login云函数是项目构建时自动生成的,云函数写法:
const cloud = require('wx-server-sdk')
cloud.init({
  env: cloud.DYNAMIC_CURRENT_ENV
})
exports.main = async (event, context) => {
  const wxContext = cloud.getWXContext()
  return {
    event,
    openid: wxContext.OPENID,
    appid: wxContext.APPID,
    unionid: wxContext.UNIONID,
    env: wxContext.ENV,
  }
}
2、获取数据库中所有用户数据。
getUsersList() {
    const that = this;
    db.collection('users').get({
        success: res => {
            that.setData({
                usersList: res.data,
            })
        },
        fail: console.error
    })
},
3、在页面刚加载的时候调用上面两个方法,拿到openId和userList。在点击按钮时,检查当前登录用户是否已经存在数据库。
goToIndex(e) {
    const that = this;
    const auth = e.detail.errMsg;
    wx.switchTab({
        url: '/pages/index/index',
    });
    if(auth === "getUserInfo:ok") {
        const avatarUrl = e.detail.userInfo.avatarUrl;
        const nickName = e.detail.userInfo.nickName;
        that.checkUser(nickName, avatarUrl);
    }
},
这里获取到用户信息数据是这个样子滴:

4、检查当前登录用户是否已经存在数据库。
checkUser(name, url) {
    const that = this;
    const list = this.data.usersList;
    const openId = this.data.openId
    const ids = [];
    list.forEach((item) => {
        ids.push(item._openid);
    })
    if(ids.indexOf(openId) === -1) {
        that.setUserInfo(name, url)
    } else {
        return;
    }
},
5、如果不存在的话,将该用户信息存入数据库users中。管它有用没用,先存着呗。
setUserInfo(name, url) {
    db.collection('users').add({
        data: {
            nickName: name,
            avatarUrl: url,
        }
    })
},
数据库中会自动给这个字段生成一个id和openId。

首页
首页从上到下分为几块,轮播图,轮播告示,icon列表,推荐商品展示。
轮播图。
直接用自带的组件,swiper和swiper-item配合使用。
<swiper class="swiper-top" indicator-dots="true" indicator-active-color="#fff" autoplay circular>
  <swiper-item wx:for="{
   {bannersList}}" wx:key="item">
    <image mode="aspectFill" data-url="{
   {item}}" src="{
   {item}}" />
  </swiper-item>
</swiper>
图片数据来自数据中定义好的。
getBannerList() {
  db.collection('banners').get({
    success: res=> {
      this.setData({
        bannersList: res.data[0].imgs,
      })
    },
    fail: console.error
  })
}
因为之前有小伙伴咨询过,如何云开发中数据库新建集合,这里用gif简单说明一下。


为啥要两个gif呢,因为超过300帧的它不给上传~
轮播告示。
和轮播图一样的,只是轮播方向不同,swiper中添加个参数 vertical。点击显示弹窗,引用的是WeUI库,咋用参考以往文章。
icon列表。
到这里就要用到本程序中最最最复杂的一个数据库集合了,几乎所有的商品数据都是存放在这个集合中的。

那icon列表就是获取goods集合中每个对象icon字段值,推荐商品列表就是每个对象中list数组中所有isHot为true的数据。
getIconList() {
  const that = this;
  const arr = [];
  db.collection('goods').get({
    success: res=> {
      const list = res.data;
      list.forEach((item) => {
        item.list.forEach((d) => {
          if(d.isHot) {
            const param = {
              ...d,
              categoryId: item._id
            };
            arr.push(param);
          }
        })
      })
      that.setData({
        categories: list,
        goodsRecommend: arr
      })
    },
    fail: console.error
  })
},
给每个icon图片上加一个跳转到分类页的点击事件,一般的跳转可以使用wx.navigateTo,而tab页的跳转只允许使用wx.switchTab,官方文档中指明这个方法是不可以后缀参数的。
而我这里肯定是需要点击不同的icon跳转到不同的分类栏目中的,那就需要在跳转时候携带该分类id,还是当前这个数组的下标。
通过定义全局参数,可以解决wx.switchTab无法携带参数的问题。
app.js中,在onLaunch里定义个全局对象。
this.globalData = {
  categoryParamId: 0,
  categoryParamIndex: 0,
}
商品分类页
在menu.js中,在最开始需要引入全局变量。
const app = getApp()那上面定义的globalData可以直接通过app拿到。
分类页这儿主要的处理逻辑有三块内容。
1、区分管理员权限和普通用户权限。
管理员权限可以有新增商品和删除的功能,普通用户只可以查看。
权限这块的处理应该会有更好的方案。
我比较挫,想到的最简单的方法就是利用openId来做过滤。在页面初次加载的时候获取当前用户的openId,和启动页一样的方法,只是回调函数中不一样。在数据库中定义个管理员集合,你需要给那些用户设置成管理员,将他们的openId放在这个集合中。
我是在app.js中获取这个管理员集合的,可能是刚刚尝过全局变量的甜头吧。
wx.cloud.database().collection('adminList').get({
    success: res => {
      this.adminList = res.data[0].admin_openId;
    },
})
那在menu.js中可以直接拿到这个adminList中数据,判断一下当前登录用户的openId在不在adminList中。
getOpenID() {
  let that = this;
  wx.cloud.callFunction({
    name: 'login',
    complete: res => {
      const openId = res.result.event.userInfo.openId;
      if(app.adminList.indexOf(openId) === -1) {
        that.setData({
          isAdmin: false
        })
      } else {
        that.setData({
          isAdmin: true
        })
      }
    }
  })
},
2、将设置成喜欢状态的商品数据存入本地缓存。
当时对于这个逻辑处理的考虑也是想了蛮久,这个小程序的制作出发点只是作为一个助手作用,方便用户查看店铺所有商品,是做一个商品分类展示的功能,不支付线上下单,主要也是因为显示下单这个功能太复杂,个人小程序没权限做。
那我就想着仅仅分类展示并不满足使用,加入个喜欢列表实用性更大。
商品的固定数据是可以存入云开发的数据库中,但是针对于每个用户不同的喜欢数据,最好的方案就是使用缓存。
localStorange的数据形式是key / value,一开始计划的是固定一个key,value中是个数组对象。
这一定是可行的,但我不会做......麻烦能实现的朋友私信我。
好的方案来不了可以来挫的嘛。我用商品的分类Id和当前商品Id拼接起来作为key,这就保证了key唯一性,那存入本地的数据是需要在喜欢列表展示的,我需要展示的数据有分类Id,id,商品名,是不是喜欢,封面缩略图,价格。明白了这几点要求,实现就很简单了。
在每个商品的爱心图标上加一个点击事件。
joinFavorites(e) {
  const that = this;
  const id = e.currentTarget.dataset.id;
  const index = e.currentTarget.dataset.index;
  const list = this.data.goodsList[this.data.curIndex].list;
  const loveList = [];
  list.forEach((item) => {
    if (item.id === id) {
      item.isLove = !item.isLove;
    }
    const param = {
      categoryId: this.data.curNav,
      id: item.id,
      name: item.goodsName,
      isLove: item.isLove,
      thumbnail: item.imgs[0],
      price: item.newPrice
    };
    loveList.push(param);
  })
  that.setData({
    goodsList: this.data.goodsList,
  })

  // 缓存的key以分类id和服装id用-连接
  const key = loveList[index].categoryId + "-" + loveList[index].id;
  this.saveLocally(key, loveList[index]);
},
// 存入本地缓存
saveLocally(key, data) {
  wx.setStorage({
    key,
    data,
  })
},
现在看这个代码,我觉得还是可以再重构优化的更好的。
3、从本地缓存中获取喜欢列表详情
有些商品是已经加入喜欢列表的,商品上的喜欢图标已经是高亮状态,等到下次进入该分类页,就应该将之前设置喜欢状态的商品显示出来,不然每次进来都是初始的模样就毫无意义了。
首先是需要获取商品列表数据,再根据本地缓存数据,将喜欢的商品数据修改一下状态。
这样就是分三步走。
获取商品列表数据。
getGoodsList() {
  const that = this;
  db.collection('goods').get({
    success: res => {
      const list = res.data;
      that.getDetails(that.data.storageData, list);

      that.setData({
        goodsList: list,
      })
    }
  })
},
读取缓存数据。
getLocally() {
  const that = this;
  wx.getStorageInfo({
    success(res) {
      if (res.currentSize > res.limitSize) {
        that.setData({
          isDialog: true
        })
      } else {
        that.setData({
          storageData: res.keys
        })
      }

    },
  })
},
从本地缓存中获取喜欢列表详情。
getDetails(localArr, goodsList) {
  const that = this;
  localArr.forEach((localItem) => {
    const itemPId = localItem.split("-")[0].toString();
    const itemId = localItem.split("-")[1].toString();
    goodsList.forEach((goodItem) => {
      if (itemPId === goodItem._id) {
        goodItem.list.forEach((item) => {
          if (itemId === item.id.toString()) {
            wx.getStorage({
              key: localItem,
              success(res) {
                item.isLove = res.data.isLove
                that.setData({
                  goodsList,
                })
              }
            })
          }
        })
      }
    })
  })
},
主要的处理逻辑就是以上这三块。还有些其他的交互方法,商品分类的切换,详情页跳转,商品删除......这些就不写了,可以去看代码,都很容易理解的。
商品详情页
点击跳转过来的时候,携带的参数只有分类id和商品id。根据这两个字段就可以在商品列表数据查询到具体所有数据。
在当前页面获取传参过来的数据。
onLoad: function (options) {
    this.setData({
        categoryId: options.categoryId,
        id: options.id
    });
}
新增商品页
按照之前数据库集合中定义的数据格式,这里就分两块。一个是相关数据的填写表单,一个就是上传的图片列表。
图片列表上传的实现,官方都给了相应的api方法。
选择图片:
wx.chooseImage({
    sizeType: ["original", "compressed"], // 可以指定是原图还是压缩图,默认二者都有
    sourceType: ["album", "camera"], // 可以指定来源是相册还是相机,默认二者都有
    success: function (res) {
        // 返回选定照片的本地文件路径列表,tempFilePath可以作为img标签的src属性显示图片
        var tempFilePaths = res.tempFilePaths;
        var imgs = that.data.imgs;
        for (var i = 0; i < tempFilePaths.length; i++) {
            if (imgs.length >= 9) {
                that.setData({
                    imgs: imgs,
                });
                return false;
            } else {
                const filePath = res.tempFilePaths[i];
                var timestamp = Date.parse(new Date());
                const cloudPath = `${timestamp}-${i}`;
                const param = {
                    cloudPath,
                    filePath,
                };
                imgs.push(param);
            }
        }
        that.setData({
            imgs: imgs,
        });
    },
});
上传图片:
uploadImgs(list) {
    const that = this;
    const imgList = [];
    list.forEach((item) => {
        wx.cloud.uploadFile({
            cloudPath: `uploadImgs/${item.cloudPath}`, // 存入uploadImgs文件夹中
            filePath: item.filePath, // 文件路径
        }).then((res) => {
            if(res.errMsg === "cloud.uploadFile:ok") {
                imgList.push(res.fileID)
            }
            that.setData({
                imgList,
            })
            if(that.data.imgList.length === that.data.imgs.length) {
                that.add()
            }
        })
        .catch((error) => {
            console.log(error);
        });
    });
},
最终把表单数据和图片列表数据到存入数据库集合中。
add() {
    const that = this;
    wx.cloud.callFunction({
        name: 'addGoods',
        data: {
            categoryId: that.data.categoryId,
            id: that.data.id,
            goodsName: that.data.goodsName,
            newPrice: that.data.newPrice,
            oldPrice: that.data.oldPrice,
            isHot: that.data.isHot,
            imgs: that.data.imgList
        }
        }).then()
},
商品新增的云函数:
const cloud = require('wx-server-sdk')
cloud.init()
const db = cloud.database()
const _ = db.command
exports.main = async (event, context) => {
    const goodsName = event.goodsName;
    const categoryId = event.categoryId;
    const id = event.id;
    const newPrice = event.newPrice;
    const oldPrice = event.oldPrice;
    const isHot = event.isHot;
    const imgs = event.imgs;
    db.collection("goods").doc(categoryId).update({
        data: {
            list: _.push({
                id,
                goodsName,
                newPrice,
                oldPrice,
                isHot,
                imgs
            })
        }
    })

    return {
        categoryId,
        id,
        goodsName,
        newPrice,
        oldPrice,
        isHot,
        imgs
    }
}
喜欢列表页
最轻松的一个页面,读取本地缓存展示数据。这里还用到了WeUI的mp-slideview组件,修改这个组件的样式还是挺麻烦,高度样式没改成功,多少存在点瑕疵。
个人信息页
这个页面已经纯属和小程序主旨功能无关了,我就是无聊写着玩凑凑页面的。想写些什么都可以自由发挥,随便添加什么功能都可以,这里我就不介绍我随便写的东西了。
至此,该篇历经四天的文章终于结束(主要是周末玩了两天),目前正文字数4500+......
我废话可真多呀。
这个小程序会继续维护,有任何不明白的地方联系我哦~
关注我吧

边栏推荐
- Node stepping on the pit 80 port is occupied
- 活动预告 | 4月23日,多场OpenMLDB精彩分享来袭,不负周末好时光
- USB URB
- Open Source Machine Learning Database OpenMLDB Contributor Program Fully Launched
- 微信小程序_开发工具的安装
- mk file introduction
- C language implementation guess Numbers (with source code, can be directly run)
- STM32-中断优先级管理NVIC
- Use the adb command to manage applications
- Tinker接入全流程---编译篇
猜你喜欢

typescript学习日记,从基础到进阶(第二章)

USB中用NRZI来编码数据
Intelligent risk control China design and fall to the ground
Fourth Paradigm OpenMLDB optimization innovation paper was accepted by VLDB, the top international database association
Day 83
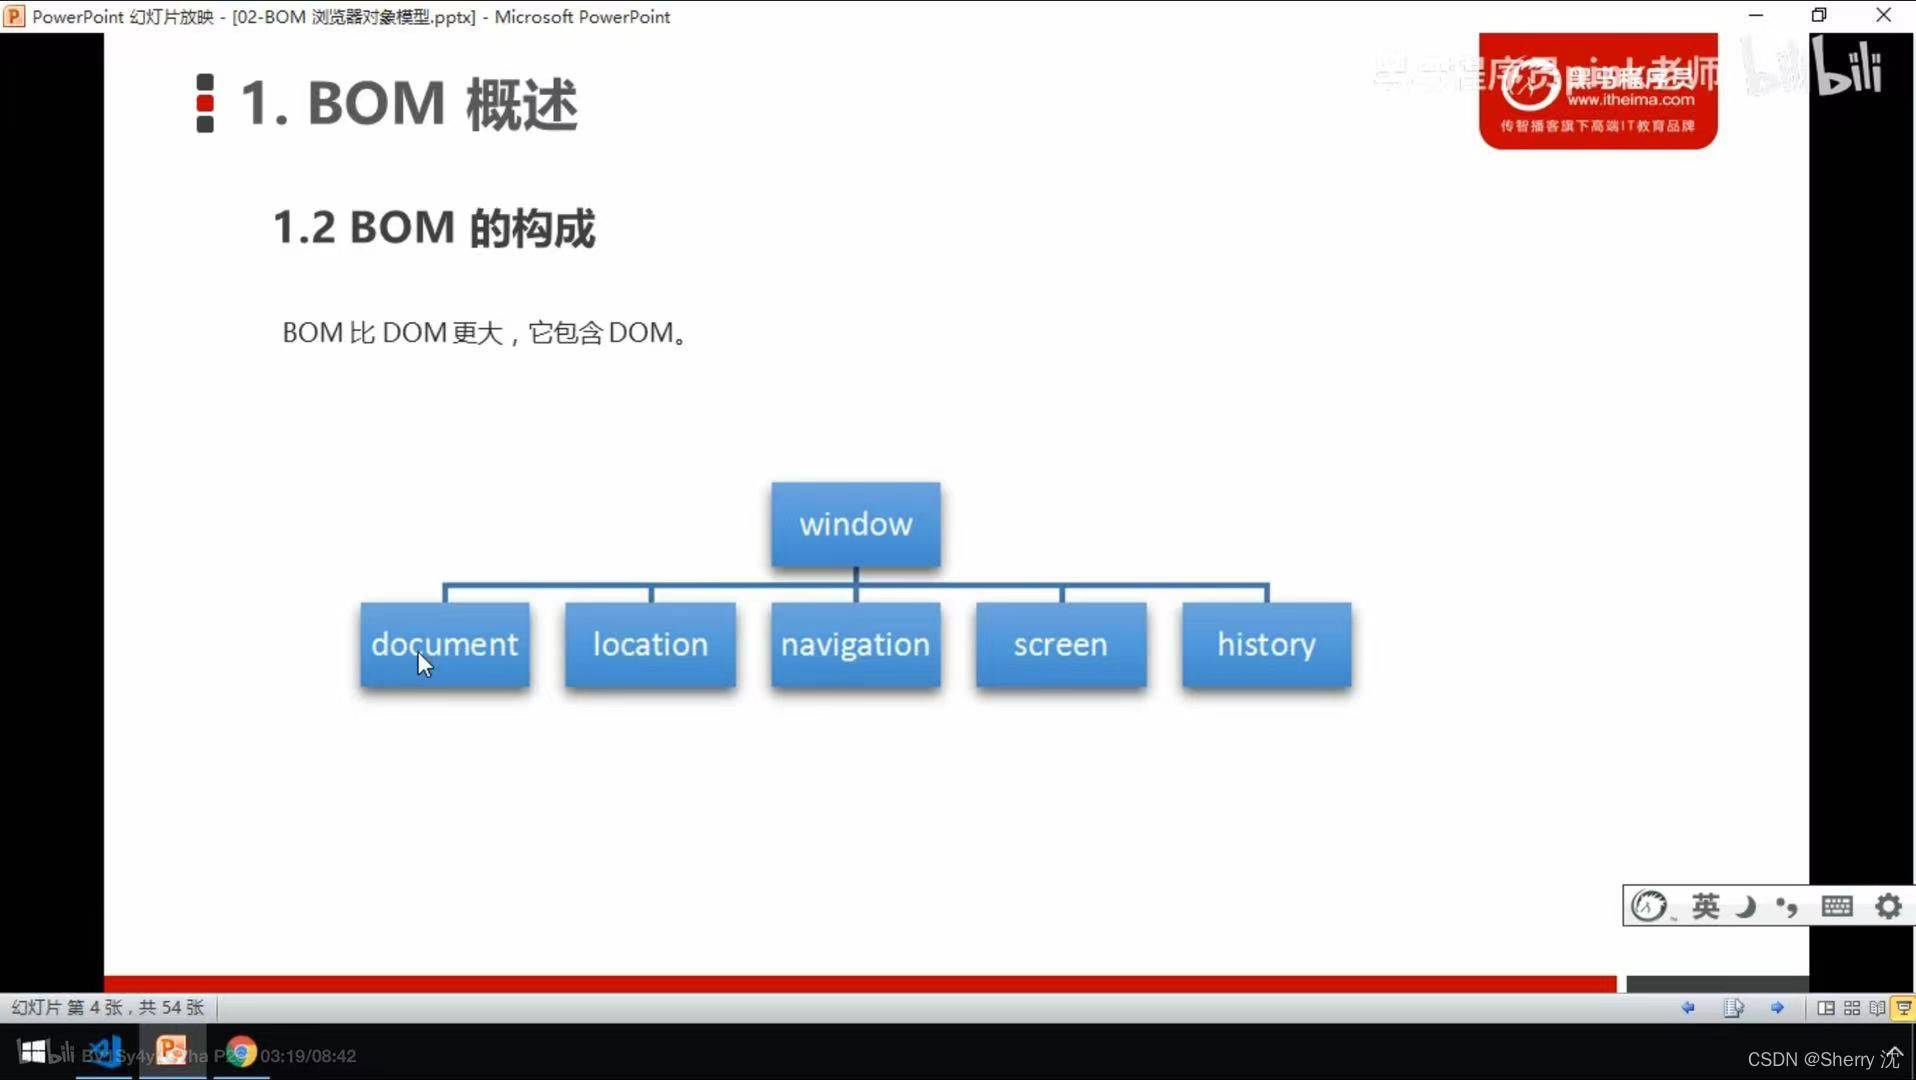
js learning advanced BOM part (pink teacher notes)
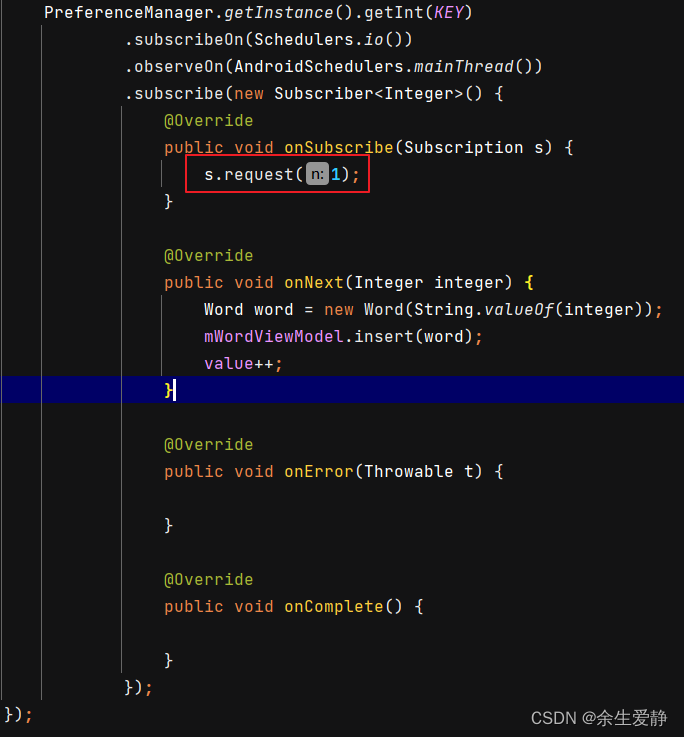
Jetpack use exception problem collection
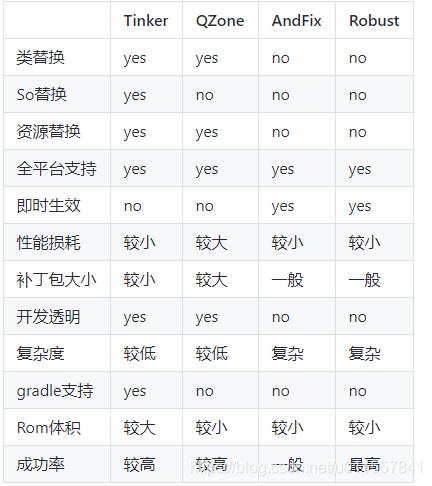
Tinker's self-introduction
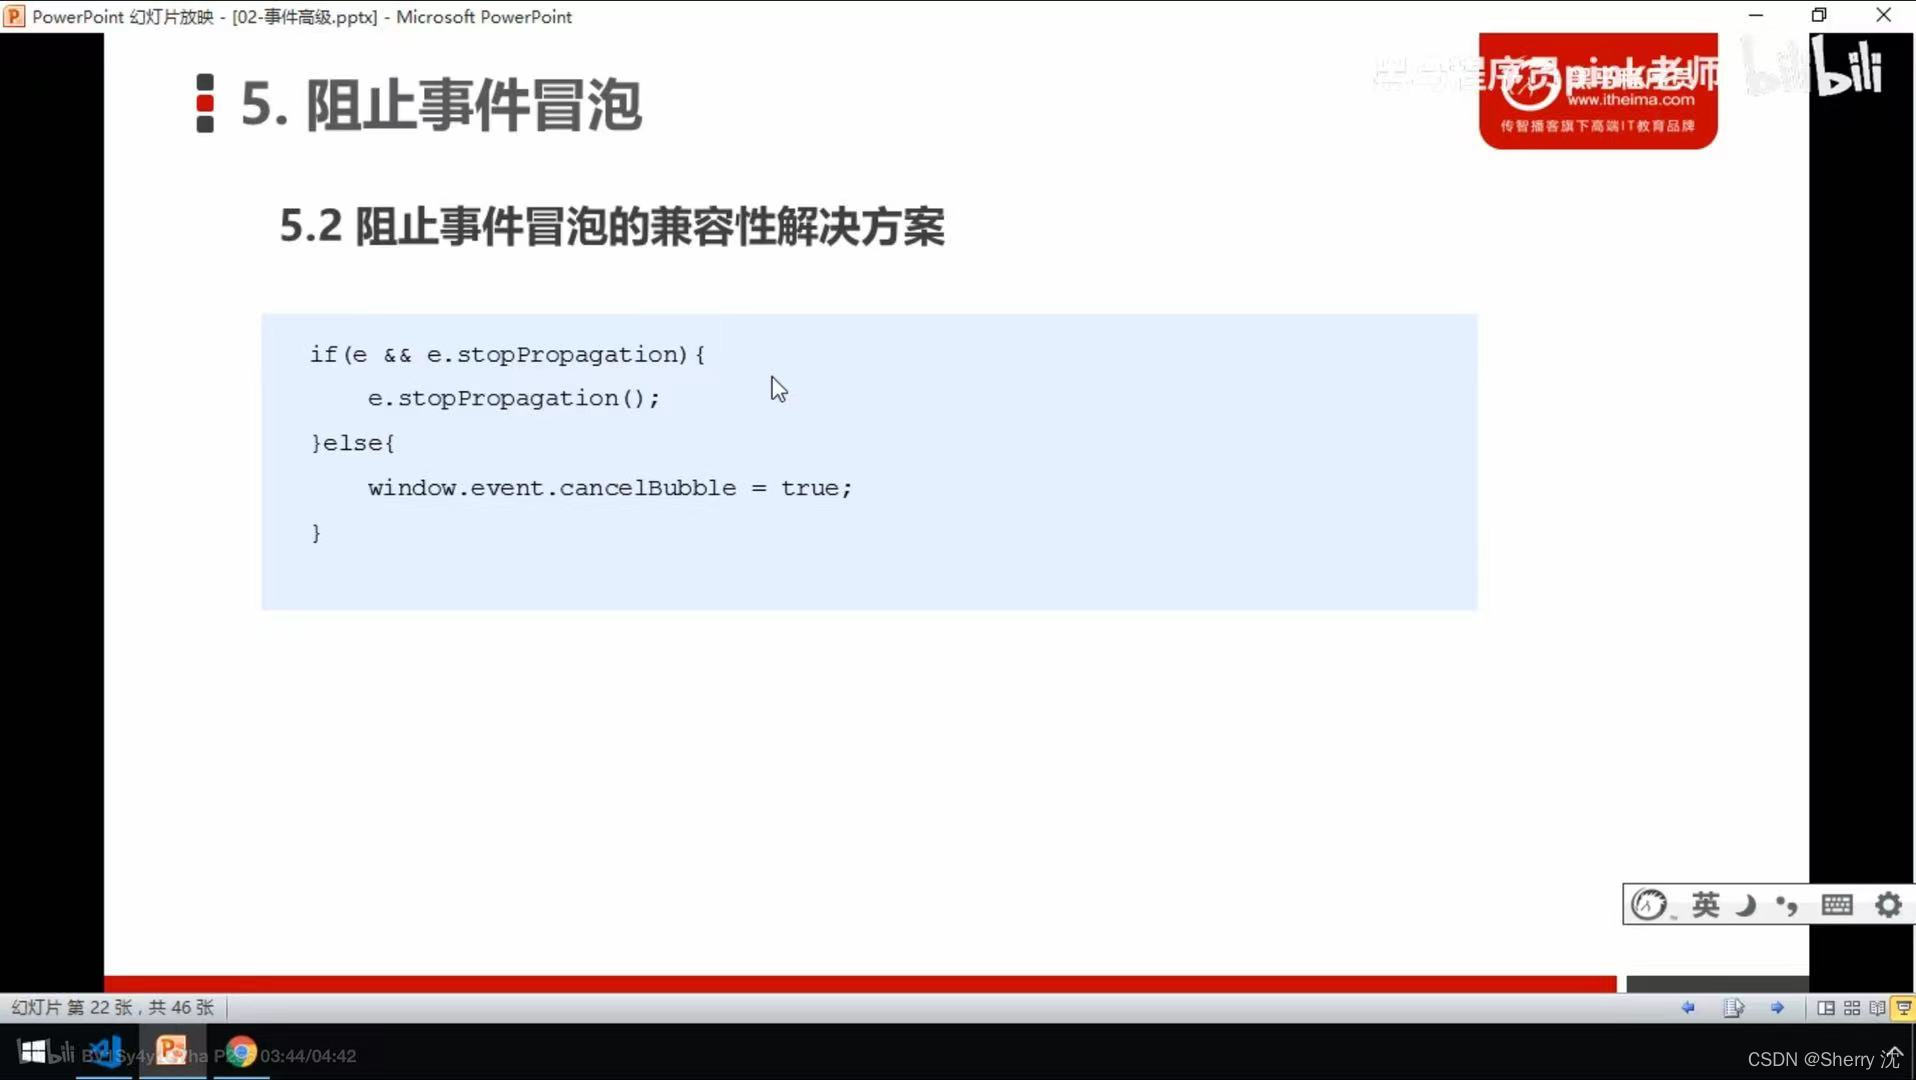
js 学习进阶(事件高级 pink老师教学笔记)
![[Meetup]OpenMLDBxDolphinScheduler 链接特征工程与调度环节,打造端到端MLOps工作流](/img/d8/a367c26b51d9dbaf53bf4fe2a13917.png)
[Meetup]OpenMLDBxDolphinScheduler 链接特征工程与调度环节,打造端到端MLOps工作流
随机推荐
Goldbach's conjecture and the ring of integers
开源机器学习数据库OpenMLDB贡献者计划全面启动
umi约定式路由规则修改
Vscode remote connection server terminal zsh+Oh-my-zsh + Powerlevel10 + Autosuggestions + Autojump + Syntax-highlighting
Jetpack use exception problem collection
USB URB
He Kaiming's new work ViTDET: target detection field, subverting the concept of layered backbone
JVM tuning and finishing
场景驱动的特征计算方式OpenMLDB,高效实现“现算先用”
Tinker's self-introduction
品优购项目实战笔记
Day 80
OpenMLDB Pulsar Connector: Efficiently connect real-time data to feature engineering
Use the adb command to manage applications
OpenMLDB + Jupyter Notebook: Quickly Build Machine Learning Applications
Real-time Feature Computing Platform Architecture Methodology and Practice Based on OpenMLDB
Jetpack使用异常问题集锦
js 学习进阶(事件高级 pink老师教学笔记)
Typescript学习日记,typescript从基础到进阶(第一章)
Invalid revision: 3.18.1-g262b901-dirty