当前位置:网站首页>vscode插件开发——代码提示、代码补全、代码分析
vscode插件开发——代码提示、代码补全、代码分析
2022-08-11 05:25:00 【Mino.66】
之前想自己写一个代码提示的插件,在网上看别人的攻略都不太满意,最后自己去啃了官方文档,英文不好磕磕碰碰的,不过还是有个阶段性的成果,今天写出来分享给大家
例行贴一下官网链接
https://code.visualstudio.com/api//
英语不好也是个问题,好在国内大佬们做过翻译,贴一下中文文档
https://liiked.github.io/VS-Code-Extension-Doc-ZH/
不过因为api部分的内容更新太快,所以还是要看官网的文档
想看效果的先直接往底下翻,因为内容比较多,就不放在文章前面了。因为我这次是只讲代码补全的内容,插件开发的其它细节涉及很少,大家如果之前完全没接触过这方面内容的话建议和我一样先在官方sample上修改代码,官方配置都配好了,直接用就行了
https://github.com/microsoft/vscode-extension-samples/tree/main/lsp-sample
下载代码后进到 lsp-sample 目录下,进到几个有package.json的目录下依次执行 npm i 或者 yarn,然后ctrl + shift + b开启代码更改监听,再按f5启动项目在宿主客户端中进行测试,或者开启监听后点击下面的按钮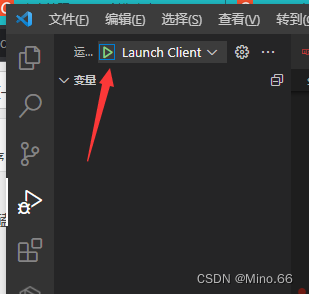
正文
在设置有基本的插件服务端和客户端的情况下,实现代码补全主要依靠两个函数(实际后面发现还有一个函数使用也很频繁,这里不对这篇文章做大幅度改动,详情参考我下一篇文章)
- connection.onCompletion
- documents.onDidChangeContent
第一个是代码补全时的主要函数,它可以设置代码补全的提示内容、插入内容、插入位置、以及可以对何时进行代码提示做出一定的条件限制
第二个函数是文本发生变更时会调用的函数,有了它我们能实现更加复杂的代码提示功能,包括更加灵活的代码补全提示时机,对文件内全部的代码做分析,正则等等
最基础的代码补全主要围绕 connection.onCompletion 展开
onCompletion
函数会接收到一个参数(默认行为),这个参数会包含用户当前光标的一些位置信息(即用户正在文件中的哪个位置在编辑代码),这个参数后面要讲,这里先说一下函数的返回内容。函数会返回一个CompletionItem数组类型的对象,vscode会根据这个返回对象来为用户提供代码提示补全的功能。
在官方的示例代码中,它的格式是这样的
connection.onCompletion(
	(_textDocumentPosition: TextDocumentPositionParams): CompletionItem[] => {

		// The pass parameter contains the position of the text document in
		// which code complete got requested. For the example we ignore this
		// info and always provide the same completion items.
		return [
			{

				label: 'TypeScript',
				kind: CompletionItemKind.Text,
				data: 1
			},
			{

				label: 'JavaScript',
				kind: CompletionItemKind.Text,
				data: 2
			}
		];
	}
);
这个返回对象,会帮助用户添加两个代码提示,分别是 TypeScript JavaScript,即输入Ty时就会弹出typescript的补全提示(在官方的例子中基本都是设置在纯文本中进行补全提示,即在宿主端你需要新建一个txt文本敲相应的内容才会有反应,配置的更改会在下文中介绍)
标签的内容会在下方进行详细的介绍,这里先不着急
我们先直接上官方关于这个 CompletionItem (反参)的接口代码
export interface CompletionItem {

    /** * The label of this completion item. By default * also the text that is inserted when selecting * this completion. */
    label: string;
    /** * The kind of this completion item. Based of the kind * an icon is chosen by the editor. */
    kind?: CompletionItemKind;
    /** * Tags for this completion item. * * @since 3.15.0 */
    tags?: CompletionItemTag[];
    /** * A human-readable string with additional information * about this item, like type or symbol information. */
    detail?: string;
    /** * A human-readable string that represents a doc-comment. */
    documentation?: string | MarkupContent;
    /** * Indicates if this item is deprecated. * @deprecated Use `tags` instead. */
    deprecated?: boolean;
    /** * Select this item when showing. * * *Note* that only one completion item can be selected and that the * tool / client decides which item that is. The rule is that the *first* * item of those that match best is selected. */
    preselect?: boolean;
    /** * A string that should be used when comparing this item * with other items. When `falsy` the [label](#CompletionItem.label) * is used. */
    sortText?: string;
    /** * A string that should be used when filtering a set of * completion items. When `falsy` the [label](#CompletionItem.label) * is used. */
    filterText?: string;
    /** * A string that should be inserted into a document when selecting * this completion. When `falsy` the [label](#CompletionItem.label) * is used. * * The `insertText` is subject to interpretation by the client side. * Some tools might not take the string literally. For example * VS Code when code complete is requested in this example `con<cursor position>` * and a completion item with an `insertText` of `console` is provided it * will only insert `sole`. Therefore it is recommended to use `textEdit` instead * since it avoids additional client side interpretation. */
    insertText?: string;
    /** * The format of the insert text. The format applies to both the `insertText` property * and the `newText` property of a provided `textEdit`. If omitted defaults to * `InsertTextFormat.PlainText`. */
    insertTextFormat?: InsertTextFormat;
    /** * How whitespace and indentation is handled during completion * item insertion. If ignored the clients default value depends on * the `textDocument.completion.insertTextMode` client capability. * * @since 3.16.0 */
    insertTextMode?: InsertTextMode;
    /** * An [edit](#TextEdit) which is applied to a document when selecting * this completion. When an edit is provided the value of * [insertText](#CompletionItem.insertText) is ignored. * * Most editors support two different operation when accepting a completion item. One is to insert a * completion text and the other is to replace an existing text with a completion text. Since this can * usually not predetermined by a server it can report both ranges. Clients need to signal support for * `InsertReplaceEdits` via the `textDocument.completion.insertReplaceSupport` client capability * property. * * *Note 1:* The text edit's range as well as both ranges from a insert replace edit must be a * [single line] and they must contain the position at which completion has been requested. * *Note 2:* If an `InsertReplaceEdit` is returned the edit's insert range must be a prefix of * the edit's replace range, that means it must be contained and starting at the same position. * * @since 3.16.0 additional type `InsertReplaceEdit` */
    textEdit?: TextEdit | InsertReplaceEdit;
    /** * An optional array of additional [text edits](#TextEdit) that are applied when * selecting this completion. Edits must not overlap (including the same insert position) * with the main [edit](#CompletionItem.textEdit) nor with themselves. * * Additional text edits should be used to change text unrelated to the current cursor position * (for example adding an import statement at the top of the file if the completion item will * insert an unqualified type). */
    additionalTextEdits?: TextEdit[];
    /** * An optional set of characters that when pressed while this completion is active will accept it first and * then type that character. *Note* that all commit characters should have `length=1` and that superfluous * characters will be ignored. */
    commitCharacters?: string[];
    /** * An optional [command](#Command) that is executed *after* inserting this completion. *Note* that * additional modifications to the current document should be described with the * [additionalTextEdits](#CompletionItem.additionalTextEdits)-property. */
    command?: Command;
    /** * A data entry field that is preserved on a completion item between * a [CompletionRequest](#CompletionRequest) and a [CompletionResolveRequest] * (#CompletionResolveRequest) */
    data?: any;
}
如果你也和我一样英语渣看不懂,不要紧,我对这部分内容进行了翻译,它并不是直接对着官方的注释直译,而是在我自己理解并且进行了一些简单的测试后以尽量通俗的语言进行的描述,希望能对你有帮助,如果有不准确或错误的地方也欢迎告知我,万分感谢!
export interface CompletionItem {

    /** * 即将补全的代码的显示内容,在默认情况下,它就是触发具体代码补全的文本以及插入 * 的代码文本内容,在比较详细的配置中,它可能只是补全代码的提示内容 */
    label: string;
    /** * 补全代码的类型,会决定代码前面显示的具体图标(系统图标,即便我们有个性化涉及的图标也会跟在这个图标后面) */
    kind?: CompletionItemKind;
    /** * 代码的标签,在使用1时会显示弃用的效果 */
    tags?: CompletionItemTag[];
    /** * 补全代码的介绍内容的标题 */
    detail?: string;
    /** * 补全代码的详细介绍 */
    documentation?: string | MarkupContent;
    /** * 该代码补全是否弃用 */
    deprecated?: boolean;
    /** * 是否将该代码提示提升到提示列表中的最上方(第一个) */
    preselect?: boolean;
    /** * 排序字符串,有配置这个的代码补全对象会依据这个进行排序,展示在代码列表中 */
    sortText?: string;
    /** * 过滤字符串,当使用这个时label可能会失去触发代码提示的功能,而是根据该字符串内容 * 触发,允许多个对象有相同的过滤内容 */
    filterText?: string;
    /** * 插入文本?这个属性的官方介绍中似乎在说这个属性会决定代码补全时具体插入的代码内容 * 但是官方还说,这个属性插入的内容会因为客户端的解释行为而发生改变,因此官方建议使用 * textEdit(下方的另外一个属性)替换,所以我也没有测试这个属性,不确定实际效果 */
    insertText?: string;
    /** * 插入文本的格式?看接口有两种格式,一种是编辑文本,一种是代码片段,但在实际测试中我并 * 没有理解这两个类型的区别 */
    insertTextFormat?: InsertTextFormat;
    /** * 官方介绍似乎是说空白 * @since 3.16.0 */
    insertTextMode?: InsertTextMode;
    /** * 插入文本,就是代码补全的具体内容,不仅如此还能选择插入的范围 */
    textEdit?: TextEdit | InsertReplaceEdit;
    /** * 额外插入的代码,会被一起插入到文本中,它还能选择插入的位置,这个也许要配合一些场景使用? * 比如在插入某段代码的时候在代码顶部导入某个包体等等 */
    additionalTextEdits?: TextEdit[];
    /** * 我的理解是快速选择的代码,在代码提示内容被激活的时候敲击指定的字符,就能快速将 * 代码补全同时键入你敲击的那个字符,这个一般情况可能感受不到效果,建议label与具体 * 插入的文本作区别时使用,感受会比较明显 */
    commitCharacters?: string[];
    /** * 命令,在键入具体的代码补全后同时执行某些命令,这个需要一些额外的配置 */
    command?: Command;
    /** * 这个直接看官方例子的用法吧 */
    data?: any;
}
onDidChangeContent
该函数会在编辑内容发生变更时调用,入参是change对象,可以拿到编辑文本的一些属性
change.documen
.lineCount: 获取编辑内容的行数
.positionAt: 获取编辑内容的位置,通常和正则表达式一起使用对代码进行分析
.version:编辑内容的变更计数
实战
接下来是实战,如果你是在官网的sample上进行修改的,首先我们需要调整一部分代码
先到client/src/extention.ts中,一般在40行左右
	// Options to control the language client
	const clientOptions: LanguageClientOptions = {

		// 仅针对ts文件
		documentSelector: [{
     scheme: 'file', language: 'typescript' }],
		synchronize: {

			// Notify the server about file changes to '.clientrc files contained in the workspace
			fileEvents: workspace.createFileSystemWatcher('**/.clientrc')
		}
	};
修改documentSelector的内容,这玩意大家应该看一眼就能知道怎么改
再到server/src/server.ts中,一般在190行左右
connection.onCompletion(
	(_textDocumentPosition: TextDocumentPositionParams): CompletionItem[] => {

		// The pass parameter contains the position of the text document in
		// which code complete got requested. For the example we ignore this
		// info and always provide the same completion items.
		return [
			{

				label: 'MinoMino',
				kind: CompletionItemKind.Text,
				data: 3
			},
		];
	}
);
我们在返回的数组中添加一个内容,label就是代码提示的内容,在这种最简单的情景中,label也是代码补全的内容。kind是使用的系统图标,data这里不填也行,填的话我们可以到下方的 connection.onCompletionResolve 中修改部分代码
connection.onCompletionResolve(
	(item: CompletionItem): CompletionItem => {

		if (item.data === 1) {

			item.detail = 'TypeScript details';
			item.documentation = 'TypeScript documentation';
		} else if (item.data === 2) {

			item.detail = 'JavaScript details';
			item.documentation = 'JavaScript documentation';
		} else {

			item.detail = '测试内容';
			item.documentation = '如果你看到这句话,说明插件已经成功运行';
		}
		return item;
	}
);
最后到最外层的package.json中,
"activationEvents": [
		"onLanguage:typescript"
	],
这个是设置插件何时被激活,在这里我设置的是打开typescript文件就激活,系统默认的应该是打开纯文本激活
这样就应该可以了,没错,这样就已经完成了最简单的代码补全插件开发,不过目前插件只能提示一个内容,我们ctrl + shift + B,开启监听,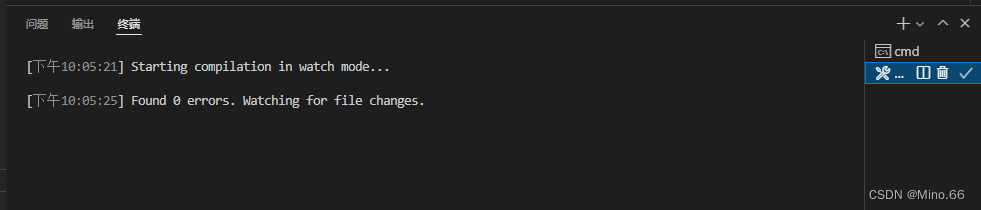
然后我们运行代码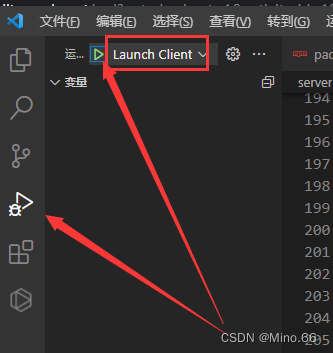
然后会打开一个新的vscode窗口,我们新建一个ts文件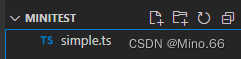
接下来敲下我写的关键字(记得要让vscode加载完配置后再敲,不然没反应),Mi(你在label里写了啥就敲啥)
没有问题,这一个实例我们就使用到了label,kind,data,detail,documentation五个属性,接下来我们开始将我们的配置细化,deprecated就不测试了,我们试试 preselect
return [
			{

				label: 'MinoMino',
				kind: CompletionItemKind.Text,
				data: 3,
				preselect: true,
			},
		];
可以看到,提示选项被移到了最上方,这样就可以优先选择
接下来是sortText,我们先增加一个代码提示
return [
	{

		label: 'MinoMino',
		kind: CompletionItemKind.Text,
		data: 3,
		sortText: 'b'
	},
	{

		label: 'MinoMin',
		kind: CompletionItemKind.Text,
		sortText: 'a'
	}
];
我们配置了两个内容,这两个内容一旦同时出现,就会根据sortText进行排序,在我们的配置中,MinoMin配置的a,在b的前面,所以选项也会出现在前面
接下来继续细化我们的配置,filterText
return [
	{

		label: 'MinoMino',
		kind: CompletionItemKind.Text,
		data: 3,
		sortText: 'b',
		filterText: 'hello'
	},
	{

		label: 'MinoMin',
		kind: CompletionItemKind.Text,
		sortText: 'a',
		filterText: 'hello'
	}
];
可以看到,label已经失效了,不再作为代码提示的触发词,而是使用filterText,尽管filterText和label内容完全没有关联
为了控制篇幅(虽然已经失败了),中间几个大家就自己去完成吧,我把稍微复杂点的textEdit介绍一下
textEdit需要接收一个对象,这个对象有两个属性,range和newText,newText很简单,就是代码补全的具体文本,range稍复杂,它描述的是代码提示的位置,也就是只有在文本中的该位置才能触发代码提示,而range对象也有两个属性
range: {

	start: textRange,
	end: textRange
},
看名字就能理解意思,就是开始的位置和结束的位置,对应的代码提示必须要在这个范围内才会被触发,start和end是相同类型的对象,它们都有两个属性,分别是line和character
const textRange = {

	line: _textDocumentPosition.position.line,
	character: 0
}
line对应的就是在代码中的第几行,而character就是对应的第几个字符,在多数情况下是0
大家可以看到,我标记line用了_textDocumentPosition这个对象,仔细看过上面代码的人应该能很快反应过来这个是我们函数onCompletion的入参,从这个入参上我们能拿到当前用户正在编辑第几行代码,综上,这部分最终的配置如下
const textRange = {

	line: _textDocumentPosition.position.line,
	character: 0
}
return [
	{

		label: 'MinoMino',
		kind: CompletionItemKind.Text,
		data: 3,
		sortText: 'b',
		filterText: 'hello',
		textEdit: {

			range: {

				start: textRange,
				end: textRange
			},
			newText: 'Hello World'
		}
	},
	{

		label: 'MinoMin',
		kind: CompletionItemKind.Text,
		sortText: 'a',
		filterText: 'hello'
	}
];
大家应该会有疑问,为什么start和end是一样的值,这个就要提到textEdit的用法了,在TextEdit的接口中,有这样的注释
/** * The range of the text document to be manipulated. To insert * text into a document create a range where start === end. */
  range: Range;
在上面其实就提到过,textEdit有两种模式,一种是插入,一种是替换,因为篇幅问题这里不详细展开,只简单演示下插入的效果
这时候就能看出,label只决定了代码提示的内容,只是在默认情况下会被当做是触发提示和完成提示的文本内容,而当filterText和textEdit都配置了的时候,对应的文本内容就和label无关了
至此我们基本算是讲完了代码提示和补全的基础内容,不过在前面我们也提到过,普通的语言服务器通常还会使用到另外一个函数,就是 onDidChangeContent ,因为入参能够拿到整个代码文本,所以很多时候这个函数可能会被用在代码分析上,在官方的例子中,我们可以看到,它被使用在了拼写提示上
// The content of a text document has changed. This event is emitted
// when the text document first opened or when its content has changed.
documents.onDidChangeContent(change => {

	validateTextDocument(change.document);
});

async function validateTextDocument(textDocument: TextDocument): Promise<void> {

	// In this simple example we get the settings for every validate run.
	const settings = await getDocumentSettings(textDocument.uri);

	// The validator creates diagnostics for all uppercase words length 2 and more
	const text = textDocument.getText();
	const pattern = /\b[A-Z]{2,}\b/g;
	let m: RegExpExecArray | null;

	let problems = 0;
	const diagnostics: Diagnostic[] = [];
	while ((m = pattern.exec(text)) && problems < settings.maxNumberOfProblems) {

		problems++;
		const diagnostic: Diagnostic = {

			severity: DiagnosticSeverity.Warning,
			range: {

				start: textDocument.positionAt(m.index),
				end: textDocument.positionAt(m.index + m[0].length)
			},
			message: `${
      m[0]} is all uppercase.`,
			source: 'ex'
		};
		if (hasDiagnosticRelatedInformationCapability) {

			diagnostic.relatedInformation = [
				{

					location: {

						uri: textDocument.uri,
						range: Object.assign({
    }, diagnostic.range)
					},
					message: 'Spelling matters'
				},
				{

					location: {

						uri: textDocument.uri,
						range: Object.assign({
    }, diagnostic.range)
					},
					message: 'Particularly for names'
				}
			];
		}
		diagnostics.push(diagnostic);
	}

	// Send the computed diagnostics to VSCode.
	connection.sendDiagnostics({
     uri: textDocument.uri, diagnostics });
}
这里,官方使用 textDocument.getText() 拿到完整的代码文本,写了一个正则表达式进行匹配,当有两个连续的大写字母时,就会有拼写错误的提示,它的实际表现效果如下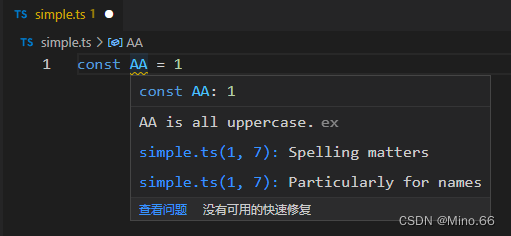
这个例子很简单
我们可以联动两个函数的功能,写一个小例子
很多时候我们需要写代码片段,不过有些代码片段我们只希望在刚打开文件时出现提示,而之后便不再出现,这个时候仅靠 connection.onCompletion 可能就不太好弄了,但是有了 onDidChangeContent 的话,实现这个功能可太简单了,上面我们提到过一个属性,version,它可以告知我们代码被修改过多少次(当然,每次重新打开文件时这个属性会被重置),我们只需要加一个条件语句就可以轻松实现这个功能
let version: number
async function validateTextDocument(textDocument: TextDocument): Promise<void> {

	// In this simple example we get the settings for every validate run.
	const settings = await getDocumentSettings(textDocument.uri);

	// The validator creates diagnostics for all uppercase words length 2 and more
	const text = textDocument.getText();
	version = textDocument.version
然后是修改之前的地方,怕有人会晕,这里贴出完整代码
connection.onCompletion(
	(_textDocumentPosition: TextDocumentPositionParams): CompletionItem[] => {

		// The pass parameter contains the position of the text document in
		// which code complete got requested. For the example we ignore this
		// info and always provide the same completion items.
	const textRange = {

		line: _textDocumentPosition.position.line,
		character: 0
	}
	if (version <= 3) {

		return [
			{

				label: '测试代码片段',
				kind: CompletionItemKind.Text,
				detail: '代码补全片段',
				documentation: '这个文本内容仅在文件第一次打开时生效',
				preselect: true,
				filterText: 'myf',
				textEdit: {

					range: {

						start: textRange,
						end: textRange
					},
					newText: ` const f = () => { return ( <div></div> ) } export default f `
				}
			}
		]
	}
	return [
		{

			label: 'MinoMino',
			kind: CompletionItemKind.Text,
			data: 3,
			sortText: 'b',
			filterText: 'hello',
			textEdit: {

				range: {

					start: textRange,
					end: textRange
				},
				newText: 'Hello World'
			}
		},
		{

			label: 'MinoMin',
			kind: CompletionItemKind.Text,
			sortText: 'a',
			filterText: 'hello'
		}
	];
}
);
然后,我们启动程序,查看效果
(这里detail没有生效是因为忘记删下面的代码了,大家知道怎么回事就行,我就不重新测试了)
可以看到,我们使用过以此这个代码提示片段后,后面再也不会出现,因为代码修改次数已经大于3了(真实情况这段代码应该写在tsx文件中,而不是ts文件中)
个性化定制
讲了这么多还没讲完,没错!我决定加一点有意思的内容,大家有了自己的代码提示了,但是可能并不满足,因为我没有自己的图标啊!我要怎样告知别人这段提示代码来自我写的插件呢?难道我只能使用系统的图标吗?
很遗憾,我暂时没找到能够替换系统图标的办法,但是这并不是说我们就不能做个性化定制了,不知道大家有没有使用过一款叫tabnine的插件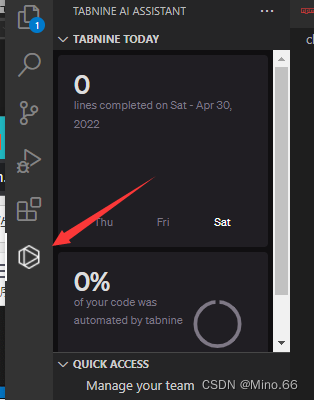
这个插件能够根据你的习惯做一些代码提示,很多时候还是挺好用的。在使用这个插件的提示时我们可以注意到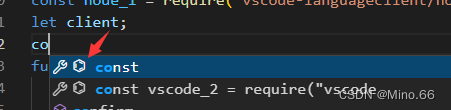
它有自己的图标!
虽然还是跟在了系统图标的后面,但是这样已经可以区分告诉别人这段代码提示来自于某个插件了,那么我们要怎样实现这样的效果呢?
其实这东西可能比你想象中要简单很多,在官方文档中,我们可以找到这样的内容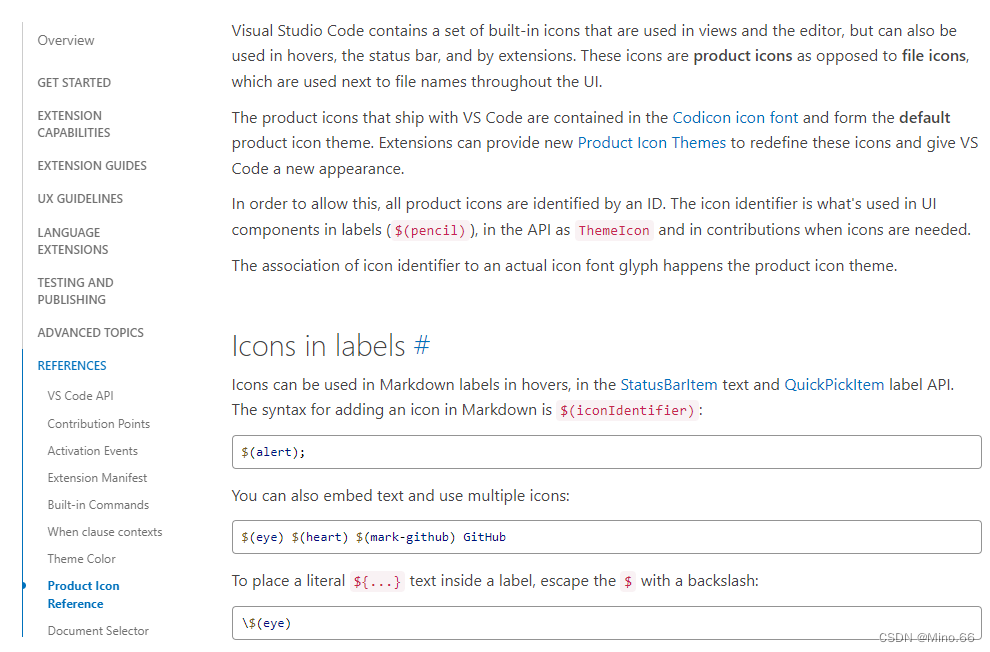
也许找的内容并不对,但我喜欢直接上手尝试,不行我们再想办法嘛
{

	label: '\$(eye) MinoMino',
	kind: CompletionItemKind.Text,
	data: 3,
	sortText: 'b',
	filterText: 'Mino',
	textEdit: {

		range: {

			start: textRange,
			end: textRange
		},
		newText: 'Hello World'
	}
},
(为了更好的测试体验,记得把之前的if判断删掉哦)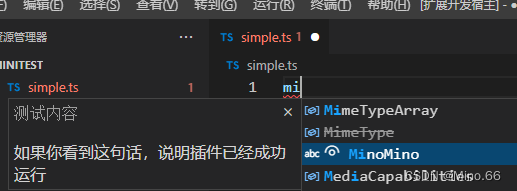
居然可以!
当然,这些是官方提供了个入口,那么如果我想要自己定制一个图标要怎样操作呢?
这个会稍微复杂一点,我们找到官方文档对应的内容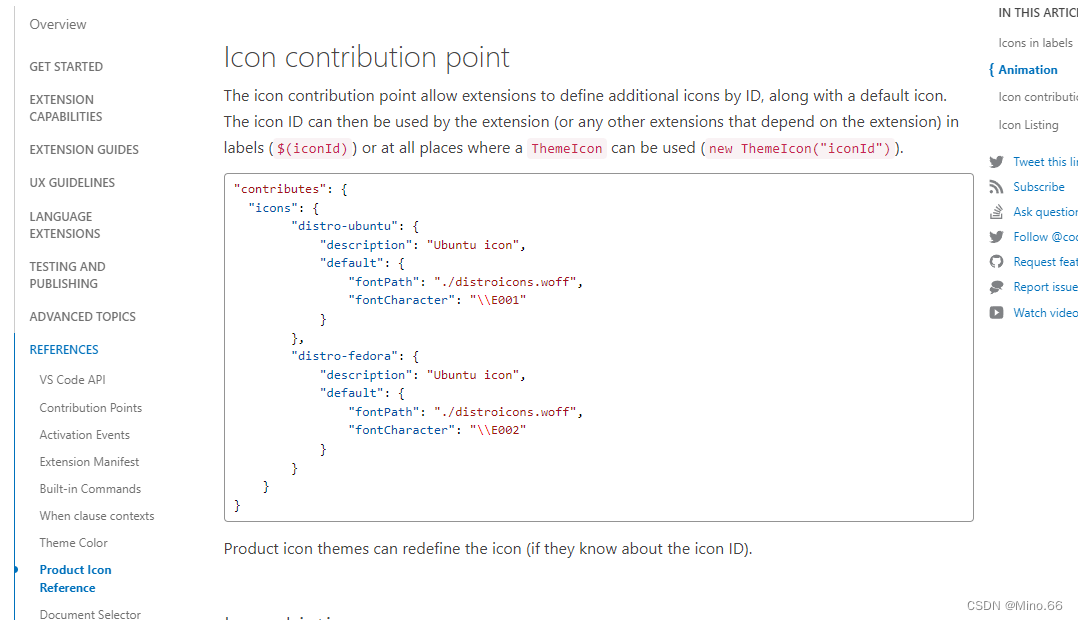
要改配置,同时要有自己的图标文件,这里给大家推荐个网站
https://icomoon.io/app/#/select
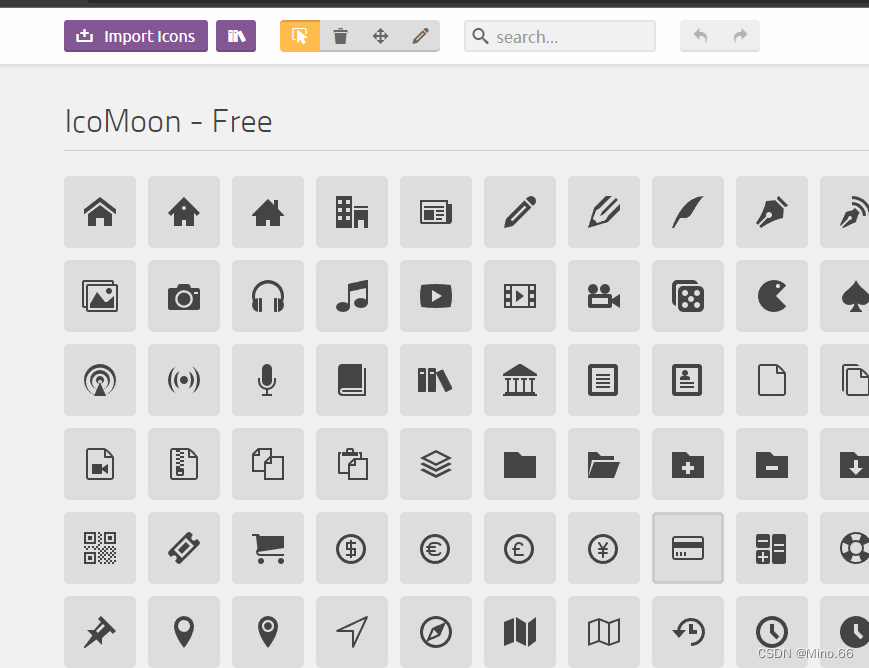
网站内容大家自己探索吧,这里我随便选一个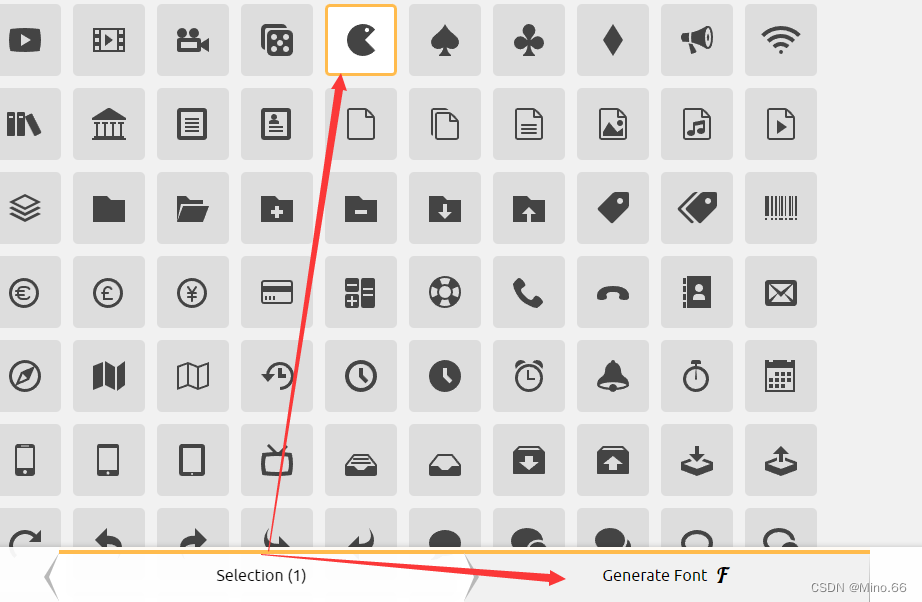

下载后找到目录中的.woff文件(ttf也行)
放到目录中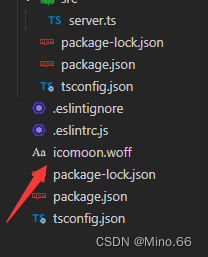
然后修改package文件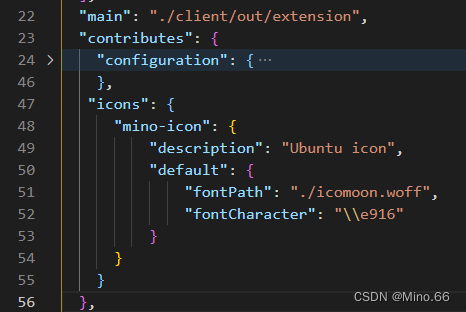
注意,fontCharacter是你在下载时网站那边显示的内容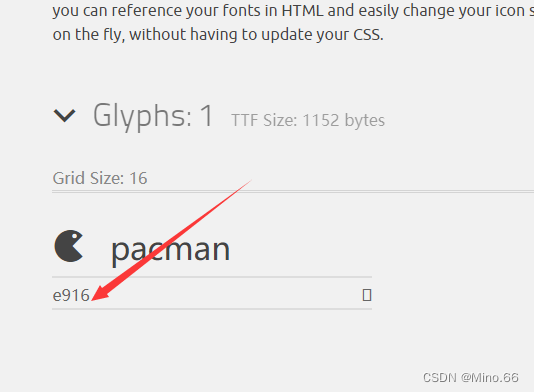
这时可以更改的,但要注意保持一致
我们把filterText改成与label完全不一样的内容(一样时会触发icon的检索,后面有机会聊这个问题)
现在测试我们的代码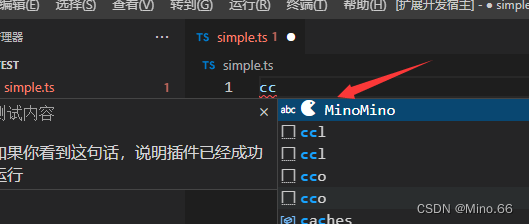
结束!
说实话一次写这么多内容对于一篇博客来讲有点不合格了,主要文章没有什么结构,比较乱,篇幅也控制的不好。如果这样你也能耐心看完,就真的非常感谢!我也会继续学习如何写出一篇合格的博客!最后,如果这篇文章有哪些地方有错误,希望大家能够告知我改进!再次感谢!
惯例贴一下我的notion地址(诶嘿)
https://seasoned-quasar-8c8.notion.site/e2b1ae0464304fdc81d5bd5db0ae5801
下一章内容补充
https://blog.csdn.net/luoluoyang23/article/details/125027963
边栏推荐
- Kotlin 增量编译的新方式 | 技术解析
- Maykel Studio - Django Web Application Framework + MySQL Database Third Training
- yolov3+centerloss+replay buffer实现单人物跟踪
- SCNet:Semantic Consistency Networks for 3D Object Detection
- 音乐竞品分析:酷狗、QQ音乐、网易云、酷我、汽水音乐
- net6的Web MVC项目实现限流功能
- 关于接口响应内容的解码
- The kernel communicates with user space through character devices
- TAMNet: A loss-balanced multi-task model for simultaneous detection and segmentation
- SWOT分析法
猜你喜欢
梅科尔工作室-Pr第一次培训笔记(安装及项目创建)
LiDAR Snowfall Simulation for Robust 3D Object Detection
Safety helmet identification system - escort for safe production

Hard hat recognition algorithm

Zhejiang University School of Software 2020 Guarantee Research Computer Real Question Practice
使用ActiveReports制作第一张报表

梅科尔工作室-DjangoWeb 应用框架+MySQL数据库第三次培训
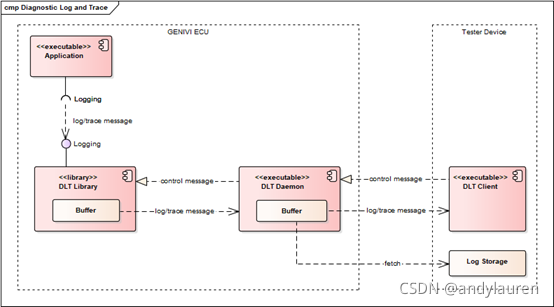
Diagnostic Log and Trace——dlt的编译和安装
红外线一认识
梅科尔工作室-PR第三次培训笔记(效果与转场及插件使用)
随机推荐
AI智能图像识别的工作原理及行业应用
网络七层结构(讲人话)
梅科尔工作室-HarmonyOS应用开发第四次培训
TAMNet: A loss-balanced multi-task model for simultaneous detection and segmentation
OpenPCDet安装最新版:spconv一步到位
STM32学习笔记(白话文理解版)—按键控制
CMT2380F32模块开发8-Base Timer例程
Mei cole studios - fifth training DjangoWeb application framework + MySQL database
音乐竞品分析:酷狗、QQ音乐、网易云、酷我、汽水音乐
CMT2380F32模块开发11-RTC例程
weex入门踩坑
梅科尔工作室-DjangoWeb 应用框架+MySQL数据库第四次培训
SCNet:Semantic Consistency Networks for 3D Object Detection
AI-based intelligent image recognition: 4 different industry applications
aPaaS和iPaaS的区别
目标检测——LeNet
Diagnostic Log and Trace——DLT 离线日志存储
自定义形状seekbar学习--方向盘view
推出 Space Marketplace 测试版 | 新发布
关于安全帽识别系统,你需要知道的选择要点