当前位置:网站首页>OLED multi-level menu record
OLED multi-level menu record
2022-04-23 03:07:00 【Taochengqi 2.0】
List of articles
As a mature project , There must not be only one feature , In general, we may need a system to schedule , Then give some visual UI, Of course, I mentioned earlier HMI Use of serial port screen , The serial port screen is really very good UI Tools , But some smaller projects are not used , So if there are some low-cost DIY Project , Usually we use OLED That's enough , enough mini, Enough to feel !
So in this article, I decided to record my transplantation oled Some process of menu , At the same time, I hope to help the brothers who read this article get started faster OLED menu !
1、 Key driven
Here, I talked about an open source keystroke tool in my previous article , Here, in order to save code , I found a more convenient way to drive , Let's introduce :
1、 Hardware connection
The simpler it is, the better , So just connect it directly here , I don't do any filter circuits anymore , Of course, it's better to have a filter, hahaha , The schematic diagram is as follows :

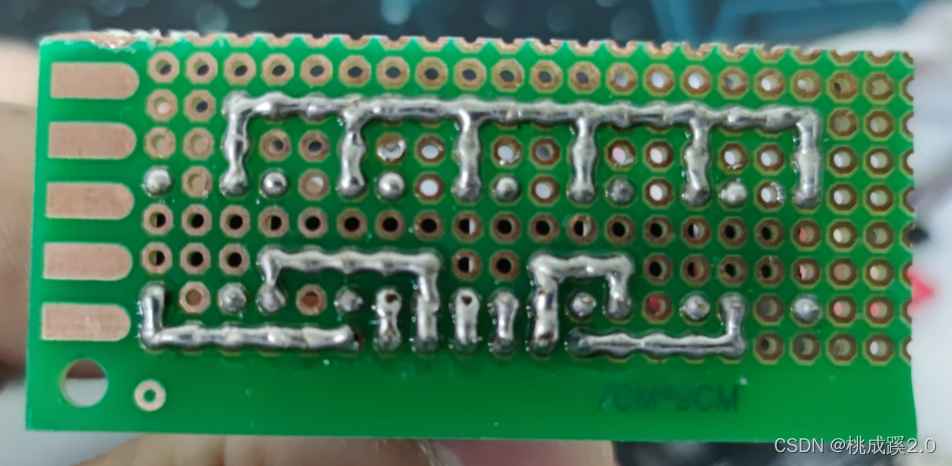
The following is a simple version of my hand welding test

You can see that the back is carried out according to the schematic diagram , As shown below
2、 Pin function configuration
The following is the configuration pin mode , Because the other end of the pin here is grounded by default , So let's connect here IO This side of the port needs to be set to the pull-up mode in advance , This will not affect our key reading , So that the change of pin level can be effectively detected every time .

The scanning surface of the key requires us to configure a periodic scanning function , Here we have many options :
- Use freertos Create a scan task
- Bare metal use while Loop to achieve
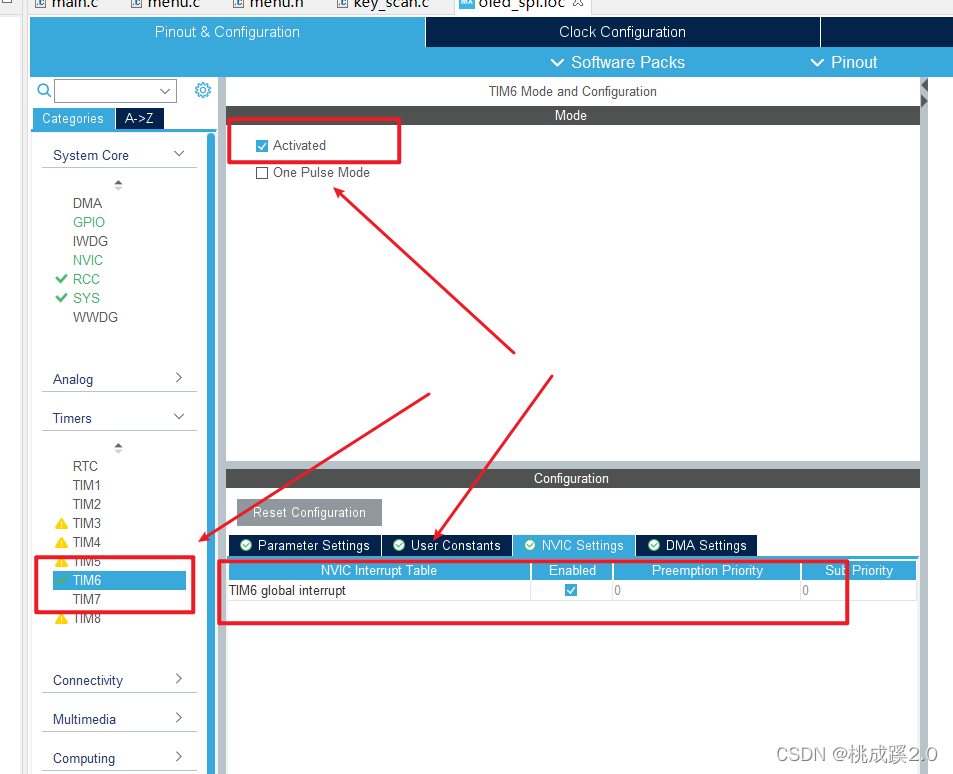
- Use timer to realize periodic scanning
Consider here that it is only for testing demo engineering , No more systems , Direct bare metal , For the convenience of transplantation , Here I use the timer to generate , Here we configure the timer 6 To achieve the function , The configuration is as follows :
3、 Program settings
Here we begin to configure the program , Let me explain the key departments here , The explanation is as follows :
The first is to make a macro for our key reading , This is convenient for us to carry out subsequent operations

The scanning function is described as follows , The key detection can be well realized by using the modified scheme

Check the scan function in the timer

To sum up, we can realize the detection of keys , The measured effect is still good , Can self verify . Source code is as follows :
void KeyScan(void)
{

    static int keyCount = 0;
    static int keyState = 0;
    if (KEY_UP == 0 && keyState == 0)
    {

        keyCount++;
        if (keyCount > 2 && KEY_UP == 0 && keyState == 0)
        {

        	KeyUp();
            keyState = 1;
        }
    }
    else if (KEY_DOWN == 0 && keyState == 0)
    {

        keyCount++;
        if (keyCount > 2 && KEY_DOWN == 0 && keyState == 0)
        {

        	KeyDown();
            keyState = 1;
        }
    }
    else if (KEY_LEFT == 0 && keyState == 0)
    {

        keyCount++;
        if (keyCount > 2 && KEY_LEFT == 0 && keyState == 0)
        {

        	KeyLeft();
            keyState = 1;
        }
    }
    else if (KEY_RIGHT == 0 && keyState == 0)
    {

        keyCount++;
        if (keyCount > 2 && KEY_RIGHT == 0 && keyState == 0)
        {

        	KeyRight();
            keyState = 1;
        }
    }
    else if (KEY_ON == 0 && keyState == 0)
    {

        keyCount++;
        if (keyCount > 2 && KEY_ON == 0 && keyState == 0)
        {

        	KeyOk();
            keyState = 1;
        }
    }
    else if (KEY_OFF == 0 && keyState == 0)
    {

        keyCount++;
        if (keyCount > 2 && KEY_OFF == 0 && keyState == 0)
        {

            keyState = 1;
        }
    }
	else if (KEY_UP == 1 && KEY_DOWN == 1 && KEY_LEFT == 1 && KEY_RIGHT == 1 && keyState == 1)
    {

        keyCount = 0;
        keyState = 0;
    }
}
2、oled drive
oled Driver can see my previous blog , There is no introduction here , It was introduced before SPI also IIC Version of , It also introduces the use of software and hardware to drive , If it is driven by software, it is more convenient to transplant other types of MCU , Here are links to related blogs , You can look it up :
SPI drive :SPI Write OLED( Hardware and software switching )
IIC drive :stm32 Configuration summary -iic Use
3、 Menu migration
1、 The idea of menu
I've seen many big guys on the Internet before oled menu , But it's not very convenient to realize , The simplest way is to write your own page and refresh it , Use buttons to jump one by one , It feels like this is very troublesome , This method is not recommended , If the menu is simple, it's OK , Once the menu is complex, it won't work , That's too hard !
So here I transplanted another big man's plan , I think it's still very good , Thank you for the big man , The source address is as follows :https://gitee.com/snqx-lqh/screen-design-using-gui/tree/master/2%E3%80%81STM32C8T6+IIC+OLED0.96GUI%E8%AE%BE%E8%AE%A1
First, let's look at the menu structure , Each menu structure contains some parameters of the menu page , The explanation is as follows :
- The number of menus
- Length of scroll bar ( For example, if you choose 16 If the font is , A page can display up to four lines , Such length 0, Because you don't need to scroll , If required, display greater than 4 That's ok , such as 5 That's ok , So the menu needs to scroll to see the following line , So the length of the scroll bar is 1 了 .)
- Menu name, etc
- The function of the menu
- Parent menu
- Sub menu
In fact, the more important ones here are the parent menu and sub menu , Using them, we can jump between menus !

2、 Menu programming
The idea of menu is introduced above , Now you can see how the menu is generated , But before that, take a look at the cover designed by the author , The cover is shown below :

You can see the settings on the program :
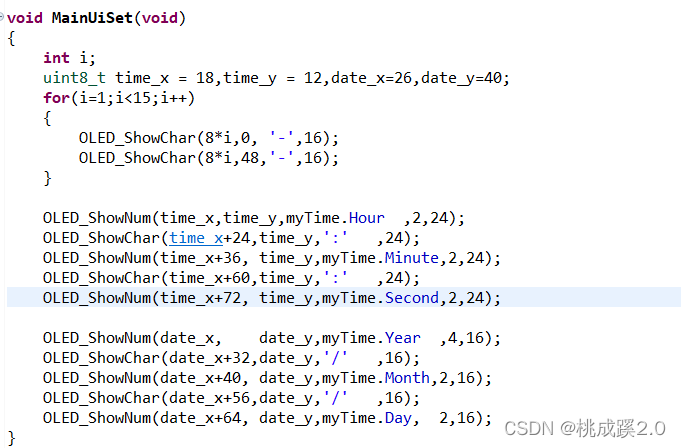
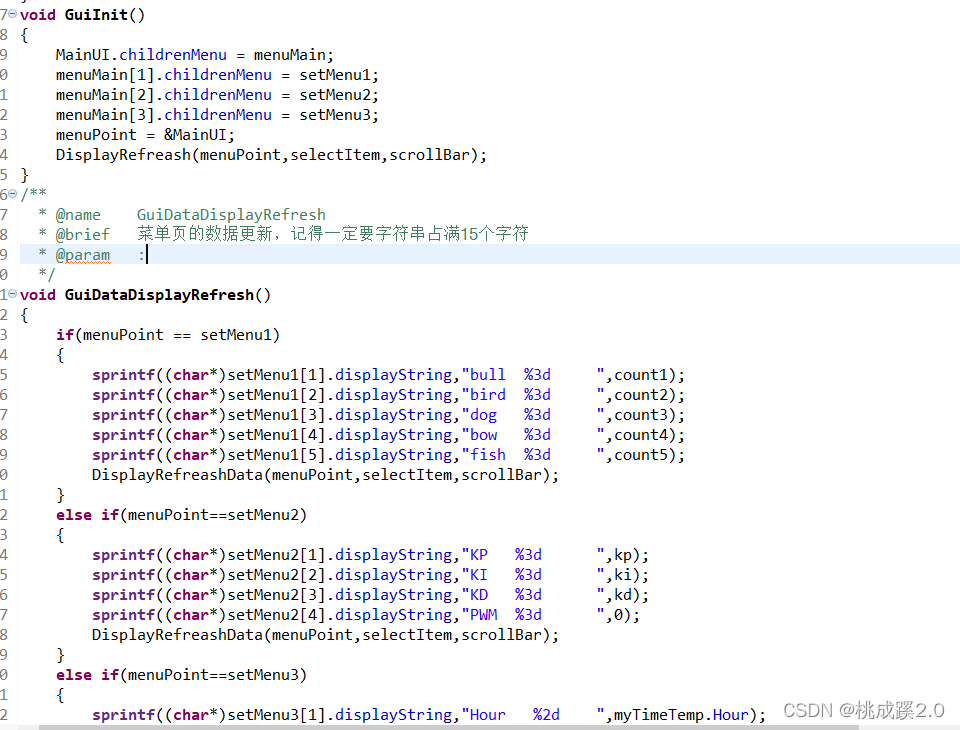
Here, a timer is used to execute in time , Then update through the parameter structure , The update of month, year and day is also executed in the timer , Now you can see the definition of the menu . It mainly depends on the definitions of sub menus and parent menus .

Let's look at the content description added to the menu , Here, if we want to use Chinese later, the following display functions also need to be modified accordingly , So it's not cumbersome for the whole process , Just English characters

Here is the definition of sliding window I said before

The following is the refresh function of the arrow to indicate

The effect is as follows :

The following is the refresh of some variables of the internal definition
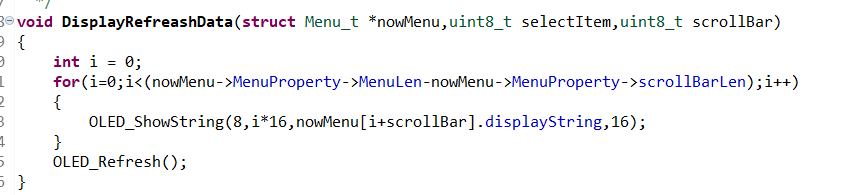
The internal variable refresh effect of the submenu is as follows :

Then we add the content just defined
Finally, the key control function , Mainly some logical choices , The note here is to refresh the screen after each operation on the index value

Add initialization and refresh functions to the main function

The final effect is as follows :
版权声明
本文为[Taochengqi 2.0]所创,转载请带上原文链接,感谢
https://yzsam.com/2022/04/202204230306011438.html
边栏推荐
- Due to 3 ²+ four ²= five ², Therefore, we call '3,4,5' as the number of Pythagorean shares, and find the array of all Pythagorean shares within n (including n).
- Xamarin效果第二十一篇之GIS中可扩展浮动操作按钮
- Niuke white moon race 5 [problem solving mathematics field]
- How to write the expected salary on your resume to double your salary during the interview?
- C syntax pattern matching [switch expression]
- TP5 multi conditional where query (using PHP variables)
- tf. keras. layers. Conv? D function
- C#中元组对象Tuple的使用
- Recursion - outputs continuously increasing numbers
- Passing object type parameters through openfeign
猜你喜欢


随机推荐
C# 11 对 ref 和 struct 的改进
OLED多级菜单记录
TP5 customization in extend directory succeeded and failed. Return information
C read / write binary file
宁德时代地位不保?
The most easy to understand dependency injection and control inversion
全网讲的最细,软件测试度量,怎样优化软件测试成本提高效率---火爆
ASP. Net and ASP NETCORE multi environment configuration comparison
利用栈的回溯来解决“文件的最长绝对路径”问题
使用栈来解决”迷你语法分析器“的问题
再战leetcode (290.单词规律)
tf. keras. layers. Embedding function
tf. keras. layers. Density function
C syntax pattern matching [switch expression]
先中二叉建树
最通俗易懂的依赖注入之服务容器与作用域
編碼電機PID調試(速度環|比特置環|跟隨)
Recommend reading | share the trader's book list and ask famous experts for trading advice. The trading is wonderful
Laravel8- use JWT
REINFORCE