当前位置:网站首页>2. GPIO control summary (kernel driver) of nanopi M1 (Quanzhi H3)
2. GPIO control summary (kernel driver) of nanopi M1 (Quanzhi H3)
2022-04-23 22:03:00 【July meteor】
development environment :VM+Ubuntu
Compile environment :linux3.4
Cross compiler tool :arm-linux-gcc 4.4.3
GPIO Kernel driver link :https://download.csdn.net/download/ddffyhg/11022291
User application links :https://download.csdn.net/download/ddffyhg/11022286
Be careful : Development board linux Version and pc End Ubuntu Versions of can be inconsistent , But it has to do with compiler driven linux The kernel version is consistent
Development board :linux 3.4
![]()
pc Client downloaded linux kernel :/home/linux/Documents/lichee/linux3.4
![]()
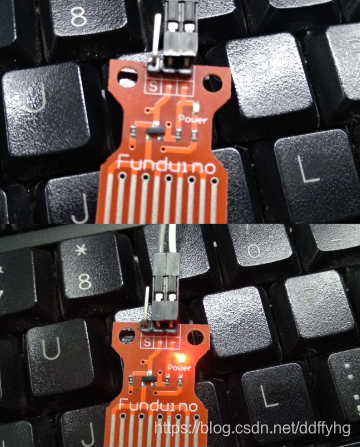
1. The physical connections are as follows :
The hardware platform uses nanopi-m1,GPIO The physical pin corresponding to the output pin is pin7
LED The positive pole of the lamp ---------->PIN7(linux 213 Pin )
LED Lamp negative pole ---------->GND
2. stay PC End lichee/linux3.4/drivers/char/ Place under directory gpio The driver file for gpio.c
3. modify Makefile file , Add at the end of the file
obj-m += gpio.o4. stay lichee Recompile the kernel under the directory
./build.sh -p sun8iw7p1 -b nanopi-h3 -m kernelAfter successful compilation , stay lichee/linux3.4/drivers/char/ The directory will generate gpio.ko file
![]()
5. take gpio.ko Copy files to development board

gpio.ko The file is the compiled driver file ,app.c The file is the corresponding user application .
6. Mount the kernel module :
insmod gpio.koView the list of kernel modules :
lsmodCheck whether there is a device node :
ls /dev/gpio*Compiling the application :
gcc -o app app.cExecute the application :
./appRunning results :

Because I don't have LED The lamp , Use the power indicator of the sensor instead :
Uninstall the kernel module :
rmmod gpioRealization GPIO Control function of kernel driver module .
版权声明
本文为[July meteor]所创,转载请带上原文链接,感谢
https://yzsam.com/2022/04/202204200609125613.html
边栏推荐
- Database Experiment four View experiment
- Pycharm download and installation
- Resolve the "chromedriver executable needs to be in path" error
- Detectron2 usage model
- Correction of date conversion format error after Oracle adds a row total
- 上海确保疫情保供生活物资质量和食品安全
- 在线Excel转CSV工具
- IIS cannot load * woff,*. woff2,*. Solution of SVG file
- Ribbon组件基本介绍和使用
- How to use the project that created SVN for the first time
猜你喜欢
![[leetcode refers to offer 47. Maximum value of gift (medium)]](/img/b4/34b3c74516e3b1ba93b7d84916dadc.png)
[leetcode refers to offer 47. Maximum value of gift (medium)]
![[leetcode refers to offer 27. Image of binary tree (simple)]](/img/65/85e63a8b7916af058d78d72d775530.png)
[leetcode refers to offer 27. Image of binary tree (simple)]
Plato farm is one of the four largest online IEOS in metauniverse, and the transaction on the chain is quite high

CVPR2022 | 基于知识蒸馏的高效预训练

OpenFeign组件的简介和使用

Deep understanding of modern mobile GPU (continuously updating)
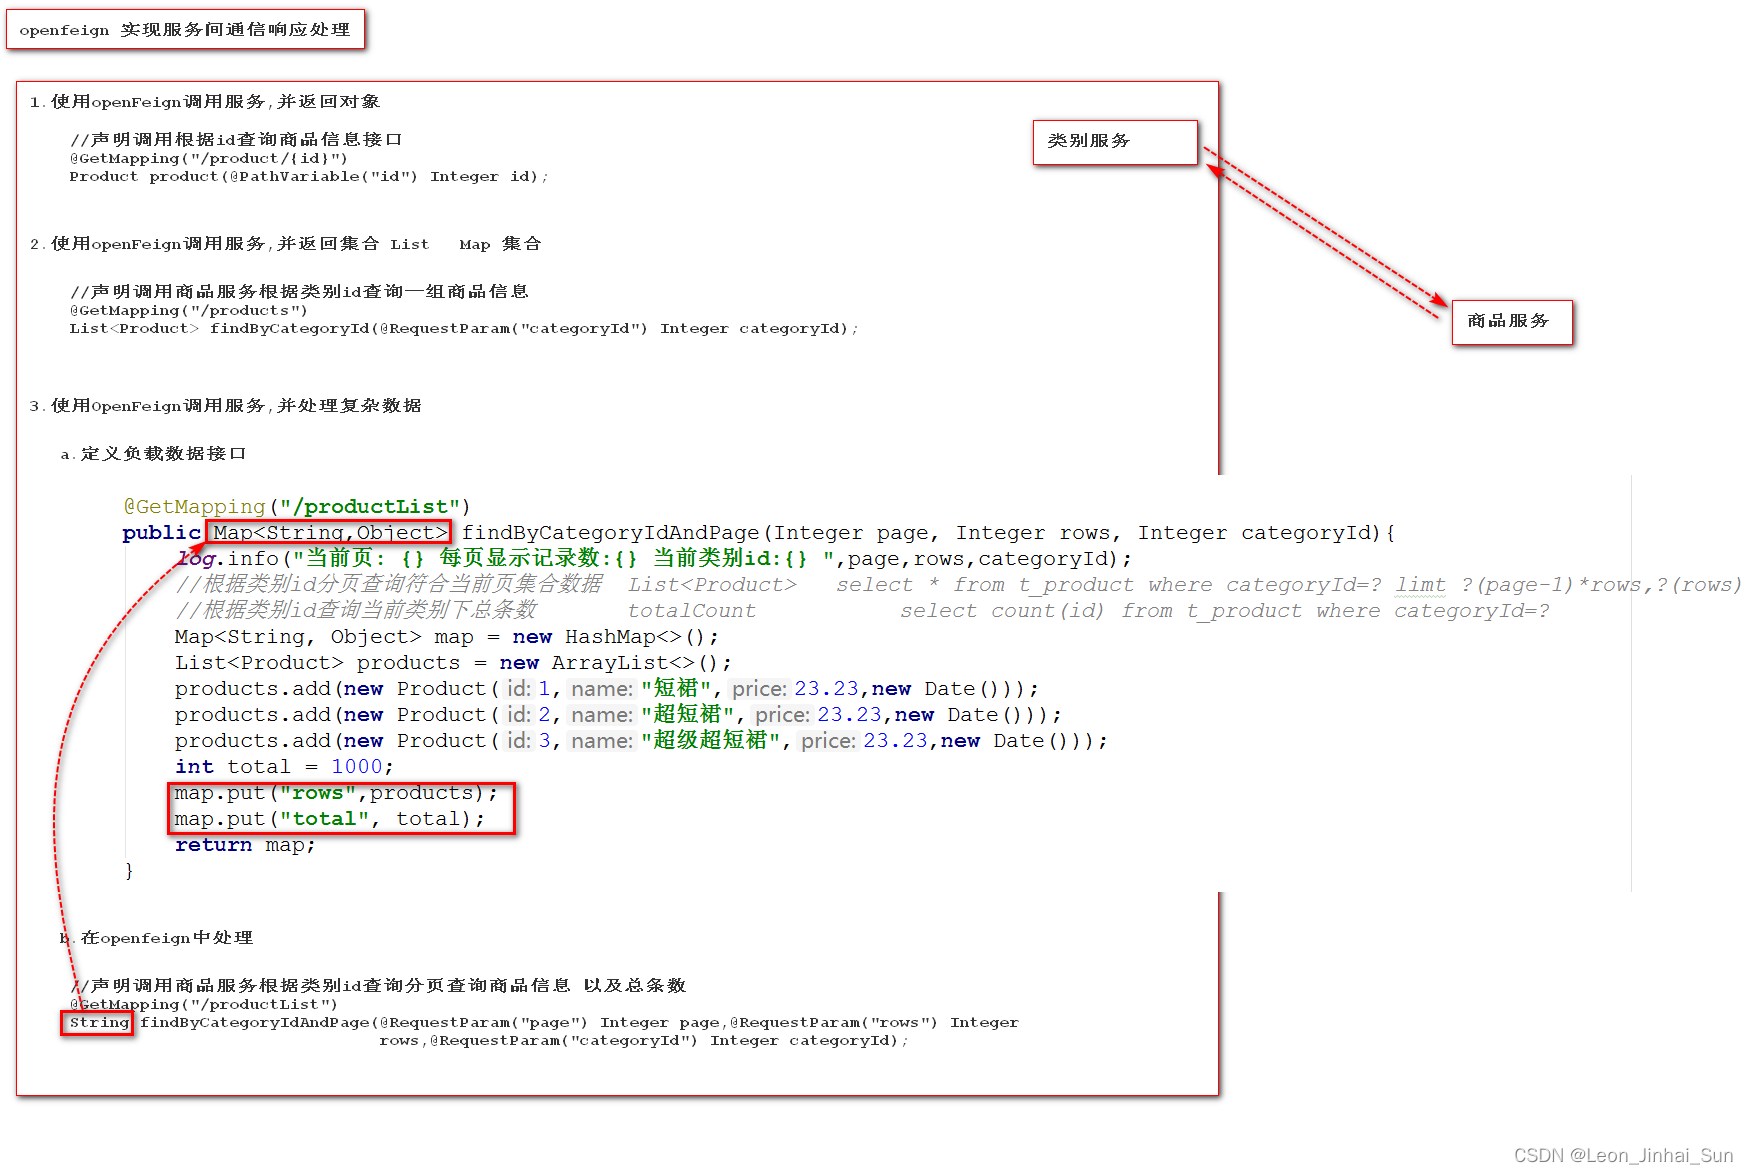
OpenFeign之响应处理
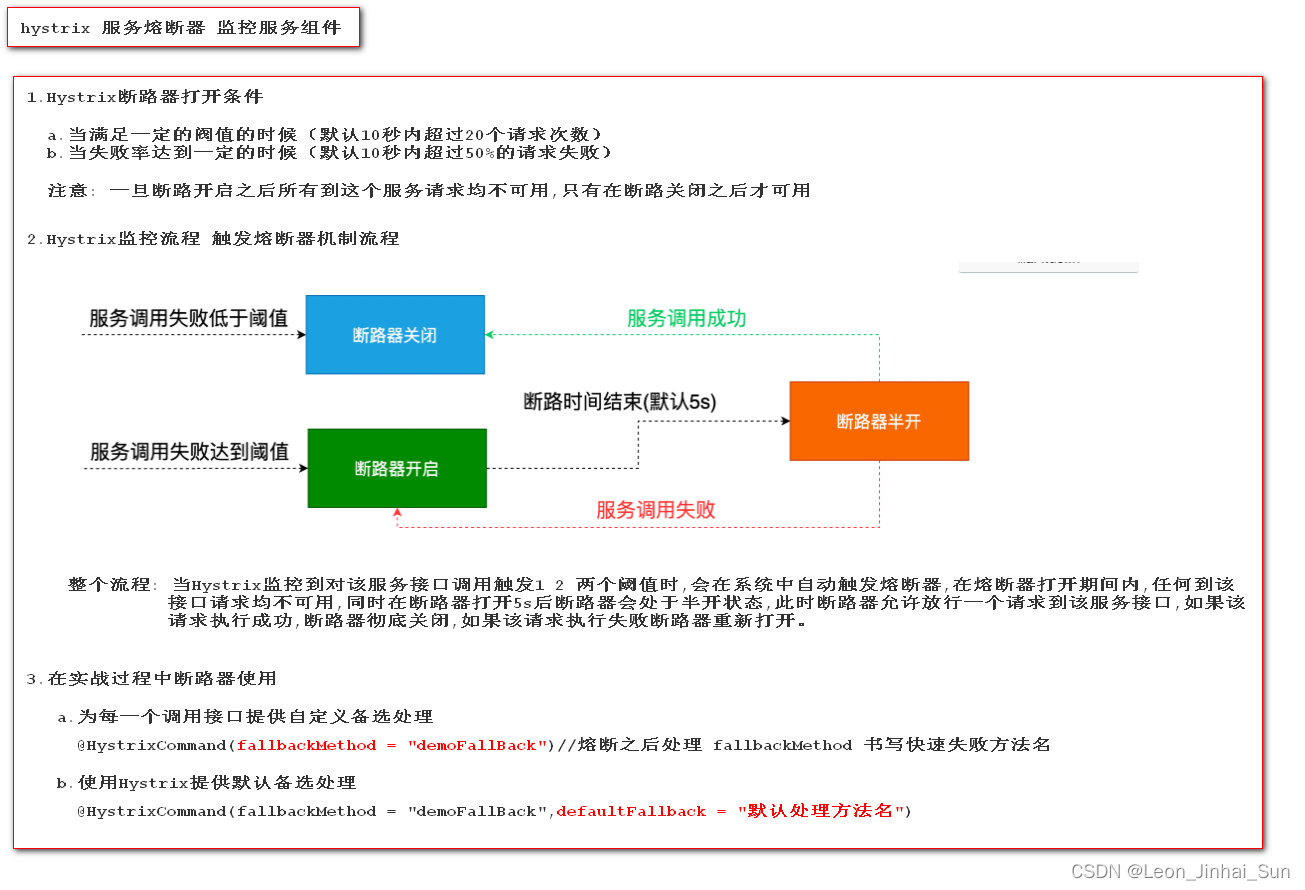
Opening conditions and process of hystrix circuit breaker and default alternative treatment

consul 关闭健康监控检查
Ribbon组件负载均衡调用和使用
随机推荐
Strictly, severely and quickly strengthen food safety supervision during the epidemic in Shanghai
QT QML component library records owned by QML except basic components
Pycharm download and installation
Plato farm is one of the four largest online IEOS in metauniverse, and the transaction on the chain is quite high
openFeign 服务调用
MySQL back to table
OpenFeign超时设置
JS merge duplicate data in array object
[※ leetcode refers to offer 32 - II. Print binary tree II from top to bottom (simple)]
从严从重从快 上海全面加强疫情期间食品安全监管
Online timing flow chart making tool
ROS learning notes - tutorial on the use of ROS
MySQL 回表
[leetcode sword finger offer 10 - II. Frog jumping steps (simple)]
[leetcode refers to the substructure of offer 26. Tree (medium)]
Hystrix断路器开启条件和流程以及默认备选处理
leetcode 2223 — 构造字符串的总得分和
Online Excel to CSV tool
Oracle updates the data of different table structures and fields to another table, and then inserts it into the new table
OpenFeign组件的使用