当前位置:网站首页>开源一夏 | mysql5.7 安装部署 -二进制安装
开源一夏 | mysql5.7 安装部署 -二进制安装
2022-08-10 18:00:00 【InfoQ】
1. 下载二进制安装包
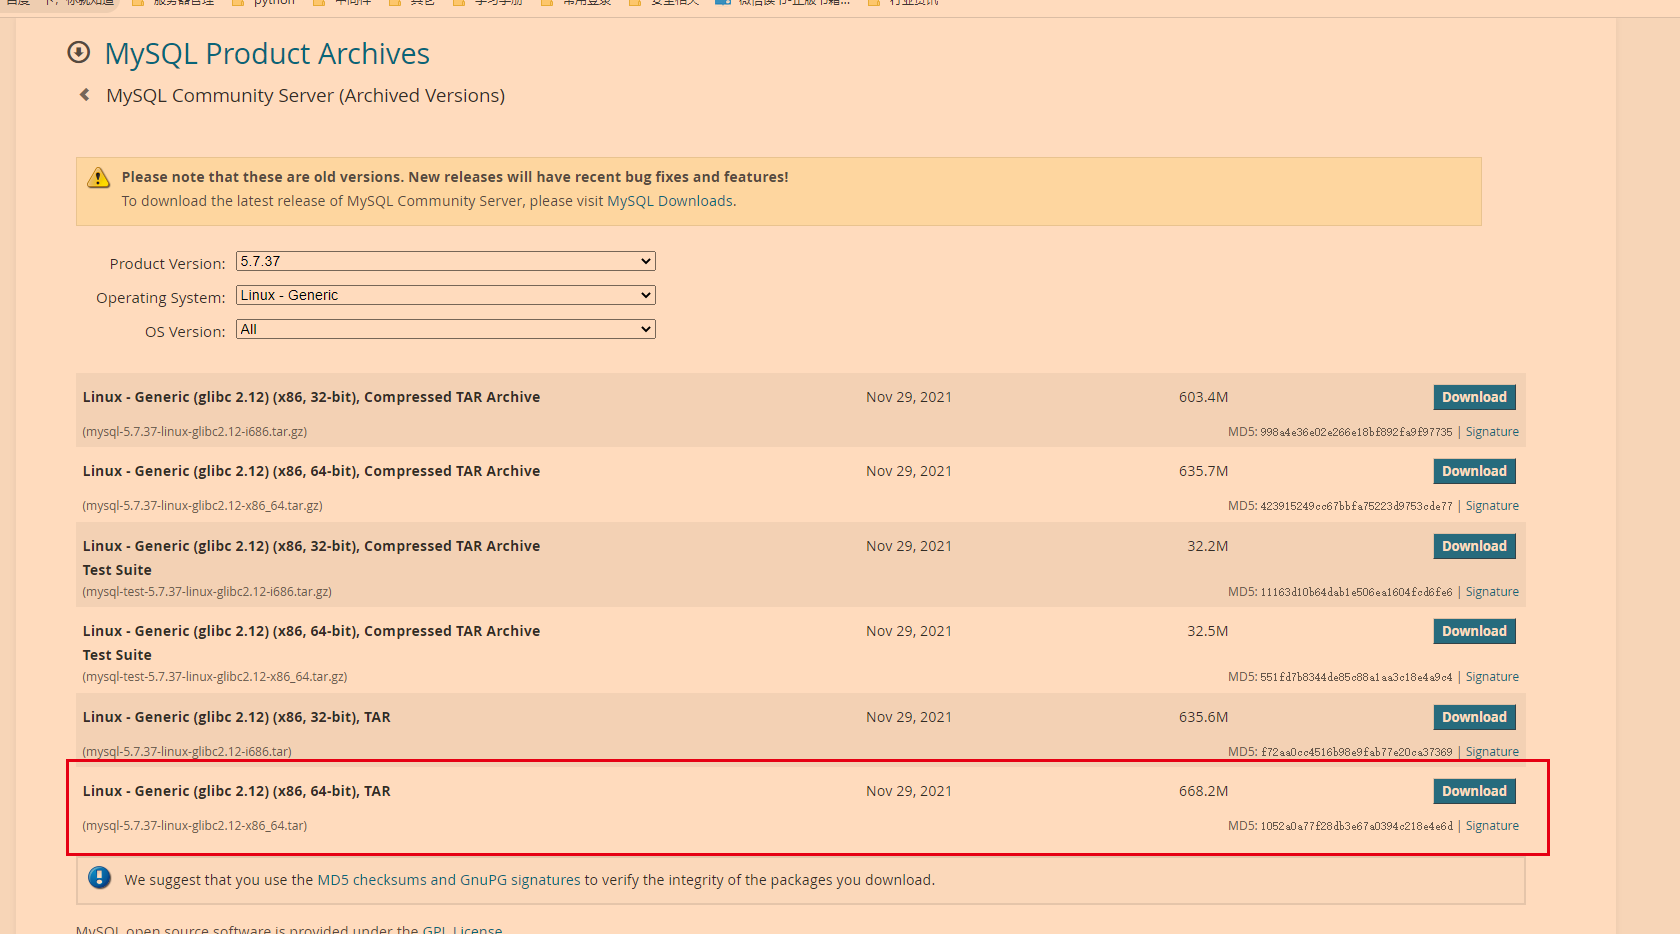
wget https://cdn.mysql.com/archives/mysql-5.7/mysql-5.7.37-linux-glibc2.12-x86_64.tar
tar -xvf mysql-5.7.37-linux-glibc2.12-x86_64.tar
# 解压出来之后还有一个test的包,那个暂时先不管
tar -xvf mysql-5.7.37-linux-glibc2.12-x86_64.tar.gz
mv mysql-5.7.37-linux-glibc2.12-x86_64 /usr/local/
cd /usr/local/
ln -sv mysql-5.7.37-linux-glibc2.12-x86_64 mysql# vim /etc/profile
export MYSQL_HOME=/usr/local/mysql
export PATH=$PATH:$MYSQL_HOME/binsource /etc/profile
mysql --versionyum -y remove mariadb*
yum -y install autoconf gcc glibc make openssl openssl-devel perl-JSON.noarchuseradd -M -s /sbin/nologin mysql
id mysqlmkdir /home/my3306
chown -R mysql.mysql /home/my33062. mysql初始化与服务配置
mysqld --initialize --user=mysql --basedir=/usr/local/mysql --datadir=/home/my3306/ --explicit_defaults_for_timestamp
vim /usr/lib/systemd/system/mysqld-3306.service[Unit]
Description=MySQL Server 3306
Documentation=man:mysqld(8)
Documentation=http://dev.mysql.com/doc/refman/en/using-systemd.html
After=network.target
After=syslog.target
[Install]
WantedBy=multi-user.target
[Service]
User=mysql
Group=mysql
# Disable service start and stop timeout logic of systemd for mysqld service.
TimeoutSec=0
# Execute pre and post scripts as root
PermissionsStartOnly=true
ExecStart=/usr/local/mysql/bin/mysqld --defaults-file=/etc/mysql-3306.cnf
LimitNOFILE = 5000
Restart=on-failure
RestartPreventExitStatus=1[mysqld]
innodb_buffer_pool_size = 5000M
server_id=106
#log_slave_updates=1
port = 3306
datadir=/home/my3306
socket=/home/my3306/mysql.sock
log-error=/home/my3306/mysqld.log
pid-file=/home/my3306/mysqld.pid
log_bin=mysql-201-3306-binlog
# gtid最好是开启
gtid_mode=ON
enforce-gtid-consistency=ON
max_connections=2048
slow_query_log=ON
binlog_format=row
skip-name-resolve
log-slave-updates=1
relay_log_purge=0
back_log=128
wait_timeout=60
interactive_timeout=7200
key_buffer_size=16M
#query_cache_size=64M
#query_cache_type=1
#query_cache_limit=50M
max_connect_errors=20
sort_buffer_size=2M
max_allowed_packet=32M
join_buffer_size=2M
thread_cache_size=200
innodb_buffer_pool_size=1024M
innodb_flush_log_at_trx_commit=1
innodb_log_buffer_size=32M
innodb_log_file_size=128M
innodb_log_files_in_group=3
binlog_cache_size=2M
max_binlog_cache_size=8M
max_binlog_size=512M
expire_logs_days=7
read_buffer_size=2M
read_rnd_buffer_size=2Msystemctl daemon-reload
systemctl enable mysqld-3306.service
systemctl start mysqld-3306.service
systemctl stop mysqld-3306.service
systemctl restart mysqld-3306.service3. 添加用户
mysql -uroot -S /home/my3306/mysql.sock -p
# 需要先修改root用户的默认密码才能执行后面的所有操作
mysql> ALTER USER 'root'@'localhost' IDENTIFIED BY '[email protected]';use mysql;
create user [email protected]'172.16.0.%' identified by '[email protected]';
grant all privileges on *.* to [email protected]'172.16.0.%' with grant option;
# 或者是
grant all privileges on *.* to 'user02'@'172.16.0.%' identified by '[email protected]' with grant option;
grant all privileges on test.* to 'user03'@'172.16.0.%' identified by '[email protected]' with grant option;
grant select on test.* to 'user04'@'172.16.0.%' identified by '[email protected]' with grant option;4. 其他问题
边栏推荐
猜你喜欢
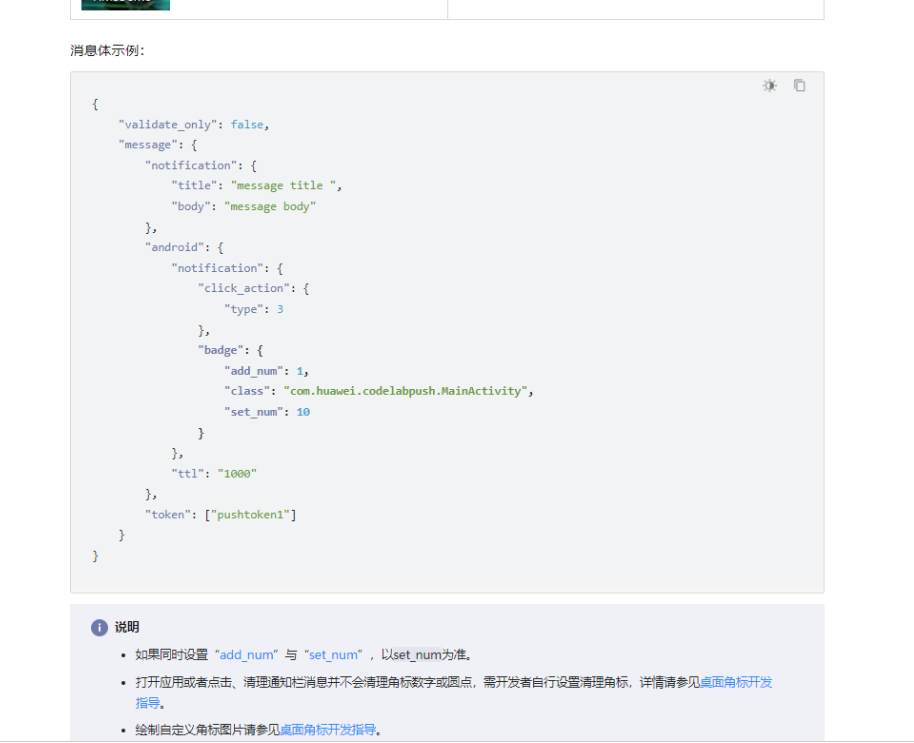
【FAQ】【Push Kit】 华为怎么设置角标
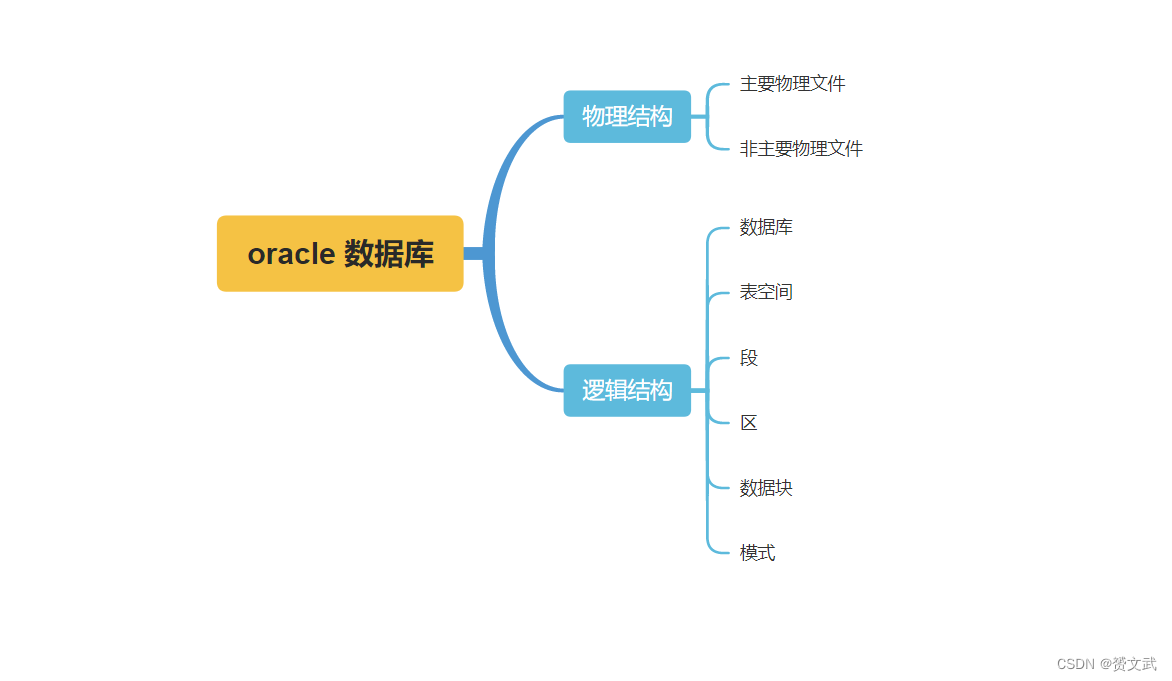
oracle11g体系结构
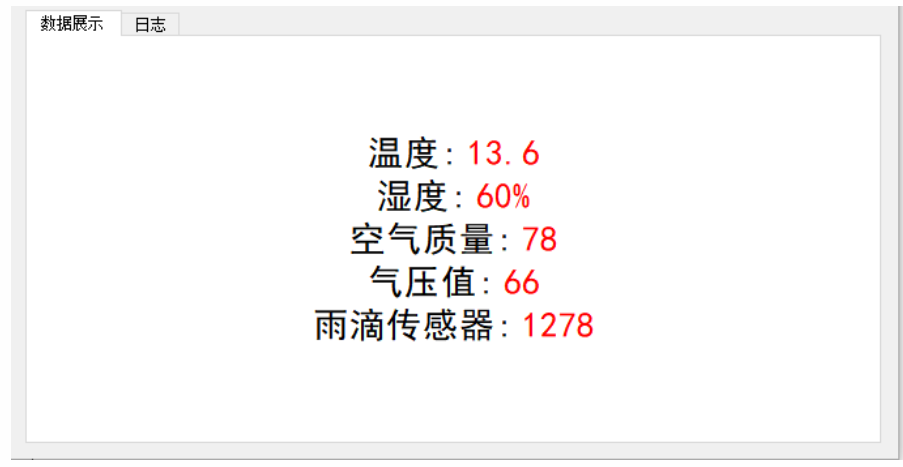
烟雾、空气质量、温湿度…自己徒手做个环境检测设备
测试接口出现“data“: “Full authentication is required to access this resource“凭证已过期
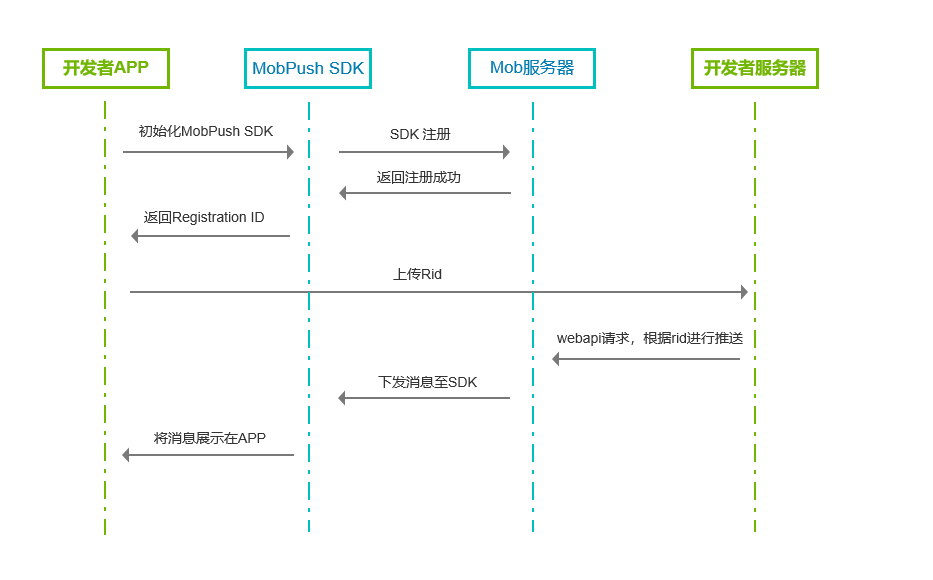
产品说明丨Android端使用MobPush快速集成方法
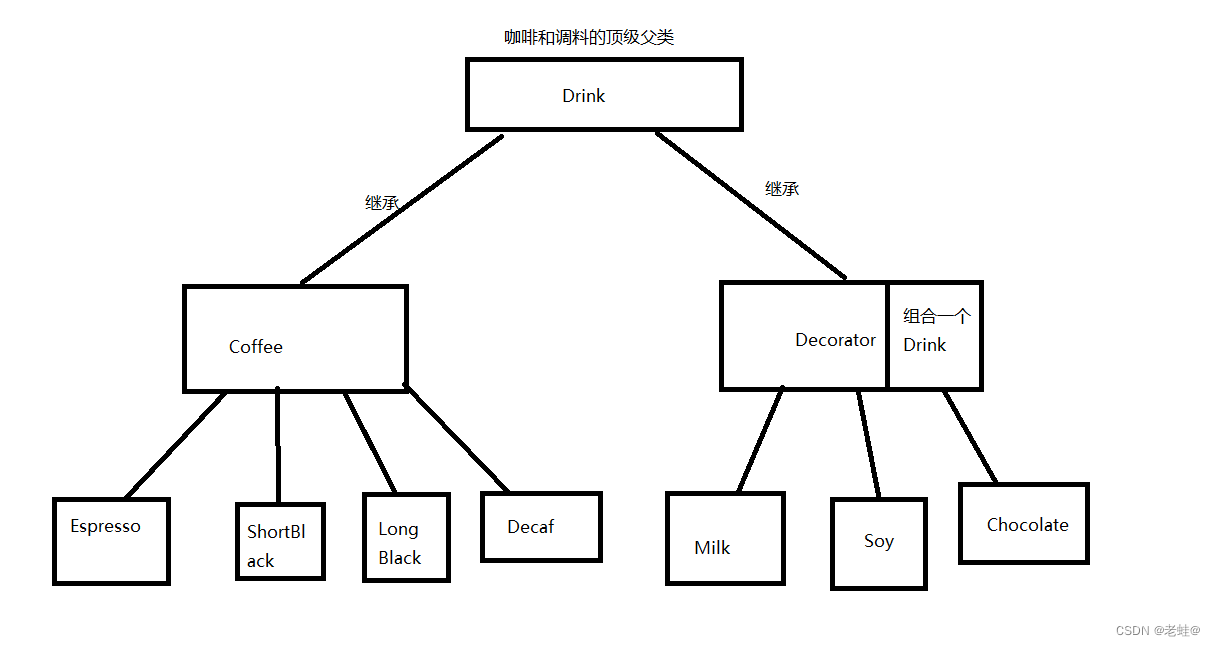
装饰者模式
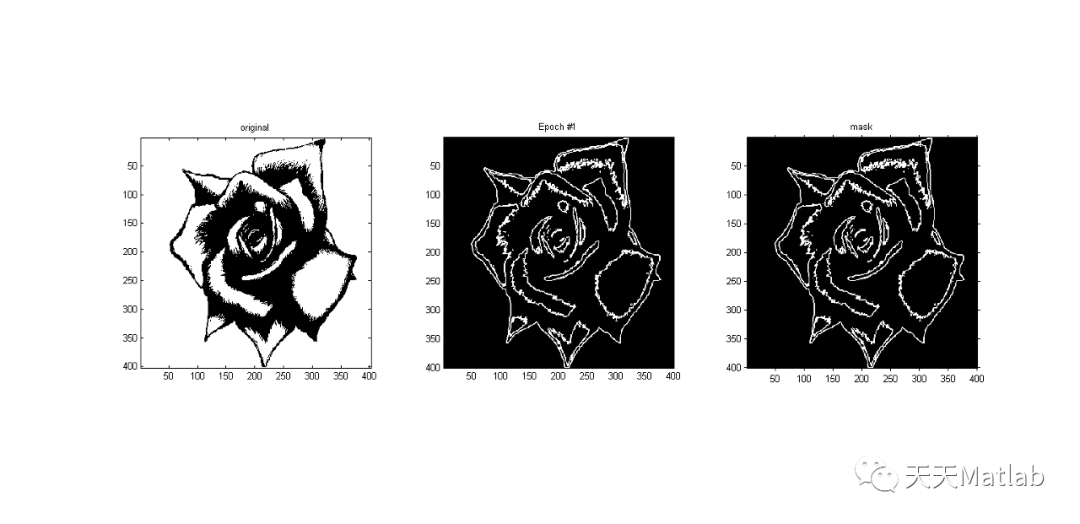
【图像分割】基于元胞自动机实现图像分割附matlab代码

Toronto Research Chemicals霉菌毒素分析丨T2 四醇
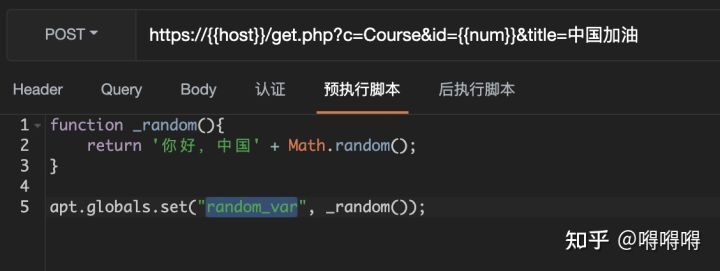
Interface test advanced interface script using -apipost (pre/post execution script)
接口测试进阶接口脚本使用—apipost(预/后执行脚本)
随机推荐
Allegro软件Shape菜单下的每个命令的含义
设置iptables规则来保护CS服务器
【FAQ】HarmonyOS ETS如何给组件设置边框
Mysql索引、事务与存储引擎
LeetCode 198:打家劫舍
接口测试进阶接口脚本使用—apipost(预/后执行脚本)
VoLTE基础自学系列 | 3GPP规范解读之Rx接口(上集)
组合模式
pyspark columns merge into one row
Flexsim 发生器和暂存区设定临时实体流颜色和端口
【FAQ】OpenHarmony与HarmonyOS的有什么区别?
【数据存储精讲】整型和浮点型有什么区别?为什么会精度丢失?
痛苦的四大原因
Making Pre-trained Language Models Better Few-Shot Learners
Intelligent bid strategy how to affect advertising effectiveness?
stm32中的CAN通讯列表模式配置解析与源码
【HMS core】【FAQ】AR Engine、Analytics Kit、Video Editor Kit、Image Kit、Map Kit典型问题合集2
Toronto Research Chemicals霉菌毒素分析丨T2 四醇
Kong自定义插件初体验
如何学习性能测试?