当前位置:网站首页>kprobe 的 3 种使用
kprobe 的 3 种使用
2022-04-23 14:11:00 【Mrpre】
- 知识背景:会编写基础内核模块
- kprobe用处:用来跟踪、记录、打桩。最常见的使用就是需要打印内核函数的执行流程,比如排查问题时、或者学习内核流程时需要用到。
- 准备工作:找一份和自己linux系统相同版本的源码(方法自行Google,ubuntu、centos、redhat各自有各自方法)
内核模块跟踪指定函数
官方文档:
https://www.kernel.org/doc/Documentation/kprobes.txt
在 内核源码目录samples/kprobes/有几个kprobe模块例子,这里直接贴出代码方便没有内核源码的同学学习
/* * NOTE: This example is works on x86 and powerpc. * Here's a sample kernel module showing the use of kprobes to dump a * stack trace and selected registers when _do_fork() is called. * * For more information on theory of operation of kprobes, see * Documentation/kprobes.txt * * You will see the trace data in /var/log/messages and on the console * whenever _do_fork() is invoked to create a new process. */

#include <linux/kernel.h>
#include <linux/module.h>
#include <linux/kprobes.h>

#define MAX_SYMBOL_LEN 64
static char symbol[MAX_SYMBOL_LEN] = "_do_fork";
module_param_string(symbol, symbol, sizeof(symbol), 0644);

/* For each probe you need to allocate a kprobe structure */
static struct kprobe kp = {

        .symbol_name    = symbol,
};

/* kprobe pre_handler: called just before the probed instruction is executed */
static int handler_pre(struct kprobe *p, struct pt_regs *regs)
{

#ifdef CONFIG_X86
        pr_info("<%s> pre_handler: p->addr = 0x%p, ip = %lx, flags = 0x%lx\n",
                p->symbol_name, p->addr, regs->ip, regs->flags);
#endif
#ifdef CONFIG_PPC
        pr_info("<%s> pre_handler: p->addr = 0x%p, nip = 0x%lx, msr = 0x%lx\n",
                p->symbol_name, p->addr, regs->nip, regs->msr);
#endif
#ifdef CONFIG_MIPS
        pr_info("<%s> pre_handler: p->addr = 0x%p, epc = 0x%lx, status = 0x%lx\n",
                p->symbol_name, p->addr, regs->cp0_epc, regs->cp0_status);
#endif
#ifdef CONFIG_TILEGX
        pr_info("<%s> pre_handler: p->addr = 0x%p, pc = 0x%lx, ex1 = 0x%lx\n",
                p->symbol_name, p->addr, regs->pc, regs->ex1);
#endif
#ifdef CONFIG_ARM64
        pr_info("<%s> pre_handler: p->addr = 0x%p, pc = 0x%lx,"
                        " pstate = 0x%lx\n",
                p->symbol_name, p->addr, (long)regs->pc, (long)regs->pstate);
#endif
#ifdef CONFIG_S390
        pr_info("<%s> pre_handler: p->addr, 0x%p, ip = 0x%lx, flags = 0x%lx\n",
                p->symbol_name, p->addr, regs->psw.addr, regs->flags);
#endif

        /* A dump_stack() here will give a stack backtrace */
        return 0;
}

/* kprobe post_handler: called after the probed instruction is executed */
static void handler_post(struct kprobe *p, struct pt_regs *regs,
                                unsigned long flags)
{

#ifdef CONFIG_X86
        pr_info("<%s> post_handler: p->addr = 0x%p, flags = 0x%lx\n",
                p->symbol_name, p->addr, regs->flags);
#endif
#ifdef CONFIG_PPC
        pr_info("<%s> post_handler: p->addr = 0x%p, msr = 0x%lx\n",
                p->symbol_name, p->addr, regs->msr);
#endif
#ifdef CONFIG_MIPS
        pr_info("<%s> post_handler: p->addr = 0x%p, status = 0x%lx\n",
                p->symbol_name, p->addr, regs->cp0_status);
#endif
#ifdef CONFIG_TILEGX
        pr_info("<%s> post_handler: p->addr = 0x%p, ex1 = 0x%lx\n",
                p->symbol_name, p->addr, regs->ex1);
#endif
#ifdef CONFIG_ARM64
        pr_info("<%s> post_handler: p->addr = 0x%p, pstate = 0x%lx\n",
                p->symbol_name, p->addr, (long)regs->pstate);
#endif
#ifdef CONFIG_S390
        pr_info("<%s> pre_handler: p->addr, 0x%p, flags = 0x%lx\n",
                p->symbol_name, p->addr, regs->flags);
#endif
}

/* * fault_handler: this is called if an exception is generated for any * instruction within the pre- or post-handler, or when Kprobes * single-steps the probed instruction. */
static int handler_fault(struct kprobe *p, struct pt_regs *regs, int trapnr)
{

        pr_info("fault_handler: p->addr = 0x%p, trap #%dn", p->addr, trapnr);
        /* Return 0 because we don't handle the fault. */
        return 0;
}

static int __init kprobe_init(void)
{

        int ret;
        kp.pre_handler = handler_pre;
        kp.post_handler = handler_post;
        kp.fault_handler = handler_fault;

        ret = register_kprobe(&kp);
        if (ret < 0) {

                pr_err("register_kprobe failed, returned %d\n", ret);
                return ret;
        }
        pr_info("Planted kprobe at %p\n", kp.addr);
        return 0;
}

static void __exit kprobe_exit(void)
{

        unregister_kprobe(&kp);
        pr_info("kprobe at %p unregistered\n", kp.addr);
}

module_init(kprobe_init)
module_exit(kprobe_exit)
MODULE_LICENSE("GPL");
这个sample非常简单,创建内核模块,内核模块初始化时注册kprobe,即就是当内核执行_do_fork时,执行我们注册的函数handler_pre和handler_post,这2个函数顾名思义,就是指的地址(这里是_do_fork起始地址)运行前后分别会运行这个2个handler。我们来编译一下这个模块,下面是Makefile,假设 我们上面源码是kprobe_example.c,则Makefile编写如下:
obj-m := kprobe_example.o
KDIR := /lib/modules/$(shell uname -r)/build
PWD := $(shell pwd)
default:
        $(MAKE) -C $(KDIR) SUBDIRS=$(PWD) modules
clean:
        rm -f *.mod.c *.ko *.o
我们make一下,生成了kprobe_example.ko。执行 insmod kprobe_example.ko加载模块。我们dmesg 看下
[338010.070981] Planted kprobe at 000000005cca734c
[338010.073901] <_do_fork> pre_handler: p->addr = 0x000000005cca734c, ip = ffffffff81e8efc1, flags = 0x246
[338010.073903] <_do_fork> post_handler: p->addr = 0x000000005cca734c, flags = 0x246
[338010.123244] <_do_fork> pre_handler: p->addr = 0x000000005cca734c, ip = ffffffff81e8efc1, flags = 0x246
[338010.123246] <_do_fork> post_handler: p->addr = 0x000000005cca734c, flags = 0x246
[338011.223298] <_do_fork> pre_handler: p->addr = 0x000000005cca734c, ip = ffffffff81e8efc1, flags = 0x246
[338011.223300] <_do_fork> post_handler: p->addr = 0x000000005cca734c, flags = 0x246
[338011.260685] <_do_fork> pre_handler: p->addr = 0x000000005cca734c, ip = ffffffff81e8efc1, flags = 0x246
[338011.260686] <_do_fork> post_handler: p->addr = 0x000000005cca734c, flags = 0x246
[338012.323273] <_do_fork> pre_handler: p->addr = 0x000000005cca734c, ip = ffffffff81e8efc1, flags = 0x246
[338012.323274] <_do_fork> post_handler: p->addr = 0x000000005cca734c, flags = 0x246
[338012.564192] <_do_fork> pre_handler: p->addr = 0x000000005cca734c, ip = ffffffff81e8efc1, flags = 0x246
[338012.564193] <_do_fork> post_handler: p->addr = 0x000000005cca734c, flags = 0x246
[338013.628269] <_do_fork> pre_handler: p->addr = 0x000000005cca734c, ip = ffffffff81e8efc1, flags = 0x246
[338013.628270] <_do_fork> post_handler: p->addr = 0x000000005cca734c, flags = 0x246
[338013.737859] <_do_fork> pre_handler: p->addr = 0x000000005cca734c, ip = ffffffff81e8efc1, flags = 0x246
[338013.737860] <_do_fork> post_handler: p->addr = 0x000000005cca734c, flags = 0x246
[338014.755413] <_do_fork> pre_handler: p->addr = 0x000000005cca734c, ip = ffffffff81e8efc1, flags = 0x246
[338014.755414] <_do_fork> post_handler: p->addr = 0x000000005cca734c, flags = 0x246
因为系统基本上都在创建新的进程(至少当你敲 dmesg时也是一次进程的创建),所以很快 dmesg 就会有一堆信息。
内核模块跟踪指定位置
知识背景:需要反汇编能力,至少给一份汇编和源码让你阅读,你能将两者对的上。
通常,我们希望在函数执行的过程中变量,即打印一些流程中的东西,而不是函数本身被调用,此时我们不能简单设置 kprobe->symbol_name 函数名字 ,假设我们期望获取 _do_fork函数变量 nr 的值:
long _do_fork(struct kernel_clone_args *args)
{

	u64 clone_flags = args->flags;
	struct completion vfork;
	struct pid *pid;
	struct task_struct *p;
	int trace = 0;
	long nr;

	/* * Determine whether and which event to report to ptracer. When * called from kernel_thread or CLONE_UNTRACED is explicitly * requested, no event is reported; otherwise, report if the event * for the type of forking is enabled. */
	if (!(clone_flags & CLONE_UNTRACED)) {

		if (clone_flags & CLONE_VFORK)
			trace = PTRACE_EVENT_VFORK;
		else if (args->exit_signal != SIGCHLD)
			trace = PTRACE_EVENT_CLONE;
		else
			trace = PTRACE_EVENT_FORK;

		if (likely(!ptrace_event_enabled(current, trace)))
			trace = 0;
	}

	p = copy_process(NULL, trace, NUMA_NO_NODE, args);
	...
	pid = get_task_pid(p, PIDTYPE_PID);
	nr = pid_vnr(pid);
我们要做的时,找到 nr = pid_vnr(pid);对应的汇编函数的地址,然后将krprobe设置为这个地址。
先查看 _do_fork在内核的地址
root@iZ0jl6ke2x86d5zhr5tafbZ:~# cat /boot/System.map-4.15.0-91-generic | grep "_do_fork"
ffffffff8108efc0 T _do_fork
发现地址是 ffffffff8108efc0,然后查看 地址在 ffffffff8108efc0的汇编,即找到_do_fork函数对应的汇编,此时需要反汇编内核镜像。
我测试的ubuntu,内核镜像位于/boot/vmlinuz-4.15.0-91-generic,但是vmlinuz是压缩文件,需要使用内核源码自带的工具(extract-vmlinux)将其进行解压,解压成vmlinux,我的环境执行
scripts/extract-vmlinux /boot/vmlinuz-4.15.0-91-generic > ./vmlinux,其中 extract-vmlinux就是linux源码自带的工具,我们使用他来解压vmlinuz生成vmlinux,然后 执行objdump -D vmlinux | grep "ffffffff8108efc0"反汇编内核二进制找到函数对应的汇编。
nr 变量 是 函数pid_vnr的返回值(也是子进程的pid) ,根据x64调用规范,调用完成pid_vnr()后,寄存器rax存放的就是其函数返回值,所以,只要将kprobe的点设置为ffffffff8108f0cc,然后获取 rax,就能获取变量nr的值。
反汇编能力就是多看汇编以及找到几个关键点(例如常量)就能定位到汇编对应的源码了,这里不再展开了
root@iZ0jl6ke2x86d5zhr5tafbZ:~# cat ./vmlinux.out | grep "ffffffff8108efc0:" -A 130
ffffffff8108efc0:       e8 0b 2d 97 00          callq  0xffffffff81a01cd0
ffffffff8108efc5:       55                      push   %rbp
ffffffff8108efc6:       48 89 e5                mov    %rsp,%rbp
ffffffff8108efc9:       41 57                   push   %r15
ffffffff8108efcb:       41 56                   push   %r14
ffffffff8108efcd:       41 55                   push   %r13
ffffffff8108efcf:       41 54                   push   %r12
ffffffff8108efd1:       45 31 ed                xor    %r13d,%r13d
ffffffff8108efd4:       53                      push   %rbx
ffffffff8108efd5:       49 89 ff                mov    %rdi,%r15
ffffffff8108efd8:       48 83 ec 50             sub    $0x50,%rsp
ffffffff8108efdc:       48 89 4d a0             mov    %rcx,-0x60(%rbp)
ffffffff8108efe0:       4c 89 c1                mov    %r8,%rcx
ffffffff8108efe3:       65 48 8b 04 25 28 00    mov    %gs:0x28,%rax
ffffffff8108efea:       00 00
ffffffff8108efec:       48 89 45 d0             mov    %rax,-0x30(%rbp)
ffffffff8108eff0:       31 c0                   xor    %eax,%eax
ffffffff8108eff2:       f7 c7 00 00 80 00       test   $0x800000,%edi			#if (!(clone_flags & CLONE_UNTRACED)) {
ffffffff8108eff8:       75 2c                   jne    0x ffffffff8108f026
ffffffff8108effa:       f7 c7 00 40 00 00       test   $0x4000,%edi				# if (clone_flags & CLONE_VFORK) {
ffffffff8108f000:       0f 84 3d 01 00 00       je     0xffffffff8108f143
ffffffff8108f006:       b8 20 00 00 00          mov    $0x20,%eax

....... 省略部分
ffffffff8108f08d:       6a ff                   pushq  $0xffffffffffffffff
ffffffff8108f08f:       41 51                   push   %r9
ffffffff8108f091:       45 31 c0                xor    %r8d,%r8d
ffffffff8108f094:       45 89 e9                mov    %r13d,%r9d
ffffffff8108f097:       4c 89 ff                mov    %r15,%rdi
ffffffff8108f09a:       e8 91 e2 ff ff          callq  0xffffffff8108d330			copy_process


ffffffff8108f09f:       49 89 c4                mov    %rax,%r12
ffffffff8108f0a2:       49 81 fc 00 f0 ff ff    cmp    $0xfffffffffffff000,%r12
ffffffff8108f0a9:       58                      pop    %rax
ffffffff8108f0aa:       5a                      pop    %rdx
ffffffff8108f0ab:       0f 87 f9 02 00 00       ja     0xffffffff8108f3aa
ffffffff8108f0b1:       65 48 8b 1c 25 00 5c    mov    %gs:0x15c00,%rbx
ffffffff8108f0b8:       01 00
ffffffff8108f0ba:       0f 1f 44 00 00          nopl   0x0(%rax,%rax,1)
ffffffff8108f0bf:       31 f6                   xor    %esi,%esi
ffffffff8108f0c1:       4c 89 e7                mov    %r12,%rdi

ffffffff8108f0c4:       e8 37 07 02 00          callq  0xffffffff810af800			get_task_pid
ffffffff8108f0c9:       48 89 c7                mov    %rax,%rdi
ffffffff8108f0cc:       49 89 c6                mov    %rax,%r14
ffffffff8108f0cf:       e8 cc 07 02 00          callq  0xffffffff810af8a0			pid_vnr
ffffffff8108f0d4:       41 f7 c7 00 00 10 00    test   $0x100000,%r15d
ffffffff8108f0db:       48 63 d8                movslq %eax,%rbx
然后将第一节的源码进行部分修改,见下面代码片段,0x11B 是 kprobe点 ffffffff8108f0db 相对于函数起始位置的偏移( ffffffff8108f0db - ffffffff8108efc0 )
regs保存的是 kprobe断点时寄存器的值,这里打印 regs->ax 即能得到 nr 值。
...
static struct kprobe kp = {

        .symbol_name    = symbol,
        .offset = 0x11B,
};
/* kprobe pre_handler: called just before the probed instruction is executed */
static int handler_pre(struct kprobe *p, struct pt_regs *regs)
{

#ifdef CONFIG_X86
        pr_info("name:%s <%s> pre_handler: p->addr = 0x%p, ip = %lx, flags = 0x%lx rax %ld\n",
                current->comm,p->symbol_name, p->addr, regs->ip, regs->flags, regs->ax);
#endif
        return 0;
}
...
内核模块获取内核函数返回值
在内核目录下,samples/kprobes/kretprobe_example.c,他专门用于获取内核函数返回值
/* * kretprobe_example.c * * Here's a sample kernel module showing the use of return probes to * report the return value and total time taken for probed function * to run. * * usage: insmod kretprobe_example.ko func=<func_name> * * If no func_name is specified, _do_fork is instrumented * * For more information on theory of operation of kretprobes, see * Documentation/kprobes.txt * * Build and insert the kernel module as done in the kprobe example. * You will see the trace data in /var/log/messages and on the console * whenever the probed function returns. (Some messages may be suppressed * if syslogd is configured to eliminate duplicate messages.) */

#include <linux/kernel.h>
#include <linux/module.h>
#include <linux/kprobes.h>
#include <linux/ktime.h>
#include <linux/limits.h>
#include <linux/sched.h>

static char func_name[NAME_MAX] = "_do_fork";
module_param_string(func, func_name, NAME_MAX, S_IRUGO);
MODULE_PARM_DESC(func, "Function to kretprobe; this module will report the"
                        " function's execution time");

/* per-instance private data */
struct my_data {

        ktime_t entry_stamp;
};

/* Here we use the entry_hanlder to timestamp function entry */
static int entry_handler(struct kretprobe_instance *ri, struct pt_regs *regs)
{

        struct my_data *data;

        if (!current->mm)
                return 1;       /* Skip kernel threads */

        data = (struct my_data *)ri->data;
        data->entry_stamp = ktime_get();
        return 0;
}

/* * Return-probe handler: Log the return value and duration. Duration may turn * out to be zero consistently, depending upon the granularity of time * accounting on the platform. */
static int ret_handler(struct kretprobe_instance *ri, struct pt_regs *regs)
{

        unsigned long retval = regs_return_value(regs);
        struct my_data *data = (struct my_data *)ri->data;
        s64 delta;
        ktime_t now;

        now = ktime_get();
        delta = ktime_to_ns(ktime_sub(now, data->entry_stamp));
        pr_info("%s returned %lu and took %lld ns to execute\n",
                        func_name, retval, (long long)delta);
        return 0;
}

static struct kretprobe my_kretprobe = {

        .handler                = ret_handler,
        .entry_handler          = entry_handler,
        .data_size              = sizeof(struct my_data),
        /* Probe up to 20 instances concurrently. */
        .maxactive              = 20,
};

static int __init kretprobe_init(void)
{

        int ret;

        my_kretprobe.kp.symbol_name = func_name;
        ret = register_kretprobe(&my_kretprobe);
        if (ret < 0) {

                pr_err("register_kretprobe failed, returned %d\n", ret);
                return -1;
        }
        pr_info("Planted return probe at %s: %p\n",
                        my_kretprobe.kp.symbol_name, my_kretprobe.kp.addr);
        return 0;
}

static void __exit kretprobe_exit(void)
{

        unregister_kretprobe(&my_kretprobe);
        pr_info("kretprobe at %p unregistered\n", my_kretprobe.kp.addr);

        /* nmissed > 0 suggests that maxactive was set too low. */
        pr_info("Missed probing %d instances of %s\n",
                my_kretprobe.nmissed, my_kretprobe.kp.symbol_name);
}

module_init(kretprobe_init)
module_exit(kretprobe_exit)
MODULE_LICENSE("GPL");
通过 proc 跟踪指定函数
官方文档:
https://www.kernel.org/doc/html/latest/trace/kprobetrace.html
我们使用proc文件系统,然后完成 上面 nr的打印
p表示probe,即kprobe(使用r就是获取返回值),_do_fork+283 283 就是上面计算的 0x11B,表示 探测 _do_fork+283 ,%ax表示获取值,这里直接获取了寄存器。
echo 'p _do_fork+283 %ax' > /sys/kernel/debug/tracing/kprobe_events
打开探测,在上面 往 kprobe_events 注入后,会在 /sys/kernel/debug/tracing/events/kprobes/目录下生成对应的项目,enable就能使能探测
echo 1 > /sys/kernel/debug/tracing/events/kprobes/p__do_fork_283/enable
查看探测内容:
cat /sys/kernel/debug/tracing/trace
arg1就是我们期望获取的 %ax 值
root@iZ0jl6ke2x86d5zhr5tafbZ:~/kernelcode/linux-source-4.15.0/samples/kprobes# cat /sys/kernel/debug/tracing/trace
# tracer: nop
#
# entries-in-buffer/entries-written: 8/8   #P:24
#
#                              _-----=> irqs-off
#                             / _----=> need-resched
#                            | / _---=> hardirq/softirq
#                            || / _--=> preempt-depth
#                            ||| /     delay
#           TASK-PID   CPU#  ||||    TIMESTAMP  FUNCTION
#              | |       |   ||||       |         |
            sshd-13335 [020] d... 399409.350298: p__do_fork_283: (_do_fork+0x11b/0x400) arg1=0x34c7
            sshd-13335 [020] .... 399410.450334: p__do_fork_283: (_do_fork+0x11b/0x400) arg1=0x34c8
            sshd-13335 [020] .... 399411.550339: p__do_fork_283: (_do_fork+0x11b/0x400) arg1=0x34c9
            bash-13375 [023] .... 399411.614785: p__do_fork_283: (_do_fork+0x11b/0x400) arg1=0x34ca
            bash-13375 [023] .... 399421.421116: p__do_fork_283: (_do_fork+0x11b/0x400) arg1=0x34cb
            sshd-13335 [020] .... 399421.469287: p__do_fork_283: (_do_fork+0x11b/0x400) arg1=0x34cc
            sshd-13335 [020] .... 399422.569368: p__do_fork_283: (_do_fork+0x11b/0x400) arg1=0x34cd
            bash-13375 [023] .... 399422.668759: p__do_fork_283: (_do_fork+0x11b/0x400) arg1=0x34ce
更多的用法请参考 上面给的官方文档连接。
kprobe的使用实际上不复杂,如果不会内核编程,也可以使用 systemtap 他是基于 kprobe的内核跟踪工具,其原理就是让你编写简单的代码,然后根据自动生成、编译、加载内核模块,对外屏蔽一些细节。
版权声明
本文为[Mrpre]所创,转载请带上原文链接,感谢
https://wonderful.blog.csdn.net/article/details/106801888
边栏推荐
- Recyclerview advanced use (I) - simple implementation of sideslip deletion
- grep无法重定向到文件的问题
- bc的用法
- MySQL数据库讲解(十)
- mysql 5.1升级到5.67
- HyperBDR云容灾V3.2.1版本发布|支持更多云平台,新增监控告警功能
- MySQL数据库讲解(九)
- API Gateway/API 网关(三) - Kong的使用 - 限流rate limiting(redis)
- MySQL lock database lock
- Get the thread return value. Introduction to the use of future interface and futuretask class
猜你喜欢

回顾2021:如何帮助客户扫清上云最后一公里的障碍?
MySQL数据库讲解(八)
进入新公司,运维工程师从下面这几项了解系统的部署
redis数据库讲解二(redis高可用、持久化、性能管理)
微信小程序将原生请求通过es6的promise来进行优化
squid代理
MYSQL一种分表实现方案及InnoDB、MyISAM、MRG_MYISAM等各种引擎应用场景介绍
After entering the new company, the operation and maintenance engineer can understand the deployment of the system from the following items
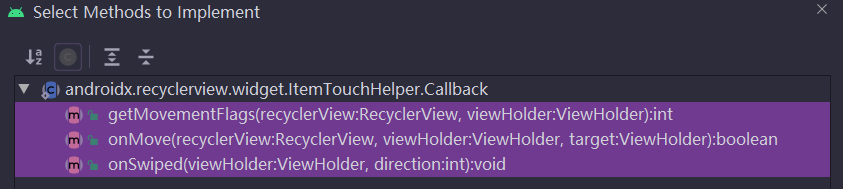
Recyclerview advanced use (I) - simple implementation of sideslip deletion

TLS/SSL 协议详解 (28) TLS 1.0、TLS 1.1、TLS 1.2之间的区别
随机推荐
进入新公司,运维工程师从下面这几项了解系统的部署
grep无法重定向到文件的问题
操作系统常见面试题目:
About the configuration and use of json5 in nodejs
js 抛物线运动方法封装
Installation and use of postman pit
dp-[NOIP2000]方格取数
Recyclerview advanced use (I) - simple implementation of sideslip deletion
IE8 browser prompts whether to block access to JS script
redis数据库讲解(三)redis数据类型
JDBC details
Gartner预测云迁移规模大幅增长;云迁移的优势是什么?
SSH 通过跳板机连接远程主机
Algorithem_ReverseLinkedList
Introduction to the use of countdownlatch and cyclicbarrier for inter thread control
MySQL lock database lock
Arrays类的使用案例
ie8 浏览器提示是否 阻止访问js脚本
mysql查询库大小
多云数据流转?云上容灾?年前最后的价值内容分享