当前位置:网站首页>Nifi fast installation and file synchronization
Nifi fast installation and file synchronization
2022-04-23 16:43:00 【A hundred nights】
Nifi In short, it is a data pull 、 A system for data processing and data distribution .
Nifi Running requires JVM, need jdk,nifi 1.x The above needs jdk8 above ,0.x need jdk7 above .
This article is in Centos 7 Install in nifi-1.8.0-bin.tar.gz
Download address :nifi.apache.org/download (xx.tar.gz yes Linux edition ,xx.zip yes Windows edition )
User manual :http://nifi.apache.org/docs.html
install
1. Download installation package
wget -b http://mirror.bit.edu.cn/apache/nifi/1.8.0/nifi-1.8.0-bin.tar.gz
2. Unzip the installation package
tar -zxf nifi-1.8.0-bin.tar.gz
3. modify nifi/conf Under the table of contents nifi.properties file
Modify host number and port number
nifi.web.http.host= Host number
nifi.web.http.port= Service port number [ Customize ]
# web properties #
nifi.web.war.directory=./lib
nifi.web.http.host=192.168.197.106   //  Change to your own host ip
nifi.web.http.port=8182			     //  Default 8080, Prevent port occupation , It can be modified to other ports
nifi.web.http.network.interface.default=
nifi.web.https.host=
nifi.web.https.port=
nifi.web.https.network.interface.default=
nifi.web.jetty.working.directory=./work/jetty
nifi.web.jetty.threads=200
nifi.web.max.header.size=16 KB
nifi.web.proxy.context.path=
nifi.web.proxy.host=
4. Service startup
Get into nifi/bin Catalog , function nifi.sh file , The front and rear operation commands are as follows
./nifi.sh run 	// The front desk operation
./nifi.sh start // Background operation
The following prompt appears: the service is started successfully ,
Java home: /opt/soft/jdk180
NiFi home: /opt/soft/nifi-1.8.0

Bootstrap Config File: /opt/soft/nifi-1.8.0/conf/bootstrap.conf
see nifi Start state
./nifi.sh stauts
-----------------------------------------------------------------------------------------------------------

Java home: /opt/soft/jdk180
NiFi home: /opt/soft/nifi-1.8.0

Bootstrap Config File: /opt/soft/nifi-1.8.0/conf/bootstrap.conf

2021-05-01 17:24:49,589 INFO [main] org.apache.nifi.bootstrap.Command Apache NiFi is currently running, listening to Bootstrap on port 43069, PID=2099
5. Service closing
If it's a foreground operation , direct Ctrl+C Exit Service .
If it's running in the background , Access to nifi/bin Catalog , Execute the following command
./nifi.sh stop
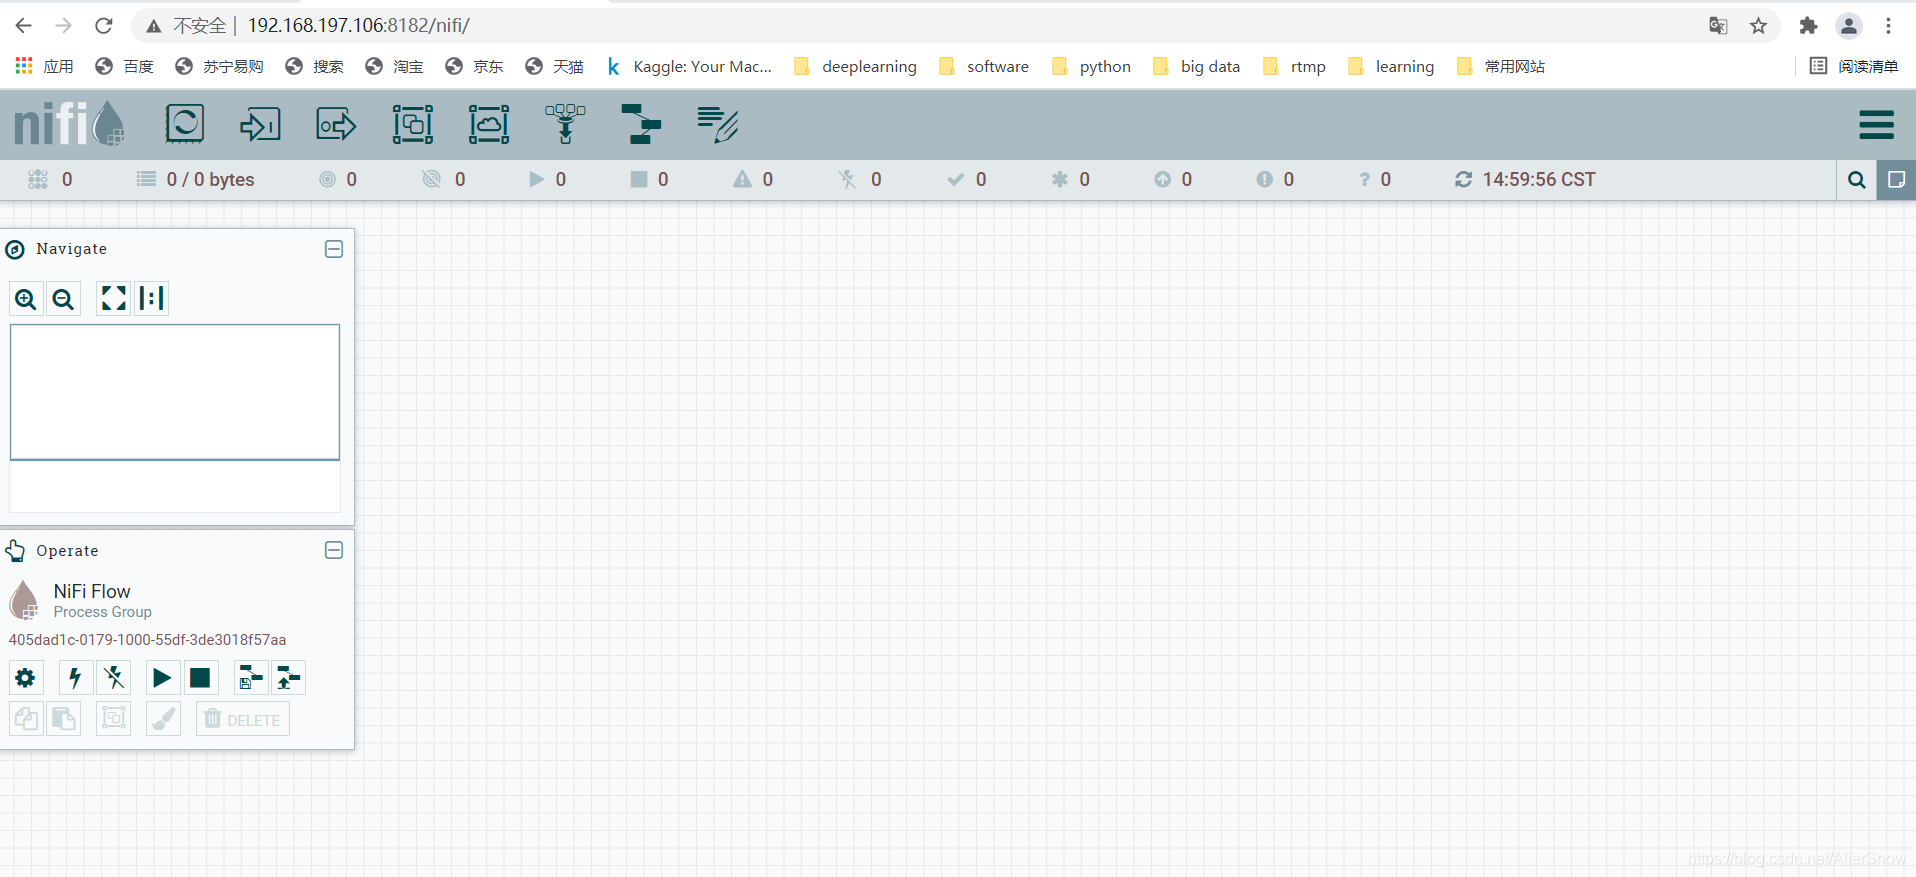
6.web UI
Service startup 1-5 Minutes later , Can open web see ,http:192.168.197.106:8182/nifi, As shown in the figure .
Use
File synchronization
Realization : take /opt/act.log Synchronize file contents to /opt/data Empty directory , And keep the source file .
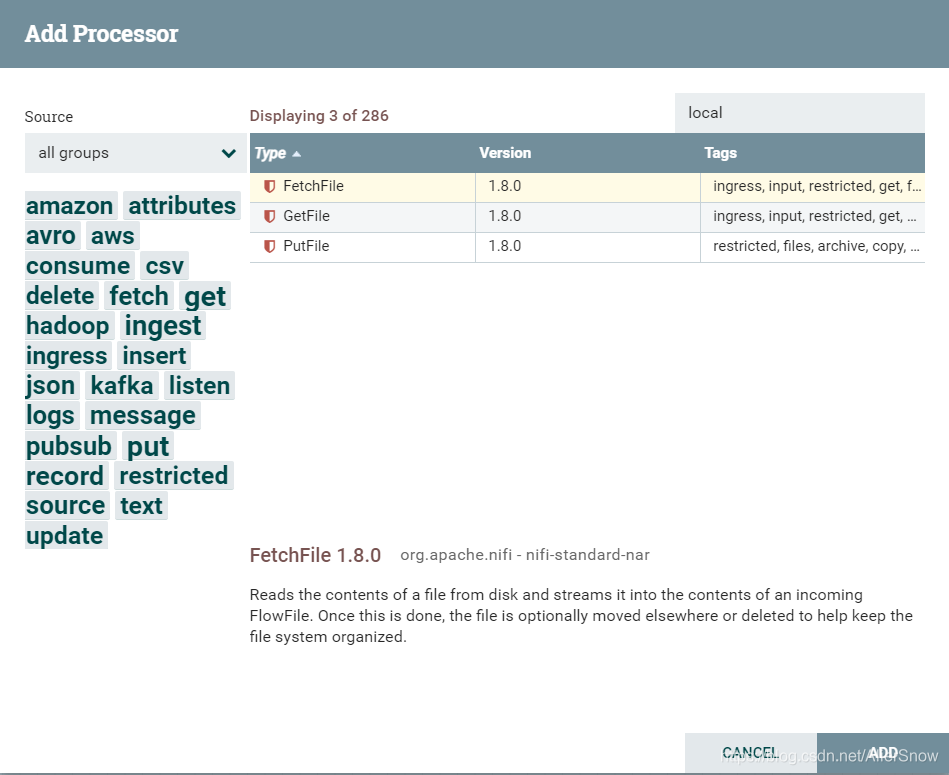
Processor required GetFile ( Read and delete files ) + PutFile( Save the file )
Drag and drop a... In the toolbar Processor Go to the canvas , Input ’local’, choice ’GetFile’ processor , Click on ADD Add to canvas , The same operation creates a ’PutFile’ processor .
To configure GetFile processor
1. Select processor , Right click selection “configure”,“settings” The admission “success”, Automatically terminate the relationship .

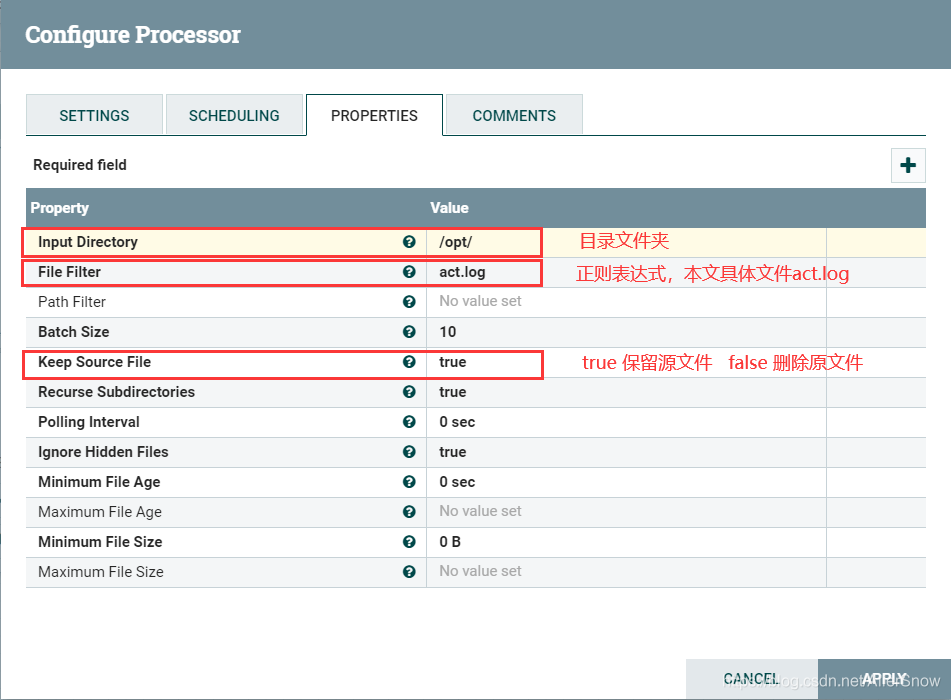
2.“properties” Attribute configuration .
- Input Directory: Enter the source directory
- File Filter: File filter
- Keep Source File: Do you want to keep the source file , Default false
- Recurse Subdirectories: Whether to pull the files in the subdirectory , Default true
After configuration , Click on ‘apply’ Save application .
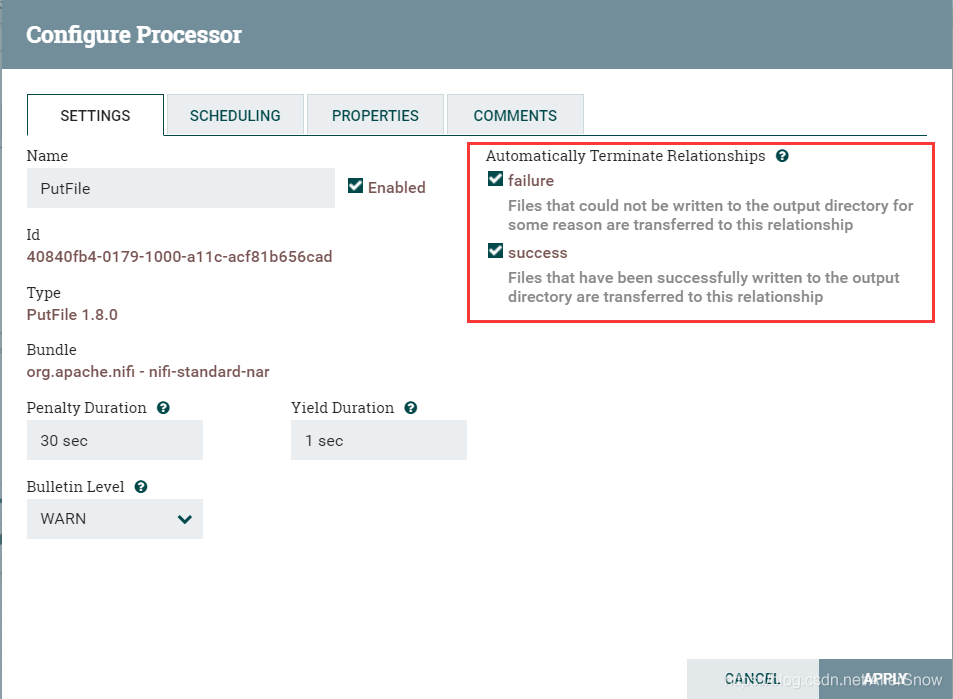
To configure PutFile processor
1. Select processor , Right click selection “configure”, stay “settings” The admission “failure” and “success”.
2.“properties” Attribute configuration
- Directory: Target directory
- Conflict Resolution Strategy: Specify the operation after a file with the same name exists . Optional value :replace Replace existing files ,fail Execution failure , Don't generate files ,ignore Ignore .
- Create Missing Directories: Specify whether the target directory does not exist or not to create a directory . Optional value :true newly build ,false No new .
After configuration , Click on ‘apply’ Save application .

Connecting the processor
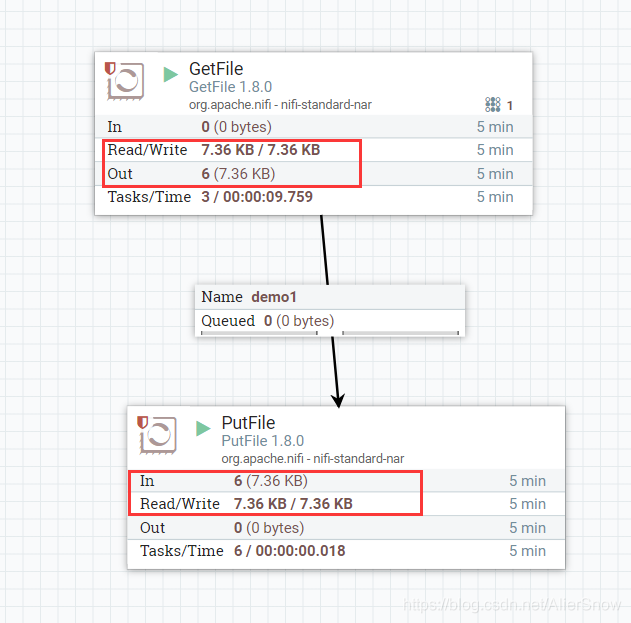
1. Move the mouse to ’GetFile’ On , The following arrow appears , Click and drag to ’PutFile’ On .

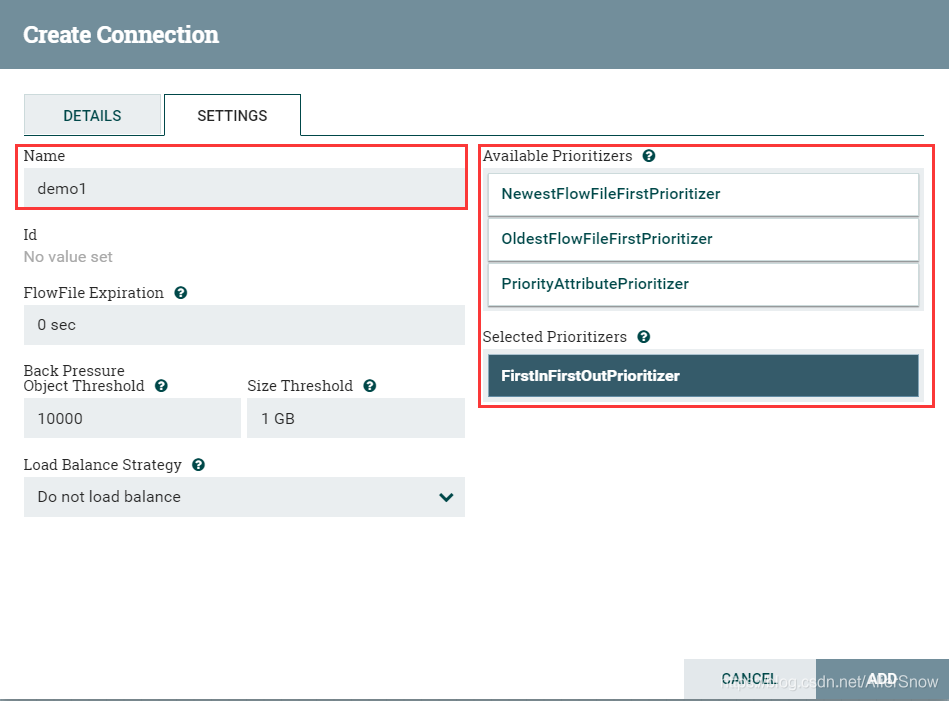
2. To configure “Settings”, Set up name:demo1, Increase priority ,‘FirstInFirstOutPrioritizer’. Click on ’add’, Create connection .
3. Right click the canvas and select ’Start‘, Visible data flow .GetFile Read file output 7.36KB,PutFile Write files to the target directory ,7.36KB, Also visible in the target directory act.log file .
版权声明
本文为[A hundred nights]所创,转载请带上原文链接,感谢
https://yzsam.com/2022/04/202204231401521069.html
边栏推荐
- 关于 background-image 渐变gradient()那些事!
- Report FCRA test question set and answers (11 wrong questions)
- Gartner announces emerging technology research: insight into the meta universe
- Sail soft implements a radio button, which can uniformly set the selection status of other radio buttons
- logback的配置文件加载顺序
- ◰GL-着色器处理程序封装
- 人脸识别框架之dlib
- Esxi encapsulated network card driver
- Set the color change of interlaced lines in cells in the sail software and the font becomes larger and red when the number is greater than 100
- PyMySQL
猜你喜欢
Dlib of face recognition framework

The solution of not displaying a whole line when the total value needs to be set to 0 in sail software

批量制造测试数据的思路,附源码
Gartner announces emerging technology research: insight into the meta universe

ACL 2022 | DialogVED:用于对话回复生成的预训练隐变量编码-解码模型
True math problems in 1959 college entrance examination
Use case execution of robot framework

无线鹅颈麦主播麦手持麦无线麦克风方案应当如何选择
Solution of garbled code on idea console
MySql主从复制
随机推荐
Sail soft segmentation solution: take only one character (required field) of a string
文件操作详解(2)
Deeply understand the relevant knowledge of 3D model (modeling, material mapping, UV, normal), and the difference between displacement mapping, bump mapping and normal mapping
5-minute NLP: text to text transfer transformer (T5) unified text to text task model
MySQL的btree索引和hash索引区别
PHP 零基础入门笔记(13):数组相关函数
The font of the soft cell changes color
信息摘要、数字签名、数字证书、对称加密与非对称加密详解
TypeError: set_figure_params() got an unexpected keyword argument ‘figsize‘
Construction of promtail + Loki + grafana log monitoring system
Phpstudy V8, a commonly used software for station construction 1 graphic installation tutorial (Windows version) super detailed
G008-hwy-cc-estor-04 Huawei Dorado V6 storage simulator configuration
Encapsulating the logging module
Deepinv20 installation MariaDB
Postman batch production body information (realize batch modification of data)
LVM and disk quota
织梦DEDECMS安全设置指南
Set the color change of interlaced lines in cells in the sail software and the font becomes larger and red when the number is greater than 100
DDT + Excel for interface test
The most detailed knapsack problem!!!