当前位置:网站首页>人脸识别框架之dlib
人脸识别框架之dlib
2022-04-23 16:25:00 【andrew P】
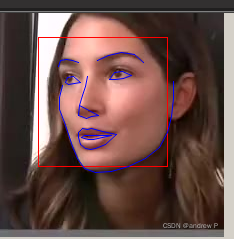
1.人脸检测如下
import dlib
from imageio import imread

detector = dlib.get_frontal_face_detector()#检测器
predictor_path = 'shape_predictor_68_face_landmarks.dat'
predictor = dlib.shape_predictor(predictor_path)#预测器
win = dlib.image_window()
path ='111.jpg'

img = imread(path)
win.clear_overlay()
win.set_image(img)

# 1 表示将图片放大一倍,便于检测到更多人脸
dets = detector(img, 1)
print('检测到了 %d 个人脸' % len(dets))
for i, d in enumerate(dets):
		print('- %d: Left %d Top %d Right %d Bottom %d' % (i, d.left(), d.top(), d.right(), d.bottom()))
		shape = predictor(img, d)
		# 第 0 个点和第 1 个点的坐标
		print('Part 0: {}, Part 1: {}'.format(shape.part(0), shape.part(1)))
		win.add_overlay(shape)
2.生成面部检测器
detector = dlib.get_frontal_face_detector()#检测器3.生成特征预测器,68维度的
predictor_path = 'shape_predictor_68_face_landmarks.dat'
predictor = dlib.shape_predictor(predictor_path)#预测器
shape_predictor(landmark_model_path)
参数:landmark_model_path:68特征landmarks模型path
官方例子如下:
http://dlib.net/face_alignment.py.html
# Load all the models we need: a detector to find the faces, a shape predictor
# to find face landmarks so we can precisely localize the face
加载我们需要的所有模型:一个用于查找人脸的检测器,一个用于查找人脸标志的形状预测器,这样我们就可以精确定位人脸
4.开始检测
# 1 表示将图片放大一倍,便于检测到更多人脸
dets = detector(img, 1)
5.返回68个特征点
shape = predictor(img, d)6.将特征点画到原来的图上
for i, d in enumerate(dets):
		print('- %d: Left %d Top %d Right %d Bottom %d' % (i, d.left(), d.top(), d.right(), d.bottom()))
		shape = predictor(img, d)
		# 第 0 个点和第 1 个点的坐标
		print('Part 0: {}, Part 1: {}'.format(shape.part(0), shape.part(1)))
		win.add_overlay(shape)
结果
版权声明
本文为[andrew P]所创,转载请带上原文链接,感谢
https://blog.csdn.net/qq_41166909/article/details/124330874
边栏推荐
- 力扣-746.使用最小花费爬楼梯
- linux上啟動oracle服務
- 第十天 异常机制
- Win11/10家庭版禁用Edge的inprivate浏览功能
- Nacos 详解,有点东西
- Cloudy data flow? Disaster recovery on cloud? Last value content sharing years ago
- Cartoon: what are IAAs, PAAS, SaaS?
- Gartner publie une étude sur les nouvelles technologies: un aperçu du métacosme
- The biggest winner is China Telecom. Why do people dislike China Mobile and China Unicom?
- Six scenarios of cloud migration
猜你喜欢
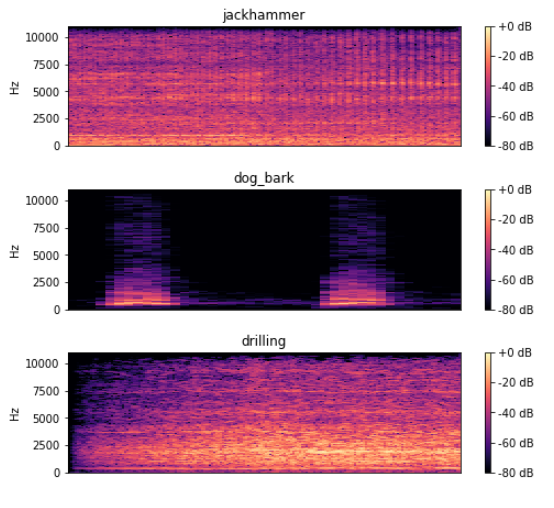
100 deep learning cases | day 41 - convolutional neural network (CNN): urbansound 8K audio classification (speech recognition)
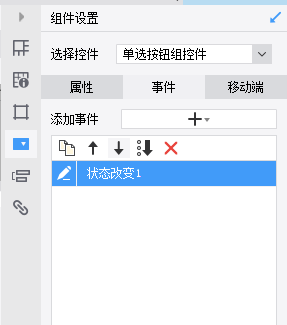
Sail soft implements a radio button, which can uniformly set the selection status of other radio buttons
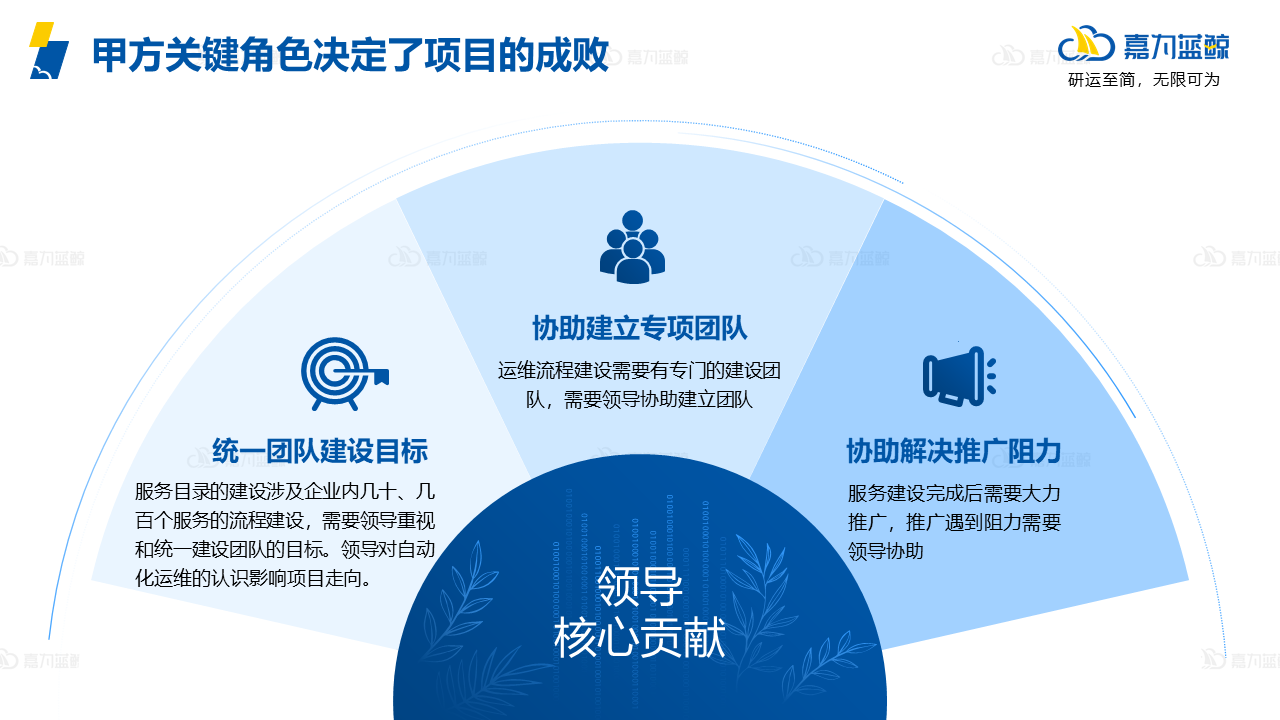
How important is the operation and maintenance process? I heard it can save 2 million a year?
欣旺达:HEV和BEV超快充拳头产品大规模出货
Day (8) of picking up matlab
The system research problem that has plagued for many years has automatic collection tools, which are open source and free
Sail soft segmentation solution: take only one character (required field) of a string
捡起MATLAB的第(6)天
![Oak-d raspberry pie cloud project [with detailed code]](/img/03/2d464d42614cd65877c645b60047ae.png)
Oak-d raspberry pie cloud project [with detailed code]
建站常用软件PhpStudy V8.1图文安装教程(Windows版)超详细
随机推荐
Hyperbdr cloud disaster recovery v3 Version 2.1 release supports more cloud platforms and adds monitoring and alarm functions
Database dbvisualizer Pro reported file error, resulting in data connection failure
捡起MATLAB的第(9)天
Hypermotion cloud migration completes Alibaba cloud proprietary cloud product ecological integration certification
捡起MATLAB的第(3)天
logback的配置文件加载顺序
Six scenarios of cloud migration
Solution to the fourth "intelligence Cup" National College Students' IT skills competition (group B of the final)
Best practice of cloud migration in education industry: Haiyun Jiexun uses hypermotion cloud migration products to implement progressive migration for a university in Beijing, with a success rate of 1
Day (9) of picking up matlab
Government cloud migration practice: Beiming digital division used hypermotion cloud migration products to implement the cloud migration project for a government unit, and completed the migration of n
Method 2 of drawing ROC curve in R language: proc package
The biggest winner is China Telecom. Why do people dislike China Mobile and China Unicom?
深度学习100例 | 第41天-卷积神经网络(CNN):UrbanSound8K音频分类(语音识别)
捡起MATLAB的第(8)天
Start Oracle service on Linux
ES常用查询、排序、聚合语句
Force buckle-746 Climb stairs with minimum cost
Unity shader learning
浅谈 NFT项目的价值、破发、收割之争