当前位置:网站首页>搭建Tigase进行二次开发
搭建Tigase进行二次开发
2022-08-09 09:26:00 【心中要有一片海】
一、导入tigase到eclipse
1、通过git克隆项目到本地。
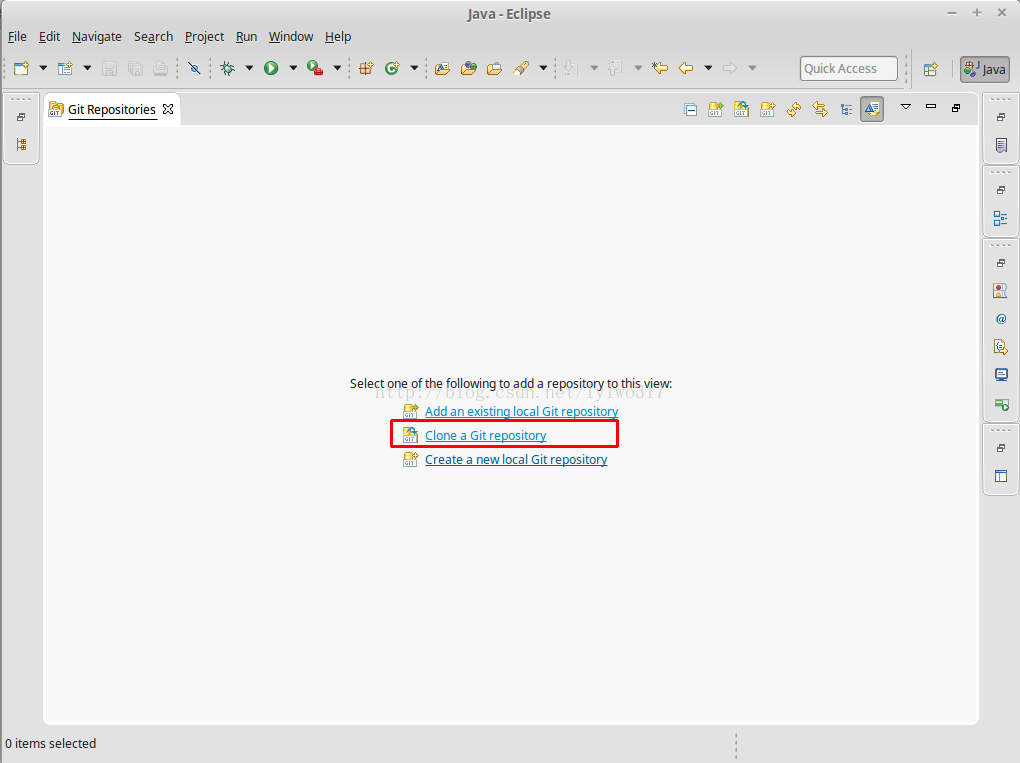
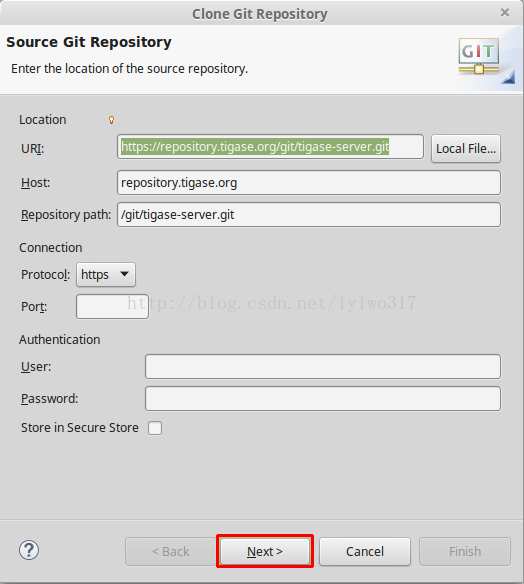
git地址 https://repository.tigase.org/git/tigase-server.git。打开 window->show View->other,选择Git Repositories点击OK,在左下角就会看到Git Repositories。点击clone,
将上面的git地址复制进去。一直next,最后finish。
等待一段时间后,就将tigase克隆到本地了。
如果已经安装好了git,并将git 添加到了环境变量中,直接用命令行提示符输入git clone https://repository.tigase.org/git/tigase-server.git 也是可以直接将项目克隆到本地
将
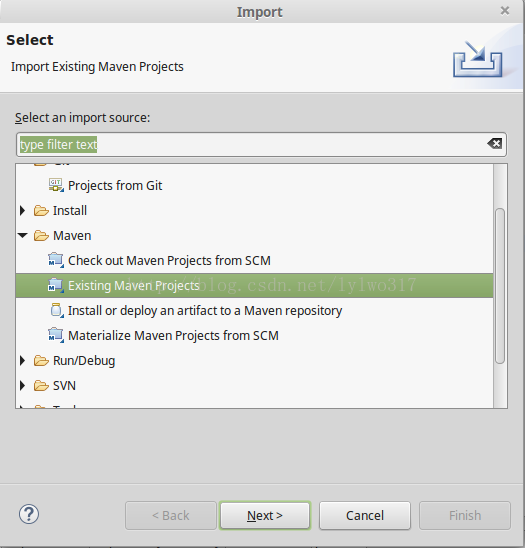
2、使用eclipse 将项目导入
file->import->Existing maven projects
browse->选择tigase路径->finish
导入之后会报错
首先tigase-server依赖tigase-utils,而tigase-utils又依赖tigase-xmltools,所以需要将tigase-utils和tigase-xmltools加入本地maven仓库
git地址分别是:https://repository.tigase.org/git/tigase-utils.git https://repository.tigase.org/git/tigase-xmltools.git
将项目拉取下来之后,在命令行提示符里面定位到项目目录,在项目根目录执行mvn install(需要安装maven并将maven添加到环境变量中,如果是linux安装完maven后,就可以直接使用了),由于tigase-utils依赖tigase-xmltools,所以先将tigase-xmltools安装到本地maven仓库,再安装tigase-utils
还有一个错误要解决,报错信息:Plugin execution not covered by lifecycle configuration: org.codehaus.gmaven:gmaven-plugin:1.5:execute (execution: gitver, phase: validate)
解决办法可以看这里:http://stackoverflow.com/a/13733232/3079390
就是将<plugins>...</plugins>转换成<pluginManagement><plugins>...</plugins></pluginManagement>
这样错误应该就解决了。


二、创建数据库
我这里使用的是Mysql数据库在tigase-server根目录中执行./scripts/db-create-mysql.sh tigase_username tigase_password database_name root_username root_password database_host (除了”./scripts/db-create-mysql.sh“,后面字段根据自己情况填写)。我这里使用的是linux系统,所以直接运行shell脚本就可以创建。如果是windows系统,可以安装cygwin来运行
执行完后登陆mysql查看是否创建成功了。
三、运行
在/tigase-server/src/main/java/tigase/server/XMPPServer.java 上右键->Run As->Java Application然后会报错,因为还有一些东西没有配置再次右键->Run As->Run configurations填写下面的配置Program arguments:
--property-file etc/init.properties
Vm arguments:
-Dfile.encoding=UTF-8 -Dsun.jnu.encoding=UTF-8 -Djdbc.drivers=com.mysql.jdbc.Driver -server -Xms100M -Xmx200M -XX:PermSize=32m -XX:MaxPermSize=256m -XX:MaxDirectMemorySize=128m
修改etc/ini.properties文件
--virt-hosts = reason-sz.no-ip.org--user-db-uri = jdbc:mysql://localhost/tigasedb?user=tigase&password=tigase12&useUnicode=true&characterEncoding=UTF-8&autoCreateUser=true--user-db = mysql--admins = [email protected]config-type = --gen-config-all--cluster-mode = truesess-man/plugins-conf/presence/auto-authorize=truesess-man/plugins-conf/jabber\:iq\:roster/auto-authorize=truesess-man/plugins-conf/auto-authorize=truec2s/processors[s]=urn:xmpp:sm:3--sm-plugins = +message-archive-xep-0136,+jabber:iq:auth,+urn:ietf:params:xml:ns:xmpp-sasl,+urn:ietf:params:xml:ns:xmpp-bind,+urn:ietf:params:xml:ns:xmpp-session,+jabber:iq:register,+jabber:iq:roster,+presence,+jabber:iq:privacy,+jabber:iq:version,+http://jabber.org/protocol/stats,+starttls,+msgoffline,+vcard-temp,+http://jabber.org/protocol/commands,+jabber:iq:private,+urn:xmpp:ping,+basic-filter,+domain-filter,+pep,-zlib--debug = server,xmpp.impl--virt-hosts = reason-sz.no-ip.org是我自己定义的虚拟主机域名,具体根据自己的实际情况定义
出现问题java.lang.ClassNotFoundException: com.mysql.jdbc.Driver
在将连接mysql的jar包add to path
再次运行,应该就不会报错了。
边栏推荐
- Ovie map computer terminal and mobile terminal can not be used, is there any alternative map tool
- 【机器学习】网络爬虫实战详解
- "The camera can't be used" + win8.1 + DELL + external camera + USB drive-free solution
- MySQL event_single event_timed loop event
- Web请求原理
- 软件测试面试题目:请你列举几个物品的测试方法怎么说?
- Understanding of PID control motor output as motor PWM duty cycle input
- 你一定要看的安装及卸载测试用例的步骤及方法总结
- 第四讲 SVN
- Ontology Development Diary 03 - When debugging is in progress
猜你喜欢
本体开发日记03-理解代码

Redis Basics

Another implementation of lateral view explode
测试计划包括哪些内容?目的和意义是什么?
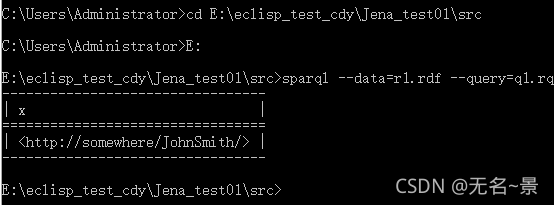
Ontology development diary 02 - simple sparql query
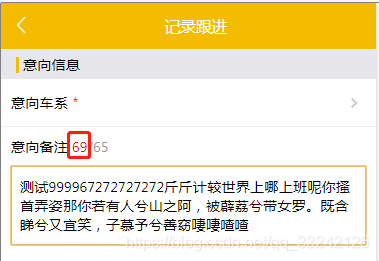
The div simulates the textarea text box, the height of the input text is adaptive, and the word count and limit are implemented
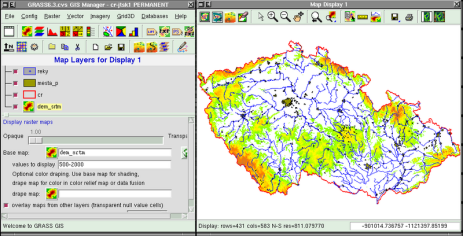
These 12 GIS software are better than the other
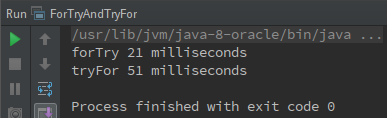
try catch 对性能影响
Domestic Google earth, terrain analysis seconds kill with the map software
软件测试个人求职简历该怎么写,模板在这里


随机推荐
选择黑盒测试用例设计方法的综合策略方案总结
单元测试是什么?怎么写?主要测试什么?
MVCC multi-version concurrency control
字符串
如何用数组实现环形队列
一个项目的整体测试流程有哪几个阶段?测试方法有哪些?
性能测试报告包括哪些内容?模板范文哪里找?看这里
Go-控制语句那些事
可以写进简历的软件测试项目实战经验(包含电商、银行、app等)
接口测试的概念、目的、流程、测试方法有哪些?
Read file by byte and character_load configuration file
AES/ECB/PKCS5Padding encryption and decryption
JS-常用方法整理
有返回值的函数
.equals ==
Summary of steps and methods for installing and uninstalling test cases that you must read
Global 19 Google Satellite Map Free View Download
[Pytorch] Install mish_cuda
手机APP测试流程规范和方法你知道多少?
全网最全的软件测试基础知识整理(新手入门必学)