当前位置:网站首页>Cloud computing skills competition -- Part 2 of openstack private cloud environment
Cloud computing skills competition -- Part 2 of openstack private cloud environment
2022-04-23 08:03:00 【King_ nul】
Original blog address
1、 Security group settings
First , Input [http://controller/dashboard], Log in to the platform page , And then according to Continue with the description in the figure below .


After configuring the security group, the next step is to configure the network
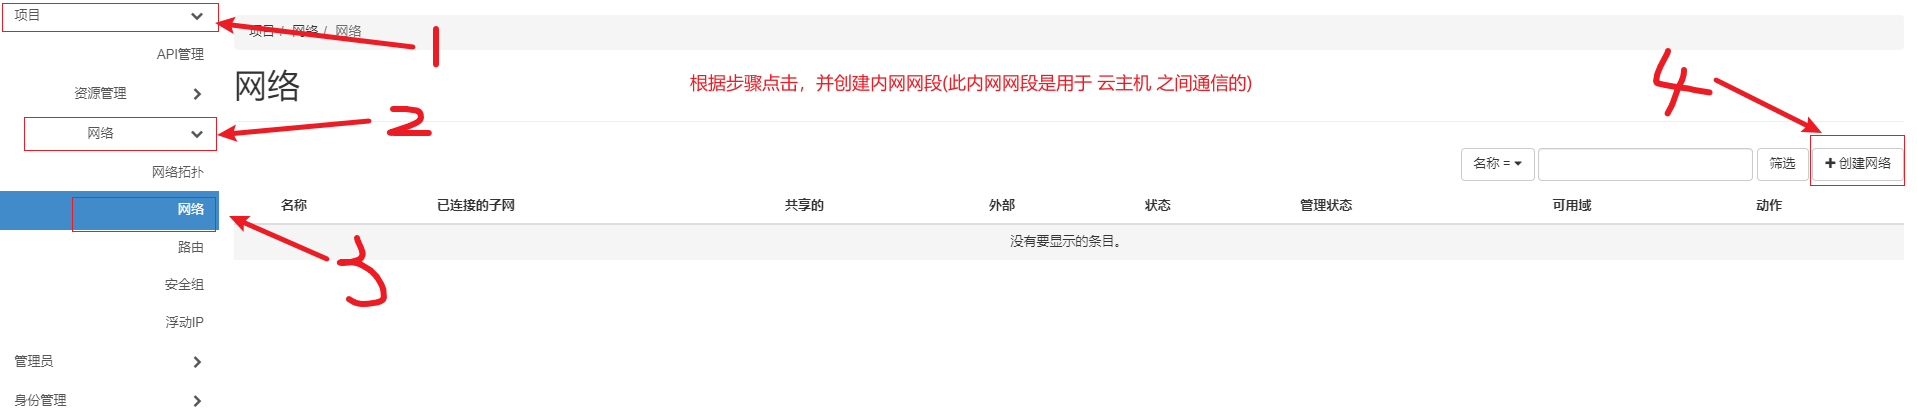
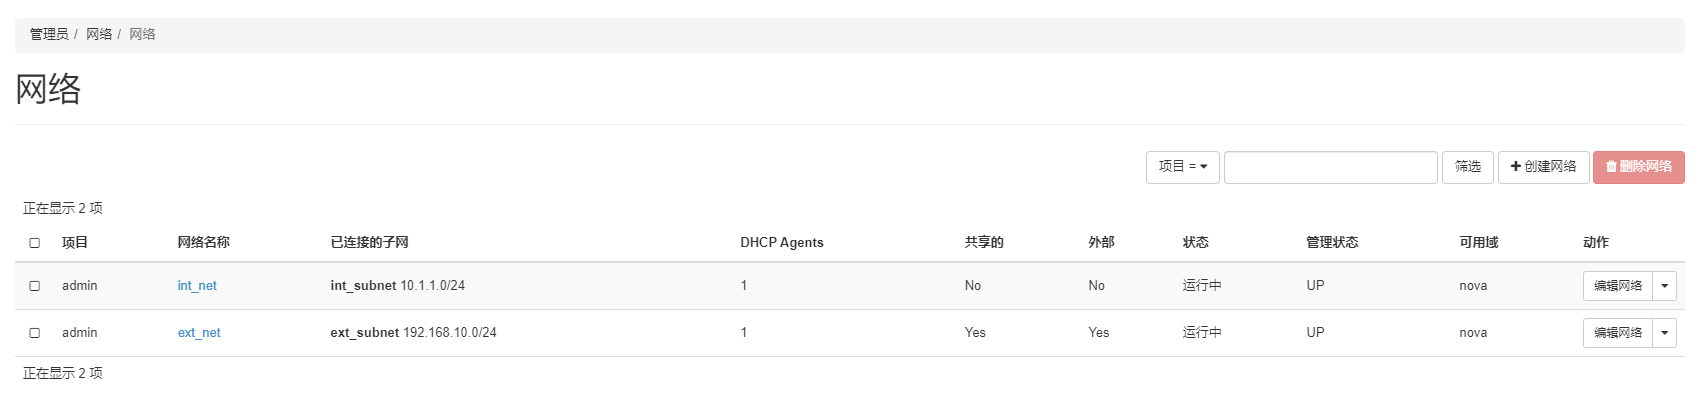
2、 Cloud platform network configuration
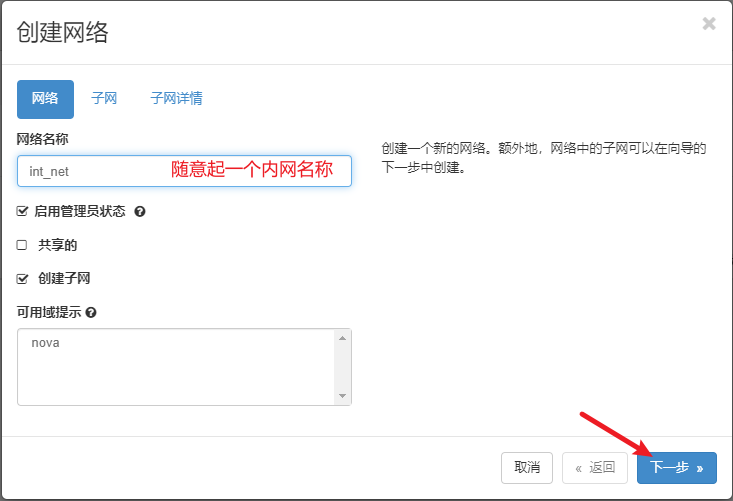
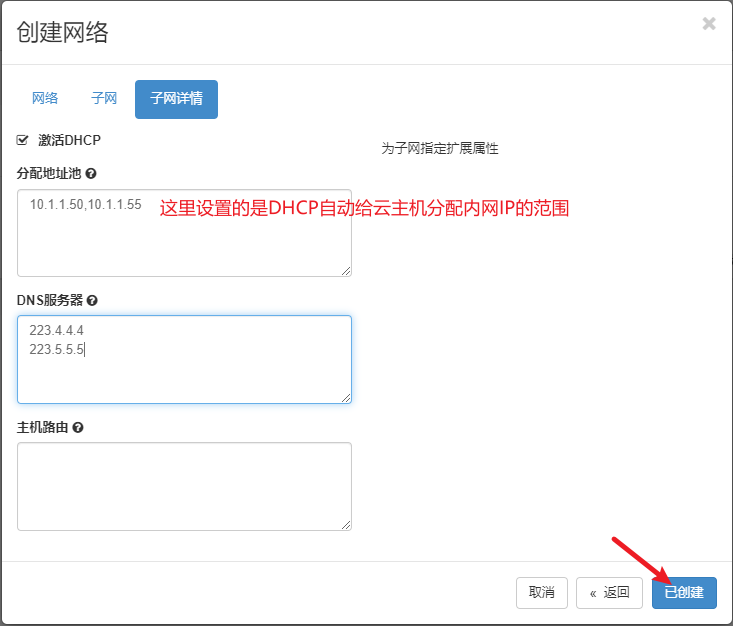
① Intranet configuration
In network configuration , You need to use the external network segment and network adapter used in the construction (provider)
Simply understand : Cloud platform is used to manage virtual machines , The network used by the virtual machine is the same as that of the host machine, that is, the virtual machine Bridging network , The network of the cloud platform establishes a bridging relationship with the external network card of the host to enable the virtual machine on the platform to access the Internet .


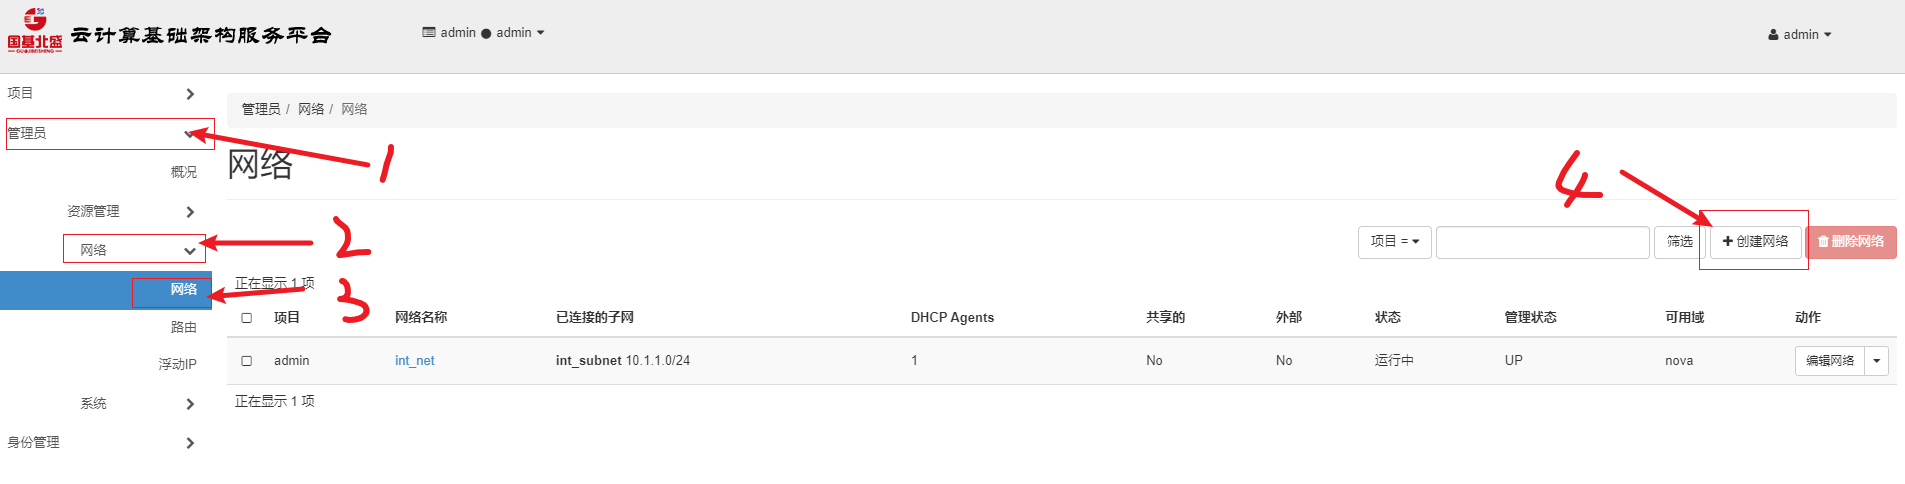
The intranet is configured here , Next, configure the external network .
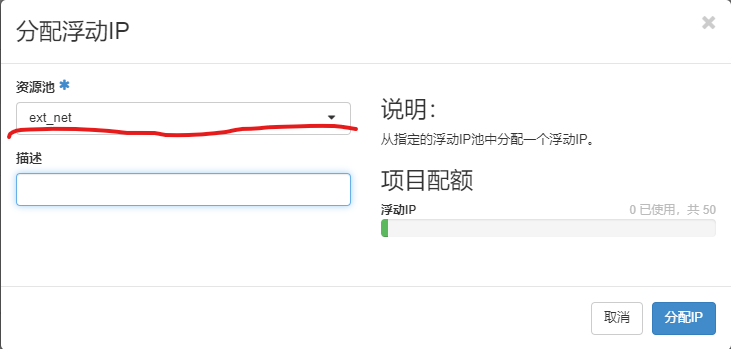
② Internet configuration


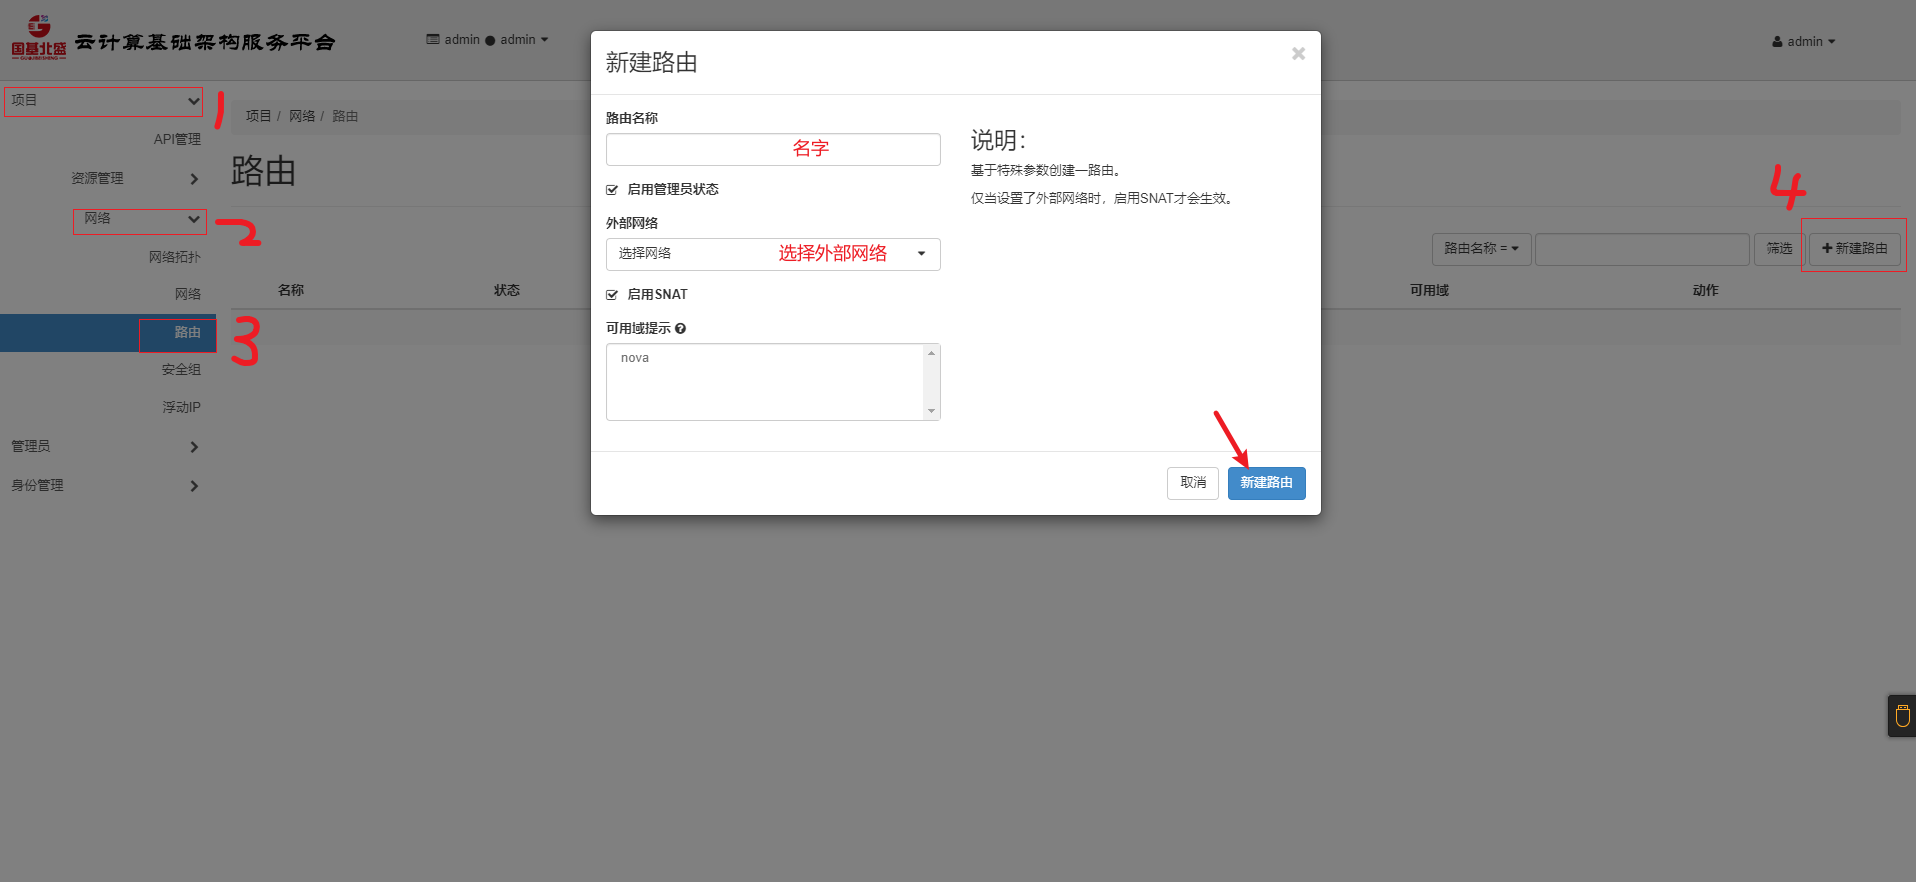
After configuring the external network , You still need to connect the intranet and extranet of the cloud platform , This requires configuring a router , Interworking between the two networks
③ Router configuration


After everything on the network is configured , So let's create one Virtual machine type
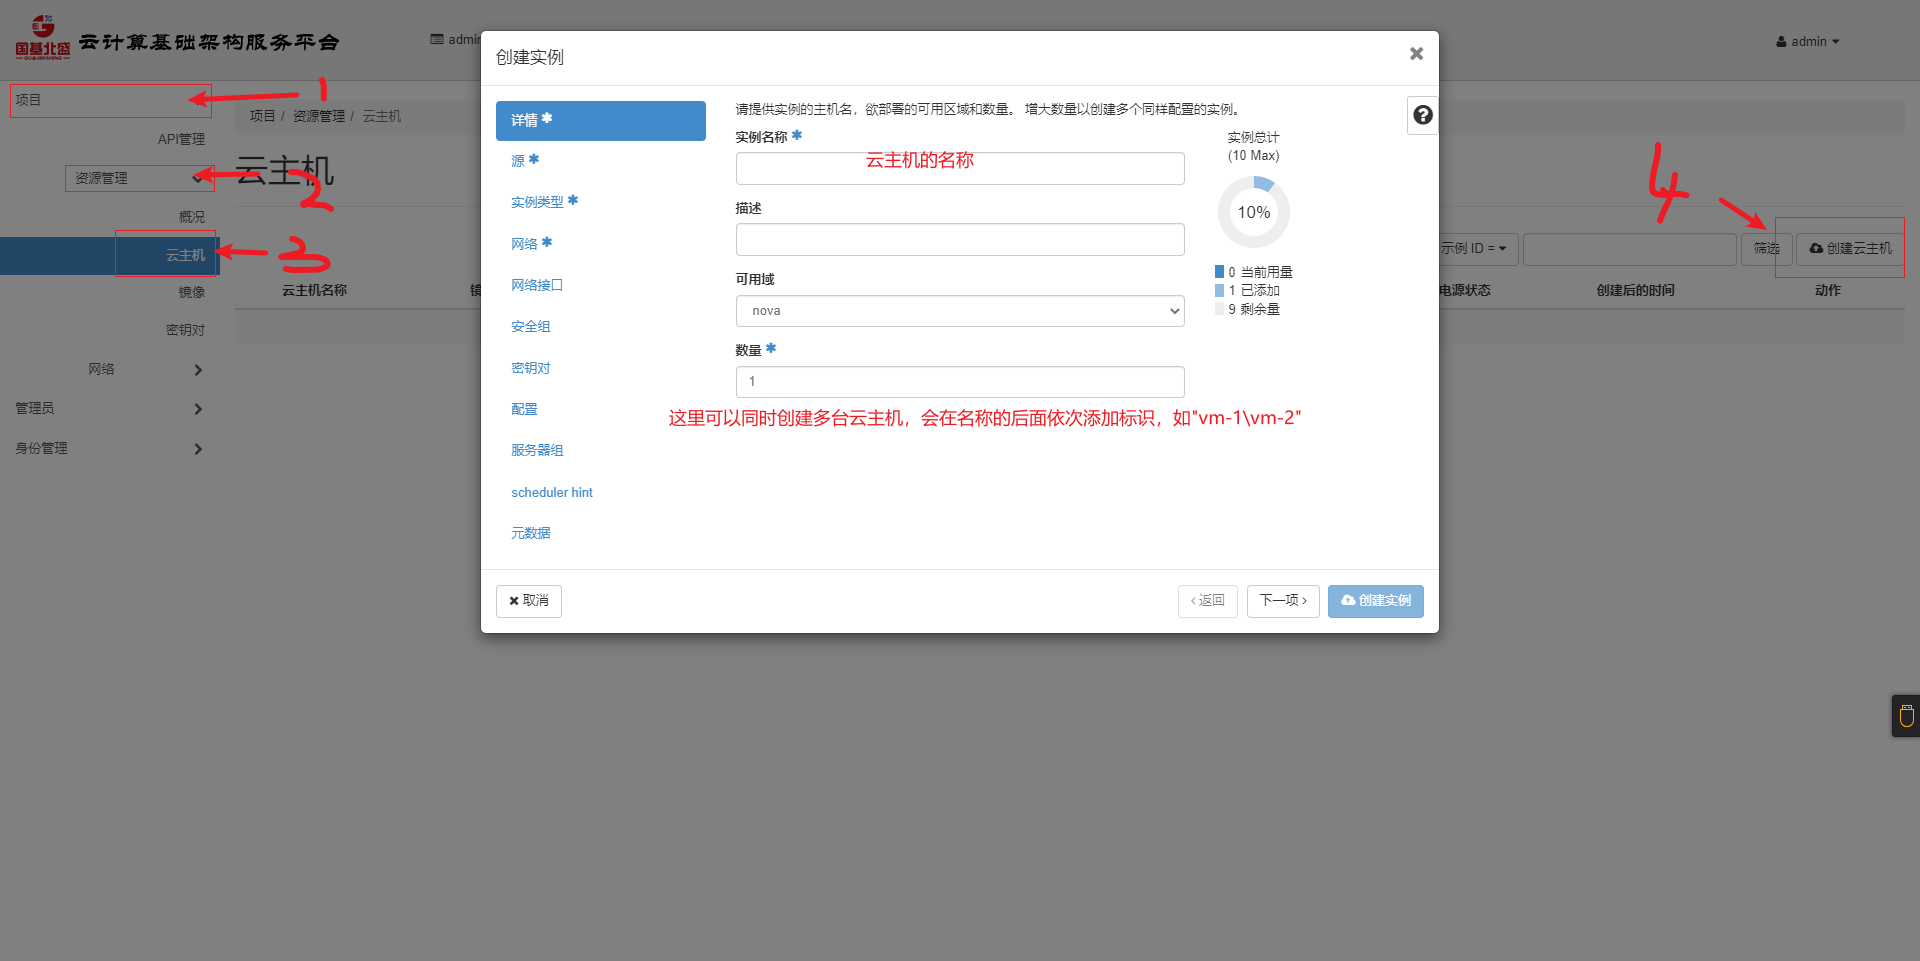
3、 Create a virtual machine type
Virtual machine type , Similar to a template file , When creating a virtual machine, use a template to directly create a virtual machine using an image , There is no need to set the memory 、 disk 、 Network configuration .


4、 Upload the image
After the virtual machine type and network are set , We can use glance Command to upload a test image ( stay openstack The official images have a small test image )
#glance  Command upload image using format
#glance image-create --name [ Custom image name ] --disk-format=qcow2 \ # qcow2  The format of the mirror image
# --container-format=bare --visibility=public \
# --file [ Mirror absolute path / Mirror name ]
# Upload CentOS Mirror image
[root@controller ~]# glance image-create --name Test --disk-format=qcow2 --container-format bare --file /iso_dir/iaas/images/CentOS_6.5_x86_64_XD.qcow2
You must provide a username via either --os-username or env[OS_USERNAME]

# Here, you will be prompted after the command is executed  You must provide a username via either --os-username or env[OS_USERNAME]
# Here is the need for certification before use glance service , So you need to source  once keystone The environment variable file
[root@controller ~]# source /etc/keystone/admin-openrc.sh
[root@controller ~]# glance image-create --name Test --disk-format=qcow2 --container-format bare --file /iso_dir/iaas/images/CentOS_6.5_x86_64_XD.qcow2
+------------------+--------------------------------------+
| Property         | Value                                |
+------------------+--------------------------------------+
| checksum         | 3e565ace16066679ea363dde5411ed25     |
| container_format | bare                                 |
| created_at       | 2022-01-30T17:42:23Z                 |
| disk_format      | qcow2                                |
| id               | ba9e7698-de7a-4857-a305-b06324de2e2e |
| min_disk         | 0                                    |
| min_ram          | 0                                    |
| name             | Test                                 |
| owner            | a4212c5560ce4844a18a567295fea23f     |
| protected        | False                                |
| size             | 283181056                            |
| status           | active                               |
| tags             | []                                   |
| updated_at       | 2022-01-30T17:42:26Z                 |
| virtual_size     | None                                 |
| visibility       | shared                               |
+------------------+--------------------------------------+
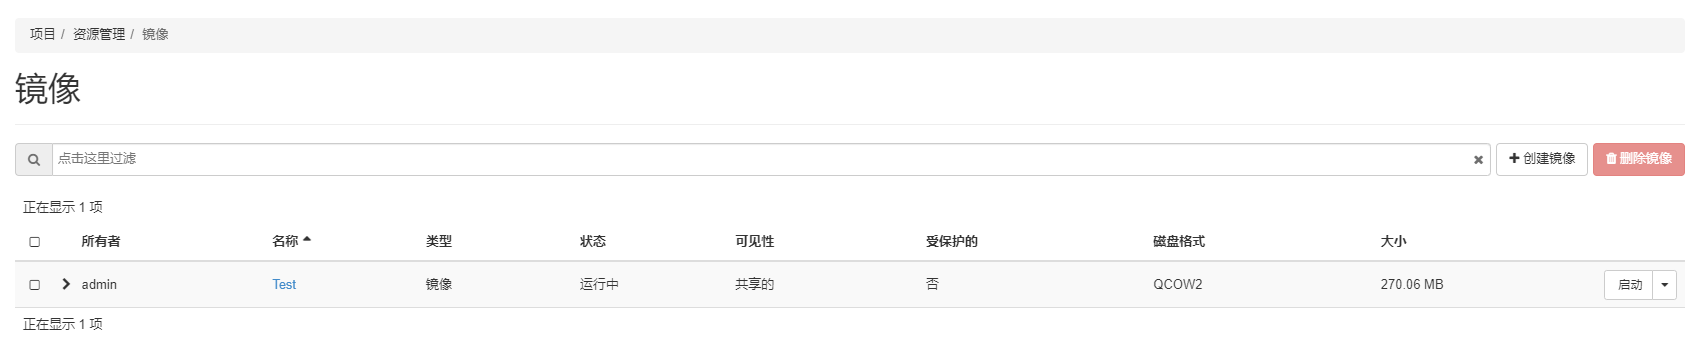
Image upload completed , Use Previously created network and virtual machine templates Create a virtual machine , And can access the Internet


The error here is that my notebook does not support nested virtualization , So you can't create another virtual machine , When you do the experiment, you make this mistake , You can add processors to the virtual machine settings ---- Dexter VT Check on , Create it again ( Both stations need to check )


to update
Here are the follow-up updates , I did it again with other machines that can nest virtualization , Create a virtual machine .


5、 ending
brothers , After reading the basic construction and setting of the platform , I think it's good. Remember to praise it … Run during the day, and at night until more than two o'clock in the morning , The memory of the notebook is only 8G, It broke several times , Restart the virtual machine several times , It's not easy to write an article , But I will keep writing , Remember to leave a message if you have a problem .
版权声明
本文为[King_ nul]所创,转载请带上原文链接,感谢
https://yzsam.com/2022/04/202204230629526423.html
边栏推荐
- Houdini > rigid body, rigid body breaking RBD
- Chapter V investment real estate
- Common markdown grammar learning
- Chapter IV intangible assets
- BUUCTF MISC刷题
- IT高薪者所具备的人格魅力
- Expression related to month, year and day in SVG
- FUEL: Fast UAV Exploration using Incremental Frontier Structure and Hierarchical Planning
- 內網滲透系列:內網隧道之icmpsh
- Alibaba sentinel学习QA
猜你喜欢
攻防世界MISC刷题1-50

VBA调用SAP RFC实现数据读取&写入

Houdini地形与流体解算(模拟泥石流)
Attack and defense world misc questions 1-50

《内网安全攻防:渗透测试实战指南》读书笔记(五):域内横向移动分析及防御
云计算技能大赛 -- openstack私有云环境 第二部分

Houdini > fluid, rigid body export, learning process notes

Chapter V investment real estate

庄懂的TA笔记(七)<Lambert+Phong+Shadow+3EvColor+AO>
CTF-MISC学习之从开始到放弃
随机推荐
读书笔记
Internal network security attack and defense: a practical guide to penetration testing (VII): cross domain attack analysis and defense
Protobuf use
庄懂的TA笔记(零)<铺垫与学习方法>
CTF-MISC总结
RAID0和RAID5的创建和模拟RAID5工作原理
Unity C single case mode learning review notes
SAP GUI安全性
Export all SVG files in the specified path into pictures in PNG format (thumbnail or original size)
Personality charm of high paid it workers
Internal network security attack and defense: a practical guide to penetration testing (8): Authority maintenance analysis and defense
Using lambda expression to solve the problem of C file name sorting (whether it is 100 or 11)
Post of experience in preparation for guarantee and research -- the 18th (2021) Central South planning department promoted the exemption to Zhejiang University Institute of Technology
第七章 资产减值
When using flash, the code ends automatically without an error, the connection cannot be maintained, and the URL cannot be accessed.
C smoothprogressbar custom progress bar control
Shapley Explanation Networks
A programmer who works four hours a day
聊聊接口幂等与消费幂等的本质
VBA调用SAP RFC实现数据读取&写入