当前位置:网站首页>【编程实践/嵌入式比赛】嵌入式比赛学习记录(二):基于TCP的图片流传输
【编程实践/嵌入式比赛】嵌入式比赛学习记录(二):基于TCP的图片流传输
2022-04-23 06:32:00 【PlusE Lin】
0.前言
经过上次的实验,比赛小组组长给我下了新的任务:设法模拟下位机向上位机发送图片比特流,并接收再展示在web前端。
经过确认,下位机是将图片以像素点的RGB值传输,依次传输图片的长宽、左上角到右下角每个像素点的像素值,即每个字节都是像素点的颜色值,而非诸如png、jpg等图片编码。目前组长要求我只要能传出灰度图即可,因此我后面的处理部分都是基于灰度图的。传彩色图片的道理是类似的。
1.图片编码
本次实验的重点在于如何接收client传来的比特流并进行处理在放到前端,因此数据格式不是重点,但为了后续讲解方便,这里还是给出本次实验图片的格式:

(这很像计算机网络中的数据链路层的字节计数法,不是嘛?)
其中,width字段占有1或2字节,表示图片宽度,height占有1或2字节,表示图片长度,pixels为像素位,由于本次实验是灰度图,因此只需要一个通道,也可以改成3个通道。
接收数据的时候,通过前两个字段就可以确认图片的样子,以及有多少个像素值了,因为传的时候往往不是一次只传同一个图片,可能是视频的多个帧传过来,因此需要划清每张图片的边界。
本实验中,width、height字段的长度取为1字节
2.图片传输方式
按照上面格式,我将3张255*255的灰度图以二进制编码的形式保存下来,得到了3个文件
之后会用网络调试助手选择一个文件并发送
3.图片接收及编码处理
首先是图片的接收部分,由于TCP server每次最多只能接收1024B的数据(这应该与数据链路层的MTU最大为1500B有关,但我也不清楚为什么是1024B),因此我们需要将接收的数据的数据缓存下来,待一帧图片接收完毕后,进行处理并保存,以供web server使用。
由于TCP server和web server是两个线程,因此存在着互斥问题,这里使用信号量进行控制,如果你对信号量不熟悉,你可以百度搜索信号量进行学习,这里不再展示。
另外说一下为什么不再使用post请求向web server发送图片编码,是因为图片编码是二进制比特流,貌似很难编码到json中,也没法转变成字符串,因此这里只能用线程间共享变量实现。
代码如下,稍显臃肿,这也是后续可以改进的地方
class DataBuffer:
    def __init__(self):
        self.tempdata=bytes(0)
        self.pic=bytes(0)
        #控制读取互斥
        self.mutex=threading.Semaphore(1)
        #通知可以取
        self.pic_mutex=threading.Semaphore(1)
        #最大量
        self.max_size=0x7fffffff

    def insert_data(self,data:bytes):
        self.mutex.acquire()
        # if(len(self.tempdata)==0):
        # self.max_size=int(data[0])*int(data[1])+2
        self.tempdata+=data
        #图片再大其大小也不会超过0x7fffffff
        if(self.max_size>=0x7fffffff):
            self.max_size=int(self.tempdata[0])*int(self.tempdata[1])+2
        if(len(self.tempdata)>=self.max_size):
            next_length=len(self.tempdata)-self.max_size
            self.pic_mutex.acquire()
            width,height,self.pic=hex_to_jpgstream(self.tempdata)
            if(next_length>0):
                self.tempdata=data[-next_length:]
                #self.max_size=int(self.tempdata[0])*int(self.tempdata[1])+2
            else:
                self.tempdata=bytes(0)
            self.max_size=0x7fffffff
            self.pic_mutex.release()
        self.mutex.release()

    def get_data(self):
        self.pic_mutex.acquire()
        pic=self.pic
        self.pic_mutex.release()
        return pic

    def clearbuffer(self):
        self.max_size=0x7fffffff
        self.tempdata=bytes(0)

Buffer=DataBuffer()

class MyHandler(socketserver.BaseRequestHandler):
    def handle(self):
        global Buffer
        while True:
            data=self.request.recv(8192)
            if not data:
                break
            else:
                Buffer.insert_data(data)
大致过程是:
- 每次接收1024个字节的数据,存入缓存变量tempdata中
- 判断是否完成接受完一个图片(通过接收数据量和图片尺寸进行比对,图片尺寸由图片格式段求出)
- 若接收完,进行处理后保存在变量pic中,同时修改tempdata为下一个图片的数据部分,并重新计算图片尺寸。
- web server取图片的时候,取得是pic而非tempdata
以下是图片处理部分,主要是将图片编码转换成jpg格式以便在前端展示
def hex_to_jpgstream(hexstream:bytes):
    #hex -> np.array
    #bytes[0]:width bytes[1]:height
    width,height=int(hexstream[0]),int(hexstream[1])
    img=[int(hexstream[i]) for i in range(2,len(hexstream))]
    img=np.array(img).reshape((width,height))
    #np.array->jpg stream
    img=cv2.imencode(".jpg",img)[1]
    img=img.tobytes()
    #jpg stream => base64
    # b64stream=base64.b64encode(img)
    return width,height,img
4.图片流展示在前端
图片展示在前端的处理与普通的后端传参的方式不同,本来考虑再使用Ajax轮询的方式更新,但后来考虑这样的负担太大了,因此改为使用Response相应返回。
这里涉及到了yield语法,大概就是生成了一个生成器,可以不断的返回一些数据,这也是视频流传输的一种方法
from flask import *
from MyServer import Buffer

app1=Flask(__name__)

data=None

@app1.route("/",methods=["GET","POST"])
def index_page():
    return render_template("index0.html")

def gen():
    while True:
        pic=Buffer.get_data()
        yield (b'--frame\r\n'
        b'Content-Type: image/jpeg\r\n\r\n' + pic + b'\r\n')

@app1.route("/video_feed")
def video_feed():
    return Response(gen(),mimetype="multipart/x-mixed-replace; boundary=frame")
前端部分
<!DOCTYPE html>
<html>
    <head>

    </head>
    <body>
        <img id="camera" src="{
     {url_for('video_feed')}}">
    </body>
</html>
最后是启动模块,启动TCP server和Web server
from flask import *
import threading
import socketserver
import time

from app_views import *
from MyServer import *


def start_TCP(host,port):
    myserver=socketserver.ThreadingTCPServer((host,port),MyHandler)
    myserver.serve_forever()

def start_flask(host,port):
    app1.run(host=host,port=port)

def main():
    th1=threading.Thread(target=start_flask,args=("192.168.71.1",5000))
    th2=threading.Thread(target=start_TCP,args=("192.168.71.1",5001))
    th1.start()
    th2.start()

if __name__=="__main__":
    main()
5.验收
启动web服务器和TCP服务器
在网络调试助手中发送数据

输入web服务器地址,发现图片展示成功
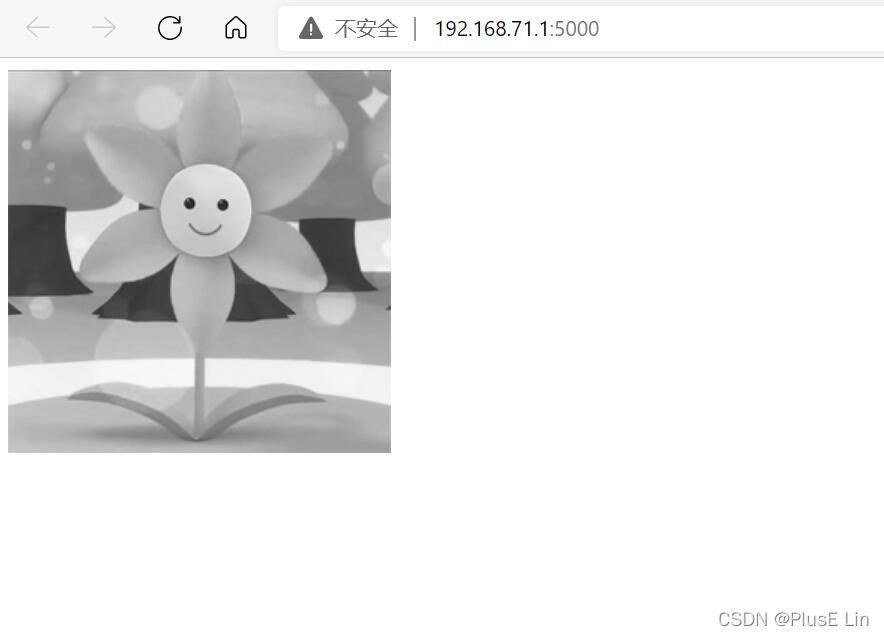
证明实验成功
6.思考
- 此方法是否能正确的应用到视频中?事实上在下一个实验中我将进行尝试
- 有没有更好的方法使TCP server和web server共享数据?有机会可以尝试其他的方式
最后,感谢观看!
版权声明
本文为[PlusE Lin]所创,转载请带上原文链接,感谢
https://blog.csdn.net/m0_51274130/article/details/124281137
边栏推荐
- Complete learning from scratch, machine learning and deep learning, including theory and code implementation, mainly using scikit and mxnet, and some practices (on kaggle)
- The problem of exporting excel form with wireframe and internal spacing of form by using web form
- 内网渗透系列:内网隧道之pingtunnel
- Unable to process jar entry [module info. Class]
- STO With Billing 跨公司库存转储退货
- Using lambda expression to solve the problem of C file name sorting (whether it is 100 or 11)
- Understanding the role of individual units in a deep neural networks
- 《内网安全攻防:渗透测试实战指南》读书笔记(四):权限提升分析及防御
- Complete color conversion formulas and conversion tables (31 kinds)
- webflux文件上传下载
猜你喜欢

Teach-Repeat-Replan: A Complete and Robust System for Aggressive Flight in Complex Environments

C#控制相机,旋转,拖拽观察脚本(类似Scenes观察方式)

Houdini地形与流体解算(模拟泥石流)

向量到一个平面的投影向量

Apache Hudi 如何加速传统的批处理模式?

內網滲透系列:內網隧道之icmpsh
内网渗透系列:内网隧道之icmpsh

Houdini > variable building roads, learning process notes

Unity C# 单例模式 学习复习笔记
C # control the camera, rotate and drag the observation script (similar to scenes observation mode)
随机推荐
Intranet penetration series: icmpsh of Intranet tunnel
Online Safe Trajectory Generation For Quadrotors Using Fast Marching Method and Bernstein Basis Poly
03Scanner类的使用(控制台输入)
C#控制相机,旋转,拖拽观察脚本(类似Scenes观察方式)
Scrapy modifies the time in the statistics at the end of the crawler as the current system time
Houdini > fluid, rigid body export, learning process notes
Série de pénétration Intranet: icmpsh du tunnel Intranet
How to present your digital portfolio: suggestions from creative recruiters
[unity VFX] Introduction notes of VFX special effects - spark production
第四章 无形资产
FUEL: Fast UAV Exploration using Incremental Frontier Structure and Hierarchical Planning
Protobuf use
Mongodb starts warning information processing
Learning records of some shooting ranges: sqli labs, upload labs, XSS
SQL user-defined scalar value function that looks up relevant column values n times forward or backward according to a specified table name, column name and column value
一文了解系列,对web渗透的常见漏洞总结(持续更新)
C SVG path parser of xamarin version
SAP STO With Billing流程与配置
内网渗透系列:内网隧道之icmptunnel(DhavalKapil师傅的)
Houdini > rigid body, rigid body breaking RBD