当前位置:网站首页>1. Summary of GPIO control of nanopi M1 (Quanzhi H3) based on wiringpi
1. Summary of GPIO control of nanopi M1 (Quanzhi H3) based on wiringpi
2022-04-23 22:03:00 【July meteor】
development environment :linux-3.4( Development board )
step :
1. install WiringPi library :
git clone https://github.com/friendlyarm/WiringNP
cd WiringNP/
chmod 755 build
./build
Check whether the installation is successful :
gpio readall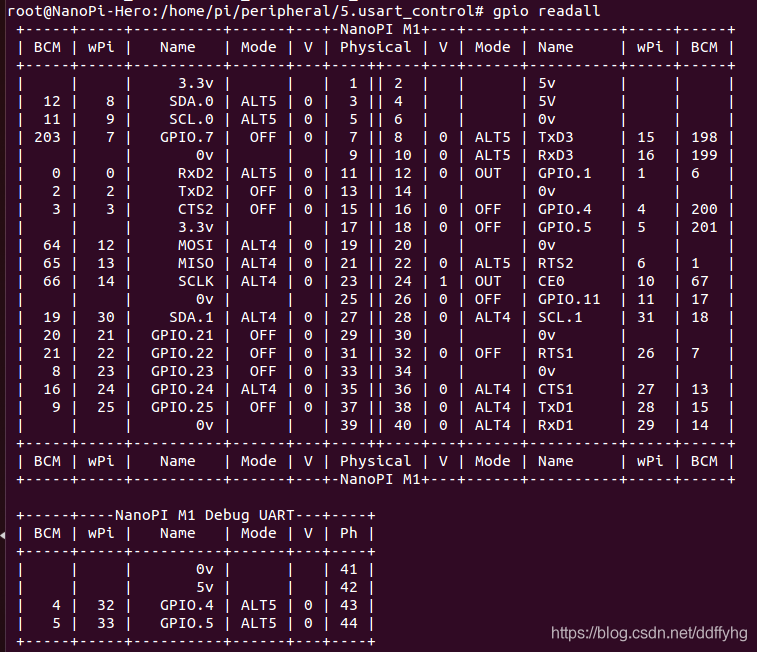
2. To write LED The test program
nanopi m1 Of pin7(GPIOG11) Pin connection LED The positive pole of ,LED The negative pole of the is grounded GND, The procedure is as follows :
vi led_control.c#include <wiringPi.h>
int main(void)
{
wiringPiSetup() ;
pinMode (7, OUTPUT) ;
for(;;)
{
digitalWrite(7, HIGH) ;
delay (500) ;
digitalWrite(7, LOW) ;
delay (500) ;
}
}3. To write Makefile
led_control:led_control.c
    gcc -Wall -o led_control led_control.c -lwiringPi -lpthread

.PHONY:
clean:
    rm -rf led_control
4. Execution procedure
./led_controlRunning results :
LED Light flashing
版权声明
本文为[July meteor]所创,转载请带上原文链接,感谢
https://yzsam.com/2022/04/202204200609125685.html
边栏推荐
- 在线Excel转CSV工具
- ERP function_ Financial management_ The difference between red and blue words in invoices
- CVPR2022 | 基于知识蒸馏的高效预训练
- DW basic course (II)
- How to make Jenkins job run automatically after startup
- Pytorch installation (personal records)
- IIS cannot load * woff,*. woff2,*. Solution of SVG file
- 关于DateUtil时间工具类造成程序报错
- SSH in win10
- Swift import third-party library reports an error no such module““
猜你喜欢

![[leetcode refers to the maximum profit of offer 63. Stock (medium)]](/img/37/478b53696f9327b7d435cdd887dd57.png)
随机推荐
Colon function and explicit keyword in constructor
ERP function_ Financial management_ The difference between red and blue words in invoices
[leetcode refers to offer 18. Delete the node of the linked list (simple)]
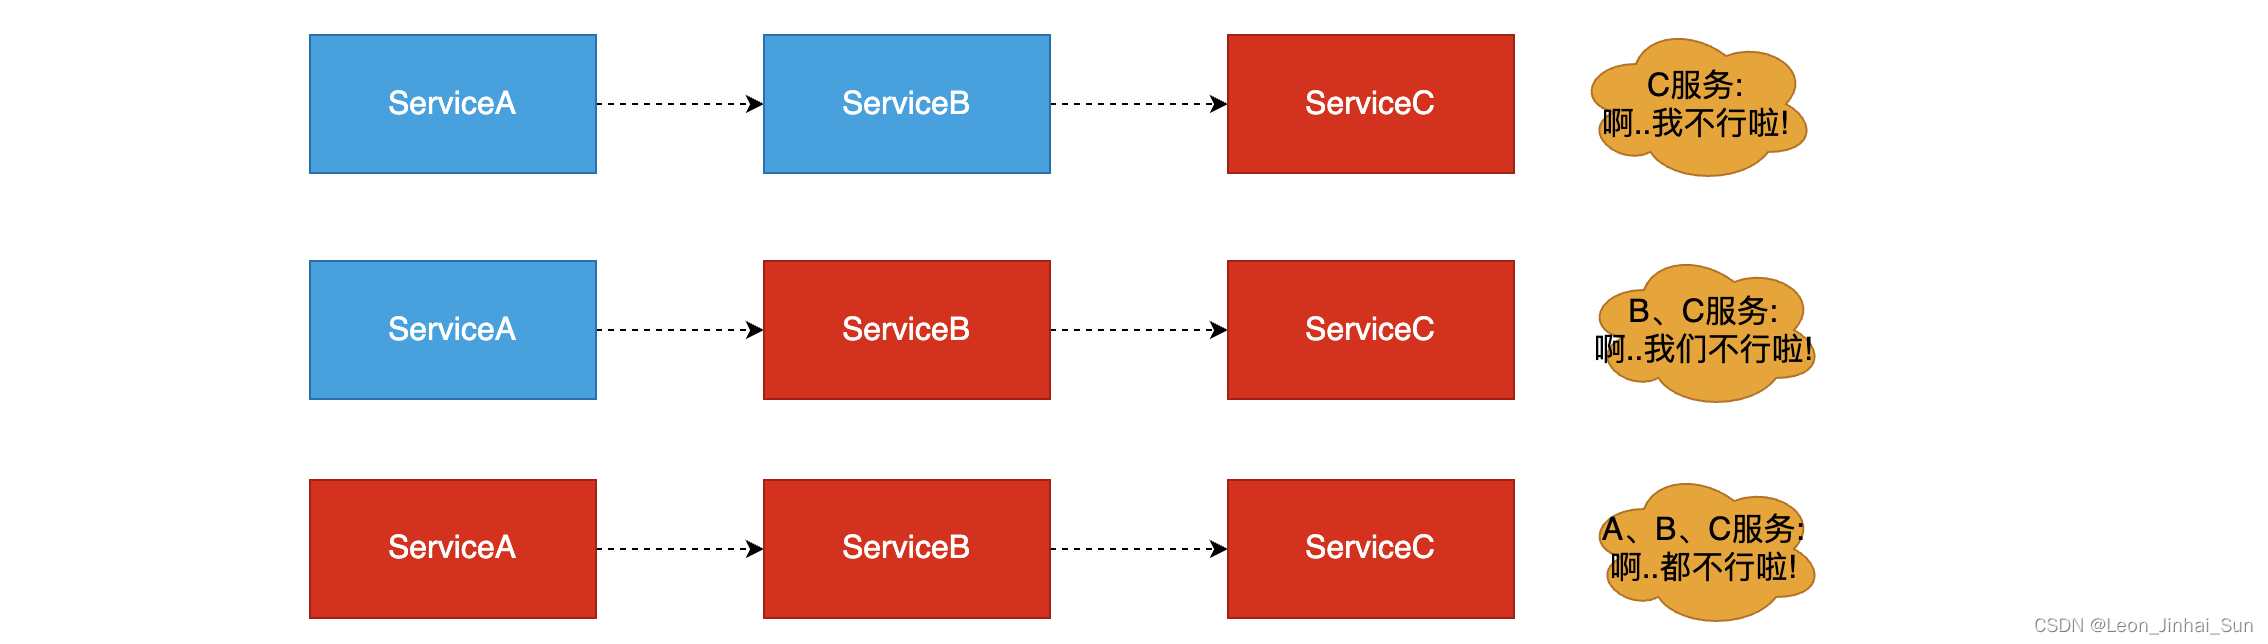
服务降级的实现
Lightweight project management ideas
DW basic tutorial (I)
How to make Jenkins job run automatically after startup
[leetcode refers to the maximum profit of offer 63. Stock (medium)]
C # problem of updating data: dynamic SQL generation is not supported for multiple base tables
手撕《Google SRE Book》
Introduction to tensorrt
Swift import third-party library reports an error no such module““
[leetcode refers to the two numbers of offer 57. And S (simple)]
A method of asynchronous response of application service through load balancing
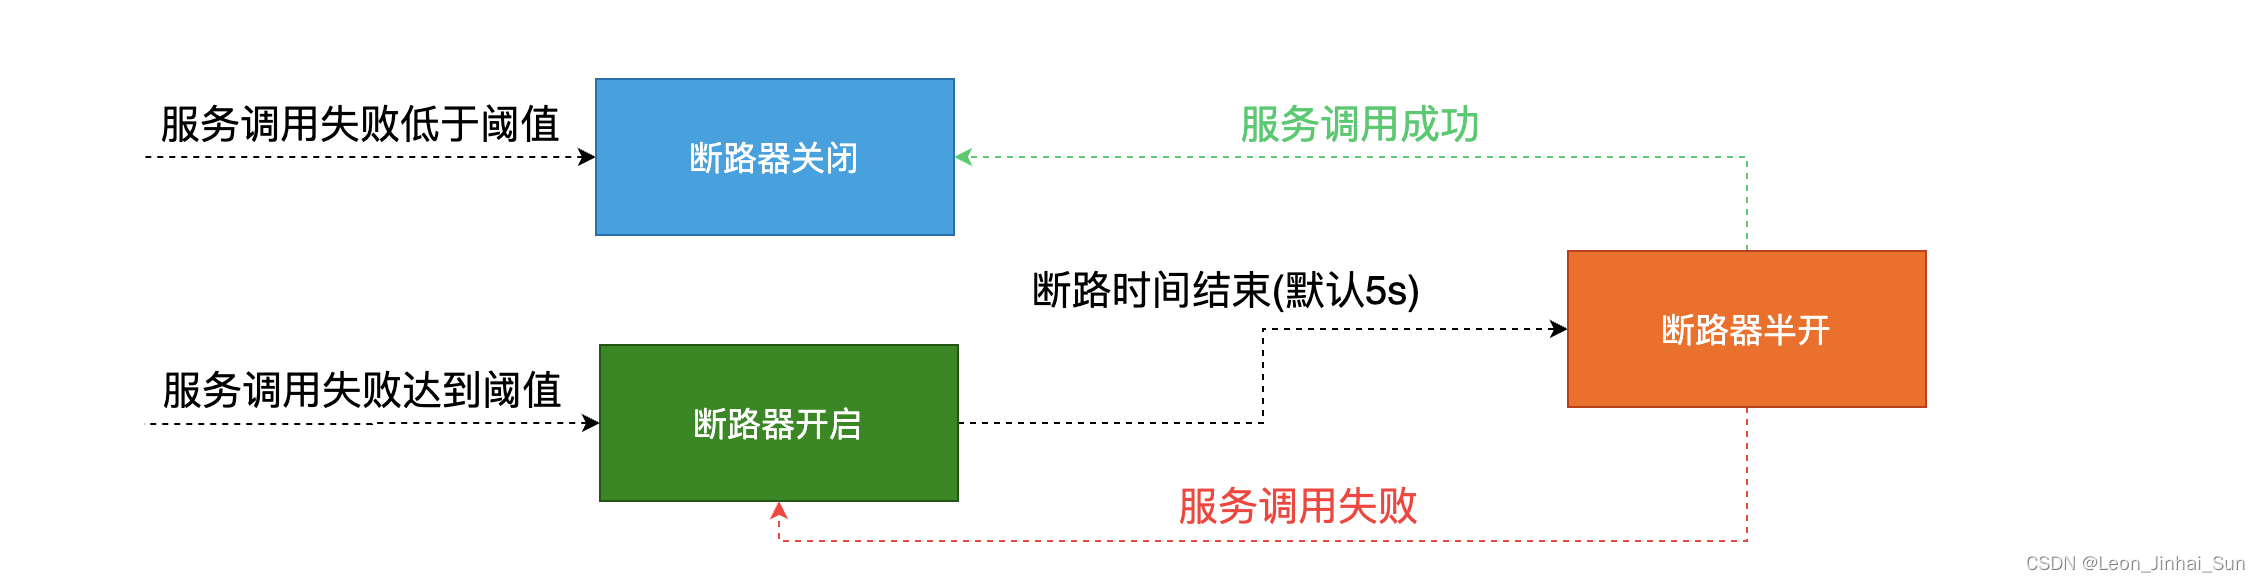
Introduction to hystrix and implementation of server fuse
What if Jenkins forgot his password
RestTemplate 服务调用
Ensuring the quality of living materials and food safety in Shanghai
微服务系统中服务降级
Hystrix断路器开启条件和流程以及默认备选处理