当前位置:网站首页>Bean life cycle
Bean life cycle
2022-08-09 23:12:00 【Price pit pit】
目录
四、BeanThe singleton and multi-instance patterns
一、bean的生命周期
Servlet的生命周期:
初始化:init ——>Tomcat启动,Servlet对象就创建/初始化了
服务:service——>浏览器发送请求,对应的ServletMake a processing call
销毁:destroy——>Tomcat停止
SpringIs the management of all in the projectJavabean对象;
这些是Javabean对象什么时候生,What time is the service available,什么时候销毁er一、Bean的初始化过程
二,ean的初始化过程

Spring Bean的生命周期
1)通过XML、Java annotation(注解)以及Java Configuration(配置类)等方式加载Spring Bean
2)BeanDefinitionReader:解析Bean的定义.在Spring容器启动过程中,会将Bean解析成Spring内部的BeanDefinition结构;理解为:将spring.xmlThe labels in are converted to BeanDefinition结构,有点类似于XML解析
3)BeanDefinition:包含了很多属性和方法.例如:id、class(类名)、
scope、ref(依赖的bean)等等.其实就是将bean(例如)的定义信息,存储到这个对应BeanDefinition相应的属性中例如:
-----> BeanDefinition(id/class/scope)4)BeanFactoryPostProcessor:是Spring容器功能的扩展接口.
注意:
1)BeanFactoryPostProcessor在spring容器加载完BeanDefinition之后,
在bean实例化之前执行的
2)对bean元数据(BeanDefinition)进行加工处理,也就是BeanDefinition
属性填充、修改等操作
三,案例
package com.zking.beanLife;

public class Demo1 {
	public static void main(String[] args) {
		Person p=new Person();
		p.setSex("男");
		System.out.println(p.getSex());
	}
}

class Person{
	private String name;
	private int age;
	private String sex;
	public String getName() {
		return name;
	}
	public void setName(String name) {
		this.name = name;
	}
	public int getAge() {
		return age;
	}
	public void setAge(int age) {
		this.age = age;
	}
	public String getSex() {
		return sex;
	}
	public void setSex(String sex) {
		this.sex = sex;
	}
	public Person() {
		this.init();
		this.name="zs";
		this.age=20;
		this.sex="未知";
	}
	public void init() {

	}
	@Override
	public String toString() {
		return "Person [name=" + name + ", age=" + age + ", sex=" + sex + "]";
	}

}
运行结果:

案例:
BeanFactory -> List<BeanDefinition>
BeanDefinition(id/class/scope/init-method)
<bean class="com.zking.spring02.biz.BookBizImpl"/>
foreach(BeanDefinition bean : List<BeanDefinition>){
   //根据class属性反射机制实例化对象
   //反射赋值设置属性
}
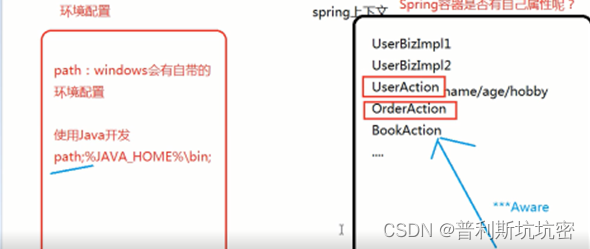
6)Aware感知接口:在实际开发中,经常需要用到Spring容器本身的功能资源
例如:BeanNameAware、ApplicationContextAware等等
BeanDefinition 实现了 BeanNameAware、ApplicationContextAware
如图:
7)BeanPostProcessor:后置处理器.在Bean对象实例化和引入注入完毕后,
在显示调用初始化方法的前后添加自定义的逻辑.(类似于AOP的绕环通知)
前提条件:如果检测到Bean对象实现了BeanPostProcessor后置处理器才会执行
案例:
package com.zking.beanLife;

public class Demo1 {
	public static void main(String[] args) {
		Person p=new Person();
		p.setSex("男");
		System.out.println(p.getSex());
	}
}

class Person{
	private String name;
	private int age;
	private String sex;
	public String getName() {
		return name;
	}
	public void setName(String name) {
		this.name = name;
	}
	public int getAge() {
		return age;
	}
	public void setAge(int age) {
		this.age = age;
	}
	public String getSex() {
		return sex;
	}
	public void setSex(String sex) {
		this.sex = sex;
	}
	public Person() {
		this.init();
		this.name="zs";
		this.age=20;
		this.sex="未知";
	}
	public void init() {

	}
	@Override
	public String toString() {
		return "Person [name=" + name + ", age=" + age + ", sex=" + sex + "]";
	}

}
Before和After方法
BeanPostProcessor
1)Before
2)调用初始化Bean(InitializingBean和init-method,Bean的初始化才算完成)
3)After8)destory:销毁
2、总结
①通过三种方式(配置文件、注解、配置类)将bean标签转成beandifinition对象
②通过BeanFactoryPostPricessorProperties can be modified before initialization
③BeanFactory进行bean实例化,就是生产javabean
④Aware感知接口,able to getSpringThe resource object inside the context
⑤BeanPostProcessor后置处理器,相当于环绕通知
四、BeanThe singleton and multi-instance patterns
1、多例模式
scope="prototype"
案例:
package com.zking.beanLife;

public class Demo1 {
	public static void main(String[] args) {
		Person p1=new Person();
		Person p2=new Person();
		Person p3=new Person();
		Person p4=new Person();
		System.out.println(p1);
		System.out.println(p2);
		System.out.println(p3);
		System.out.println(p4);
	}
}

class Person{
	private String name;
	private int age;
	private String sex;
	public String getName() {
		return name;
	}
	public void setName(String name) {
		this.name = name;
	}
	public int getAge() {
		return age;
	}
	public void setAge(int age) {
		this.age = age;
	}
	public String getSex() {
		return sex;
	}
	public void setSex(String sex) {
		this.sex = sex;
	}
	public Person() {
		this.init();
		this.name="zs";
		this.age=20;
		this.sex="未知";
	}
	public void init() {

	}
//	@Override
//	public String toString() {
//		return "Person [name=" + name + ", age=" + age + ", sex=" + sex + "]";
//	}
//
}
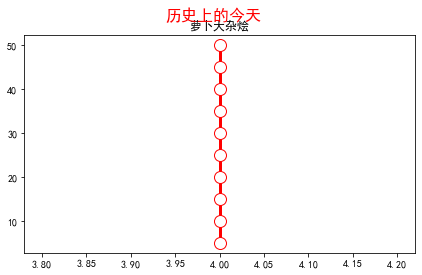
运行截图:

2、单例模式

scope="singLeton"
案例:
package com.zking.beanLife;

public class Demo1 {
	public static void main(String[] args) {
//		Person p1=new Person();
//		Person p2=new Person();
//		Person p3=new Person();
//		Person p4=new Person();
		Person p1=Person.newInstance();
		Person p2=Person.newInstance();
		Person p3=Person.newInstance();
		Person p4=Person.newInstance();
		System.out.println(p1);
		System.out.println(p2);
		System.out.println(p3);
		System.out.println(p4);
	}
}

class Person{
	private Person() {

	}

	private final static Person p=new Person();

	public static Person newInstance() {
		return p;
	}
}
3、Demonstrate the difference between singleton and multiple instances
①InstanceFactory
package com.zking.beanLife;

public class InstanceFactory {
	public void init() {
		System.out.println("初始化方法");
	}

	public void destroy() {
		System.out.println("销毁方法");
	}

	public void service() {
		System.out.println("业务方法");
	}
}
ParamAction
package com.zking.beanLife;

import java.util.List;

public class ParamAction {
	private int age;
	private String name;
	private List<String> hobby;
	private int num = 1;
	// private UserBiz userBiz = new UserBizImpl1();

	public ParamAction() {
		super();
	}

	public ParamAction(int age, String name, List<String> hobby) {
		super();
		this.age = age;
		this.name = name;
		this.hobby = hobby;
	}

	public void execute() {
		// userBiz.upload();
		// userBiz = new UserBizImpl2();
		System.out.println("this.num=" + this.num++);
		System.out.println(this.name);
		System.out.println(this.age);
		System.out.println(this.hobby);
	}
}
Demo2:
package com.zking.beanLife;

import org.junit.Test;
import org.springframework.beans.factory.BeanFactory;
import org.springframework.beans.factory.xml.XmlBeanFactory;
import org.springframework.context.ApplicationContext;
import org.springframework.context.support.ClassPathXmlApplicationContext;
import org.springframework.core.io.ClassPathResource;
import org.springframework.core.io.Resource;

/*
 * spring	bean的生命週期
 * spring	beanA single instance of multiple instances
 */
public class Demo2 {
	// Demonstrate the difference between singleton and multiple instances
	@Test
	public void test1() {
		ClassPathXmlApplicationContext applicationContext = new ClassPathXmlApplicationContext("/spring-context.xml");
//		ApplicationContext applicationContext = new ClassPathXmlApplicationContext("/spring-context.xml");
		ParamAction p1 = (ParamAction) applicationContext.getBean("paramAction");
		ParamAction p2 = (ParamAction) applicationContext.getBean("paramAction");
		// System.out.println(p1==p2);
		p1.execute();
		p2.execute();

//		单例时,容器销毁instanceFactory对象也销毁;多例时,The container destroys the object is not necessarily destroyed;
		applicationContext.close();
	}

	// The time point that reflects the initialization of singleton and multiple instances instanceFactory
	@Test
	public void test2() {
		ApplicationContext applicationContext = new ClassPathXmlApplicationContext("/spring-context.xml");
	}

	// BeanFactory会初始化bean对象,However, different initialization methods will be adopted according to different implementation subclasses
	// 默认情况下bean的初始化,The singleton pattern will execute immediately,但是此时XmlBeanFactory作为子类,Container creation in singleton mode,beanDependencies are not initialized,Only to get usedbeanobject is initialized
	@Test
	public void test3() {
		// ClassPathXmlApplicationContext applicationContext = new
		// ClassPathXmlApplicationContext("/spring-context.xml");

		Resource resource = new ClassPathResource("/spring-context.xml");
		BeanFactory beanFactory = new XmlBeanFactory(resource);
//		InstanceFactory i1 = (InstanceFactory) beanFactory.getBean("instanceFactory");

	}

}
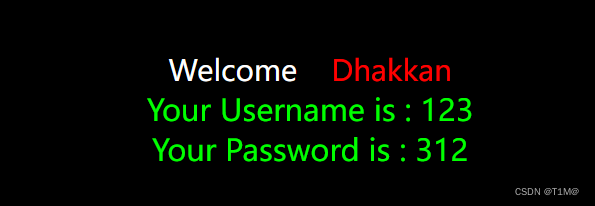
运行结果:

边栏推荐
猜你喜欢


随机推荐
C语言预处理命令是什么?
简单问题窥见数学
Shanghai Konan SmartRocket series product introduction (3): SmartRocket iVerifier computer interlocking system verification tool
AI识万物:从0搭建和部署手语识别系统
MySQL跨表、多表更新SQL语句总结
TF使用constant生成数据
【云原生】4.2 DevOps 精讲篇
论文解读(DropEdge)《DropEdge: Towards Deep Graph Convolutional Networks on Node Classification》
Hessian Matrix 海森矩阵
编程时请选择正确的输入法,严格区分中英文
Word文档怎么输入无穷大符号∞
Pagoda measurement - building LightPicture open source map bed system
Use zeros(), ones(), fill() methods to generate data in TF
Wps下划线怎么弄?Wps添加下划线的最全方法
ACM MM 2022 | Cloud2Sketch: 长空云作画,AI笔生花
Word怎么制作一张标准的答题卡?
LED闪烁 闪灯芯片IC 手电筒IC 闪灯控制IC 闪烁IC流水灯
编程语言中,取余和取模的区别
NetCore路由的Endpoint模式
CVPR22 Oral|通过多尺度token聚合分流自注意力,代码已开源