当前位置:网站首页>Several ways to draw timeline diagrams
Several ways to draw timeline diagrams
2022-08-09 23:04:00 【Zhou radish】
I shared an automated production earlier《历史上的今天》Timeline pictures for articles,The feedback from friends is generally good,Especially the way to make the timeline,还是非常巧妙的.Today we are going to share a few different ways to make it,You can compare the pros and cons of each method by yourself
Matplotlib 制作
Matplotlib 作为 Python The most important visualization tool in the family,其基本的 API And the drawing process still needs to be mastered.Especially how flexible the library is and serves as the basis for many tools,重要性不言而喻
Let's take a look at how to draw a timeline chart
Import libraries and settings XY 轴数据
import matplotlib.pyplot as plt
plt.rcParams['font.sans-serif'] = ['SimHei']
plt.rcParams['axes.unicode_minus'] = False

y1 = [5, 10, 15, 20, 25, 30, 35, 40, 45, 50]
x1 = [4, 4, 4, 4, 4, 4, 4, 4, 4, 4]
Because the timeline effect is achieved through a line chart,In order to achieve a vertical line situation,这里设置了 X The axis values are all the same,Y Axial values are equally distributed
Create canvas and title
fig, ax = plt.subplots(sharey=True, figsize=(7, 4))
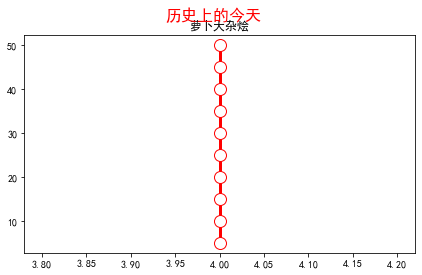
ax.plot(x1, y1, label='First line', linewidth=3, color='r', marker='o', markerfacecolor='white', markersize=12)
plt.title('萝卜大杂烩')
plt.suptitle('历史上的今天', fontsize=16, color='red')
此时效果如下
Next we set the data on both sides of the timeline
# 右侧数据
right_y_year = 0.95
right_y_text = 0.9
year_right = 1931
for i in range(5):
    plt.text(0.57, right_y_year, str(year_right+1), fontsize=15, horizontalalignment='center', verticalalignment='center',
             transform=ax.transAxes, color='black')
    plt.text(0.75, right_y_text, "从百草园到三味书屋-鲁迅" + str(i), fontsize=15, horizontalalignment='center', verticalalignment='center',
             transform=ax.transAxes, color='red')
    right_y_year -= 0.2
    right_y_text -= 0.2
    year_right += 1

# 左侧数据
left_y_year = 0.85
left_y_text = 0.8
year_left = 1941
for i in range(5):
    plt.text(0.43, left_y_year, str(year_left+1), fontsize=15, horizontalalignment='center', verticalalignment='center',
             transform=ax.transAxes, color='black')
    plt.text(0.2, left_y_text, "从百草园到三味书屋-鲁迅" + str(i), fontsize=15, horizontalalignment='center', verticalalignment='center',
             transform=ax.transAxes, color='red', url='https://www.baidu.com')
    left_y_year -= 0.2
    left_y_text -= 0.2
    year_left += 1
这里主要使用了 text 函数,Add data to each side of the timeline
If we also want to add other personal information,Such as public account QR code, etc,You can add pictures at specified locations,Also remove the axes
# 增加图片
img = plt.imread('二维码.png')
ax2 = plt.axes((0.7, 0.1, 0.3, 0.3))
ax2.imshow(img, origin='lower', alpha=0.5)
ax2.axis('off')
ax.axis('off')
plt.show()
最终效果如下

可以看出,由于 text The function determines the position of the text display by the coordinates,So the data distribution on both sides of our timeline is still not particularly perfect,I don't know if there is another more convenient way to set it up
Plotly 绘制
Plotly 作为 Python Another very powerful visualization tool in the family,The drawing of the timeline diagram can also be completed
在绘图之前,Perfect to process the data first
The data used here is2020Weibo hot search data throughout the year
import pandas as pd


weibo = pd.read_csv("weibo_2020.csv")
def deal_date(frame):
    tmp = frame.split('-')
    return tmp[0] + '-' + tmp[1]

weibo['new_date'] = weibo['date'].apply(lambda x : deal_date(x))
key_list_right = []
for i in range(1, 12, 2):
    if i < 10:
        mydate = '2020-0%s' % str(i)
    else:
        mydate = '2020-%s' % str(i)
    keyword = weibo[weibo['new_date'] == mydate].sort_values(by='searchCount', ascending=False)['keyword'].tolist()[0]
    searchCount = weibo[weibo['new_date'] == mydate].sort_values(by='searchCount', ascending=False)['searchCount'].tolist()[0]
    mount = str(i) + '月'
    content = ','.join([keyword, str(searchCount) + '搜索量', mount])
    key_list_right.append(content)
print(key_list_right)
Output:
['The latest epidemic map,18130201搜索量,1月',
 '肖战工作室道歉,13117531搜索量,3月',
 'Stanley Ho passed away,15302424搜索量,5月',
 '高考作文,15647446搜索量,7月',
 'Sisters who ride the wind and waves form a group night,8226994搜索量,9月',
 '特朗普,7310000搜索量,11月']
可以看到,Through the above data processing,We successfully extracted1、3、5、7、9以及11The most searched topic of the month for the month,In the same way, you can obtain the hot search title data of the two months
下面开始作图
import plotly.express as px
import plotly.graph_objects as go
from plotly.subplots import make_subplots
import pandas as pd
from plotly.graph_objs import *

layout = Layout(
    paper_bgcolor='rgba(0,0,0,0)',
    plot_bgcolor='rgba(0,0,0,0)',
    title={'text': '微博热搜', 'x': 0.5},
    yaxis={'title': 'Proportion (%)'}
)
fig = go.Figure(layout=layout)
fig.add_traces([go.Scatter(x=[2,2,2,2,2,2], y=[5, 10, 15, 20, 25, 30], text=key_list_right, textposition="bottom right", mode="lines+text"),
                go.Scatter(x=[2,2,2,2,2,2], y=[5, 10, 15, 20, 25, 30], textposition="top left", mode="lines+text", text=key_list_left)])
fig.update_traces(showlegend=False)
fig.update_layout(xaxis=dict(visible=False), yaxis=dict(visible=False))
fig.show()
通过 Plotly Drawing is relatively simple,直接使用 text The parameters can be added to the hot search data we get
最终效果如下

The effect is simple,It's because we didn't do too much styling,You can explore different styles by yourself
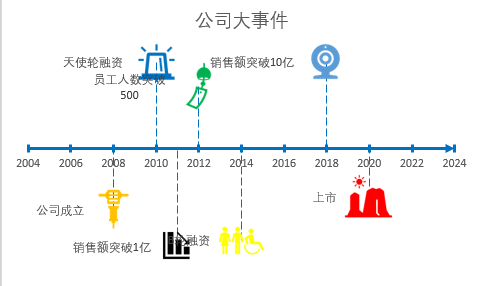
Excel 绘制
Both of the above methods require a certain code base,下面介绍的 Excel The method can be said that everyone can do it,一起来看看吧
先来看看最终的效果
首先准备数据,我们在新建的 Excel Create the following data in the document

Then insert a scatter plot
Insert a blank scatterplot first,然后将 X 轴设置为【年份】,Y 轴设置为【位置】,再把 Y Both axes and gridlines are removed
Next let's beautify it X 轴
我们双击 X 轴,调出格式窗口,Set in the Axis Options tab【单位】,将【小】改为1,设置【刻度线】,将【主刻度线】set to cross.再点击【油漆桶】,Choose a line color,Adjust the width to 2,将【End arrow type】Adjust to right arrow
Next we put X 轴连接起来

First select a scatter point,添加误差线.Then set the horizontal error bars to no outline,Select the vertical error bars again,把【Vertical error bars】Set to negative bias,Then set the error amount to 100%,Finally, adjust the style of the vertical error bars
Let's start adding data
We add the company's big events to the data table
Add to the chart【数据标签】,That is, the column of events in the data,然后再去掉 Y 值即可
最后我们还可以通过 Excel Comes with various icons for beautification operations

好了,以上就是今天分享的所有内容,如果对你有帮助,Please like and support~
边栏推荐
- How to deal with keys when Redis is large?
- Acrel5000web能耗系统在某学院的应用-Susie 周
- Application of Acrel5000web Energy Consumption System in a College-Susie Week
- Photometric Stereo 光度立体法三维重建
- Ankerui supports Ethernet communication, profibus communication embedded energy meter APM guiding technical requirements-Susie Week
- SQLi-LABS Page-2 (Adv Injections)
- 同步锁synchronized追本溯源
- Bean生命周期
- Unity2D_背景粒子效果
- Cookie、session、token
猜你喜欢


![[Deep learning] pix2pix GAN theory and code implementation](/img/4a/b95b68bee66bd572cf213994e26429)

随机推荐
gmail+mtalk配合打免费网络电话。
人人都可以DIY的大玩具,宏光MINIEV GAMEBOY产品力强,出行新装备
SecureCRT强制卸载
DSPE-PEG-Silane, DSPE-PEG-SIL, phospholipid-polyethylene glycol-silane modified silica particles
STC8H开发(十五): GPIO驱动Ci24R1无线模块
MySQL:错误1153(08S01):得到的数据包大于“ max_allowed_packet”字节
小黑leetcode之旅:94. 二叉树的中序遍历(补充Morris 中序遍历)
编程时请选择正确的输入法,严格区分中英文
Acrel5000web能耗系统在某学院的应用-Susie 周
FS4066耐高压1到4节内置MOS的锂电池充电管理芯片
LeetCode Daily Question (321. Create Maximum Number)
URL Protocol web page to open the application
matlab neural network ANN classification
What to do if Windows 11 can't find Internet Explorer
LoRa Basics无线通信技术和应用案例详解
CVPR22 Oral|通过多尺度token聚合分流自注意力,代码已开源
CMake installation upgrade higher version
Definition and Basic Operations of Sequence Tables
微软word怎么转换成pdf文件?微软word转换为pdf格式的方法
Lyapp exponents and bifurcation diagrams for fractional chaotic systems