当前位置:网站首页>asp.net使用MailMessage发送邮件的方法
asp.net使用MailMessage发送邮件的方法
2022-04-23 14:11:00 【Rv1989】
1. 新建web窗体Email.aspx,在设计页面中添加table控件,设置table为六行两列,并添加相应的控件,整体设计如图所示:(软件:Vs2017)
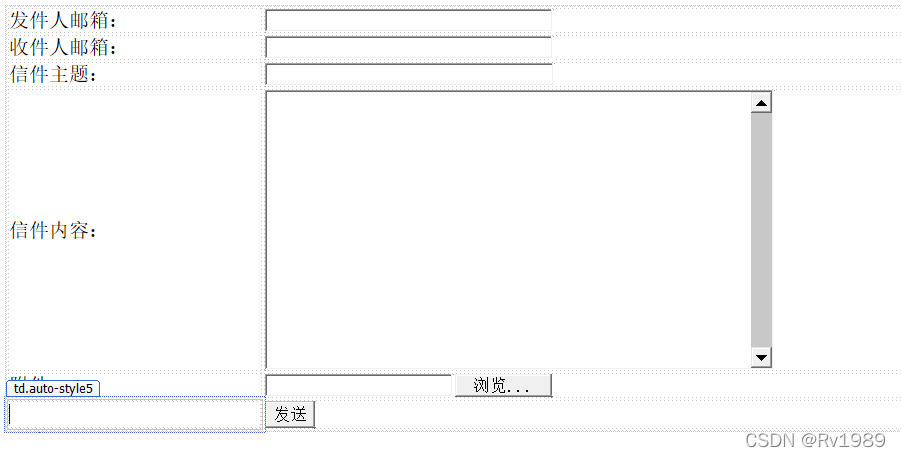
控件名称及ID如下:
书写后台代码之前需要先了解MailMessage类中的各个属性:
From:发件人邮箱地址。
To:收件人的邮箱地址。
CC:抄送人邮箱地址。
Subject:邮件标题。
Body:邮件内容。
Attachments:邮件附件
此外MailMessage还需要用到SmtpClient类进行发送邮件。SmtpClient类的意思是:允许应用程序使用简单邮件传输协议 (SMTP) 来发送电子邮件。SmtpClient类常用的一些属性和方法:
(SmtpClient 类 (System.Net.Mail) | Microsoft Docs)
1、Host: 获取或设置用于 SMTP 事务的主机的名称或 IP 地址。
2、EnableSsl:是否使用安全套接字层加密连接。
3、UseDefaultCredentials:是否随请求一起发送。
4、Credentials:获取或设置用于验证发件人身份的凭证。
5、Send():发送。
需要额外了解MailMessage.Fields属性:
作用:获取一个映射到 Microsoft 协作数据对象 (CDO) 字段的对象的集合。
(MailMessage.Fields 属性 (System.Web.Mail) | Microsoft Docs)
简单来说就是MailMessage.Fields属性可以将用户名和密码发送到简单邮件传输协议, (SMTP) 服务器进行身份验证。我们想要实现发送邮箱可以用到这个方法:
mail.Fields.Add("http://schemas.microsoft.com/cdo/configuration/smtpauthenticate", "1");
mail.Fields.Add("http://schemas.microsoft.com/cdo/configuration/sendusername", "(你的用户名)");
mail.Fields.Add("http://schemas.microsoft.com/cdo/configuration/sendpassword", "(密码)");
2.下面 Email.aspx.cs代码以网易邮箱为例,实现发送邮件:
1.需要引入命名空间:
using System.IO;//上传附件
using System.Web.Mail; //发送邮件
2.为Button1 添加 Button1_Click事件:
protected void Button1_Click(object sender, EventArgs e)
{
MailMessage objMail = new MailMessage();//实例化一个邮件类objMail
objMail.From = mailFrom.Text;
objMail.To = mailTo.Text;
objMail.Subject = Subject.Text;
objMail.Body = Body.Text;
objMail.Fields.Add("http://schemas.microsoft.com/cdo/configuration/smtpauthenticate", "1");
objMail.Fields.Add("http://schemas.microsoft.com/cdo/configuration/sendusername", "[email protected]");//个人邮箱
objMail.Fields.Add("http://schemas.microsoft.com/cdo/configuration/sendpassword", "(授权码)");
objMail.Fields.Add("http://schemas.microsoft.com/cdo/configuration/smtpserverport", 465);
objMail.Fields.Add("http://schemas.microsoft.com/cdo/configuration/smtpusessl", "true");
//先将客户端的文件上传到服务器端
string filename, filepath;
filename = Path.GetFileName(FileUpload1.PostedFile.FileName);
filepath = Server.MapPath("./") + filename;
FileUpload1.PostedFile.SaveAs(filepath);
//创建MailAttachment对象,添加附件
MailAttachment objAttach = new MailAttachment(filepath);
objMail.Attachments.Add(objAttach); //添加附件
SmtpMail.SmtpServer = "smtp.163.com";//对应邮箱发送邮件的服务器地址
SmtpMail.Send(objMail);//执行发送操作
}
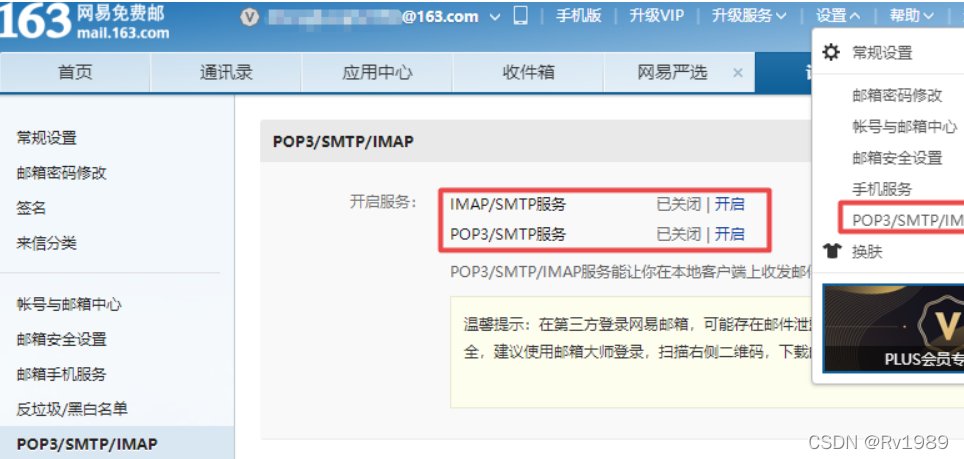
3.授权码的获取:
授权码的在这里的作用就相当于密码,开通后即可使用foxmail、Outlook等第三方客户端进行收发邮件。
登录网易邮箱-->找到设置-->POP3/SMTP/IMAP-->按照提示开启IMAP/SMTP服务-->获取授权码
整体代码如下:
using System;
using System.Collections.Generic;
using System.Linq;
using System.Web;
using System.Web.UI;
using System.Web.UI.WebControls;
using System.IO;
using System.Web.Mail;

namespace course1.Login
{
    public partial class Email : System.Web.UI.Page
    {
        protected void Page_Load(object sender, EventArgs e)
        {

        }

        protected void Button1_Click(object sender, EventArgs e)
        {
            MailMessage objMail = new MailMessage();//实例化一个邮件类objMail
            objMail.From = mailFrom.Text;//objMail.From表示原邮件地址 即发送人的邮箱
            objMail.To = mailTo.Text;//objMail.To 表示收件人地址 即收件人邮箱
            objMail.Subject = Subject.Text;//objMail.Subject 表示邮件主题 即邮件的标题
            objMail.Body = Body.Text;//objMail.Body 即邮件的内容
            objMail.Fields.Add("http://schemas.microsoft.com/cdo/configuration/smtpauthenticate", "1");
            objMail.Fields.Add("http://schemas.microsoft.com/cdo/configuration/sendusername", "(邮箱账号)");
            objMail.Fields.Add("http://schemas.microsoft.com/cdo/configuration/sendpassword", "(授权码)");
            objMail.Fields.Add("http://schemas.microsoft.com/cdo/configuration/smtpserverport", 465);
            objMail.Fields.Add("http://schemas.microsoft.com/cdo/configuration/smtpusessl", "true");

            //先将客户端的文件上传到服务器端
            string filename, filepath;
            filename = Path.GetFileName(FileUpload1.PostedFile.FileName);
            filepath = Server.MapPath("./") + filename;
            FileUpload1.PostedFile.SaveAs(filepath);

            //创建MailAttachment对象,添加附件
            MailAttachment objAttach = new MailAttachment(filepath);
            objMail.Attachments.Add(objAttach); //添加附件

            SmtpMail.SmtpServer = "smtp.163.com";//对应邮箱发送邮件的服务器地址
            SmtpMail.Send(objMail);//执行发送操作
        }
    }
}
运行截图:
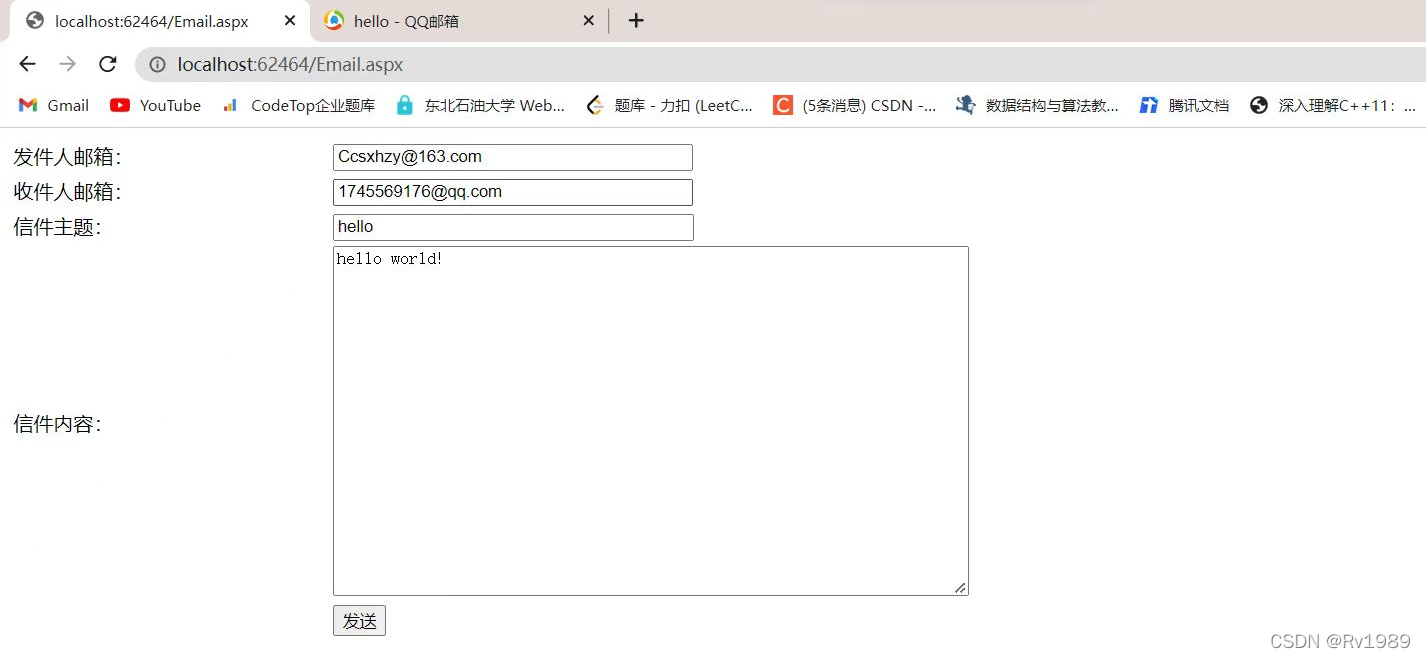
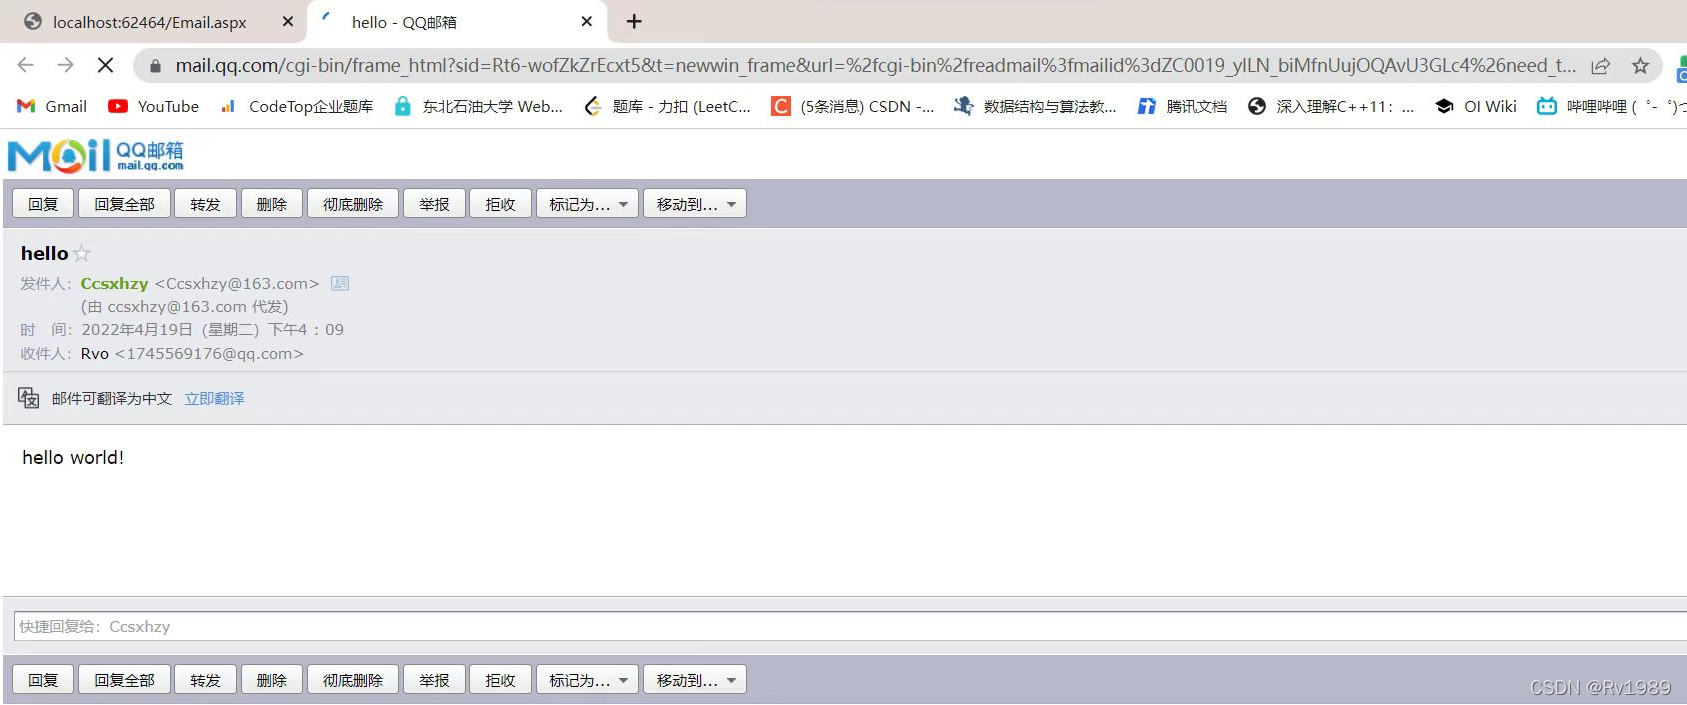
以上介绍的就是ASP.NET web页面实现发送邮件,希望对你有所帮助!!
版权声明
本文为[Rv1989]所创,转载请带上原文链接,感谢
https://blog.csdn.net/m0_64355496/article/details/124339171
边栏推荐
- MySQL数据库讲解(十)
- bc的用法
- rsync+inotify远程同步
- IE8 browser prompts whether to block access to JS script
- TLS/SSL 协议详解 (28) TLS 1.0、TLS 1.1、TLS 1.2之间的区别
- 快速搞懂线程实现的三种方式
- Win10 comes with groove music, which can't play cue and ape files. It's a curvilinear way to save the country. It creates its own aimpack plug-in package, and aimp installs DSP plug-in
- 金融行业云迁移实践 平安金融云整合HyperMotion云迁移解决方案,为金融行业客户提供迁移服务
- Docker (V) MySQL installation
- KVM学习资源
猜你喜欢
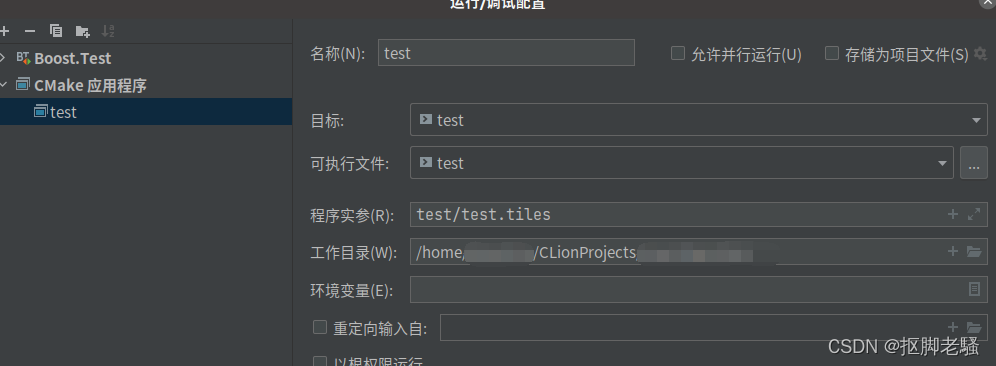
Pass in external parameters to the main function in clion

Logback logger and root
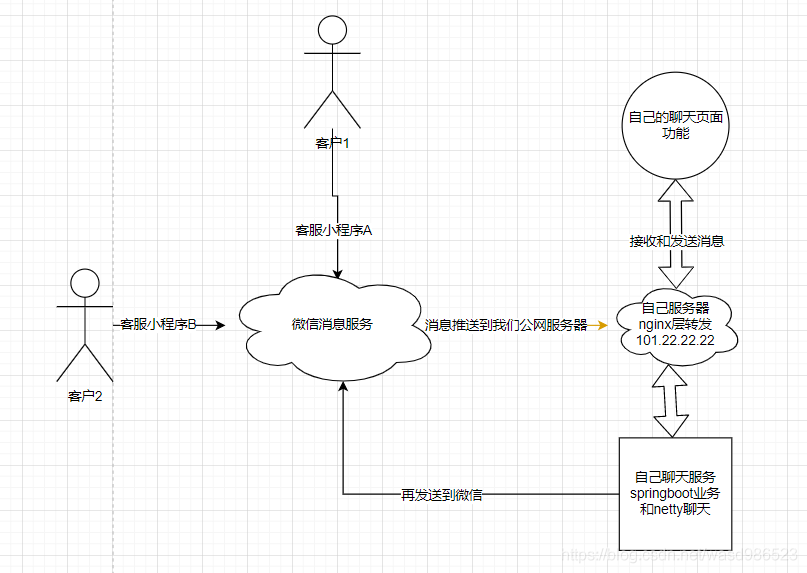
微信小程序客服接入,实现发送和接收消息
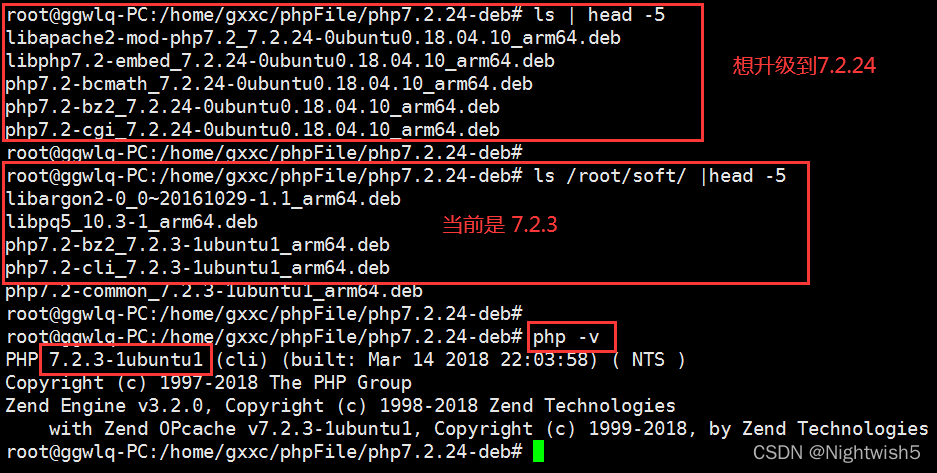
Tongxin UOS php7 2.3 upgrade to php7.0 two point two four

sar命令详解
KVM学习资源
01-nio basic ByteBuffer and filechannel
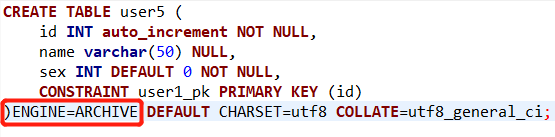
A table splitting implementation scheme of MySQL and InnoDB, MyISAM and MRG_ Introduction to MyISAM and other engine application scenarios
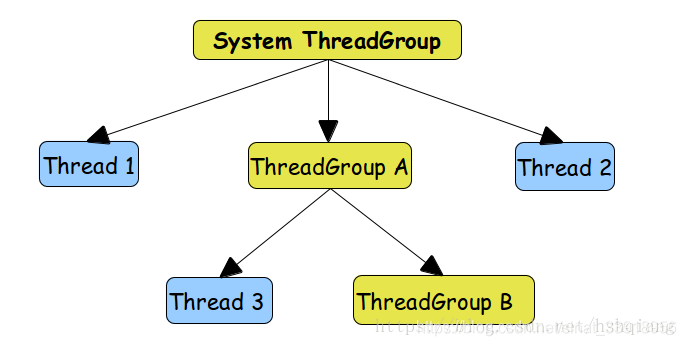
线程组ThreadGroup使用介绍+自定义线程工厂类实现ThreadFactory接口
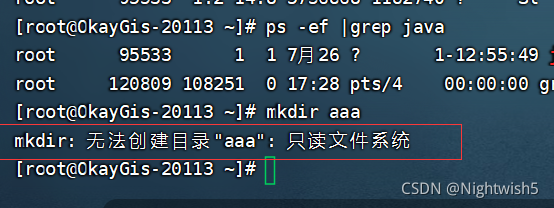
Processing MKDIR: unable to create directory 'AAA': read only file system
随机推荐
统信UOS卸载php7.2.24,安装php7.4.27 ;卸载再安装为PHP 7.2.34
MYSQL一种分表实现方案及InnoDB、MyISAM、MRG_MYISAM等各种引擎应用场景介绍
返回数组排序后下标
std::map 和 std::vector 内存释放
Operation instructions of star boundary text automatic translator
squid代理
Win10 comes with groove music, which can't play cue and ape files. It's a curvilinear way to save the country. It creates its own aimpack plug-in package, and aimp installs DSP plug-in
openstack理论知识
Preview CSV file
dp-[NOIP2000]方格取数
Nacos作为配置中心(四) 使用Demo
VMware installation 64 bit XP Chinese tutorial
mysql 5.1升级到5.610
ssh限制登录的四种手段
进入新公司,运维工程师从下面这几项了解系统的部署
ansible及常用模块的使用
翻牌效果
On the problem of cliff growth of loss function in the process of training
js 递归(1)
xx项目架构随记