当前位置:网站首页>[servlet] detailed explanation of servlet (use + principle)
[servlet] detailed explanation of servlet (use + principle)
2022-04-23 14:29:00 【Stuttering demon king】
List of articles
1. Servlet Introduce
1.1 What is? Servlet
-
Servlet(Server Applet Abbreviation , Full name Java Servlet): yes use Java Write a server-side program . Its main function is to browse and modify data interactively , Generate dynamic Web Content . The narrow sense Servlet Refer to Java Language implementation of an interface , The generalized Servlet Anything that implements this Servlet The class of the interface , In general , People will be Servlet Understood as the latter .
-
Servlet Run on support Java In the application server . In principle ,Servlet Can respond to any type of request , but In most cases Servlet Only to extend the base HTTP Agreed Web The server .
-
Servlet Is a technology to realize dynamic pages , It's a group made up of Tomcat For programmers API, Help programmers develop a simple and efficient web app
1.2 Servlet The main work of
- Allow programmers to register a class , stay Tomcat Received a specific HTTP On request , Execute some code in this class
- Help programmers parse HTTP request , hold HTTP The request parses from a string into a HttpRequest object
- Help programmers construct HTTP Respond to , Programmers just give the specified HttpResponse Fill in some properties of the object ,Servlet Will automatically follow HTTP A protocol is constructed HTTP Response string , And pass Socket Write and return to the client
2. Servlet Program creation steps
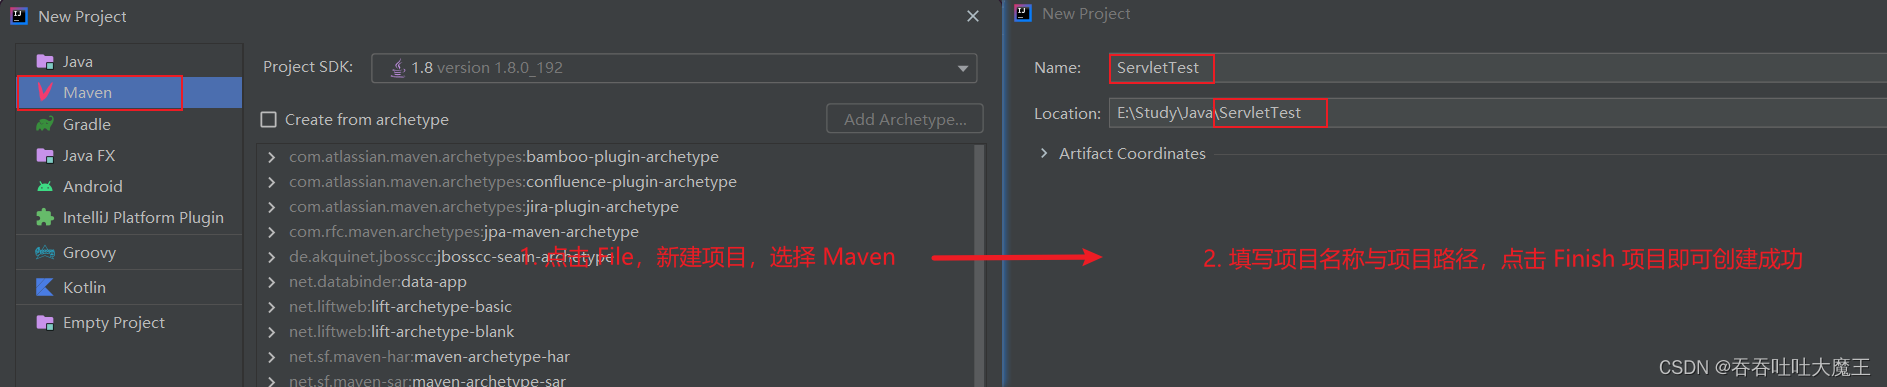
2.1 Create project
The following uses IDEA Take you to write a simple Servlet Program , Mainly to let you know a general process
-
use first IDEA Create a Maven project
-
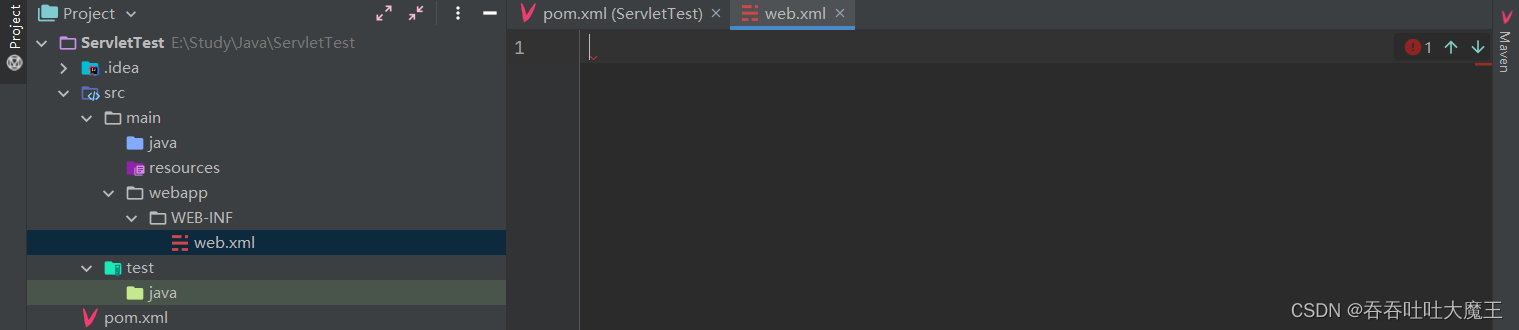
Create a good project as follows

-
From the above figure, we can see that there are some directory structures in the created project , This is a Maven The standard structure of the project , among
src: The root directory used to store source code and test codemain: Directory used to store source codetest: Directory used to store test codejava: To hold Java Code directoryresources: Used to store dependent resource filespom.xml: yes Maven The core configuration file for the project , About this Maven Related properties of the project , It's all here xml To configure
2.2 Introduce dependencies
Maven After the project is created , It will automatically generate a pom.xml file , We need to introduce... Into this file Servlet API Rely on the jar package
-
open The central warehouse , Search for Servlet, Click on
Java Servlet API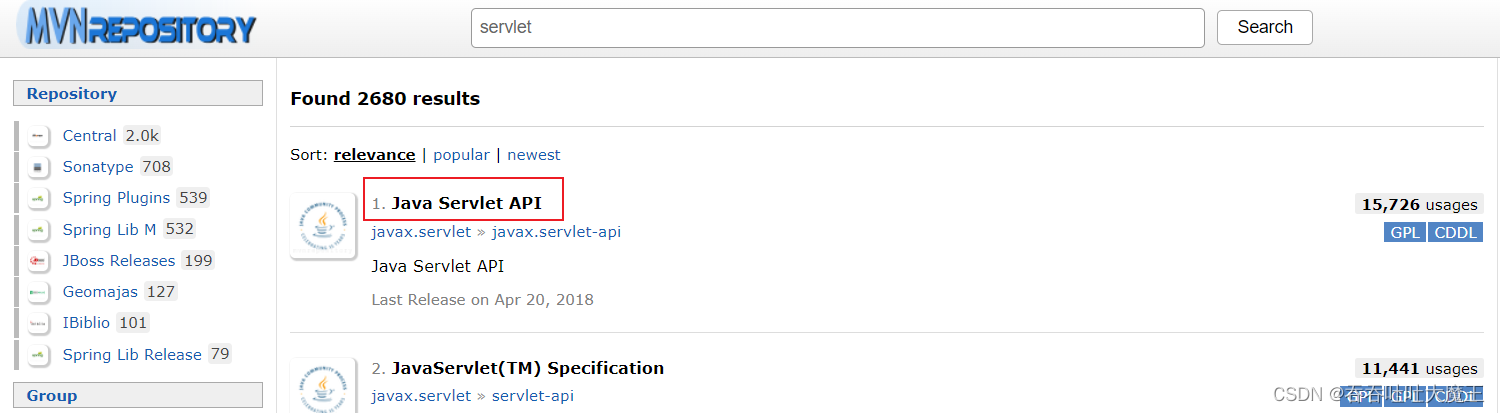
-
Select the corresponding Tomcat Version of Servlet( Because I am currently using Tomcat 8 series , So choose Servlet 3.1.0 that will do )

-
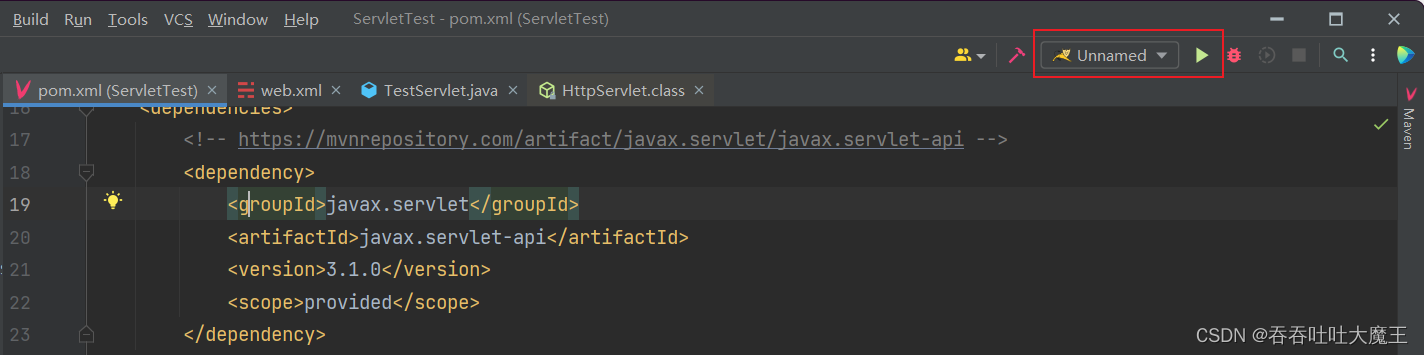
The version provided by the central warehouse xml Copy to project's
pom.xmlin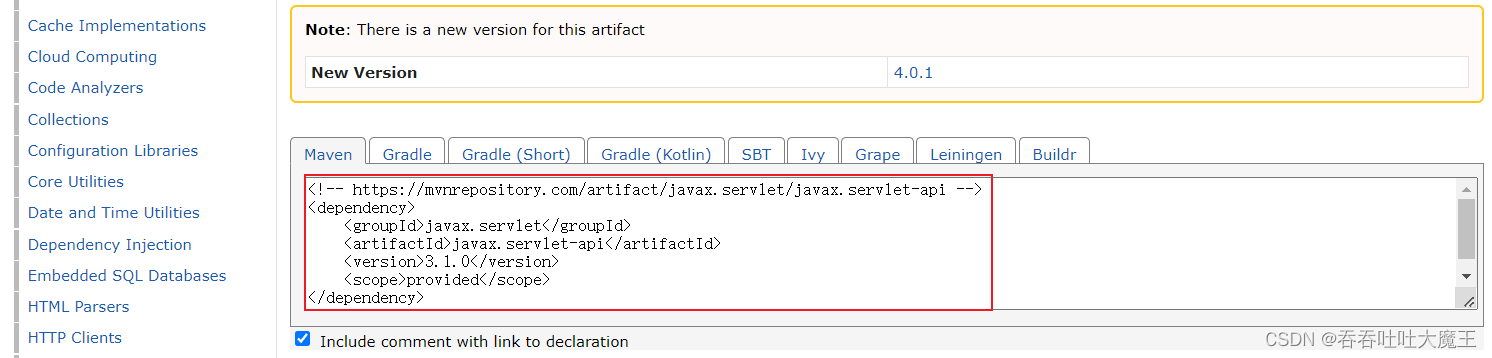
-
The modified
pom.xmlThe documents are as follows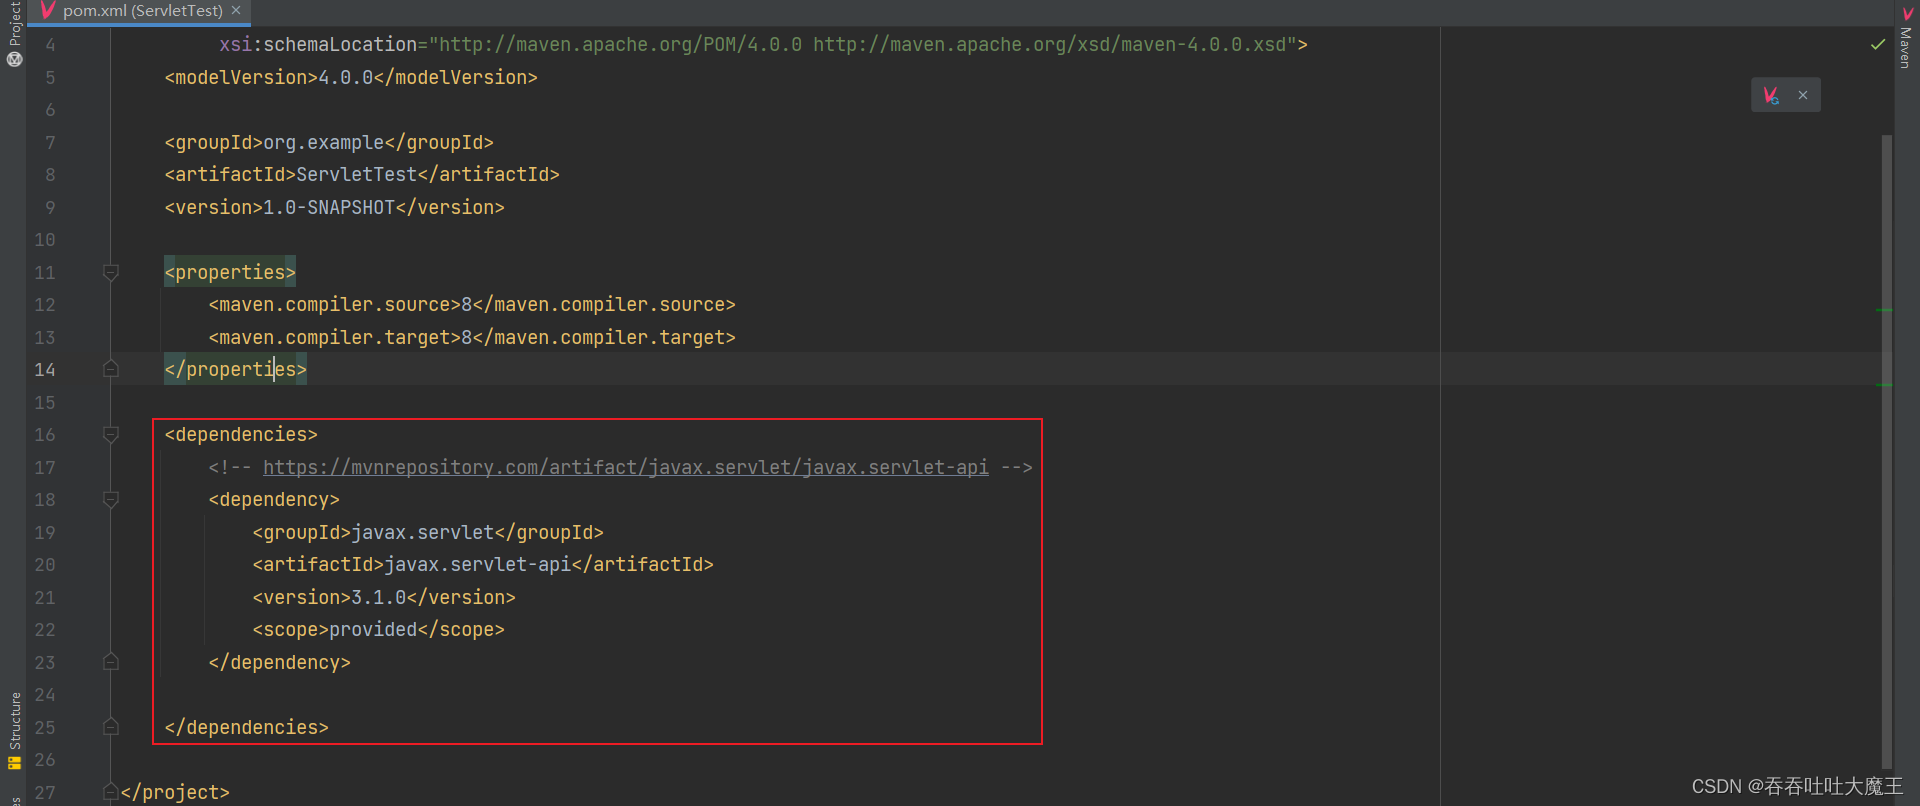
There can be multiple dependencies in a project , Every dependency is a
<dependency>label . The introduced dependencies should be placed in one<dependencies>Label , This label is used to place the items that the project depends on jar package ,Maven The dependency will be automatically downloaded to the local -
There are several parameters in the dependency of the copy , Have the following meanings respectively :
groupId: The of an organization or company IDartifactId: Indicates the of a project or product IDversion: Version numberscope: Used to specify the scope of the dependency , Include the tests of your project 、 compile 、 function 、 Packaging and other declaration cycles .
-
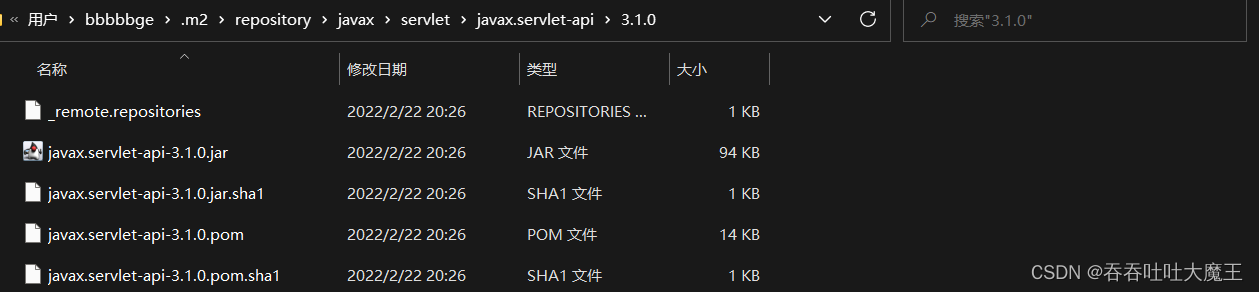
If you want to find just Maven Download to a local third-party library , Path as follows
2.3 Create directory
Web The project has its own requirements for directory structure , Only Maven The standard catalogue is not enough , The following directories need to be created and configured
-
stay main Under the table of contents , Create a
webappCatalogwebapp Directory is used to deploy to Tomcat An important directory in , It can store some static resources
-
stay webapp Under the table of contents , Create a
WEB-INFCatalog -
stay WEB-INF Under the table of contents , Create a
web.xmlfileTomcat By finding this web.xml Documents can be handled correctly webapp Dynamic resources in
-
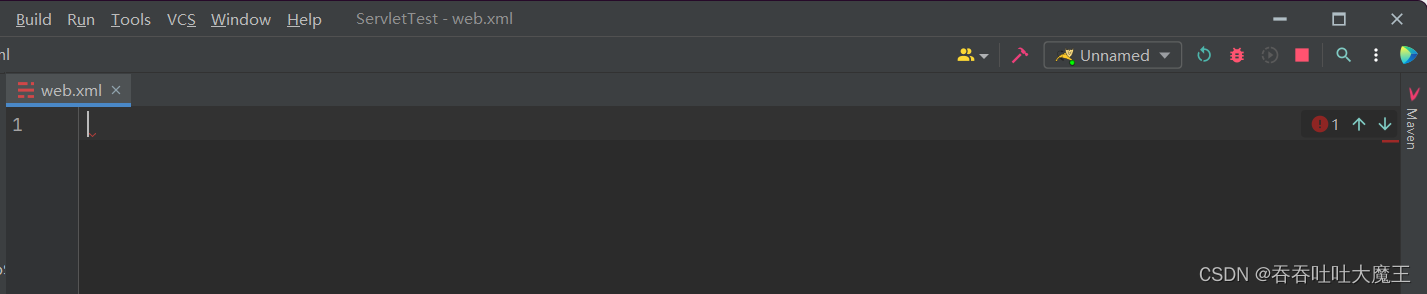
To write
web.xmlweb.xml The content in cannot be empty , The writing inside is fixed , When used, you can directly copy the following code
<!DOCTYPE web-app PUBLIC "-//Sun Microsystems, Inc.//DTD Web Application 2.3//EN" "http://java.sun.com/dtd/web-app_2_3.dtd" >
<web-app>
	<display-name>Archetype Created Web Application</display-name>
</web-app>
2.4 Write code
Write a simple code to let the response return a custom character conversion
-
Create a TestServlet class , And let it inherit from
HttpServlet
HttpServlet This class comes from pom.xml Introduced in Servlet API Rely on the jar package
-
stay TestServlet Class
doGetMethod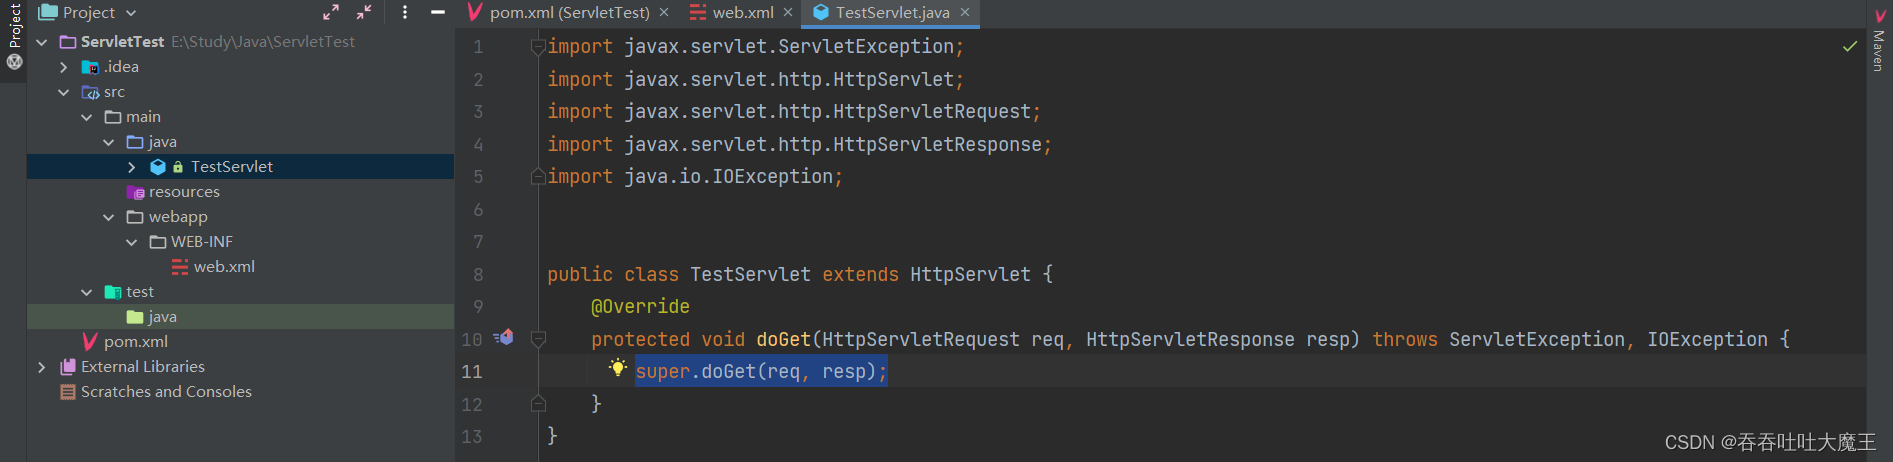
doGet yes HttpServlet Methods in class , Here is the of overriding the parent class in the child class doGet
-
In order to understand doGet The role of methods , We can look at its source code

HttpServletRequest: Express HTTP request ,Tomcat according to HTTP The format of the request converts the request in string format into a HttpServletRequest object , Through this object, you can get the information in the requestHttpServletResponse: Express HTTP Respond to , The response object can be constructed through code , then Tomcat Return the response to the browser- adopt doGet We can roughly understand the source code of , Its function is to return a response based on the received request 405 perhaps 400, Then we can rewrite this method , Execute your own business logic according to the received request , Construct the result as a response object
-
stay doGet In the method , adopt
HttpServletResponseClassgetWriter()Method to respond to body Write data in text format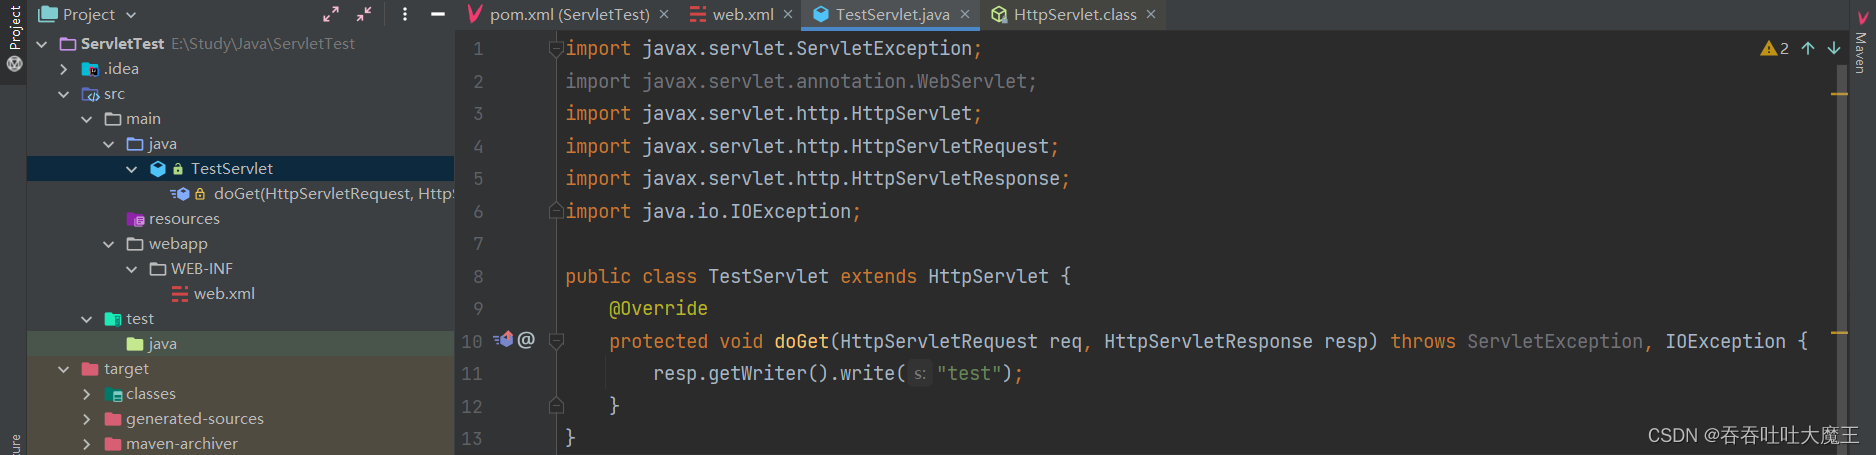
resp.getWriter()Will get a stream object , Through this stream object, you can write some data , The number written will be constructed as a HTTP Responsive body part ,Tomcat Will turn the entire response into a string , adopt Socket Write back to the browser -
Need to give TestServlet Add a specific comment
@WebServlet("/test")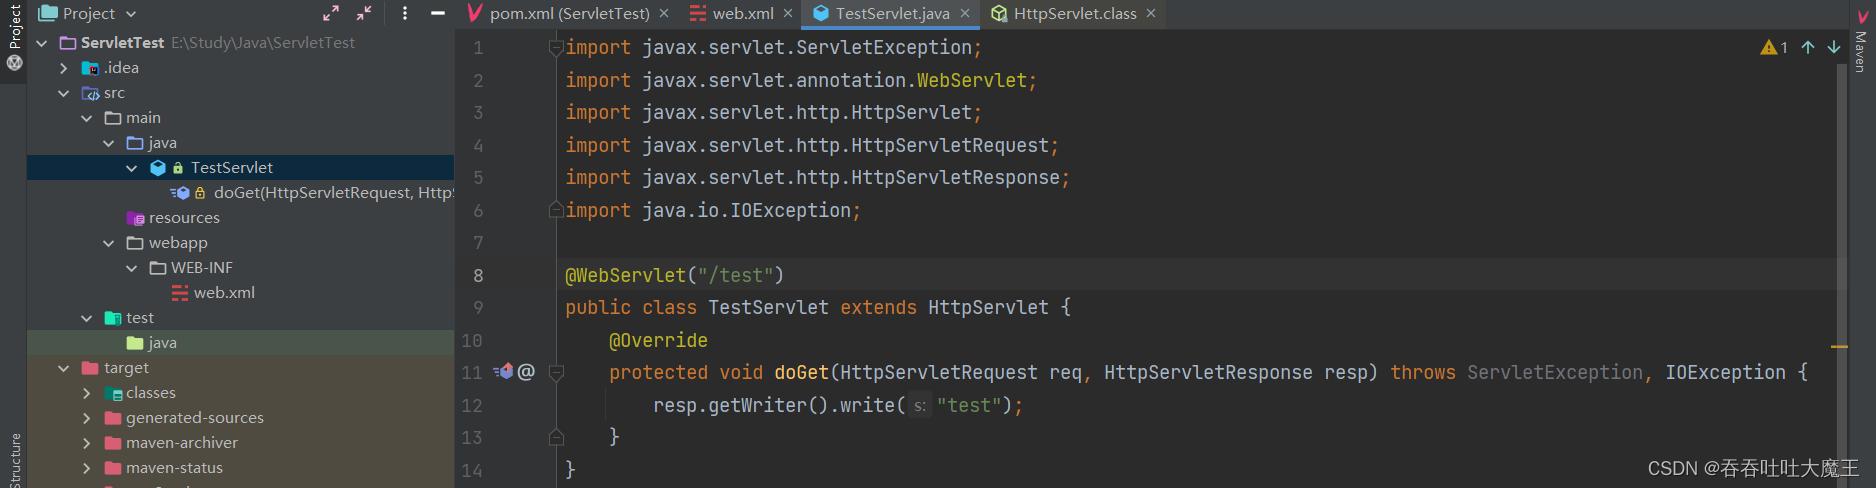
The above solution aid means Tomcat Of the requests received ,URL Of Servlet Path Path is
/testWill only call TestServlet The code for this class , The string in the annotation indicates URL Of Servlet Path -
So far, the writing of the program has been completed ! But you may wonder if the above code is not passed main Method as entry , This is because main Methods have been included in Tomcat It's in , The program we write cannot be executed alone , But need to match Tomcat To execute ( stay Tomcat We specifically analyze this problem in the pseudo code of )
2.5 packaged applications
After the program is written , You can use Maven package
-
The first change pom.xml, Add some necessary configuration ( Type of package and package name after package )
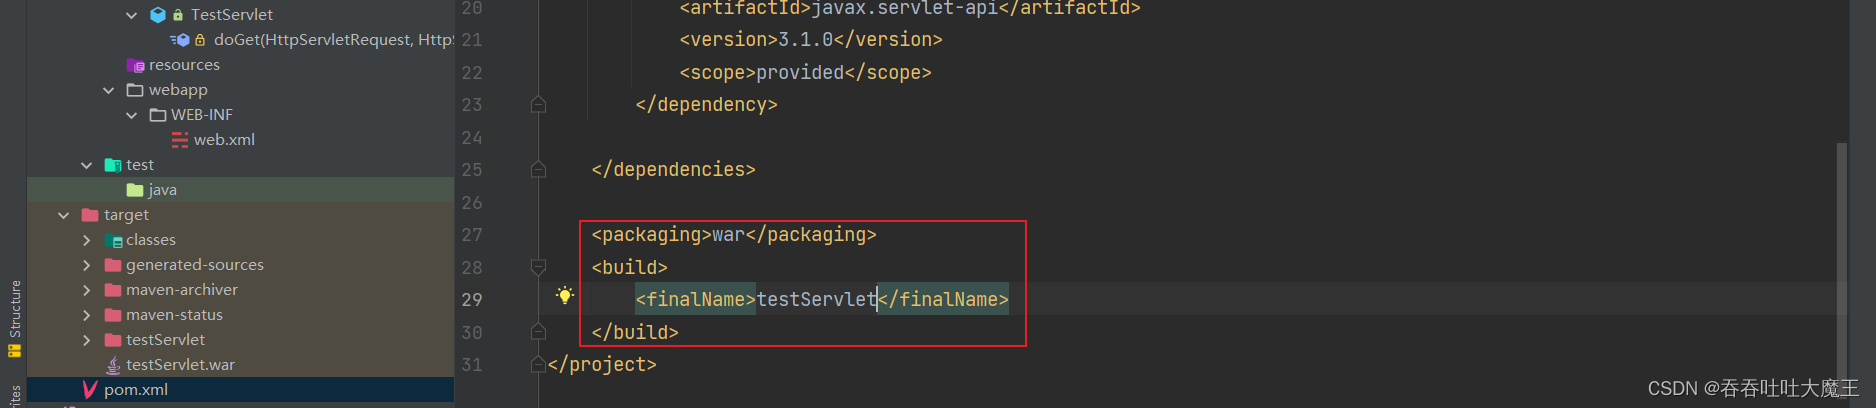
- packaging Label is used to set the type of packaging ( If the packing type is not modified, the default value is jar package ,jar The bag is ordinary Java The result of program packaging , It contains some
.classfile ; And deployed in Tomcat The compressed package in is generally war package ,war Inside the bag is Java Web Program , In addition to .class Outside the document , Also contains HTML、CSS、JavaScript、 Pictures, etc. ) - finalName The label is used to set the name after packaging ( Package name is very important , It corresponds to... In the request URL Of Context Path)
- packaging Label is used to set the type of packaging ( If the packing type is not modified, the default value is jar package ,jar The bag is ordinary Java The result of program packaging , It contains some
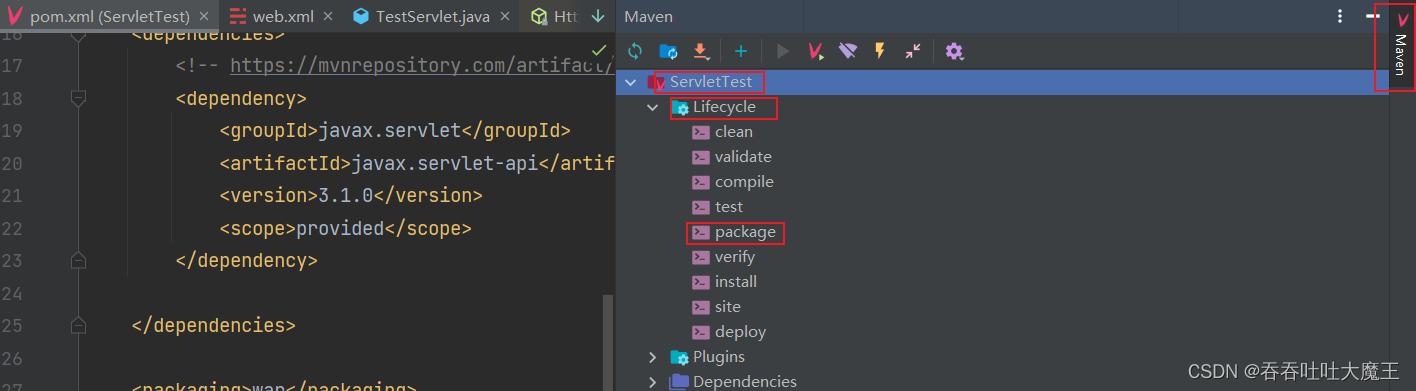
-
Perform the packaging operation ( open Maven window , an Lifecycle, double-click package package )
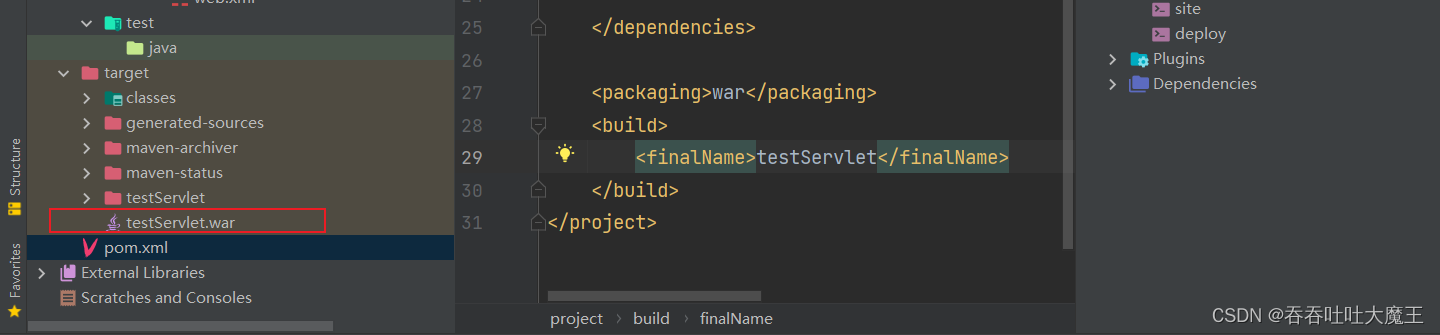
-
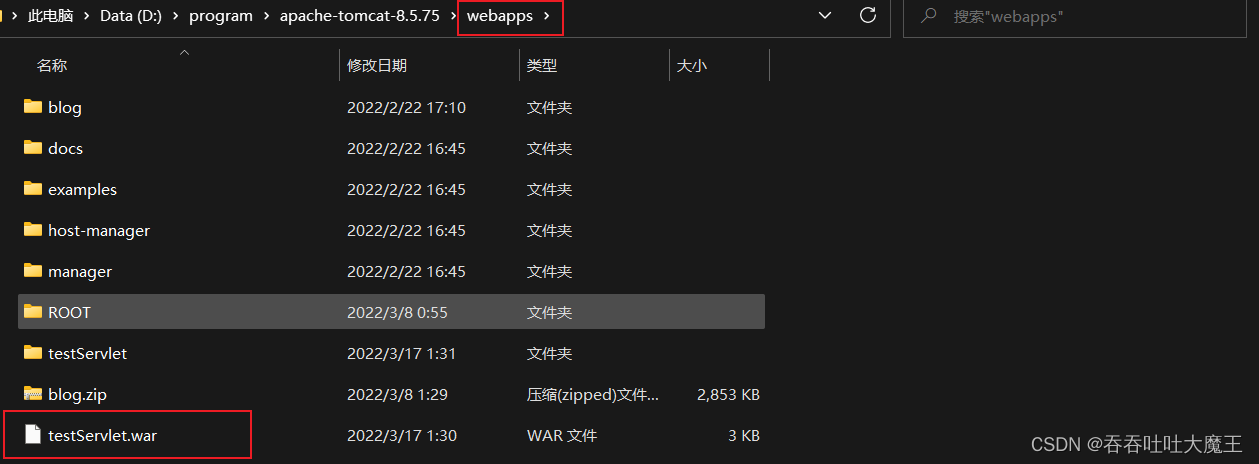
After successful packing , You can find more target Catalog , There is a testServlet.war The package
2.6 The deployment process
Next, we can deploy the program
-
First of all, it will be played war Package copy to Tomcat Of webapps Under the table of contents
-
start-up Tomcat( stay Tomcat Of bin Click in the directory
startup.bat)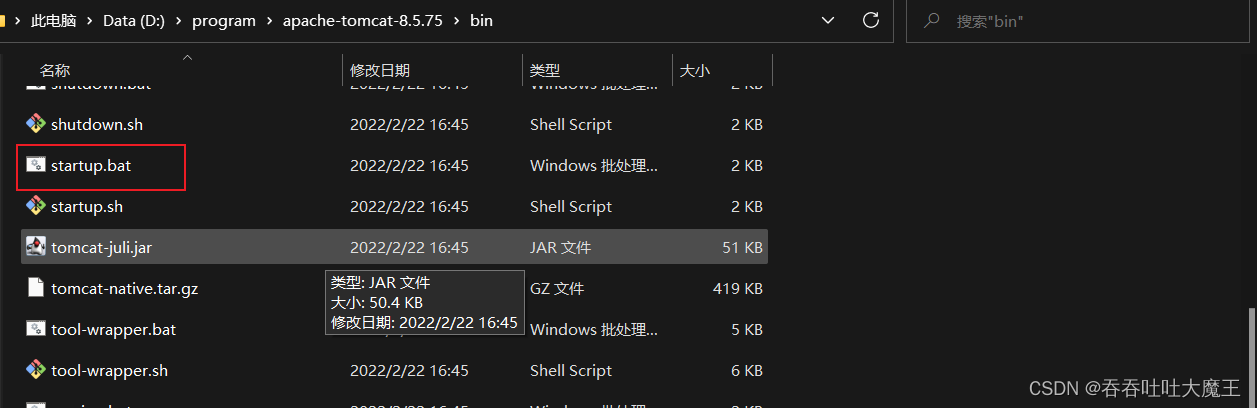
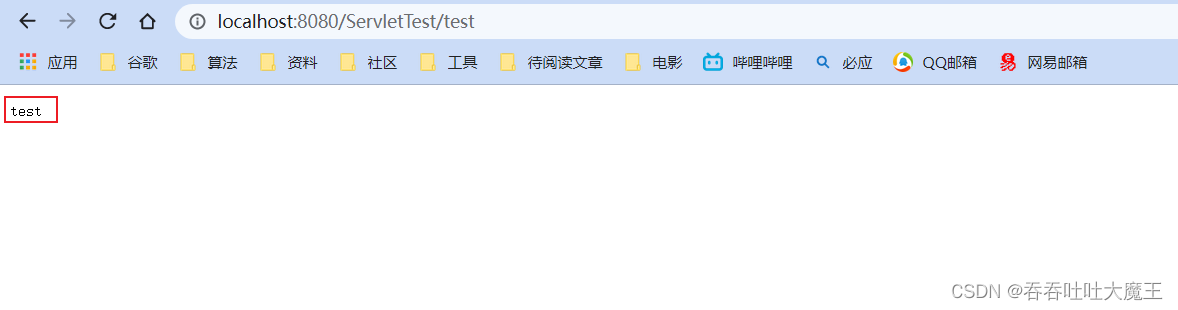
2.7 Verification procedure
At this point, access through the browser http://127.0.0.1:8080/testServlet/test You can see the results of the program implementation
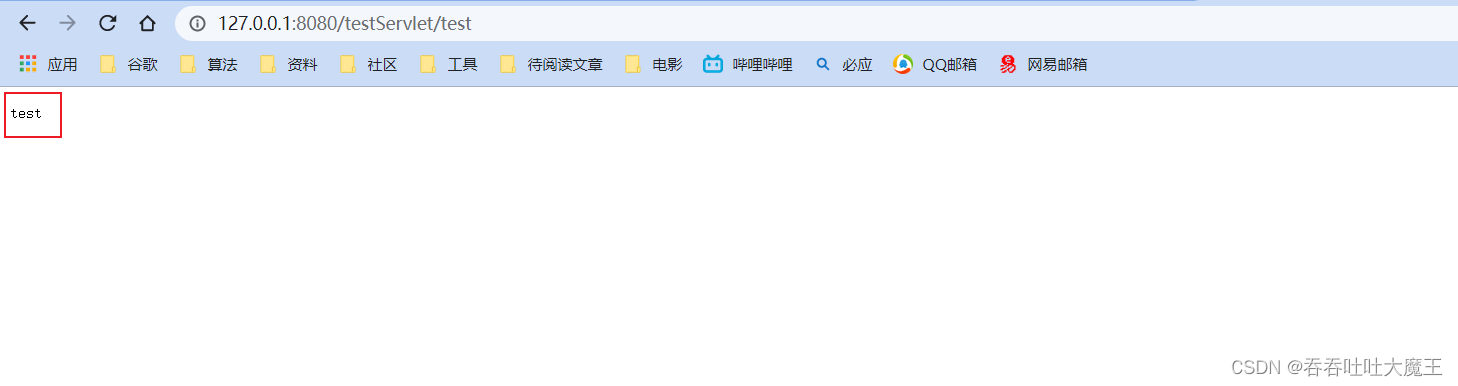
Be careful :URL The path in is divided into two parts Context Path and Servlet Path
- Context Path This path represents a webapp, From the package name
- Servlet Path This path represents a webapp A page in , From the corresponding Servlet class
@WebServletWhat's in the notes
3. Use Smart Tomcat Deployment
In order to simplify the above operation process , In fact, there are some simpler ways
- For creating projects 、 Introduce dependencies 、 There are three steps to create a directory , You can actually use Project template To quickly generate , However, due to the slow loading speed of project templates , So... Is not recommended here
- For the two steps of packaging program and deployment program , You can actually use Smart Tomcat plug-in unit To quickly achieve , The following will introduce how it is used
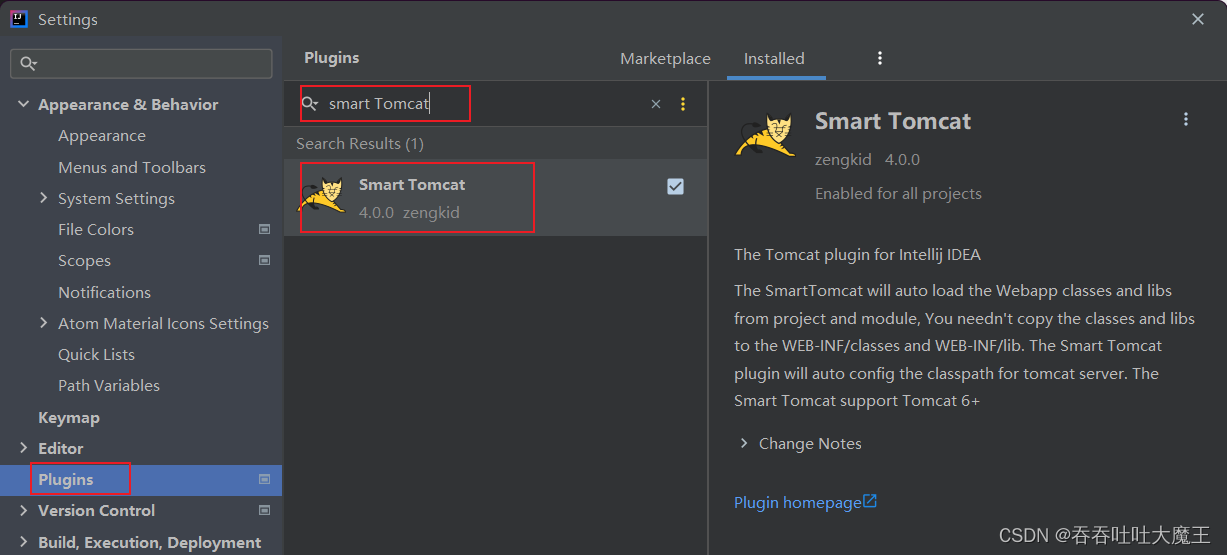
3.1 install Smart Tomcat
-
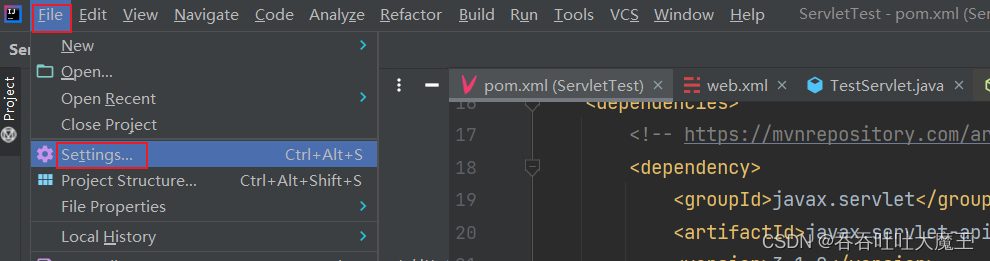
Click on File → Settings
-
Click on Plugins, Search in search bar Smart Tomcat, Then install it
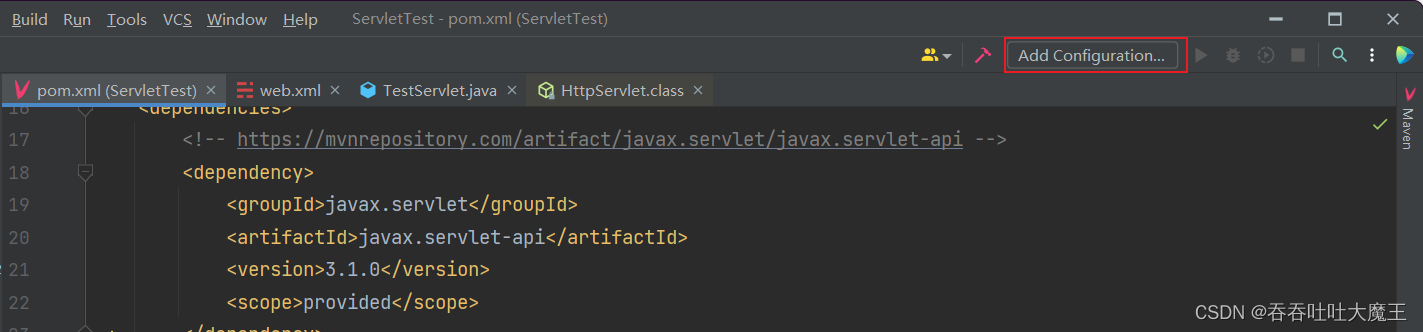
3.2 To configure Smart Tomcat
-
Click on Add Configuration
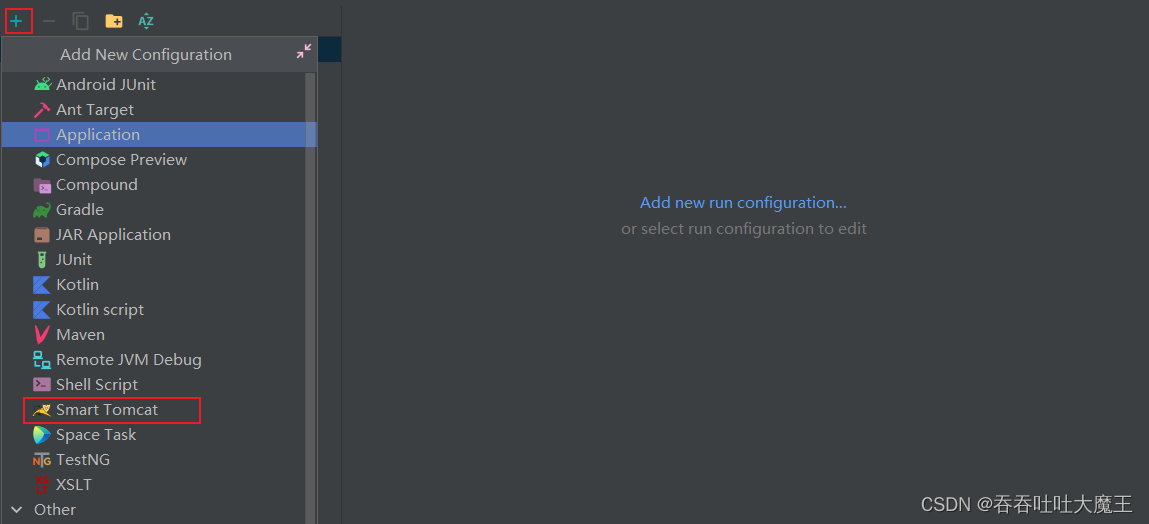
-
Click on the top left + Number , And select Smart Tomcat
-
Mainly modify these three parameters
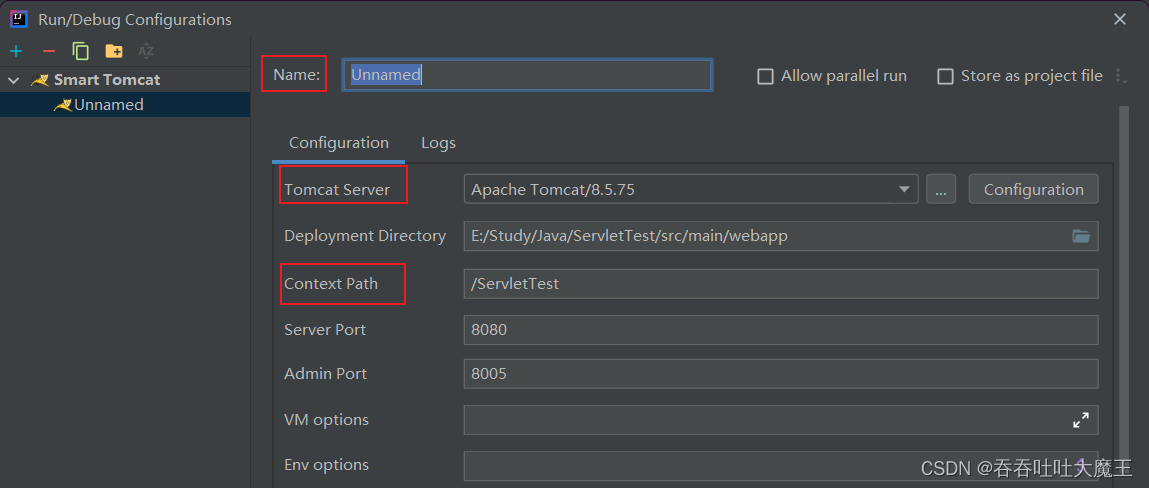
- Name: This column can be filled in casually
- Tomcat Server: Express Tomcat directory
- Deployment Directory: Indicates the project publishing directory
- Context Path: Indicates the project path , The default value is the project name
- Servlet Port: Indicates the service port
- Admin Port: Indicates the management port
- VM options: Express JVM Parameters
-
Good configuration Smart Tomcat after ,Add Configuration It will be shown as Name Name , And there are more symbols of triangle operation on the right
3.3 Use Smart Tomcat
-
Click the triangle to run Smart Tomcat, The following message indicates that the program is started successfully

-
Click on the blue connection , Jump to the project path , add Servlet Path You can display the results of the program
4. Access error solution
4.1 appear 404
appear 404 reason : The resource accessed by the user does not exist , The approximate rate is URL The path of is not written correctly
Error instance 1: Write less. Context Path perhaps Context Path Write the wrong 
Error instance 2: Write less. Servlet Path perhaps Servlet Path Write the wrong
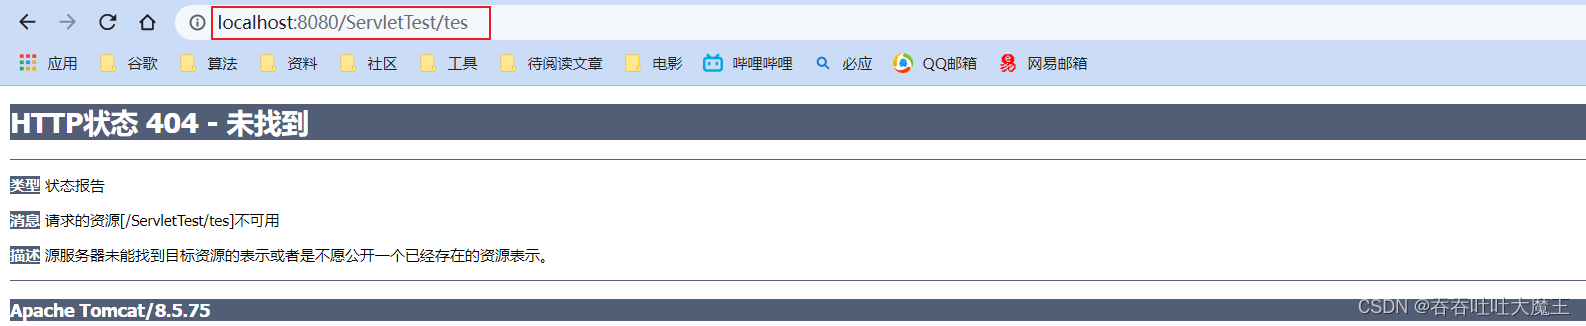
Error instance 3: web.xml Write the wrong ( Such as emptying web.xml The content in )
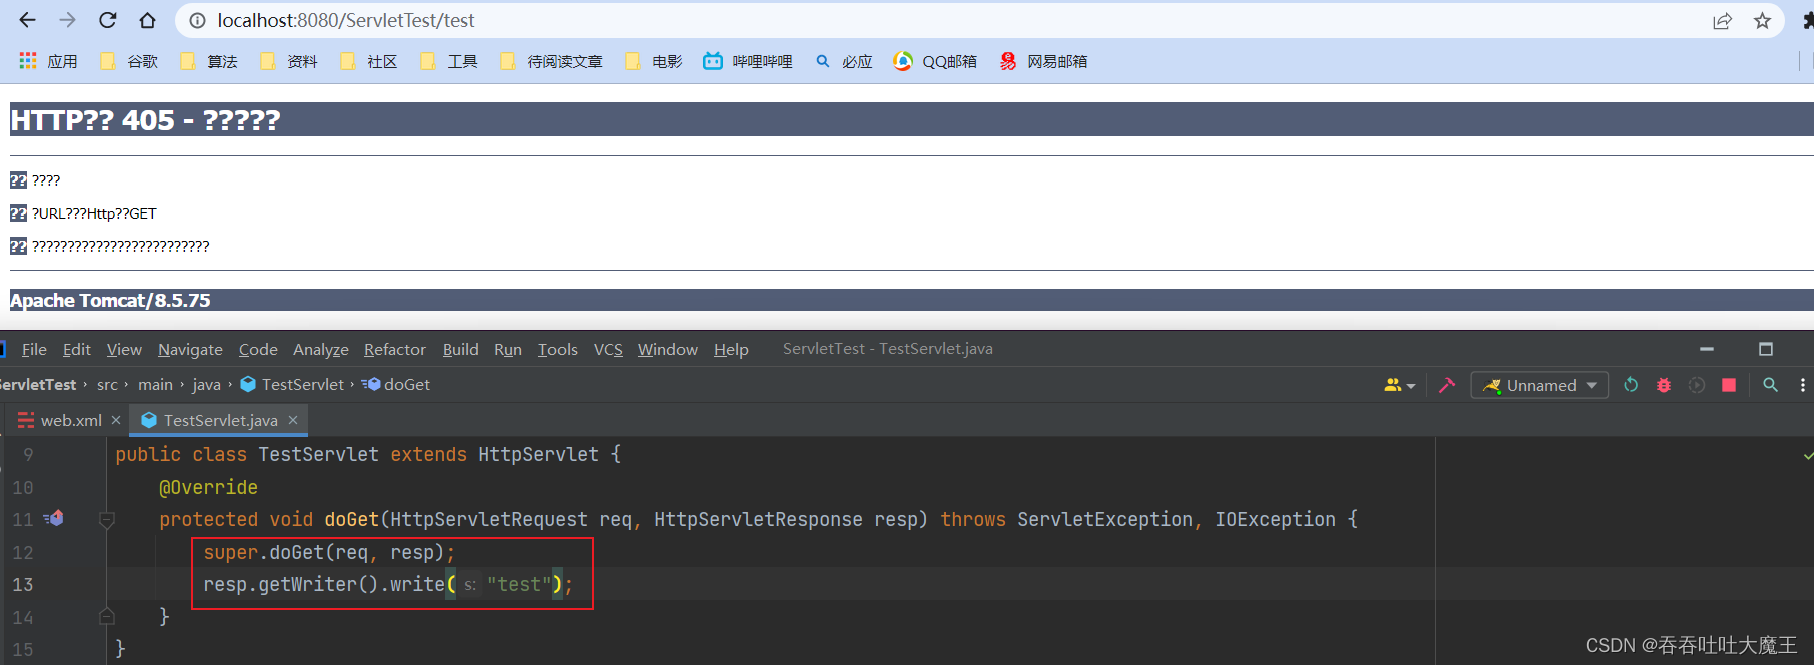
4.2 appear 405
appear 405 reason : The accessed server cannot support or use the method in the request
Error instance 1: No rewriting doGet Method
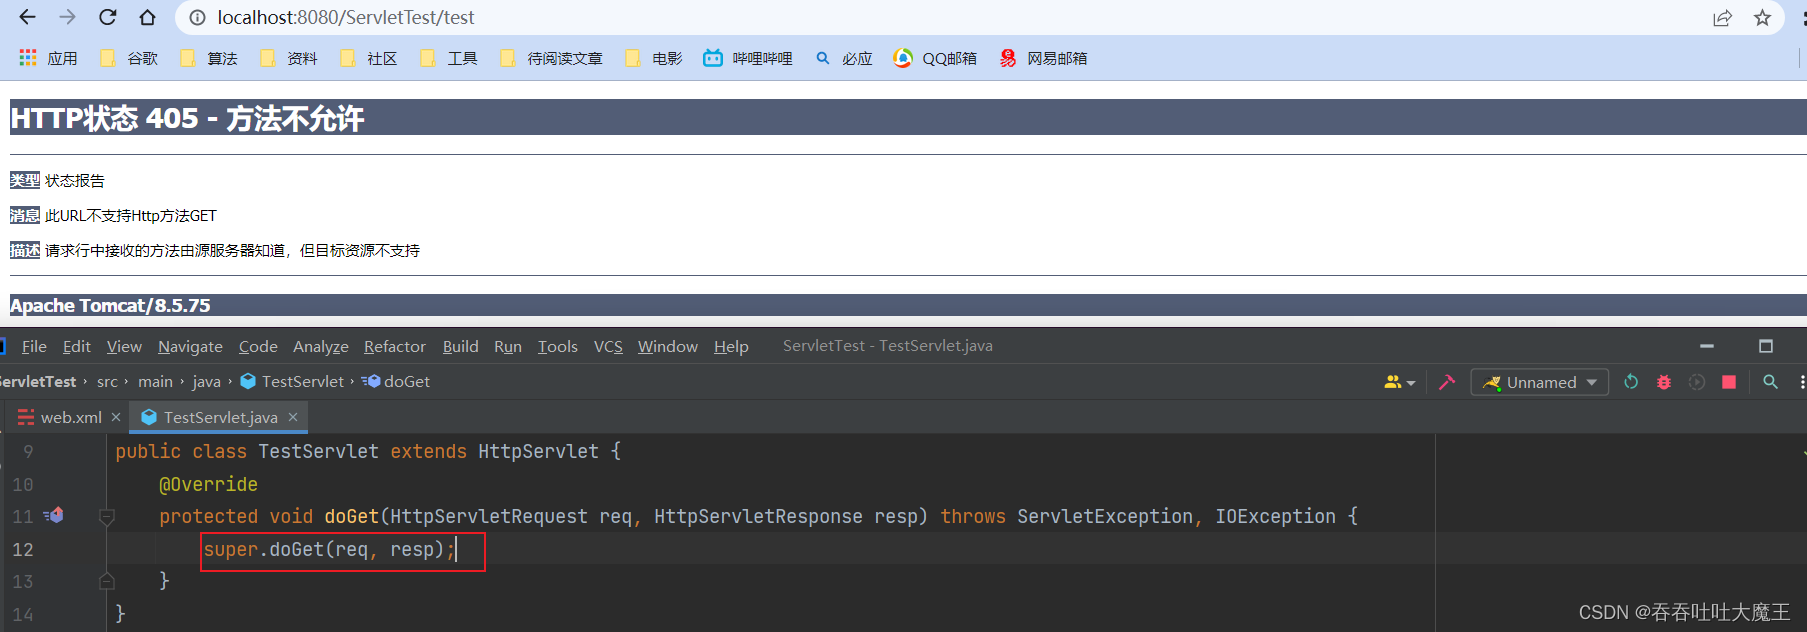
Error instance 2: Rewrote doGet Method , But the parent class is not deleted doGet Method
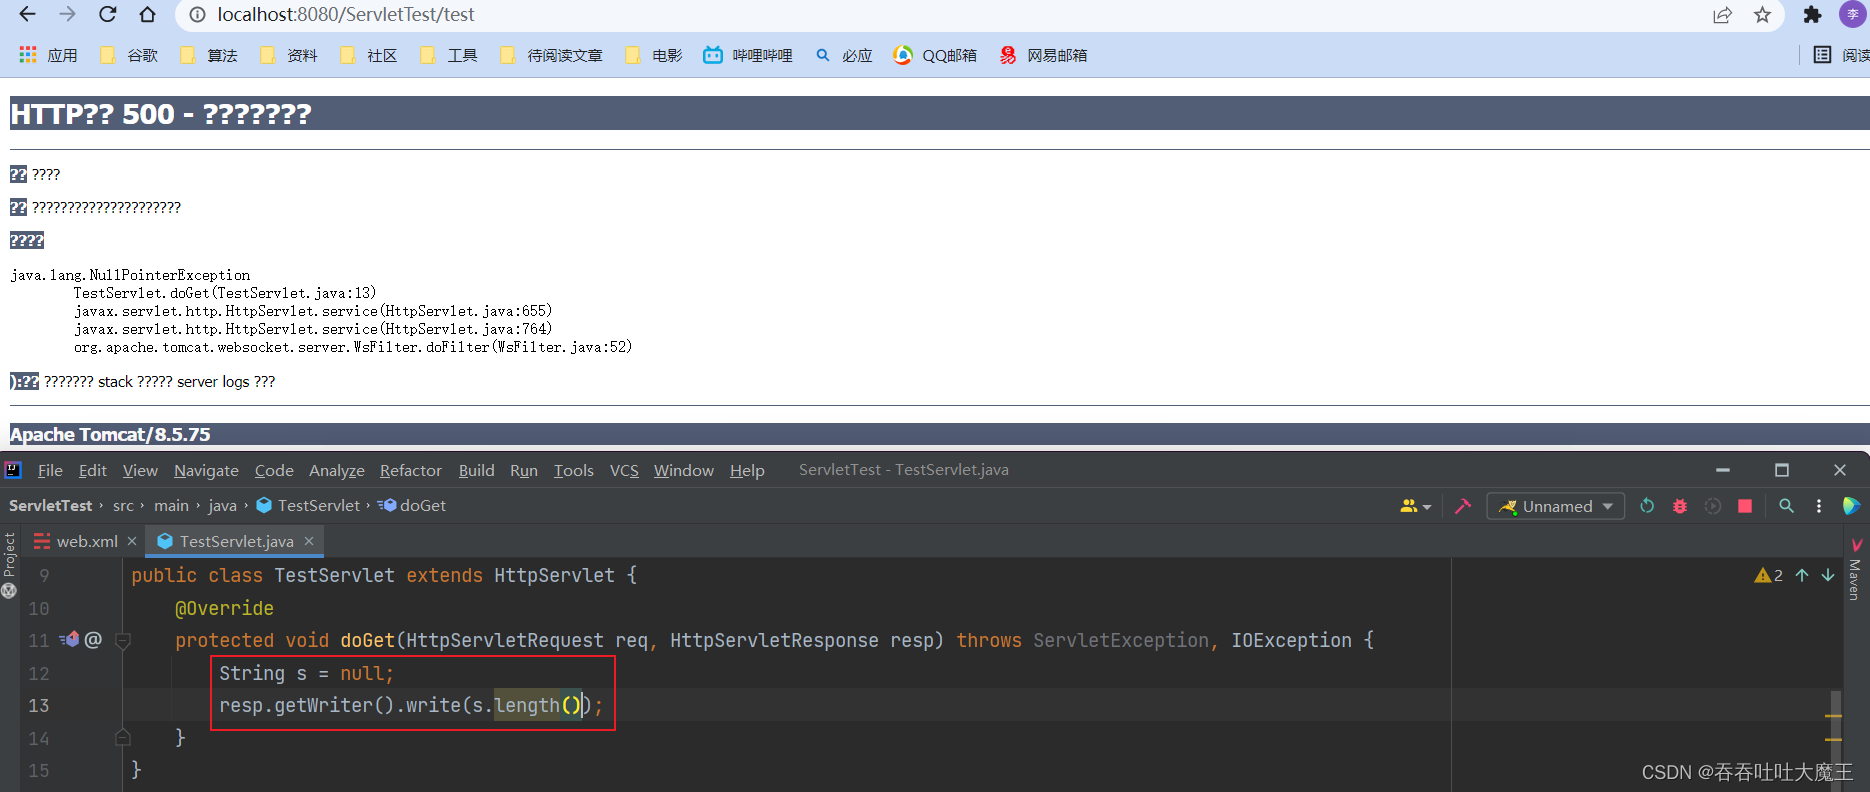
4.3 appear 500
appear 500 reason : The server encountered an internal error , Tend to be Servlet The exception thrown in the code results in
Error instance : Null pointer exception in code
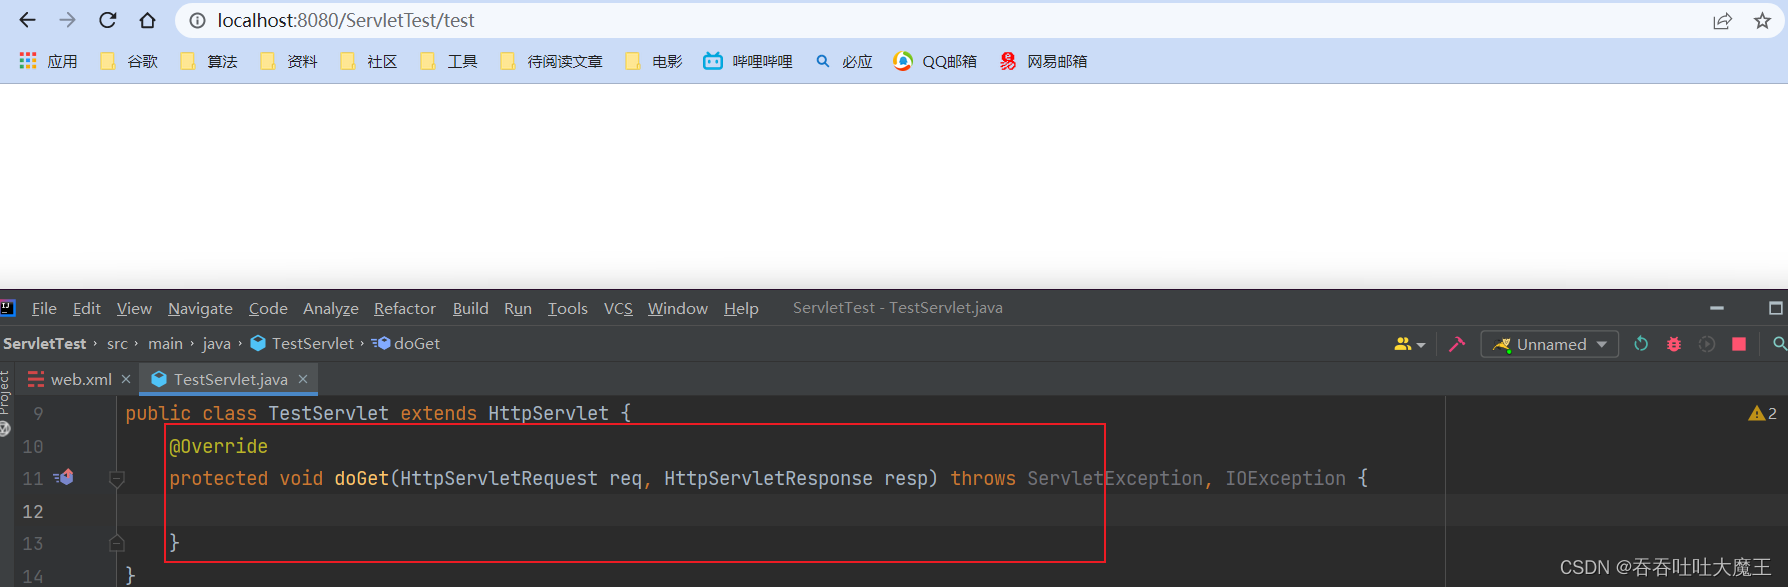
4.4 appear “ Blank page ”
Reason for blank page : Responsive body There's nothing in it
Error instance : take resp.getWriter().write() Operation delete
4.5 appear “ Can't access this website ”
appear “ Can't access this website ” reason : Generally, you can't access Tomcat( May be Tomcat Didn't start , It could be IP/ The port number is wrong )
Error instance : annotation @WebServlet There is less in /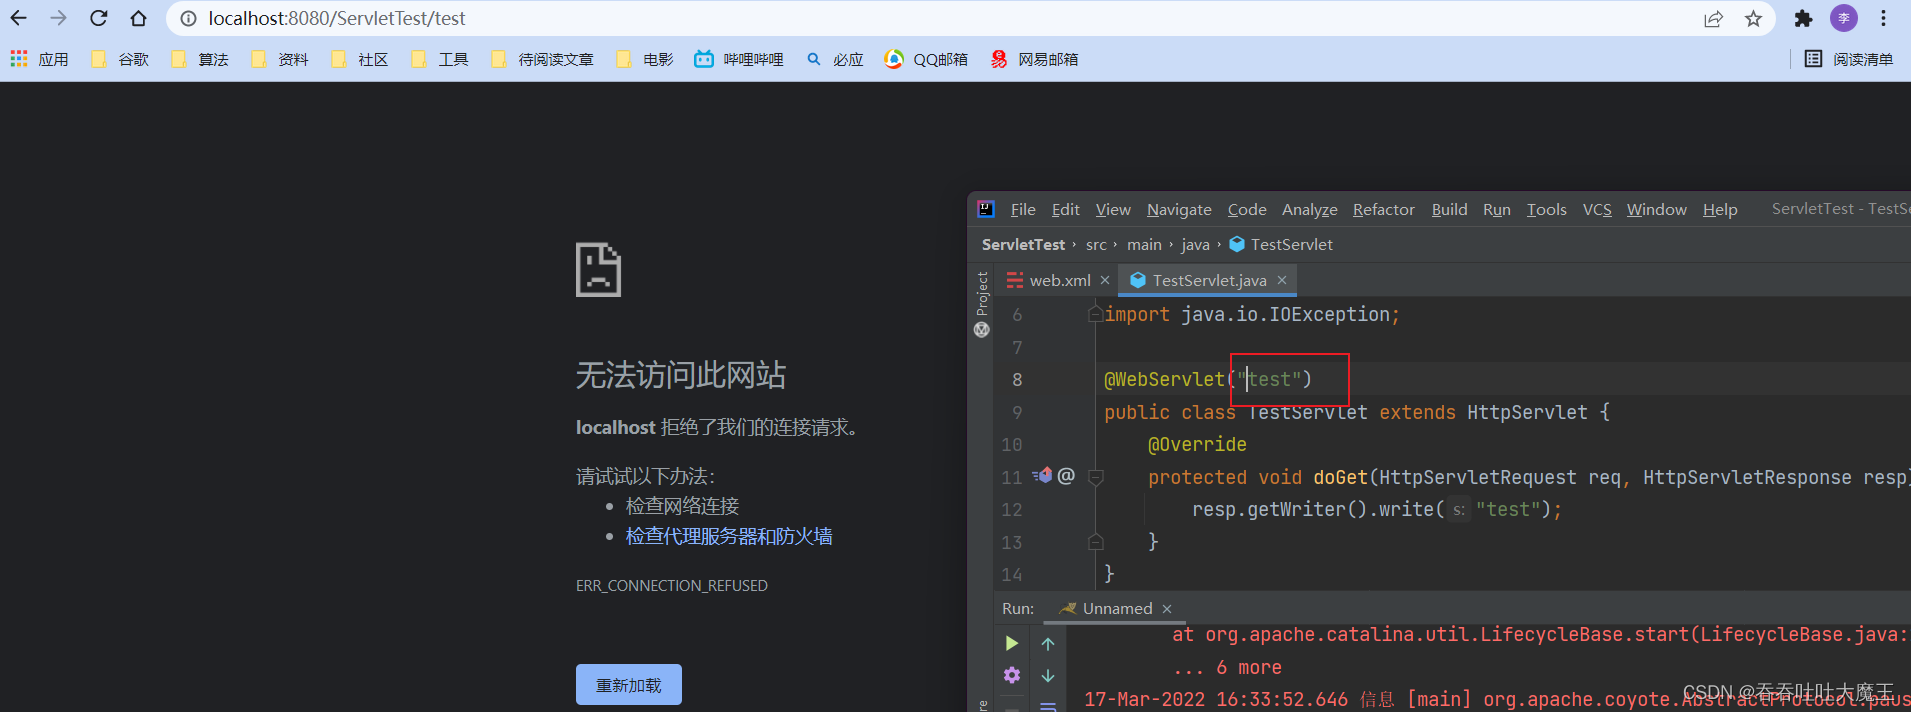
4.6 There is a problem of Chinese code disorder
Respond to the cause of Chinese garbled code problem : The encoding method of the compiler used ( It's usually utf-8) Different from the browser's encoding , The browser follows the system coding method by default ,win10 The system default is GBK code
Solution : By the of the response object setContentType() Method to modify the browser's encoding format for the response body
@WebServlet("/test")
public class TestServlet extends HttpServlet {

    @Override
    protected void doGet(HttpServletRequest req, HttpServletResponse resp) throws ServletException, IOException {

        resp.setContentType("text/html;charset=utf-8");
        resp.getWriter().write(" The great demon ");
    }
}
![[ Failed to transfer the external chain picture , The origin station may have anti-theft chain mechanism , It is suggested to save the pictures and upload them directly (img-uKLlqalS-1650529905418)(C:/Users/bbbbbge/Pictures/%E6%8E%A5%E5%8D%95/image-20220413163421106.png)]](/img/f8/31890ad6527f02a5061fcfab4bfbbd.png)
5. Servlet Operation principle
stay Servlet In the code of , We didn't write main Method , So the corresponding doGet How is the code called ? How is the response returned to the browser ?
5.1 Servlet The architecture of
We have achieved Servlet Is in Tomcat Based on , The image below shows Servlet stay Web Location in the application
![[ Failed to transfer the external chain picture , The origin station may have anti-theft chain mechanism , It is suggested to save the pictures and upload them directly (img-GGlWiBzk-1650529905419)(C:/Users/bbbbbge/Pictures/img/202203180021103.jpeg)]](/img/15/feb46eccaa524fa937ba43869073bd.png)
When the browser sends a request to the server ,Tomcat As HTTP The server , You can receive this request .Tomcat My job is to parse HTTP request , And give the request to Servlet For further processing .Servlet The code generates the response object according to the request calculation ,Tomcat Then construct the response object as HTTP Respond to , Back to the browser . also Servlet The code often transfers data with the database .
5.2 Tomcat The pseudo code
Pass below Tomcat In the form of pseudo code Tomcat Initialization and request processing are two parts of the core logic
-
Tomcat Initialization process of
class Tomcat { // Used to store all Servlet object private List<Servlet> instanceList = new ArrayList<>(); public void start() { // According to the contract , Read WEB-INF/web.xml The configuration file // And parsed by @WebServlet Annotated class // Let's assume that this array contains all the parsed @WebServlet Annotated class . Class<Servlet>[] allServletClasses = ...; // What we need to do here is to instantiate all Servlet The object comes out ; for (Class<Servlet> cls : allServletClasses) { // Here is the use of java The reflection characteristics in // In fact, it also involves a class loading problem , Because our class bytecode file , As agreed // The way is all in WEB-INF/classes Stored under the folder , therefore tomcat The internal is // Implemented a custom class loader (ClassLoader), Used to take charge of this part of the work . Servlet ins = cls.newInstance(); instanceList.add(ins); } // Call each Servlet Object's init() Method , This method will only be called once in the life of the object for (Servlet ins : instanceList) { ins.init(); } // Start a HTTP The server , And use the way of thread pool to deal with each Request ServerSocket serverSocket = new ServerSocket(8080); // actually tomcat Not a fixed thread pool , This is just to illustrate the situation ExecuteService pool = Executors.newFixedThreadPool(100); while (true) { Socket socket = ServerSocket.accept(); // Each request is independently supported by a thread , It shows Servlet It runs in a multithreaded environment pool.execute(new Runnable() { doHttpRequest(socket); }); } // Call each Servlet Object's destroy() Method , This method will only be called once in the life of the object for (Servlet ins : instanceList) { ins.destroy(); } } public static void main(String[] args) { new Tomcat().start(); } }- Tomcat Our code has built-in main Method , When we start Tomcat When , It's from Tomcat Of main Method started
- By @WebServlet The class modified by annotation will be in Tomcat When it starts, it is obtained , And centralized management
- Tomcat adopt Reflection Such a syntax mechanism is used to create @WebServlet An instance of a modified class
- After these instances are created , Will call one of init Method to initialize
- Before these instances are destroyed , Will call one of destory Method to finish the work
- Tomcat Inside is also through Socket API Network communication
- Tomcat In order to be able to handle multiple HTTP request , It adopts the way of multithreading to realize , therefore Servlet It runs in a multithreaded environment
-
Tomcat Process request
class Tomcat { void doHttpRequest(Socket socket) { // Refer to what we learned before HTTP The principle of server is similar , Conduct HTTP Request parsing and response construction of the protocol HttpServletRequest req = HttpServletRequest.parse(socket); HttpServletRequest resp = HttpServletRequest.build(socket); // Judge URL Whether the corresponding file can be found directly in our root path , If you find , Static content // Use it directly IO Output content if (file.exists()) { // Return static content return; } // The logic here is dynamic // Find the... To process this request Servlet object Servlet ins = findInstance(req.getURL()); // call Servlet Object's service Method // This will eventually call to our own HttpServlet Methods in subclasses of try { ins.service(req, resp); } catch (Exception e) { // return 500 page , Indicates an internal server error } } }- Tomcat from Socket Read in Chinese HTTP The request is a string , then Tomcat According to HTTP The format of the protocol is parsed into a HttpServletRequest object
- Tomcat Meeting according to URL Medium Path Determine whether the request requests a static resource or a dynamic resource . If it's a static resource , Directly find the corresponding file , Pass the contents of the document through Socket return ; If it is a dynamic resource , It's not until Servlet Related logic of
- Tomcat Will be based on URL Medium Context Path and Servlet Path Determine which... To call Servlet Example of service Method
- adopt service Method , Will further call our rewritten doGet perhaps doPost Methods, etc.
-
Servlet Of service Method implementation
class Servlet { public void service(HttpServletRequest req, HttpServletResponse resp) { String method = req.getMethod(); if (method.equals("GET")) { doGet(req, resp); } else if (method.equals("POST")) { doPost(req, resp); } else if (method.equals("PUT")) { doPut(req, resp); } else if (method.equals("DELETE")) { doDelete(req, resp); } ...... } }- Servlet Of service Method will be based on the current request , Decide to call one of them doXXX Method
- Calling doXXX Method time , Will trigger polymorphic Mechanism , So as to execute the of subclasses written by ourselves doXXX Method
6. Servlet API Detailed explanation
about Servlet It mainly introduces three classes , Namely HttpServlet、HttpServletRequest and HttpServletResponse.
among HttpServletRequest and HttpServletResponse yes Servlet Two interfaces specified in the specification ,HttpServlet There are no member variables that implement these two interfaces in , They're just HttpServlet Of service and doXXX And so on . The instantiation of these two interface classes is in Servlet Implemented in a container .
6.1 HttpServlet
The core approach
| Method name | Timing of invocation |
|---|---|
init |
stay HttpServlet After being instantiated once |
destory |
stay HttpServlet Called once when the instance is no longer in use |
service |
received HTTP Call when requested |
doGet |
received GET Call when requested ( from service Method call ) |
doPost |
received POST Call when requested ( from service Method call ) |
doPut/doDelete/doOptions/... |
Call... When receiving other corresponding requests ( from service Method call ) |
Servlet Life cycle of : Servlet The life cycle of Servlet The process of object creation to destruction , Let's introduce the process of its life cycle
- Servlet The object is Tomcat To instantiate , And after the instantiation is completed, the base note is called. init Method ( Call it once )
- Tomcat For requests received , Will pass the corresponding Servlet Of service Methods to deal with ( It can be called multiple times )
- Tomcat Before the end , Would call Servlet Of destory Method to recycle resources ( Call at most once )
Be careful : init and service Be able to ensure that they are Tomcat call , however destory not always , Whether it can be called depends on Tomcat How it ended
- If you kill the process directly , Then there's no time to call destory
- If you pass Tomcat Management port ( Default 8005) Shut down , You can call destory
Handle GET Request example :
Directly through the browser URL Send a GET Method request , To handle this request
@WebServlet("/get")
public class TestServlet extends HttpServlet {

    @Override
    protected void doGet(HttpServletRequest req, HttpServletResponse resp) throws ServletException, IOException {

        resp.getWriter().write("get");
    }
}
![[ Failed to transfer the external chain picture , The origin station may have anti-theft chain mechanism , It is suggested to save the pictures and upload them directly (img-JLEwJSSm-1650529905419)(C:/Users/bbbbbge/Pictures/%E6%8E%A5%E5%8D%95/image-20220414010557437.png)]](/img/78/8ef78ce63d9e651131060cdc56ddd2.png)
Handle POST Request example :
Because through the browser URL The request sent is GET Method request , So we need to send a message in other ways POST The request is then used to process . send out POST The way of request is through Ajax、form The form or socket api Construct , It is more troublesome if it is simply used for testing , Software is recommended here postman, This is a very powerful API debugging 、Http Requested tools .
@WebServlet("/post")
public class TestServlet extends HttpServlet {

    @Override
    protected void doPost(HttpServletRequest req, HttpServletResponse resp) throws ServletException, IOException {

        resp.getWriter().write("post");
    }
}
![[ Failed to transfer the external chain picture , The origin station may have anti-theft chain mechanism , It is suggested to save the pictures and upload them directly (img-FjHoxMyG-1650529905419)(C:/Users/bbbbbge/Pictures/%E6%8E%A5%E5%8D%95/image-20220413162336658.png)]](/img/9f/8da7ff683893e759fb8cb251b43501.png)
6.2 HttpServletRequest
The core approach
| Method | describe |
|---|---|
String getProtocol() |
Return the name and version number of the protocol |
String getMethod() |
Return requested HTTP Method name |
String getRequestURL() |
Return requested URL, Without query string |
String getRequestURI() |
Return the requested URL Part of , Without protocol name 、 Port number 、 Query string |
String getContextPath() |
Return indication request URL in Context Path part |
String getServletPath() |
Return indication request URL in ServletPath part |
String getQueryString() |
Returns the first line of the request URL Subsequent query string |
Enumeration getParameterNames() |
Return to one String Enumeration of objects , The name of the parameter included in the request |
String getParameter(String name) |
Returns the value of the request parameter as a string , If the parameter does not exist, return null |
String[] getParameterValues(String name) |
Returns an array of string objects , Include the parameters of all given requests , If the parameter does not exist, return null |
Enumeration getHeaderNames() |
Returns an enumeration , Include all the top names in the request |
String getHeader(String name) |
Returns the value of the specified request header as a string |
String getCharacterEncoding() |
Returns the name of the character encoding used in the body of the request |
String getContentType() |
Returns the text of the request MIME type , If you don't know the type, return null |
int getContentLength() |
Returns the length of the request body in bytes , And provide input stream , Returns... If the length is unknown -1 |
InputStream getInputStream() |
Used to read the body of the request , Return to one InputStream object |
Example 1: Returning a page through the above method is the specific content of the request HTTP Request format
@WebServlet("/showRequest")
public class ShowRequestServlet extends HttpServlet {

    @Override
    protected void doGet(HttpServletRequest req, HttpServletResponse resp) throws ServletException, IOException {

        //  Here we return a  HTML, stay  HTML  It shows that  HttpRequestServlet  Some of the core methods in the class
        //  Put these  API  The return result of is passed  StringBuilder  Splicing
        resp.setContentType("text/html;charset=utf-8");
        StringBuilder html = new StringBuilder();
        html.append(req.getMethod());
        html.append(" ");
        html.append(req.getRequestURL());
        html.append("?");
        html.append(req.getQueryString());
        html.append(" ");
        html.append(req.getProtocol());
        html.append("</br>");
        Enumeration<String> headerNames = req.getHeaderNames();
        while(headerNames.hasMoreElements()){

            String headName = headerNames.nextElement();
            String header = req.getHeader(headName);
            html.append(headName);
            html.append(": ");
            html.append(header);
            html.append("</br>");
        }
        html.append("</br>");
        //InputStream body = req.getInputStream();
        resp.getWriter().write(html.toString());
    }
}
![[ Failed to transfer the external chain picture , The origin station may have anti-theft chain mechanism , It is suggested to save the pictures and upload them directly (img-AfoyYGZK-1650529905419)(C:/Users/bbbbbge/Pictures/%E6%8E%A5%E5%8D%95/image-20220414160226859.png)]](/img/7b/26483934fe2ecd3f37a7c51f6b4975.png)
Example 2: Handle HTTP Requested body Data format in
-
If body The content format is
x-www-form-urlencoded, UsegetParameterTo deal with- Here is to get body The data of , because GET There is no general method body, Use here POST Method demonstration
- Appointment body The data format of is :x-www-form-urlencoded
- Appointment body The data content of is :username=123&passwd=456
@WebServlet("/postParameter") public class PostParameterServlet extends HttpServlet { @Override protected void doPost(HttpServletRequest req, HttpServletResponse resp) throws ServletException, IOException { resp.setContentType("text/html;charset=utf-8"); String username = req.getParameter("username"); String passwd = req.getParameter("passwd"); resp.getWriter().write("username=" + username + "</br>" +"passwd=" + passwd); } }![[ Failed to transfer the external chain picture , The origin station may have anti-theft chain mechanism , It is suggested to save the pictures and upload them directly (img-7WZYFVi4-1650529905420)(C:/Users/bbbbbge/Pictures/%E6%8E%A5%E5%8D%95/image-20220414165054978.png)]](/img/7e/69b768f85bad14a71ce9fcef922283.png)
-
If body The content format is
json, First, the whole body Read it out , With the help of the third-party library json To parse ,Java The standard library is not built-in json The method of analysis )- Here is to get body The data of , because GET There is no general method body, Use here POST Method demonstration
- Appointment body The data format of is :json
- Appointment body The data content of is :
{
username=123,
passwd=456
} - Use here jackson Third party Library , Before use, you need to Maven Our central warehouse will jackson Dependency introduction of pom.xml in
![[ Failed to transfer the external chain picture , The origin station may have anti-theft chain mechanism , It is suggested to save the pictures and upload them directly (img-vTtJUM5R-1650529905420)(C:/Users/bbbbbge/Pictures/%E6%8E%A5%E5%8D%95/image-20220414180437830.png)]](/img/dd/6fa08c52901ee3d0e789755ab97d8e.png)
- jackson The core class in is
ObjectMapper, Through this class ofreadValue(String content, Class<T> valueType)Method , It can be json String into a class object ( The first parameter is json character string , The second parameter is the class object ),ObjectMapper It will traverse the name of each member in the defined class , Go to json A string of key Search for , If found, return the corresponding value to the member
// Custom will json String conversion class class UserInfo { public String username; public String passwd; } @WebServlet("/jsonParameter") public class JsonParameterServlet extends HttpServlet { @Override protected void doPost(HttpServletRequest req, HttpServletResponse resp) throws ServletException, IOException { resp.setContentType("text/html;charset=utf-8"); // 1. First put the whole body Read out String body = readBody(req); // 2. according to json Format ObjectMapper objectMapper = new ObjectMapper(); UserInfo userInfo = objectMapper.readValue(body, UserInfo.class); resp.getWriter().write("username=" + userInfo.username + "</br>" + "passwd=" + userInfo.passwd); } // Define a method to read all... In the request body private String readBody(HttpServletRequest req) throws IOException { // 1. To get the first body The length of , Unit is byte int contentLength = req.getContentLength(); // 2. Prepare a byte array , To hold the body Content byte[] buffer = new byte[contentLength]; // 3. Get InputStream object InputStream inputStream = req.getInputStream(); // 4. from InputStream Object , Put data into byte array inputStream.read(buffer); // 5. Will be stored body Convert the byte array of contents into a string return new String(buffer, "utf-8"); } }![[ Failed to transfer the external chain picture , The origin station may have anti-theft chain mechanism , It is suggested to save the pictures and upload them directly (img-1PxAWqBo-1650529905420)(C:/Users/bbbbbge/Pictures/%E6%8E%A5%E5%8D%95/image-20220414181955002.png)]](/img/8d/30eed9204d4b68d0f7b4d9b8ab3856.png)
6.3 HttpServletResponse
The core approach
| Method | describe |
|---|---|
void setStatus(int sc) |
Set the status code... For this response |
void setHeader(String name, String value) |
Set a with a given name and value header, If name Already exist , Then overwrite the old value |
void addHeader(String name, String value) |
Add a with the given name and value header, If name Already exist , Do not overwrite old values , Instead, add a new key value pair |
void setContentType(String type) |
Set the content type of the response sent to the client |
void setCharacterEncoding(String charset) |
Set the character encoding of the response sent to the client , for example utf-8 |
void sendRedirect(String location) |
Set up Location Field , Implement redirection |
PrintWriter getWriter() |
Used to go to body Write data in text format |
OutputStream getOutputStream() |
Used to go to body Write data in binary format |
Example 1: Pass code , Construct different response status codes
@WebServlet("/status")
public class StatusServlet extends HttpServlet {

    @Override
    protected void doGet(HttpServletRequest req, HttpServletResponse resp) throws ServletException, IOException {

        int status = 404;
        resp.setStatus(status);
        resp.getWriter().write("status=" + status);
    }
}
![[ Failed to transfer the external chain picture , The origin station may have anti-theft chain mechanism , It is suggested to save the pictures and upload them directly (img-onfxNEdj-1650529905420)(C:/Users/bbbbbge/Pictures/%E6%8E%A5%E5%8D%95/image-20220415004153808.png)]](/img/be/d5aad468fbf2c17463169d89fff112.png)
Example 2: Set a... In the response header Refresh Field , Implement the field refresh program
Refresh The value of represents the refresh time per second , When the program is refreshed in milliseconds , There may be errors
@WebServlet("/autoRefresh")
public class AutoRefreshServlet extends HttpServlet {

    @Override
    protected void doGet(HttpServletRequest req, HttpServletResponse resp) throws ServletException, IOException {

        //  Set a response  Refresh  Of  header, every other  1s  The clock is refreshed once
        resp.setHeader("Refresh", "1");

        //  Returns a current time , Used to display the refresh effect
        resp.getWriter().write("timestamp=" + System.currentTimeMillis());
    }
}

Example 3: Implement redirection
-
Method 1 : Set the status code and... In the response header Location To implement redirection
@WebServlet("/redirect") public class RedirectServlet extends HttpServlet { @Override protected void doGet(HttpServletRequest req, HttpServletResponse resp) throws ServletException, IOException { // Set the status code to 3XX resp.setStatus(302); // Set up a Location, Redirect to CSDN Blog home page resp.setHeader("Location", "https://blog.csdn.net/weixin_51367845?spm=1000.2115.3001.5343"); } } -
Method 2 : Use it directly sendRedirect() Method to implement redirection
@WebServlet("/redirect")
public class RedirectServlet extends HttpServlet {

    @Override
    protected void doGet(HttpServletRequest req, HttpServletResponse resp) throws ServletException, IOException {


        resp.sendRedirect("https://blog.csdn.net/weixin_51367845?spm=1000.2115.3001.5343");
    }
}
7. Implementation of the server wall confession program
7.1 Basic introduction
Previous articles 《【Web Three piece set 】 JavaScript WebAPI》 Implemented a pure front-end confession wall code , The results are as follows . This time will combine the above knowledge , Implement a server version of the confession wall program 
7.2 Prepare to operate
-
Create one Servlet project
-
Copy the previously written pure front-end confession wall code to webapp Under the table of contents
-
Agree on the interface of front and back-end interaction , The program only needs to agree on two interfaces
-
Get all messages from the server
-
Agreement request : Method is GET, The request path is /message
-
Agreed response : The version number is HTTP/1.1, Status code for 200 OK, use JSON data format
-
JSON The specific format is :
[ { from: "", to: "", message: "" } ]
-
-
Add a message to the server through the client
- Agreement request : Method is POST, The request path is /message
- Agreed response : The version number is HTTP/1.1, Status code for 200 OK, After the submission is successful, the response page displays “ Submit successfully ”
-
-
Create a
MessageServletclass ,@WebServletAnnotated as/message, Corresponding to the agreed request path , Complete the code of the server section through the above agreement -
Change the front-end code
7.3 Code implementation
Back end code implementation :
import com.fasterxml.jackson.databind.ObjectMapper;

import javax.servlet.ServletException;
import javax.servlet.annotation.WebServlet;
import javax.servlet.http.HttpServlet;
import javax.servlet.http.HttpServletRequest;
import javax.servlet.http.HttpServletResponse;
import java.io.IOException;
import java.net.HttpRetryException;
import java.util.ArrayList;
import java.util.List;

//  This class represents the details of a message
class Message{

    public String from;
    public String to;
    public String message;
}

@WebServlet("/message")
public class MessageServlet extends HttpServlet {

    //  All messages are represented by this array
    private List<Message> messages= new ArrayList<>();

    //  This code is used to complete the operation of obtaining all messages from the server
    @Override
    protected void doGet(HttpServletRequest req, HttpServletResponse resp) throws ServletException, IOException {

        resp.setContentType("application/json;charset=utf-8");
        //  Get message list
        //  What we need to do here is to put the current  messages  The array is converted to  json  Format back to browser
        ObjectMapper objectMapper = new ObjectMapper();
        //  adopt  ObjectMapper  Of  writeValuesAsString()  Method can convert an object into  json  character string
        //  Because of the  message  It's a  List, So the result is  json  Array
        String jsonString = objectMapper.writeValueAsString(messages);
        resp.getWriter().write(jsonString);
    }

    //  Use this code to complete the operation of adding a message
    @Override
    protected void doPost(HttpServletRequest req, HttpServletResponse resp) throws ServletException, IOException {

        resp.setContentType("text/html;charset=utf-8");
        ObjectMapper objectMapper = new ObjectMapper();
        Message message = objectMapper.readValue(req.getInputStream(), Message.class);
        messages.add(message);
        resp.getWriter().write(" Submit successfully !");
    }
}
Front end code implementation :
<!DOCTYPE html>
<html lang="en">
<head>
    <meta charset="UTF-8">
    <meta http-equiv="X-UA-Compatible" content="IE=edge">
    <meta name="viewport" content="width=device-width, initial-scale=1.0">
    <title> Confession wall </title>

    <style> * {
       margin: 0; padding: 0; box-sizing: border-box; } .container {
       width: 600px; margin: 0 auto; } h1 {
       text-align: center; padding: 20px 0; color: pink; } p {
       text-align: center; font-size: 15px; color: grey; padding: 5px 0; } .row {
       display: flex; height: 40px; justify-content: center; align-items: center; } .row span {
       width: 80px; } .row .edit {
       width: 250px; height: 35px; } .row .submit {
       width: 330px; height: 40px; background-color: orange; color: #fff; border: none; } .row .submit:active {
       background-color: grey; } </style>
</head>
<body>
    <div class="container">
        <h1> Confession wall </h1>
        <p> Click Submit after entering , The message will be displayed on the wall </p>
        <div class="row">
            <span> who :</span>
            <input type="text" class="edit">
        </div>
        <div class="row">
            <span> To whom :</span>
            <input type="text" class="edit">
        </div>
        <div class="row">
            <span> what did you say? :</span>
            <input type="text" class="edit">
        </div>
        <div class="row">
            <input type="button" value=" Submit " class="submit">
        </div>
    </div>
    <script src="http://code.jquery.com/jquery-2.1.1.min.js"></script>

    <script> let submitButton = document.querySelector('.submit'); submitButton.onclick = function() {
       // 1.  Get the content in the input box  let edits = document.querySelectorAll('.edit'); let from = edits[0].value; let to = edits[1].value; let message = edits[2].value; // 2.  According to the contents of the input box , structure  HTML  Elements , Add to page  if(from == '' || to == '' || message == '') {
       return; } let div = document.createElement('div'); div.innerHTML = from + ' Yes ' + to + ' say :' + message; div.className = 'row'; let container = document.querySelector('.container'); container.appendChild(div); // 3.  Clear the last input  for(let i = 0; i < edits.length; i++){
       edits[i].value = ''; } // 4.  Send the newly added message to the server  let body = {
       from: from, to: to, message: message }; $.ajax ({
       url: "message", method: "post", contentType: "application/json;charset=utf8", //  adopt  JSON.stringify  Convert objects to strings  data: JSON.stringify(body), success: function(data, status){
       console.log(data); } }) } //  Server version  // 1.  When the page is loaded , Get the message list from the server , And show it on the web  function load() {
       $.ajax({
       method: "get", url: "message", success: function(data, status) {
       //  The response here  data  In fact, it has been  jquery  Into an array of objects  //  But the automatic conversion here has a premise , The server responds  header  in  ContentType  yes  json let container = document.querySelector('.container'); for(let message of data){
       //  Traverse each element , Remove one function key for each element  div  label  let div = document.createElement('div'); div.className = 'row'; div.innerHTML = message.from + " Yes " + message.to + "  say :" + message.message; container.append(div); } } }) } load(); </script>
</body>
</html>
7.4 Persistent storage
With the above modifications , The original pure front-end code adds the server , As long as the server is turned on , Even if you refresh the page , The added data will not disappear . But if you restart the server , The original data will be lost , To solve this problem , You need to make the data persistent storage .
Persistent storage : It's data ( Like objects in memory ) Save to a permanent storage device ( Disk ), It is a mechanism to convert program data between persistent state and transient state .
Persistent storage mechanisms include : JDBC and file IO
Next, we will add a database to make the above confession wall program persistent storage
-
Build the database and table first ( You can create a file first , The database and tables to be built are written )
drop database if exits messagewall; create database messagewall; use messagewall; drop table if exits message; create table message ( `from` varchar(50), `to` varchar(50), `message` varchar(1024) ); -
stay pom.xml Introduce in the file mysql Of jar package
![[ Failed to transfer the external chain picture , The origin station may have anti-theft chain mechanism , It is suggested to save the pictures and upload them directly (img-23JXKeIU-1650529905421)(C:/Users/bbbbbge/Pictures/%E6%8E%A5%E5%8D%95/image-20220416172438996.png)]](/img/af/02899f68662a3b48379f95f6568c37.png)
-
Connect to database , Create a DBUtil class , Used to encapsulate database connection establishment and resource release operations
import com.mysql.jdbc.jdbc2.optional.MysqlDataSource; import javax.sql.DataSource; import java.sql.Connection; import java.sql.PreparedStatement; import java.sql.ResultSet; import java.sql.SQLException; // This class is used to encapsulate the establishment and connection operation of the database public class DBUtil { private static final String URL = "jdbc:mysql://127.0.0.1:3306/messagewall?characterEncoding=utf8&setSSL=false"; private static final String USERNAME = "root"; private static final String PASSWORD = "1234"; private static DataSource dataSource = new MysqlDataSource(); static { ((MysqlDataSource)dataSource).setURL(URL); ((MysqlDataSource)dataSource).setUser(USERNAME); ((MysqlDataSource)dataSource).setPassword(PASSWORD); } public static Connection getConnection() throws SQLException { return dataSource.getConnection(); } public static void close(Connection connection, PreparedStatement statement, ResultSet resultSet){ if(resultSet != null){ try { resultSet.close(); } catch (SQLException throwables) { throwables.printStackTrace(); } } if(statement != null){ try { statement.close(); } catch (SQLException throwables) { throwables.printStackTrace(); } } if(connection != null){ try { connection.close(); } catch (SQLException throwables) { throwables.printStackTrace(); } } } } -
modify MessageWall Class code , There are two major changes , Will be the original messages Array delete
-
When getting a message , You can add one
getMessages()Method , Used to get all messages in the database// Get all messages from database private List<Message> getMessages() { Connection connection = null; PreparedStatement statement = null; ResultSet resultSet = null; List<Message> messages = new ArrayList<>(); try { // 1. Establish connection with database connection = DBUtil.getConnection(); // 2. structure sql String sql = "select * from message"; statement = connection.prepareStatement(sql); // 3. perform sql resultSet = statement.executeQuery(); // 4. Traverse the result set while(resultSet.next()){ Message message = new Message(); message.from = resultSet.getString("from"); message.to = resultSet.getString("to"); message.message = resultSet.getString("message"); messages.add(message); } } catch (SQLException throwables) { throwables.printStackTrace(); } finally { DBUtil.close(connection, statement, resultSet); } return messages; } -
The new message is , You can add a
addMessage()Method , Store a new message to the database// Add a message to the database private void addMessage(Message message) { Connection connection = null; PreparedStatement statement = null; try { // 1. Establish connection with database connection = DBUtil.getConnection(); // 2. structure sql String sql = "insert into message values(?, ?, ?)"; statement = connection.prepareStatement(sql); statement.setString(1, message.from); statement.setString(2, message.to); statement.setString(3, message.message); // 3. perform sql statement.executeUpdate(); } catch (SQLException throwables) { throwables.printStackTrace(); } finally { DBUtil.close(connection, statement, null); } }
So far , A complete server confession program is written ! When I roll out the above code myself , Due to connection MySQL Of URL The port number in is wrong , Cause oneself to look for a long time bug, So if you encounter problems when trying the above code , Be sure to see if you have the wrong number !
-
8. Cookie and Session
8.1 Cookie Introduce
Previous articles 《HTTP protocol 》 in , Just introduced Cookie, It can be combined with the content of this article to understand .
-
Cookie What is it? ?
Cookie It is a mechanism provided by the browser to store data on the client ( Because the browser prohibits the code in the web page from directly accessing the files on the local disk , Want to achieve persistence in web pages , You can go through Cookie Such a mechanism )
-
Cookie What's in it ?
Cookie Programmers store custom data , The stored data is a string , Is a key value pair structure , Use... Between key value pairs
;Division , Use... Between key and value=Division -
Cookie Where are from ?
When the server returns a response , The data to be saved in the client can be saved in
Set-CookieThis header Is returned to the browser -
Cookie Where to go? ?
The next time the client accesses the server , Will put the previously saved Cookie Send it to the server
-
Cookie Typical application scenarios :
have access to Cookie To save the user's login information . For example, after we log in to a website , The next time you log in, you don't need to re-enter your user and password
-
Cookie The defects of :
Every request should be sent to all under the domain name Cookie adopt HTTP The request is passed to the server , therefore Cookie The storage capacity of is limited .
In understanding Cookie in the future , We found that Cookie It cannot be used to store direct information related to users , One is Cookie Limited storage capacity , Second, it takes up a lot of bandwidth when sending requests , Third, it is not safe . That is, these data are not suitable for saving on the client , It's more appropriate to save on the server , Through conversation (Session) Can save this data .
8.2 Session Introduction to session mechanism
Basic introduction :
In the computer , Especially in network applications ,Session be called “ Session control ”.Session Object stores the properties and configuration information required for a specific user session . When the user is in the Web When you jump between pages , Stored in Session The variables in the object will not be lost , But it's going on throughout the user session . When a user requests... From an application Web When the page , If the user does not have a session , be Web The server will automatically create a Session object . When the session expires or is abandoned , The server will terminate the session .Session One of the most common uses of objects is to store user preferences . for example , If the user indicates that they don't like to view graphics , This information can be stored in Session In the object . Note that session state only supports Cookie In your browser .
The essence of conversation :
- The essence of conversation is a Hashtable , It stores some Key value pair structure ,key be called sessionId, It's not random 、 Not repeated 、 Unique string ,value Is the identity information to be saved , adopt HttpSession Object to save .key and value All are Servlet Automatically created .
- Each user login generates a session , The server will use Hashtable Manage these sessions in a way
- The detailed data of a session passes through a HttpSession Object to store , also HttpSession The key value stored in the object pair structure is also the data ,key and value All customized by programmers
next Cooike It is not suitable for storing direct information related to users , Because the client is not suitable for storing this data , On the server side, you can use Session Session to save . The following will introduce the process of user login Session Conversational mechanism
- When the user successfully logs in , The server Session A new record will be generated in , And put sessionId Return to the client ( for example HTTP The response can be through Set-Cookie Field returns , among Cookie Of key by “JSESSION”,value Generated for the server sessionId The specific value of )
- Then the client just needs to save this sessionId , When a subsequent request is sent to the server , I'll bring it with me in the request sessionId( for example HTTP The request will be accompanied by Cookie Field is used to pass Session)
- After the server receives the request , According to the request sessionId stay Session Query the identity information of the corresponding user in , In the process of follow-up
Session The benefits of session mechanism :
- Makes the client very lightweight , Don't save too much data
- The amount of data transferred between the client and the server is small , Save bandwidth
- The data is stored on the server , Even if the client has problems , And the data won't be lost
Be careful : Servlet Of Session The default is stored in memory , If you restart the server Session Data will be lost
8.3 Cookie and Session The difference between
-
Cookie Is a mechanism for the client to store data , Can store identity information , Other information can also be stored , Is a key value pair structure
-
Session Is a mechanism for the server to store data , It is mainly used to store identity related information , Is a key value pair structure
-
Cookie and Session Often used in conjunction with , But it's not necessary .
- Cookie You can also save some data on the client , These data are not necessarily user identity information , Is not necessarily sessionId
- Session Medium sessionId You don't have to pass Cookie and Set-Cookie To pass on
8.4 Servlet in Cookie and Session The core method of
HttpServletRequest Related methods in class
| Method | describe |
|---|---|
HttpSession getSession( Parameters ) |
Get the session in the server , If the parameter is true, When no session exists, a new session is created ( Including generating a new sessionId and HttpSession object ), And pass Set-Cookies take sessionId Return to the client ; If the parameter is false, When there is no session, it will return null. If there is sessionId And legal , According to this sessionId Find the corresponding HttpSession Object and return |
Cookie[] getCookies() |
Returns an array , Contains all the information when the client sends a request Cookie object , Will automatically Cookie The format in is parsed into key value pairs |
HttpServletResponse Related methods in class
| Method | describe |
|---|---|
void addCookie(Cookie cookie) |
The specified cookie Add to response |
HttpSession Related methods in class
- HttpSession yes Java The platform is right session The implementation specification of the mechanism , Because it's just an interface , Specific implementation for each web Application server provider .
- The server will create a separate for each user HttpSession, Expressed as a session , And one HttpSession Object contains multiple key value pairs , You can go HttpSession Store the required data in
| Method | describe |
|---|---|
Object getAttribute(String name) |
The method returns in Session The object with the specified name in the session , If there is no object with the specified name , Then return to null |
void setAttribute(String name, Object value) |
This method binds an object to the object with the specified name Session In the session |
boolean isNew() |
Determine whether the current session is newly created |
Cookie Related methods in class
- This class describes a Cookie, adopt Cookie Object created by class , Each object is a key value pair
- HTTP Of Cookie Fields actually store multiple key value pairs , Each key value pair is in Servlet All of them correspond to one Cookie object
| Method | describe |
|---|---|
String getName() |
This method returns cookie The name of ( This value is Set-Cookie Field set to the browser , Cannot be changed after creation ) |
String getValue() |
This method obtains and Cookie The value of the Association |
void setValue(String newValue) |
This method is set up with Cookie The value of the Association |
8.5 Realize user login function
Next, we will use the above Session and Cookie To realize a user login function , And you can record the number of times you visit the page
Login function implementation ideas :
- Read the user and password submitted by the user
- Verify the user password
- Determine whether the login is successful
- Create a session , Save custom information
- Redirect to the specified page
Login function implementation process :
-
First implement a login page
<!DOCTYPE html> <html lang="en"> <head> <meta charset="UTF-8"> <meta http-equiv="X-UA-Compatible" content="IE=edge"> <meta name="viewport" content="width=device-width, initial-scale=1.0"> <title> The login page </title> </head> <body> <form action="login" method="post"> <input type="text" name="username"> <input type="password" name="password"> <input type="submit" value=" Sign in "> </form> </body> </html>![[ Failed to transfer the external chain picture , The origin station may have anti-theft chain mechanism , It is suggested to save the pictures and upload them directly (img-OvzuJIvC-1650529905422)(C:/Users/bbbbbge/Pictures/%E6%8E%A5%E5%8D%95/image-20220420200000423.png)]](/img/23/661f54829443184865f4e823dd13ea.png)
-
Achieve one Servlet To handle the login request above
Because here is through form Form to construct post request , Then through the HttpServletRequest Class
getParameter()Method can get the value of the parameter in the request bodyimport javax.servlet.ServletException; import javax.servlet.annotation.WebServlet; import javax.servlet.http.HttpServlet; import javax.servlet.http.HttpServletRequest; import javax.servlet.http.HttpServletResponse; import javax.servlet.http.HttpSession; import java.io.IOException; @WebServlet("/login") public class LoginServlet extends HttpServlet { @Override protected void doPost(HttpServletRequest req, HttpServletResponse resp) throws ServletException, IOException { resp.setContentType("text/html;charset=utf8"); // 1. Get the user name and password from the request String username = req.getParameter("username"); String password = req.getParameter("password"); // 2. Verify the user password if(username == null || "".equals(username) || password == null || "".equals(password)){ resp.getWriter().write("<h3> Account number or password cannot be empty !</h3>"); return; } // 3. Determine whether the login is successful ( Suppose the user name is admin, The password for 1234. However, the account and password should be stored in the database , This is just for testing ) if(!username.equals("admin") || !password.equals("1234")){ resp.getWriter().write("<h3> Wrong account or password !</h3>"); return; } // 4. Login successful , Create a session , Used to record the information of the current user HttpSession session = req.getSession(true); // Through this operation , Add a programmer defined information to the session , Number of visits session.setAttribute("visitCount", 0); // 5. Feedback the result of successful login to the client ( The feedback here is not a simple hint “ Login successful ”, Instead, jump directly to the specified page ) resp.sendRedirect("index"); } } -
By implementing a Servlet To represent the redirected page after successful login
import javax.servlet.ServletException; import javax.servlet.annotation.WebServlet; import javax.servlet.http.HttpServlet; import javax.servlet.http.HttpServletRequest; import javax.servlet.http.HttpServletResponse; import javax.servlet.http.HttpSession; import java.io.IOException; @WebServlet("/index") public class IndexServlet extends HttpServlet { @Override protected void doGet(HttpServletRequest req, HttpServletResponse resp) throws ServletException, IOException { resp.setContentType("text/html;charset=utf8"); // Only the login success parameter can be true, Here is the parameter , So fill in false HttpSession session = req.getSession(false); // Determine whether the current user is logged in if(session == null){ // You can prompt that you are not logged in , You can also redirect to the login page // resp.getWriter().write("<h3> Login is empty !</h3>"); resp.sendRedirect("login2.html"); return; } // Indicates that the user has logged in , Get the number of accesses in the session Integer visitCount = (Integer) session.getAttribute("visitCount"); visitCount += 1; session.setAttribute("visitCount", visitCount); resp.getWriter().write("<h3>visitCount = " + visitCount + "</h3>"); } } -
So far , A simple user login function is successful . The effect is as follows

9. Upload file operation
Uploading files is a common requirement in daily development , stay Servlet Also supported in
9.1 Servlet The core method of uploading files in
HttpServletRequest Related methods in class
| Method | describe |
|---|---|
Part getPart(String name) |
Gets the value given in the request name The file of |
Collection<Part> getParts() |
Get all the files |
Part Related methods in class
| Method | describe |
|---|---|
String getSubmittedFileName() |
Get the submitted file name |
String getContentType() |
Get the file type submitted |
long getSize() |
Get file size , The unit is byte |
void write(String path) |
Write the submitted file data to the disk file |
9.2 Upload file operation
-
First write a front page , For uploading files
- Upload files generally use post The requested form implementation
- adopt form Form construction upload file , Add a enctype Field , It said body Data format in , Its default value is :
x-www-form-urlencoded, Here we need to change it to :multipart/form-data, It is the data format for uploading files or pictures - first input in type The value of is file, It indicates that the first input box is the file selection box ,name The value of is the same as that in the back end getPart Get the operation of the specified file
<!DOCTYPE html> <html lang="en"> <head> <meta charset="UTF-8"> <meta http-equiv="X-UA-Compatible" content="IE=edge"> <meta name="viewport" content="width=device-width, initial-scale=1.0"> <title> Upload files </title> </head> <body> <form action="upload" method="post" enctype="multipart/form-data"> <input type="file" name="MyFile"> <input type="submit" value=" Upload "> </form> </body> </html> -
Write a Servlet Used to process uploaded files
- The operation of uploading files also needs to be given to Servlet Add a
@MultipartConfigannotation , Otherwise, the server code cannot be usedgetPart()Method getPart()The parameters in the method and form Formsinput="file"Labeled name Properties corresponding to- The client can submit multiple files at a time ,getPart() Methods according to the name Property to get different files
- Two backslashes can be used between the paths of the write to disk file operation
\\, You can also use a forward slash/ - The path of writing to disk file is the saved file name at the end , Include file suffixes
import javax.servlet.ServletException;
import javax.servlet.annotation.MultipartConfig;
import javax.servlet.annotation.WebServlet;
import javax.servlet.http.HttpServlet;
import javax.servlet.http.HttpServletRequest;
import javax.servlet.http.HttpServletResponse;
import javax.servlet.http.Part;
import java.io.IOException;

@MultipartConfig
@WebServlet("/upload")
public class UploadServlet extends HttpServlet {

    @Override
    protected void doPost(HttpServletRequest req, HttpServletResponse resp) throws ServletException, IOException {

        resp.setContentType("text/html;charset=utf8");
        //  adopt  getPart  Method to get the file passed from the front end
        Part part = req.getPart("MyFile");
        //  Get the file name
        String fileName = part.getSubmittedFileName();
        System.out.println(" The file named : " + fileName);
        //  Get the file type submitted
        String fileType = part.getContentType();
        System.out.println(" The file type is : " + fileType);
        //  Get file size
        long fileSize = part.getSize();
        System.out.println(" File size is : " + fileSize);


        //  Write file data to disk file
        part.write("C:\\Users\\bbbbbge\\Desktop\\upload.jpg");

        resp.getWriter().write(" Upload successful !");
    }
}
- The operation of uploading files also needs to be given to Servlet Add a
So far , A simple file upload operation can be realized , We can observe the request of file upload operation by grabbing the package ?
![[ Failed to transfer the external chain picture , The origin station may have anti-theft chain mechanism , It is suggested to save the pictures and upload them directly (img-agQADJIH-1650529905422)(C:/Users/bbbbbge/Pictures/%E6%8E%A5%E5%8D%95/image-20220421131825048.png)]](/img/ac/64127634d26c3cc115c6a9e9ec6b00.png)
Through the packet capturing operation, we will find several problems :
- The size of the text is different from the size of the file we upload , The number of bytes of the text is slightly larger than that of the uploaded file
- The data type is
multipart/form-dataNo problem , But there's one more string behind itboundary=----WebKitFormBoundaryAl26z0nbP6JzAUGL, This boundary stay body In means a Separation line , Below the first split line are the attributes of the uploaded file and the content of the file , When the content of the file ends, there is a second dividing line - Because of this split line and some properties of the file , Therefore, the size of the body in the request is slightly larger than the content of the uploaded file
版权声明
本文为[Stuttering demon king]所创,转载请带上原文链接,感谢
https://yzsam.com/2022/04/202204231423418829.html
边栏推荐
- 555 timer + 74 series chip to build eight way responder, 30s countdown, proteus simulation, etc
- Design of single chip microcomputer Proteus for temperature and humidity monitoring and alarm system of SHT11 sensor (with simulation + paper + program, etc.)
- API Gateway/API 网关(四) - Kong的使用 - 集成Jwt和熔断插件
- Preview CSV file
- Tongxin UOS php7 2.3 upgrade to php7.0 two point two four
- Flop effect
- c语言在结构体传参时参数压栈问题
- Branch statement of process control
- 电子秤称重系统设计,HX711压力传感器,51单片机(Proteus仿真、C程序、原理图、论文等全套资料)
- flannel 原理 之 子网划分
猜你喜欢
QT interface optimization: QT border removal and form rounding

机器学习之逻辑回归(Logistic Regression)原理讲解和实例应用,果断收藏
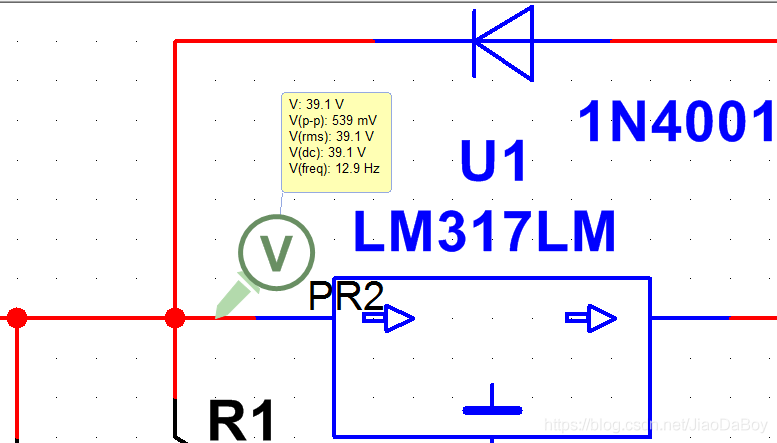
LM317的直流可调稳压电源Multisim仿真设计(附仿真+论文+参考资料)

51 MCU + LCD12864 LCD Tetris game, proteus simulation, ad schematic diagram, code, thesis, etc
redis的五种数据类型
555 timer + 74 series chip to build eight way responder, 30s countdown, proteus simulation, etc
Outsourcing for four years, abandoned

全连接层的作用是什么?
外包干了四年,废了...
电子秤称重系统设计,HX711压力传感器,51单片机(Proteus仿真、C程序、原理图、论文等全套资料)
随机推荐
全连接层的作用是什么?
流程控制之分支语句
kprobe 的 3 种使用
51单片机的花卉、农田自动浇水灌溉系统开发,Proteus仿真,原理图和C代码
async void 导致程序崩溃
Electronic scale weighing system design, hx711 pressure sensor, 51 single chip microcomputer (proteus simulation, C program, schematic diagram, thesis and other complete data)
Flop effect
bc的用法
一篇博客让你学会在vscode上编写markdown
redis的五种数据类型
Upgrade of openssh and modification of version number
Solve the problem of SSH configuration file optimization and slow connection
MySQL同步Could not find first log file name in binary log index file错误
想要成为架构师?夯实基础最重要
Eight way responder system 51 Single Chip Microcomputer Design [with Proteus simulation, C program, schematic diagram, PCB files, component list and papers, etc.]
机器学习之逻辑回归(Logistic Regression)原理讲解和实例应用,果断收藏
Sed learning for application
51 MCU + LCD12864 LCD Tetris game, proteus simulation, ad schematic diagram, code, thesis, etc
Redis cluster 原理
redis 模块编程中 key value的生命周期