当前位置:网站首页>Introduction to QT programming
Introduction to QT programming
2022-04-23 18:22:00 【Things will turn when they reach the extreme 1024】
Common data
0 Special hex
1. Hexadecimal numeric value to character
1.1 0x31 Turn into "31"
1.1.1 QByteArray The original data
//QByteArray Display in hexadecimal format "1">>"31"   0x06>>"06"  10>>"0A"
QByteArray data;
QString ret(data.toHex().toUpper());//toUpper() Capitalization
QString ret(data.toHex());
QString MainWindow::ByteArrayToHexString(QByteArray data){
    QString ret(data.toHex().toUpper());int len = ret.length()/2;// Insert space
for(int i=1;i<len;i++)
{
    ret.insert(2*i+i-1," ");
}
return ret;
1.1.2 int or char And other common values
int data=1512;  //"05e8"
QString strsend48503=QString("%1").arg(data,4,16,QLatin1Char('0'));//int Type or char Both types are acceptable
data,// The original data
4,   // How many characters does it take
16,  // Data base
QLatin1Char('0')// What character is filled in the insufficient position on the left

     Method 2
  int m=0x31;
  QString string;
  string=QString::number(m,16);//31
1.2 0x31 Turn into "1"
1.2.1 QByteArray The original data
  QByteArray byte;
  byte.resize(2);
  byte[0]=0x31;
  byte[1]=0x32;
  QString string =byte;   // string="12"
1.2.2 int or char And other common values
  int m=0x31;
  QString string;
  string[0]=m;
  qDebug()<<string;  //"1"
  char ms[]={0x31,0x31,0x31,0x31,0x31};
  string=ms;
  qDebug()<<string; //"11111"
2 Hexadecimal character to numeric value
2.1 "31" Turn into 0x31
2.1.1 QByteArray The original data
 First to Qstring Well
 Or for calculation, you can directly use QByteArray Calculation , How to use array index QByteArray And ordinary char Same use
  char ch=0x0C;
  QByteArray string;
  string.resize(5);
  string[0]=0x01;    //01
  string[1]=ch;      //0C
  string[2]=++ch;    //0D
  string[3]=ch&0xF0; //00
  string[4]=ch|0xF0; //FD
  qDebug()<<string.toHex().toUpper();  //"010C0D00FD"
2.1.2 QString
This is more troublesome , Only by byte by byte comparison
/*
 describe : Put two hexadecimal characters into a hexadecimal byte
'a','A'>>0xAA
*/
char charToHex(char H,char L)
{
  if((H >= '0') && (H <= '9'))
    H-='0';
  else if((H >= 'A') && (H <= 'F'))
    H=H-'A'+10;
  else H='*';

  if((L >= '0') && (L <= '9'))
    L-='0';
  else if((L >= 'A') && (L <= 'F'))
    L=L-'A'+10;
  else L='*';
  return ((H&0x0F)<<4)|(L&0x0F);
}
/*
 describe : Convert a hexadecimal string into an array of hexadecimal numbers
"01 15 26 581512">>{0x01,0x15,0x26,0x58,0x15,0x12}
*/
 char* dataTypeConversion::hexStr_To_Hexchar(QString data)
{   //"19885984ac418df"
   static char re[200];
   for(int re_num=0;re_num<200;re_num++)
     {re[re_num]=0;}
   int Lenth,cnt=0;
   data.remove(' ');    // Remove spaces from string
   data=data.toUpper();
   Lenth=data.length();   // To obtain the length of the
   if(Lenth%2==1)
     {
       data+="0";
       Lenth++;
     }
   std::string ch = data.toStdString();
   const char*p = ch.c_str();
   char high = 0, low = 0;
   int i=0;
      for (cnt=0; cnt<Lenth; cnt+=2)
      {

          high = p[cnt];
          low = p[cnt+1];
          re[i++]=charToHex(high,low);
      }
      return re;
}
2.2 "1" Turn into 0x31
2.2.1 QByteArray The original data
QString ret(data.toHex().toUpper());// To 16 Hexadecimal uppercase   QByteArray.toHex()     Convert to hexadecimal characters  '1'>>"31"
/*
 describe : Convert a hexadecimal string into an array of hexadecimal numbers
"123456">>{0x31,0x32,0x33,0x34,0x35,0x36}
*/
//mode  :2 Show 0x 0: Show spaces
QString dataTypeConversion::strToHexstr(QByteArray data,int mode)
{
  QString ret(data.toHex().toUpper());// To 16 Hexadecimal uppercase   QByteArray.toHex()     Convert to hexadecimal characters  '1'>>"31"
  int len = ret.length()/2;
  if(mode==2)
    {
      ret.insert(0,"0X");
      for(int i=1;i<len;i++)
        {
          ret.insert(4*i+i-1,",0X");// Format
        }
    }
  else {
      for(int i=1;i<len;i++)
        {
          ret.insert(2*i+i-1," ");// Format
        }
    }
  return ret;
}
2.2.2 QString
Numerically, put QString It can be calculated as an array
1. Data type conversion
1.1QByteArray
1.1.1 QByteArray>>QString
  QByteArray bytes("hello world Chinese characters ");
  QString string = bytes;   // Method 1    Directly equal to
  qDebug()<<string;
  string = QString(bytes);   // Method 2 Use constructors
  qDebug()<<string;
  string.prepend(bytes);   // Method 3  Splicing        The effects of the three methods are the same except for the splicing function , The display of Chinese characters is normal
  qDebug()<<string;
// For localized encoded strings , It can be used  QString::fromLocal8Bit  The function converts the string source to  QString  object ; about  UTF-8  Encoded string , It can be used  QString::fromUtf8  Function to implement conversion . If you want to convert in reverse , Just   Use the corresponding  to***  function . Usually, these functions are enough .
1.1.2QByteArray>>String
QString string;
std::string str;
str = string.toStdString();
1.1.3QByteArray>>char *
char *ch;         // Cannot be defined as ch[n], Arrays are different from pointers ;
QByteArray byte;
ch = byte.data();
1.1.4QByteArray>>unsigned char*( No change character )
1.1.5QByteArray>>unsigned char*( Hexadecimal characters )
1.1.6QByteArray>>int
  QByteArray bytes("1234");
  bool ok;  // Successfully converted to true
  int string = bytes.toInt(&ok,10);//1234

  bytes=("1A");
  bytes.toInt(&ok,10);// error

  bytes=("1A");
  bytes.toInt(&ok,16); //26
1.2QString
1.2.1QString >>QByteArray
QString str("hello");
QByteArray bytes = str.toUtf8(); // QString turn QByteArray Method 1
QString str("hello");
QByteArray bytes = str.toLatin1();  // QString turn QByteArray Method 2
1.2.2QString >>String
QString string;
std::string str;
str = string.toStdString();
1.2.3QString >>char *
QString string;
char *ch;
ch = string.toLatin1.data();
1.2.4QString >>unsigned char*( No change character )
1.2.5QString >>unsigned char*( Hexadecimal characters )
1.2.6QString >>int
  QString string="FFAB";
  bool ok;
  int uch = string.toInt(&ok, 16);// Hexadecimal FFAB= Decimal system 65451    Print display 65451
  string="1234";
  uch = string.toInt(&ok, 10)+5;// The result of the conversion is 1234    Add a calculated 1239
// The second parameter is base
| Basic types | Qt Nickname | Transfer into function | Transfer out function | describe |
|---|---|---|---|---|
| short | qint16 | arg or setNum | toShort | 2 bytes , Signed short integers . |
| unsigned short | ushort、quint16 | arg or setNum | toUShort | 2 bytes , Unsigned short . |
| int | qint32 | arg or setNum | toInt | 4 bytes , signed int . |
| unsigned int | uint、quint32 | arg or setNum | toUInt | 4 bytes , Unsigned integer . |
| long | nothing | arg or setNum | toLong | Signed long integer , about 32 Bit programming long yes 4 bytes , about 64 Bit programming is 8 bytes . |
| unsigned long | ulong | arg or setNum | toULong | Unsigned long , about 32 Bit programming unsigned long yes 4 bytes , about 64 Bit programming is 8 bytes . |
| long long | qlonglong、qint64 | arg or setNum | toLongLong | 8 bytes , Signed long integer . |
| unsigned long long | qulonglong、quint64 | arg or setNum | toULongLong | 8 bytes , Unsigned long integer . |
| float | None by default | arg or setNum | toFloat | 4 bytes , Single-precision floating-point . |
| double | The default corresponds to qreal | arg or setNum | toDouble | 8 bytes , Double precision floating point . |
1.3String
1.3.1String>>QByteArray
1.3.2String>>QString
1.3.3String>>char *
1.3.4String>>unsigned char*( No change character )
1.3.5String>>unsigned char*( Hexadecimal characters )
1.3.6String>>int
1.4char *
1.2.1char *>>QByteArray
  char *ch="145aBc Chinese characters ";
  QByteArray byte;
  byte = QByteArray(ch);  // Show "145aBc\xE6\xB1\x89\xE5\xAD\x97"
1.2.2QString
  char *ch="145aBc Chinese characters ";
  QString string= QString(QLatin1String(ch));//"145aBc?±\u0089?\u00AD\u0097"
1.2.2String
1.2.4unsigned char*( No change character )
1.2.5unsigned char*( Hexadecimal characters )
1.2.6int
1.5unsigned char*( No change character )
1.2.1QByteArray
1.2.2QString
unsigned char uch;
QString string = QString::number(uch,16);
1.2.2String
1.2.4char*( No change character )
1.2.5unsigned char*( Hexadecimal characters )
1.2.6int
1.6unsigned char*( Hexadecimal characters )
1.7int
1.7.1 int>>QByteArray
/*int turn QByteArray
1584 To  0x15,0x84*/
QByteArray  dataTypeConversion::intToByte(int i)
{
    QString intToQString=QString("%1").arg(i,4,16,QLatin1Char('0'));
    //qDebug()<<intToQString;
    QByteArray QStringTovalueQByte = intToQString.toLocal8Bit();
    QByteArray valueQByteToHex = QByteArray::fromHex(QStringTovalueQByte);
    //qDebug()<<valueQByteToHex.toHex();
    return valueQByteToHex;
}
1.7.1.1 String form
QByteArray arr;
    arr+="// Serial port configuration \r\n";
    arr+=QString("comboBoxBaud=%1\r\n").arg(12);
1.7.1.2 Numerical form
1.2 The number
1.2.1 int To hexadecimal characters
QString strsend48503=QString("%1").arg(ui->spinBox_485_03IDAddr->value(),4,16,QLatin1Char('0'));//int Type or char Both types are acceptable
1. essential information
1.1 Create the default program
1.1.1 main.c
#include "mainwindow.h"
#include <QApplication>   // Application class
//argc   Number of command line variables
//*argv[]    Command line variable array
int main(int argc, char *argv[])
{
  QApplication a(argc, argv);   //QT There is and only one local object in
  MainWindow w;   // Create a custom window object
  w.show();      // The window object displays

  return a.exec();//a.exec   Enter the message loop mechanism      Blocking code
}
1.1.2 .pro
QT+= core gui     #QT Included modules   core Core module     gui Graphic module
greaterThan(QT_MAJOR_VERSION, 4): QT += widgets  #4 Version above add  widgets  Control module
TARGET = untitled1   # The goal is     Generated exe Program name
TEMPLATE = app   # Templates    Applications
DEFINES += QT_DEPRECATED_WARNINGS
CONFIG += c++11
SOURCES += \       # Source file
        main.cpp \
        mainwindow.cpp
HEADERS += \       # The header file
        mainwindow.h
FORMS += \
        mainwindow.ui
...
1.1.3 mainwindow.cpp
#include "mainwindow.h"
#include "ui_mainwindow.h"
// Constructors
MainWindow::MainWindow(QWidget *parent) :
  QMainWindow(parent),
  ui(new Ui::MainWindow)            // Initialize list syntax
{
  ui->setupUi(this);
}
// Destructor
MainWindow::~MainWindow()
{
  delete ui;
}
1.1.4 mainwindow.h
#ifndef MAINWINDOW_H
#define MAINWINDOW_H
#include <QMainWindow>   // Current base class
namespace Ui {
  class MainWindow;
}
class MainWindow : public QMainWindow
{
  Q_OBJECT   // Provide QT Signal and slot mechanism in
public:
  explicit MainWindow(QWidget *parent = nullptr);
  ~MainWindow();
private:
  Ui::MainWindow *ui;
};
#endif // MAINWINDOW_H
1.2 Shortcut key
Naming specification
Class names are capitalized , Capitalize between words
Effective name of the letter 、 Variable name ... Initial lowercase , Capitalize between words
Common shortcut key
 function ctrl+R
 compile  ctrl+B
 Help document  F1
 notes ctrl + /
 Font zoom ctrl+ Mouse wheel
 The whole line of code moves ctrl+shift++ ↑ perhaps ↓
 lookup  ctrl+f
 Automatic alignment ctrl+i
 Between the same names .h and .cpp Switch  ctrl+F4
1.3 Basic control interface
Button QPushButton*btn=new QPusheutton
Set parent window btn->setParent(this)
Show text btn->setText(“aaa”)
Move btn->move(x,y)
Window size resize( wide , high )
Set fixed size setFixedSize( wide , high )
Set the window title setWindowTitle( Title name )
1.4 QT Print
The header file :#include
Method :
qDebug()<<" Text "<<endl;
1.4.1 Automatically print according to the data type
short Data_Len_11=-59;
qDebug()<<QString::number(Data_Len_11);
    static QString number(int, int base=10);
    static QString number(uint, int base=10);
    static QString number(long, int base=10);
    static QString number(ulong, int base=10);
    static QString number(qlonglong, int base=10);
    static QString number(qulonglong, int base=10);
    static QString number(double, char f='g', int prec=6);
1.5 Signals and slots (slots)
1.5.1 Example
connect Link
Parameters 1 Signal sender ( The pointer )
Parameters 2 Transmitted signal ( Signal address )
Parameters 3 Receiver of signal ( The pointer )
Parameters 4 Processing slot function ( Slot function address )
connect (mybtn,&MyPushButton::clicked,this,&MyPushButton::closs); // Realization MyPushButton Object created by class mybtn happen clicked when , close window
connect(btn,&QPushButton::clicked,this,&QWidget::close);// Same effect
1.5.2 Custom signal slot
demand :
Teacher class student class
ClassIsover Class is over , The teacher sends a custom signal , I'm hungry
The students responded to the hungry signal , And invite the teacher to dinner
// The signal
class teacher : public QMainWindow
{
  Q_OBJECT
public:
  explicit teacher(QWidget *parent = nullptr);
signals:
  // Custom signal writing
  //1、 return void
  //2、 Signals only need to declare , There is no need to achieve
  //3、 Signals can be overloaded
  void hungry();
public slots:
};
// Custom slot function
class student : public QMainWindow
{
  Q_OBJECT
public:
  explicit student(QWidget *parent = nullptr);
signals:
  // Custom slot function     writes public slots Lower or global functions     or public Next , perhaps lambda expression   ( Anonymous functions ?)
public slots:
  //1、 return void
  //2、 Need statement , It also needs to be realized
  //3、 Overload allowed
  void treateat();
};
void  student::treateat()
{
  qDebug()<<" Invite the teacher to dinner ";
}
//H file
class MyWindow : public QMainWindow
{
  Q_OBJECT
public:
  explicit MyWindow(QWidget *parent = nullptr);
  ~MyWindow();
student * st;
teacher * te;
void classIsover();
private:
  Ui::MyWindow *ui;
};
//cpp file
MyWindow::MyWindow(QWidget *parent) :
  QMainWindow(parent),
  ui(new Ui::MyWindow)
{
  ui->setupUi(this);
  te=new teacher(this);// Here as a member , So that the object still exists after the construction function is completed    If added before teacher * Will become a local variable , It will be released after the completion of the framework function
  st=new student(this);
  connect(te,&teacher::hungry,st,&student::treateat);
  classIsover();
}
void MyWindow::classIsover()
{
  // Custom trigger signal  emit
  emit te->hungry();
}
There are parameter signal slots
//student Add... To the class declaration
  void treateat(QString foodName);
//student Add member function overload
void  student::treateat(QString foodName)
{
// It can lead to foodName Display with double quotation marks
//qDebug()<<" Invite the teacher to dinner , eat "<<foodName;
// Remove the double quotation marks
// First call .toutf8() To QByteArray  type , Calling .data() To char *
 qDebug()<<" Invite the teacher to dinner , eat "<<foodName.toUtf8().data();
}
//teacher Class declaration adds a signal   function overloading
  void hungry(QString foodName);
// Main running function :
// Signal slot connection with parameters
  // The pointer -> Address
  // A function pointer   ->   Function address
  void(teacher::*teacherSignal)(QString)=&teacher::hungry;  //teacherSignal It's a teacher Point to... Under class teacher::hungry Function pointer of
//(QString)  It's a list of parameters
  void(student::*studentSlot)(QString)=&student::treateat;

  connect(te,teacherSignal,st,studentSlot);
  classIsover();
Disconnect the signal slot
disconnect(te,teacherSignal,st,studentSlot);
Signals connect signals
  // Signals connect signals
  QPushButton *btn=new QPushButton(this);
  this->resize(600,400);
  btn->setText(" Class is over ");
  void(teacher::*teacherSignal2)()=&teacher::hungry;  //teacherSignal It's a teacher Point to... Under class teacher::hungry Function pointer of
  void(student::*studentSlot2)()=&student::treateat;
  connect(te,teacherSignal2,st,studentSlot2);
  connect(btn,&QPushButton::clicked,te,teacherSignal2);
// Multiple signals can be connected to the same signal slot
// The parameters of the signal and slot function must correspond to each other , The number of parameters can be inconsistent , The number of signals must be greater than or equal to the number of slot functions ( Logic is to give more, you can not )
// When the custom signal and slot are overloaded , Use the function pointer to specify the function address
1.5.3 Lambda expression
Lambda The expression belongs to a kind of custom slot function
Lambda Expressions are used to define and create anonymous function objects
Lambda The grammatical form of is as follows :
[ Function object parameters ] ( Operator overload function parameters ) mutable or exception Statement -> return type { The body of the function }
You can see ,Lambda It is mainly divided into five parts :[ Function object parameters ]、( Operator overload function parameters )、mutable or exception Statement 、-> return type 、{ The body of the function }.
[ Function object parameters ]
Identify a Lambda The beginning of the expression , This part has to exist , Don't omit . Function object parameters are passed to the constructor of the function object class automatically generated by the compiler
Functional . Function object arguments can only use those to define Lambda Till now Lambda Local variables that are visible within the scope of action ( Include Lambda Category
Of this). Function object arguments have the following form :
-
empty . No function object arguments .
-
=. You can use Lambda All visible local variables in the range ( Include Lambda Of the class this), And it's a way of passing values ( The compiler automatically passes all local variables by value for us ).
-
&. You can use Lambda All visible local variables in the range ( Include Lambda Of the class this), And it's the way of reference passing ( So the compiler automatically passes us all local variables by reference ).
-
this. You can use Lambda Member variables in the class .
-
a. take a Passing by value . When passing by value , You can't modify what's passed in the body of a function a A copy of the , Because by default the function is const Of , To modify the copy passed in , You can add mutable Modifier .
-
&a. take a Pass by reference .
-
a,&b. take a Pass by value ,b Pass by reference .
-
=,&a,&b. except a and b Pass by reference , Other parameters are passed by value .
-
&,a,b. except a and b Pass by value , Other parameters are passed by reference .
( Operator overload function parameters )
Identify overloaded () The parameters of the operator , Without parameters , This part can be omitted . Parameters can be defined by pressing values ( Such as : (a, b)) And by reference ( Such as : (&a, &b)) Two kinds of
Way to deliver .
mutable or exception Statement
This part can be omitted . When passing function object parameters by value , add mutable After the embellishment , You can modify the copy passed in ( Note that you can modify the copy , instead of
Value itself ).exception Declare an exception to be thrown by a specified function , For example, throw an integer type exception , have access to throw(int).
-> return type
Identifies the type of the return value of the function , When the return value is void, Or there's only one place in the body of the function return The place of ( At this point, the compiler can automatically infer the return value type )
when , This part can be omitted .
{ The body of the function }
Identification function implementation , This part cannot be omitted , But the function body can be empty .
  //lambda expression
  //[=]  Act on all visible local variables in the range
  //[&]  reference , Sometimes there are problems , quote btn Enter the read-only state
  // Recommended lambda expression  :  [=](){}
  //[ Variable name ]    Only this variable can be used
  //lambda An expression is equivalent to defining a variable in a function body , When there is a directly newly defined function body in the function , Because of the variables in this function, the new function cannot be used ,
  //  Join in lambda Expressions are available
  connect(btn,&QPushButton::clicked,this,[=]()
  {
    //btn->setText("aaa");//btn be not in connect The contained function body    [] Internal addition = that will do
      btn->setText("aaa");
  });

  //mutab1e  keyword
  // add mutable After the embellishment , You can modify the copy passed in by value ( Note that you can modify the copy , Not the value itself )
  QPushButton *myBtn=new QPushButton (this);
  QPushButton * myBtn2=new QPushButton (this);
  myBtn->move(200,150);
  myBtn2->move(300,150);
  int m=10;
  connect(myBtn,&QPushButton::clicked,this,[m]()mutable {m=20;qDebug()<<m;});
  connect(myBtn2,&QPushButton::clicked,this,[=](){qDebug()<<m;});
  qDebug()<<m;
  // The above phenomenon is    Press the button 1  Print 20    Press the button 2   Print 10
  // namely mutable  Make the incoming m The value of can be changed , meanwhile {} After the end M The value of has changed back , namely mutable What changes is the copy of the incoming value

//-> Return value + type
  int n=10;
  n=[]()->int {return 100000;}();
  qDebug()<<"n="<<n;
  // utilize Lambda Expression implementation, click the button to close the window
  // Click on btn2 Button to close the window
  QPushButton * myBtn3=new QPushButton (this);
  myBtn3->move(400,150);
  myBtn3->setText(" close window ");
  connect(myBtn3,&QPushButton::clicked,this,[=]()
  {
  this->close();
    });
from connect see lambda expression ,connect The fourth parameter of the slot function needs to be passed into the address ,lambda The expression is equivalent to no need to introduce the function address from elsewhere , Directly in connect Write the function body in the parameter list ,[] Inner is used to pass parameters to the function body ,{} Write the specific function implementation in
  connect(myBtn3,&QPushButton::clicked,this,[=]() { this->close();}); //this It can be omitted
connect(myBtn3,&QPushButton::clicked,[=]() { this->close();});
summary :
1. Commonly used :
[=](){}
2. add mutable After the embellishment , You can modify the copy passed in by value ( Note that you can modify the copy , Not the value itself )
3. Return value
n=[]()->int{return 100000;}();
1.5.3 mutable Use
If connect You want to change the variable passed in , Need to use mutable keyword
/* Normal use format */
connect(serial,&QSerialPort::readyRead,this,[=](){
 		//.....
});
/*mutable Use format */
connect(serial,&QSerialPort::readyRead,this,[=]()mutable  //mutable Add to change the passed in variable
{
    //.....
});
1.6 menu bar
1.6.1 Set menu bar and toolbar
1. menu bar The header file #include
  // menu bar     only one
  QMenuBar * bar =menuBar();    // There can only be one     So there's no need to new
  // Set the menu bar to the window
  setMenuBar(bar);
  // The Settings menu
  QMenu *fileMenu = bar->addMenu(" file ");
  QMenu *editMenu = bar->addMenu(" edit ");
  // Add menu item
  QAction *newFile=fileMenu->addAction(" newly build ");
  // Add a split line
  fileMenu->addSeparator();
  // Add menu item
  QAction *openFile=fileMenu->addAction(" open ");
2. The toolbar The header file #include
// The toolbar    There can be multiple
  QToolBar *toolbar=new QToolBar();   // There can be multiple     So use new
  // Set the toolbar to the window
  //addToolBar(toolbar);// Default on the top
  addToolBar(Qt::LeftToolBarArea,toolbar);// Set to the left     All enumerations are in Qt::   In scope
  // Only left and right stops are allowed
  toolbar->setAllowedAreas(Qt::LeftToolBarArea|Qt::RightToolBarArea);
  // Close float
  //toolbar->setFloatable(false);
  // Set up mobile
  toolbar->setMovable(false);// Turn off mobile , The toolbar cannot be dragged
  // Add gizmos to the toolbar
  QPushButton *btn=new QPushButton(" Button 1",this);
  toolbar->addWidget(btn);// Put the button into the toolbar
  // Add menu item to toolbar
  toolbar->addAction(newFile);
  // Add a split line
  toolbar->addSeparator();
  toolbar->addAction(openFile);
1.6.2 Status bar and riveted parts
1. status bar The header file #include
label The header file #include
  // status bar    only one
  QStatusBar* status= statusBar();// There can only be one     So there's no need to new
  // Put the status bar in the window
  setStatusBar(status);
  // Put in the label
  QLabel * staLabel=new QLabel(" Left information ",this);
  // Put the label in the status bar
  status->addWidget(staLabel);// From left to right
  QLabel * staLabel2=new QLabel(" Information on the right ",this);
  status->addPermanentWidget(staLabel2);// From right to left
2. Riveted parts The header file #include
Core components The header file #include
The position of riveted parts is relative to the core parts
  // status bar    only one
  QStatusBar* status= statusBar();
  // Put the status bar in the window
  setStatusBar(status);
  // Put in the label
  QLabel * staLabel=new QLabel(" Left information ",this);
  // Put the label in the status bar
  status->addWidget(staLabel);// From left to right
  QLabel * staLabel2=new QLabel(" Information on the right ",this);
  status->addPermanentWidget(staLabel2);// From right to left
  // Riveted parts     Floating window
  QDockWidget *dock=new QDockWidget(" Riveted parts ",this);
  // Put in window
  addDockWidget(Qt::BottomDockWidgetArea,dock);
  // Set docking position
  dock->setAllowedAreas(Qt::TopDockWidgetArea|Qt::BottomDockWidgetArea);
  // Core components      There can only be one
  QTextEdit *edit=new QTextEdit(this);
  setCentralWidget(edit);
1.7 Resource file
1. Import resources into the project
2. Add files ->Qt->Qt Recourse File
3. give a name res, Generate res.grc file
4. Right click -open in editor Open by editing
5. Add prefix name /
6. Add files
7. Resource file Usage mode “:+ Prefix + file name ”
1.8 Dialog box
1.8.1 Custom dialog
The header file #include
Dialog classification
1. Modal dialog // You cannot operate on other windows
2. modeless dialog box // You can operate on other windows
 connect( ui->actionnew,&QAction::triggered ,[=](){  //actionnew New menu bar or toolbar
      // Dialog classification
      // Modal dialog        // You cannot operate on other windows
      // modeless dialog box      // You can operate on other windows
       // Modal dialog
//      QDialog dlg(this);
//      dlg.resize(120,60);
//      dlg.exec();    // Blocking
      // modeless dialog box
//      QDialog dlg2(this);  // Because in the function ( Heap area )    When the function ends, it's gone
//      dlg2.resize(120,60);
//      dlg2.show();
      QDialog *dlg2=new QDialog(this);  // Create in stack area by pointer
      dlg2->resize(120,60);
      dlg2->show();
      dlg2->setAttribute(Qt::WA_DeleteOnClose);  //55 Attribute number     Because in the stack area    Memory is not released until the file is closed , To prevent memory waste caused by multiple pop-up dialog boxes before closing , Set to close to release
    qDebug()<<" Pop-up dialog box ";});
The only difference between the two dialog boxes is the way they are displayed , Modal dialog dlg.exec(); // Block the modeless dialog dlg2.show();
1.8.2 System dialog
It's all modal
1.Qt The built-in dialog boxes of are roughly divided into the following categories :
QColorDialog: Choose a color ;
QFileDialog: Choose a file or directory ;
QFontDialog: Select the font ;
QInputDialog: Allow the user to enter a value , And return its value to ;
QMessageBox: Modal dialog , Used to display information 、 Asking questions, etc ;
QPageSetupDialog: Provide paper related options for the printer ;
QPrintDialog: Printer configuration ;
QPrintPreviewDialog: Print preview ;
QProgressDialog: Display operation process .
2. The header file #include
3.QMessageBox:: Dialog function ( Parameters …); Return data type StandardButton
Parameters 1: The parent window ; Parameters 2: Window title ; Parameters 3: Prompt information ; Parameters 4: Key type Parameters 5: Default activation key
Parameters 4 You can change the name of the button , At the same time, the number of buttons can be changed A|B|C It will pop up 3 individual A|B That's the two one.
//QMessageBox   Modal dialog
  // Error prompt dialog
  connect( ui->actioncritical  ,&QAction::triggered ,[=](){
      QMessageBox::critical(this," error ","critical Text ");
    });
  // Message prompt dialog
  connect( ui->actioninfro  ,&QAction::triggered ,[=](){
      QMessageBox::information(this," Information ","information Text ");
    });
  // inquiry     A choice
  //QMessageBox    Parameters 1: The parent window ; Parameters 2: Window title ; Parameters 3: Prompt information ; Parameters 4: Key type   Parameters 5: Default activation key
  connect( ui->actionques  ,&QAction::triggered ,[=](){
    if(QMessageBox::Save== QMessageBox::question(this," inquiry ","question Text ",QMessageBox::Save|QMessageBox::Cancel|QMessageBox::Close,QMessageBox::Close))
      {
        qDebug()<<" preservation ";
      }
    else {
        qDebug()<<" give up ";
      }
    });
  // Warning
  connect( ui->actionwarn  ,&QAction::triggered ,[=](){
      QMessageBox::warning(this," Warning ","warning");
    });
1.7.2.1 QInputDialog
Allow the user to enter a value , And return its value to ;
1. The header file :
#include <QMessageBox>
#include <QDir>
    bool ok;
    QString text = QInputDialog::getText(this, tr(" Please enter the button text "),
                                         tr(" Button "), QLineEdit::Normal,
                                         QDir::home().dirName(), &ok);
    if (ok && !text.isEmpty())
      {
      qDebug()<<text;
        this->setText(text);
      }
1.8.3 Other dialog boxes
1.8.3.1 File selection dialog box
1. The header file #include
2.QFileDialog::getOpenFileName( Parameters …); Return data type Qtring
Parameters 1: The parent window ; Parameters 2: display information ; Parameters 3: The default path ; Parameters 4: File type filtering
  // File dialog
  connect( ui->actionopen  ,&QAction::triggered ,[=](){
      // Parameters 1: The parent window ; Parameters 2: display information ; Parameters 3: The default path ; Parameters 4: File type filtering
  QString fileName =QFileDialog::getOpenFileName(this," Open file ","C:\\Users\\Administrator\\Desktop\\QT\\05\\Dialog","(*.cpp)");
    qDebug()<<fileName;   // File name with path
    });
1.8.3.2 Color dialog
1. The header file #include
2.QColorDialog::getColor(QColor(255,0,0)); Return data type QColor
   // Color dialog
  connect( ui->actioncolor  ,&QAction::triggered ,[=](){
  QColor color = QColorDialog::getColor(QColor(255,0,0));
      if (color.isValid()) {
    qDebug()<<color.red()<<color.green()<<color.blue();  // Print colors
      }
  };
1.8.3.3 Font dialog
1. The header file #include
2.QFontDialog::getFont(&ok,QFont(“ Imitation song ”,36)); Return data type QFont
  connect( ui->actionfont  ,&QAction::triggered ,[=](){
      bool ok;// Mark whether the selected font exists
      // Parameters 1: Boolean ; Parameters 2:QFont
      //QFont   Parameters 1: default font ; Parameters 2: Font size
  QFont font=QFontDialog::getFont(&ok,QFont(" Imitation song ",36));
  qDebug()<<" typeface "<<font.family().toUtf8().data()<<" Font size "<<font.pointSize()<<" Is it inclined "<<font.italic()<<" Is it bold "<<font.bold();
    });
1.9 The commonly used control
1.9.1 Button control
[ Failed to transfer the external chain picture , The origin station may have anti-theft chain mechanism , It is suggested to save the pictures and upload them directly (img-nJK14NL9-1600760844863)(C:\Users\Administrator\AppData\Roaming\Typora\typora-user-images\1571097962141.png)]
1. Add images [ Failed to transfer the external chain picture , The origin station may have anti-theft chain mechanism , It is suggested to save the pictures and upload them directly (img-43CCkc8k-1600760844864)(C:\Users\Administrator\AppData\Roaming\Typora\typora-user-images\1571098010998.png)]
[ Failed to transfer the external chain picture , The origin station may have anti-theft chain mechanism , It is suggested to save the pictures and upload them directly (img-aMAJdekB-1600760844865)(C:\Users\Administrator\AppData\Roaming\Typora\typora-user-images\1571098040453.png)]
3.Radio button The radio In the default window, all radio buttons are a group , That is, there is only one valid , You can choose Containers Under the Group Box Controls are grouped
ui->radioButton_nan->setChecked(true);// Set the radio box to be selected by default
1.9.1.1 QPushButton
1. Set the display text this->setText(text);
2. Read the display text this->text()
3. Get closed open status
  connect(ui->pushButton_ON,&QPushButton::toggled,[=](bool clicked){
      if(clicked){  // open
          ui->pushButton_ON->setText(" Turn off the serial port ");
        }
      else{
        ui->pushButton_ON->setText(" Open the serial port ");
        }
    });
1.9.1.2 CheckBox Check button
2. Status and return value : The choice is 2, It's not selected 0 tristate After selection Half selected is 1 All selected are 2 No, yes 0
  connect(ui->checkBox,&QCheckBox::stateChanged,[](int state){
      qDebug()<<"state="<<state;// The choice is 2, It's not selected 0  tristate After selection     Half selected is 1    All selected are 2   No, yes 0
    });//int state   The signal has a parameter , The slot function also adds a parameter
2. Setting state
ui->checkBoxHexDis->setCheckState(Qt::Checked)
 ui->checkBoxHexDis->setCheckState(Qt::CheckState(filearr.toInt()));// Enumeration casts
//Qt::Unchecked          0     The item is unchecked.
//Qt::PartiallyChecked   1     The item is partially checked. Items in hierarchical models may be partially checked if some, but not all, of their children are checked.
//Qt::Checked            2     The item is checked.

 The enumeration type itself is int Type of .
 therefore ,c++ in ,int Convert to enumeration type , Just cast directly .
 Similar to the following :
OrderDataEntity::ENUM_ORDER_DELIVERY_TYPE(    2   )
OrderDataEntity::ENUM_ORDER_DELIVERY_TYPE This is an enumeration type .
1.9.1.3 tool button Control
1. Set not to automatically bounce back after clicking
QAbstractButton checkable
2.tool button Control Mainly display pictures toolbuttonStyle Select the relative position of the picture and text
autoRaise When checked, the button border is hidden , A border appears when the mouse moves to this position .
1.9.2 ltem Widgets(Item-Based)
1.9.2.1 List Widgets
1. Each item is called QListWidgetitem *item=new QListwidgettem(“aaa”)
ui->ListWidgt->addutem(item)
2. Set alignment item->setTextAlignment(at::AligniCenter);
3. Add all data at once
QStringList list;
list<<“ Hoe standing grain gradually pawning a midday ”<<“ Sweat dripping under the grass ”<<” Who knows what's on the plate <<” Every grain is hard ”;
ui->listwidget->addltems(list);
 // listWidget
  QListWidgetItem * item=new QListWidgetItem(" Hoe standing grain gradually pawning a midday ");    // A separate item
  ui->listWidget->addItem(item);   // Add to list
  QStringList List;     // Many together , Because each item is actually a QStringList
  List<<"123"<<"456"<<"789";
  item->setTextAlignment(Qt::AlignHCenter);// Alignment mode
  ui->listWidget->addItems(List);   // Show multiple items
1.9.2.2 tree Widgets
1. Set head ui->treeWidget->setHeaderLabels(QStringList()<<“ hero ”<<“ Introduce ”);
2. Add root node
QTreeWidgetItem * treeitem_L=new QTreeWidgetItem(QStringList()<<“ Power ”);
ui->treeWidget->addTopLevelItem(treeitem_L);
3. Add child nodes
QStringList heroL1,heroL2;
heroL1<<“ Just been pig ”<<“ Front row tanks , Can absorb damage while causing a considerable range of output ”;
QTreeWidgetItem *L1=new QTreeWidgetItem(heroL1);
treeitem_L->addChild(L1);
//treeWidget
  // Set head
  ui->treeWidget->setHeaderLabels(QStringList()<<" hero "<<" Introduce ");
  //treeWidget Each item is called  QTreeWidgetItem
  QTreeWidgetItem * treeitem_L=new QTreeWidgetItem(QStringList()<<" Power ");
  QTreeWidgetItem * treeitem_M=new QTreeWidgetItem(QStringList()<<" agile ");
  QTreeWidgetItem * treeitem_Z=new QTreeWidgetItem(QStringList()<<" intelligence ");

  // Add root node
  ui->treeWidget->addTopLevelItem(treeitem_L);
  ui->treeWidget->addTopLevelItem(treeitem_M);
  ui->treeWidget->addTopLevelItem(treeitem_Z);

  QStringList heroL1,heroL2;
  QStringList heroM1,heroM2;
  QStringList heroz1,heroz2;
  heroL1<<" Just been pig "<<" Front row tanks , Can absorb damage while causing a considerable range of output ";
  heroL2<<" The captain "<<" Front row tanks , An all-round hero who can control the field ";
  heroM1<<" Moon riding "<<" Middle row physical output , You can use the split blade to attack multiple targets ";
  heroM2<<" Little fish man "<<" Front row soldiers , Good at stealing enemy attributes to enhance their combat effectiveness ";
  heroz1<<" Necromancer "<<" Front row mage tanks , High magic resistance , Have healing skills ";
  heroz2<<" witch doctor "<<" Rear auxiliary mage , You can use strange witchcraft to curse enemies and heal teammates ";
  // Add child nodes
  QTreeWidgetItem *L1=new QTreeWidgetItem(heroL1);
  QTreeWidgetItem *L2=new QTreeWidgetItem(heroL2);
  treeitem_L->addChild(L1);
  treeitem_L->addChild(L2);
  QTreeWidgetItem *M1=new QTreeWidgetItem(heroM1);
  QTreeWidgetItem *M2=new QTreeWidgetItem(heroM2);
  treeitem_M->addChild(M1);
  treeitem_M->addChild(M2);
  QTreeWidgetItem *z1=new QTreeWidgetItem(heroz1);
  QTreeWidgetItem *z2=new QTreeWidgetItem(heroz2);
  treeitem_Z->addChild(z1);
  treeitem_Z->addChild(z2);
1.9.2.3 table widgets
1. Set Columns ui->tableWidget->setColumnCount(3);
2. Set the horizontal header ui->tableWidget->setHorizontalHeaderLabels(QStringList()<<“ full name ”<<“ Gender ”<<“ Age ”);
3. Set rows ui->tableWidget->setRowCount(5);
4. Set the text ui->tableWidget->setItem(0,0,new QTableWidgetItem(“ Arthur ”));
//tableWidget
// Set Columns
  ui->tableWidget->setColumnCount(3);
// Set the horizontal header
  ui->tableWidget->setHorizontalHeaderLabels(QStringList()<<" full name "<<" Gender "<<" Age ");
// Set the number of lines
  ui->tableWidget->setRowCount(5);
  // Set specific content
  ui->tableWidget->setItem(0,0,new QTableWidgetItem(" Arthur "));
  QList<QString> namelist;
  namelist<<" Arthur "<<" Daji "<<" Angela "<<" zhaoyun "<<" Guan yu ";
  QStringList sexList;
  sexList<<" male "<<" Woman "<<" Woman "<<" male "<<" male ";

  for(int i=0;i<5;i++)
  {
      int col=0;
      ui->tableWidget->setItem(i,col++,new QTableWidgetItem(namelist[i]));
      ui->tableWidget->setItem(i,col++,new QTableWidgetItem(sexList.at(i)));
      //int  turn QString
      ui->tableWidget->setItem(i,col++,new QTableWidgetItem(QString::number(18+i)));
   }
// Read
    QString tabeDate[ui->tableWidgetCOPY->rowCount()][ui->tableWidgetCOPY->columnCount()];
    for(int i=0; i<ui->tableWidgetCOPY->rowCount(); i++)
    {
        for(int j=0; j<ui->tableWidgetCOPY->columnCount(); j++)
        {
            tabeDate[i][j] = ui->tableWidgetCOPY->item(i, j)->text();
        }
    }
1.9.3 Display controls
1.9.3.1 QTextEdit
1. Multiple lines can change font and color
2. Change the color
QPalette palette = ui->lineEdit->palette();
const QColor &color = QColorDialog::getColor(palette.color(QPalette::Background), this);

if (color.isValid()) {

    palette.setColor(QPalette::Highlight, color);

    ui->lineEdit->setPalette(palette);

}
 here :palette.setColor(QPalette::Highlight, color);

QPalette::Highlight //  The background color of the selected text .
QPalette::HighlightText //  The foreground color of the selected text .
QPalette::Text //  The foreground of the text
QPalette::Base // QTextEdit Background color of ,  The default is white .
3. Change font
4. Set the cursor to the end of the file
QTextCursor tmpCursor = ui->textRe->textCursor();
tmpCursor.movePosition(QTextCursor::Left, QTextCursor::MoveAnchor, 4);
ui->textRe->setTextCursor(tmpCursor);
ui->textRe->moveCursor(QTextCursor::End, QTextCursor::MoveAnchor);
5. Read
ui->textEdit_Re->toPlainText()
6. Add text from the cursor
ui->textRe->append(str);//str Add content after cursor Auto CR
Use to add text before adding
ui->textRe->document()->setMaximumBlockCount(1000);// Set and display the number of times that can be added
1.9.3.2 QSpinBox
Digital input display
prefix // Prefix of digital display
suffix // Suffix for digital display
minimum // The minimum value of the numerical range
maximum // The maximum value of the numerical range
singlestep // Set step size , That is, adjust the button to change the value step by step
vlaue // Current display value
displayInegerBase //QSpinBox The unique properties of , Displays the base number used by integers
decimals //QDoubleSpinBox The unique properties of , Displays the number of decimal places of the value
1.9.4 Other controls
1. Change the label name of various multi selection windows currentitemText
Various operations of the drop-down box
  ui->setupUi(this);
  // Set up stackedWidget Window default interface
  ui->stackedWidget->setCurrentIndex(0);
  // The drop-down
  ui->comboBox->addItem("9600");
  ui->comboBox->addItem("19200");
  ui->comboBox->addItem("115200");
  // Navigate to an option
  //ui->comboBox->setCurrentIndex(2);
  ui->comboBox->setCurrentText("115200");
3…Stacked Widget Control runs without a toggle button , You need to use other controls to control the display toggle
ui->stackedWidget->setCurrentIndex(0);
4.Label Can display pictures
  // utilize Label  display picture
  ui->labelimage->setPixmap(QPixmap("://Icon/play.png"));
  // utilize Label  Show dynamic diagram
  QMovie *movie=new QMovie("://Icon/aa.gif");
  ui->labelgif->setMovie(movie);
  // Play movie picture
  movie->start();
1.9.5 Custom control
-
Add a class Qt Designer interface class contain .h .cpp and .ui file
-
ui After the interface design is completed Fill in the base class name correctly Pay attention to and .cpp The class name in the file is the same , It has nothing to do with the file name
-
Package signals and slots , Connect controls within a custom control , At the same time, you can add classes to external interfaces , Realize the data connection between custom control and main interface
-
Master file
// Set and read the value of custom control connect(ui->btn_Set10,&QPushButton::clicked,[=](){ ui->widget->setData(10); }); connect(ui->btn_Read,&QPushButton::clicked,[=](){ qDebug()<<ui->widget->getData(); }); -
Custom control internal connection
//QSpinBox Move QSlider Follow void (QSpinBox::*spinSignal)(int)=&QSpinBox::valueChanged; connect(ui->spinBox,spinSignal,ui->verticalSlider,&QSlider::setValue); //QSlider Move QSpinBox Follow connect(ui->verticalSlider,&QSlider::valueChanged,ui->spinBox,&QSpinBox::setValue); -
Custom control external interface
void smallWidget::setData(int val)
{
  ui->spinBox->setValue(val);   // There are also signals of change
}
int smallWidget::getData()
{
  return ui->spinBox->value();
}
class smallWidget : public QWidget
{
  Q_OBJECT
public:
  explicit smallWidget(QWidget *parent = nullptr);
  ~smallWidget();
  void setData(int val);
  int getData();
private:
  Ui::smallWidget *ui;

};
7. Custom controls need to pay attention to the problem of signals , Example left mouse click event
Rewritten a function :mouseReleaseEvent, Send a signal after clicking the custom control with the mouse
Class declaration in signal Add function declaration under , Just declare , No function implementation is required , Return value void, Do not duplicate the name of the original class , There is a problem of not triggering the slot .
Add mouse click events
class ClickedLabel : public QLabel
{
    Q_OBJECT
signals:
    void My_licked();//   The signal
public:
   ...
protected:
    void mouseReleaseEvent( QMouseEvent* );  // Mouse click event
private:
    QString m_str;
};
Add signal trigger function to class entity
void ClickedLabel::mouseReleaseEvent(QMouseEvent *evt)
{
    emit this->My_licked();  //emit Keyword is used to signal
}
2. Advanced
2.1 Event handling
2.1.1 Capture QLabel Mouse events in
1. Create a new one QLabel Subclass Right click Project >>Add new >>c++>>C++ Class>>Base class(QLable)
2. take mylable Medium #include Replace with QLabel(H), Replace the parent class inheritance with QLabel(Cpp+H),
3. Main interface QLable Upgrade to custom QLable
4.H File to add
class MyLable : public QLabel
{
  Q_OBJECT
public:
  explicit MyLable(QWidget *parent = nullptr);

  // Mouse entry
  void enterEvent(QEvent *);
  // Mouse away
  void leaveEvent(QEvent *);

// The mouse click
   void mousePressEvent(QMouseEvent *ev) ;
   // Mouse release
   void mouseReleaseEvent(QMouseEvent *ev) ;
   // Mouse movement
   void mouseMoveEvent(QMouseEvent *ev) ;
signals:
public slots:
};
5.cpp File to add
#include <QMouseEvent>
MyLable::MyLable(QWidget *parent) : QLabel(parent)
{
  this->setMouseTracking(true);// Set mouse tracking , After adding, you can move without pressing
}
// Mouse entry
void MyLable::enterEvent(QEvent *)
{
  qDebug()<<" Mouse entry ";
}
// Mouse away
void MyLable::leaveEvent(QEvent *)
{
  qDebug()<<" Mouse away ";
}
// The mouse click
   void MyLable::mousePressEvent(QMouseEvent *ev)
   {
     // Set only the left mouse button to press
     //Qt::LeftButton
     //Qt::RightButton
     //Qt::MidButton
     if(ev->button()==Qt::LeftButton)
       {qDebug()<<" left-click ";}
     if(ev->button()==Qt::RightButton)
       {qDebug()<<" Right click ";}
     if(ev->button()==Qt::MidButton)
       {qDebug()<<" In the key ";}

     QString str=QString(" The mouse click  X=%1 Y=%2").arg(ev->x()).arg(ev->y()); // Format input
       qDebug()<<str;
   }
   // Mouse release
   void MyLable::mouseReleaseEvent(QMouseEvent *ev)
   {
     QString str=QString(" Mouse release  X=%1 Y=%2").arg(ev->x()).arg(ev->y()); // Format input
     qDebug()<<str;
   }
   // Mouse movement
   void MyLable::mouseMoveEvent(QMouseEvent *ev)
   {
     // Because the mouse movement is different from other events , You need to use a variety of keys to judge
     if(ev->buttons() & Qt::LeftButton)// Including left key press
         {qDebug()<<" Left click to move ";}
     if(ev->buttons() & Qt::RightButton)// Including right-click
         {qDebug()<<" Right click to move ";}

     QString str=QString(" Mouse movement  X=%1 Y=%2").arg(ev->x()).arg(ev->y()); // Format input
     qDebug()<<str;
   }
6. One of the more important points
6.1 Mouse event header file #include
6.2 Set mouse tracking this->setMouseTracking(true);//, After adding, you can move without pressing
6.3 Mouse movement is different from other events in distinguishing left and right buttons
ev->buttons() & The left value Get multiple key states at the same time
6.4 Key status
 //Qt::LeftButton
 //Qt::RightButton
 //Qt::MidButton
6.5 QString Format input
QString str=QString(“ Mouse movement X=%1 Y=%2”).arg(ev->x()).arg(ev->y()); // Format input
2.1.2 Timer event one
1. Timer event
  // Timer event
  void timerEvent(QTimerEvent *);
  // Timer event
void Widget::timerEvent(QTimerEvent *tim)
{
  ...
}
2. Start timer
  ID_Timer1=startTimer(1000);
  ID_Timer2=startTimer(2000);    // Start a new timer   startTimer There is a return value    The return value is used to distinguish different timers ID
3. Distinguish between different timers
void Widget::timerEvent(QTimerEvent *tim)
{
  if(tim->timerId()==ID_Timer1)
    {
	...
    }
}
4. example H
#include <QWidget>

namespace Ui {
  class Widget;
}

class Widget : public QWidget
{
  Q_OBJECT

public:
  explicit Widget(QWidget *parent = nullptr);
  ~Widget();
  // Timer event
  void timerEvent(QTimerEvent *);
  int ID_Timer1;
  int ID_Timer2;

private:
  Ui::Widget *ui;
};
5. example cpp
Widget::Widget(QWidget *parent) :
  QWidget(parent),
  ui(new Ui::Widget)
{
  ui->setupUi(this);
  // Start timer      Parameters 1:int, interval (ms);

  ID_Timer1=startTimer(1000);
  ID_Timer2=startTimer(2000);    // Start a new timer   startTimer There is a return value    The return value is used to distinguish different timers ID

}

Widget::~Widget()
{
  delete ui;
}
// Timer event
void Widget::timerEvent(QTimerEvent *tim)
{
  if(tim->timerId()==ID_Timer1)
    {
      static int num;
      ui->label_2->setText(QString::number(num++));
    }
  else {
      if(tim->timerId()==ID_Timer2)
        {
          static int num2;
          ui->label_3->setText(QString::number(num2++));
        }
    }
}
2.1.3 Timer class
1. The header file :#include “QTimer”
2. Create a class
QTimer *timer =new QTimer(this);
3. Start stop
  timer->start(500);// start-up   ms
  timer->stop();  // The timer is off
4. Events trigger
  connect(timer,&QTimer::timeout,[=](){
      static int num =1;
      ui->label_3->setText(QString::number(num));
    });
5. example
  // utilize Qtimer Timer class   Realize timing
  QTimer *timer =new QTimer(this);
  timer->start(500);// start-up   ms
  connect(timer,&QTimer::timeout,[=](){
      static int num =1;
      ui->label_3->setText(QString::number(num));
    });
  //timer->stop();  // The timer is off
2.1.4 Event distributor
1.bool event(QEyent *e)
5.2 e->type()) all Qt In the event
5.3 Interception operations that can be done in the event distributor , If the user intercepts , Return... In the corresponding event true Handle events on your own behalf
2.1.5 Event filter
step 1 Install event filters for controls
ui->label->installEventFilter(this);
step 2 rewrite ventFilter event
bool Widget:eventFilter(QObiect *obj,QEvent*e );
3 File read and write
3.1 Simple reading and writing
1. The header file
#include <QFile>    // file
#include <QTextCodec>   // code
2. read
 ui->lineEdit->setText(filePath);
          QTextCodec *codec = QTextCodec::codecForName("gbk");   // Coding format
          // Put the contents of the file into textEdit
          QFile file(filePath);
          // Set the opening mode
          file.open(QIODevice::ReadOnly);// Read only open
          QByteArray arr;
          //arr=file.readAll();
          // Show arr
         // ui->textEdit->setText(codec->toUnicode(arr));   // With gbk The encoding mode displays
          // The default supported format is utf-8
          // Method 2
          while(!file.atEnd())
            {
              arr+=file.readLine();
            }
          ui->textEdit->setText(codec->toUnicode(arr));
          file.close();
3. Write
          file.open(QIODevice::Append);// Start at the end of the file
          file.write("12345asdf Kublai Khan will be fine ");/// Chinese characters are garbled
          file.close();
4. Get the current path
QDir::currentPath();
4 Sound effect
QSound *sound=new QSound ;
sound->play();
QString
QString &    append(const QString & str)
append  Append substring to the end of string .
QString &    prepend(const QString & str)
prepend  Add substring to string header .
bool    startsWith(const QString & s, Qt::CaseSensitivity cs = Qt::CaseSensitive) const
startsWith  Judgment string ( Such as  "abcd") Whether to use a substring ( Such as  s  yes  "ab") Lead ,cs  It refers to whether the case is sensitive when judging  , return  bool.
bool    endsWith(const QString & s, Qt::CaseSensitivity cs = Qt::CaseSensitive) const
endsWith  Judgment string ( Such as  "abcd") Whether to use a substring ( Such as  s  yes  "cd") ending ,cs  It refers to whether the case is sensitive when judging , return  bool.
bool    contains(const QString & str, Qt::CaseSensitivity cs = Qt::CaseSensitive) const
contains  Determine whether the string object contains substrings  str , Parameters  cs  It refers to whether the case is sensitive when judging , Of the following functions  cs  It's all the same , Don't repeat it .
int    count(const QString & str, Qt::CaseSensitivity cs = Qt::CaseSensitive) const
count  For substrings in string objects  str  Count the number of occurrences , Return the number of occurrences , If it doesn't appear, return to  0.
int    indexOf(const QString & str, int from = 0, Qt::CaseSensitivity cs = Qt::CaseSensitive) const
indexOf  from  from  Start to query the substring with the specified sequence number  str, Return to the first found  str  Substring start position sequence number . If you can't find it, return  -1 .
int    lastIndexOf(const QString & str, int from = -1, Qt::CaseSensitivity cs = Qt::CaseSensitive) const
lastIndexOf  By default, query forward from the end of the string , Set up  from  after , from  from  Query the substring forward at the starting position  str, Returns the first match  str  Substring start position sequence number ( Search range  0 ~ from , The starting sequence number of the substring is closest to  from). If you can't find it, return  -1 .
QString &    insert(int position, const QString & str)
insert  It's a substring  str  Insert into  position  Serial number position , Substring  str  The starting sequence number after insertion is  position .
QString &    remove(int position, int n)
remove  from  position  Remove the starting position  n  Characters , If  n  Than  position  The length of the substring at the beginning of the position is large , The rest will be removed .
QString &    remove(const QString & str, Qt::CaseSensitivity cs = Qt::CaseSensitive)
 This is overloaded  remove  Function will match all substrings of the  str  Are removed from the string , It's better to eliminate spaces and so on .
QString &    replace(int position, int n, const QString & after)
replace  Will be taken from  position  Starting with the serial number  n  Substrings of characters are replaced with  after  character string .
QString &    replace(const QString & before, const QString & after, Qt::CaseSensitivity cs = Qt::CaseSensitive)
 This is overloaded  replace  All substrings that appear in the string  before  Replace all with new  after.
QStringList    split(QChar sep, SplitBehavior behavior = KeepEmptyParts, Qt::CaseSensitivity cs = Qt::CaseSensitive) const
QStringList    split(const QString & sep, SplitBehavior behavior = KeepEmptyParts, Qt::CaseSensitivity cs = Qt::CaseSensitive) const
split  Use characters or substrings  sep  Segment the contents of the current string , Then, all the sub strings are segmented with  QStringList  Return in the form of a list , Each substring can be extracted from the returned list .behavior  It's a separation mode , Whether to keep blank character area, etc .
QString    section(QChar sep, int start, int end = -1, SectionFlags flags = SectionDefault) const
QString    section(const QString & sep, int start, int end = -1, SectionFlags flags = SectionDefault) const
section  The function first divides a string into characters or substrings  sep  Break into paragraphs , similar  split  Divide , but  section  Just go back to  start  Paragraphs to  end  Between paragraphs . If not specified  end  Until the end .flags  Parameters affect partitioning behavior , Such as case sensitivity 、 Whether to ignore blank areas, etc .
QString    left(int n) const
left  Returns the left side of the string  n  A substring of characters .
QString    right(int n) const
right  Returns the right side of the string  n  A substring of characters .
QString    mid(int position, int n = -1) const
mid  Return from  position  The position begins  n  A substring of characters . Not set up  n  If so, include it to the end .
QString &    fill(QChar ch, int size = -1)
  fill  Use characters  ch  Fill in the current string , If you don't specify  size , Just fill in all the characters as  ch  character . If you specify a positive number  size, The string length is reset to  size  size , It's still full of  ch  character .
QString    repeated(int times) const
 Concatenate the current string repeatedly  times  frequency , Returns a new repeating string .
QString    trimmed() const
trimmed  Eliminate white space characters at the beginning and end of the string , Include  '\t', '\n', '\v', '\f', '\r', ' '  .  Whitespace in the middle of a string is not handled .
QString    simplified() const
simplified  Eliminate all white space characters in the string , Include  '\t', '\n', '\v', '\f', '\r', ' '  .  Both ends and the middle are eliminated .
void    truncate(int position)
File encapsulation
EXE Use on other computers
First you need to add environment variables : Computer right click Properties -> Advanced properties -> environment variable (n)-> In the system variable Path-> edit -> newly build ( example :D:\Qt\Qt5.12.0\5.12.0\mingw73_64\bin), Is to look for bin Folder
stay exe In the folder , It's best to have only one under the folder exe file ,Shift Right click here to open the command window and enter windeployqt Executable name example :windeployqt COM.exe, Put the relevant documents back after completion
Force data type conversion
| const_cast | Go to const attribute |
|---|---|
| static_cast | Static type conversion , Such as int convert to char |
| dynamic_cast | Dynamic type conversion , Such as polymorphic type conversion between subclass and parent class |
| reinterpret_cast | Just reinterpret the type , But there's no binary conversion |
//!  This operator is used to modify the const or volatile attribute ( except const  or volatile Beyond modification ,type_id and expression It's the same type )
const_cast<type_id>(expression)
//!  This operator takes expression Convert to type-id type ( There is no runtime type checking to ensure the security of the transformation )
static_cast<type-id>(expression)
//!  This operator takes expression convert to type-id Object of type (Type-id  Must be a pointer to a class 、 Class reference or void*)
dynamic_cast<type-id>(expression)
//! reinterpret_cast Operators are used to handle conversions between unrelated types ; It will produce a new value , This value will be the same as the original parameter (expressoin) There are exactly the same bits .
reinterpret_cast<type-id>(expression)
Display the current date time
example :
  QTimer *timer = new QTimer(this);    // Used to display the current date
  timer->start(1000);   // Update every second
  connect(timer, &QTimer::timeout,[=](){
      QDateTime time = QDateTime::currentDateTime();// Get the current time of the system
      QString str = time.toString("hh:mm:ss zzz"); // Set the display format
      qDebug()<<str;
    });
| Format | Result |
|---|---|
| dd.MM.yyyy | 21.05.2001 |
| ddd MMMM d yy | Tue May 21 01 |
| hh:mm:ss.zzz | 14:13:09.042 |
| h:m ap | 2:13:9 pm |
Reading and writing Excel
1.pro File to add
CONFIG += qaxcontainer
2. The header file
#include <ActiveQt/QAxObject>
3. Read file flow
Establish process and open file , Get table properties
// establish excel Process and get the total number of columns in the table
    QAxObject excel("Excel.Application");     // Build process
    excel.setProperty("Visible",false);    // I do not know!
    QAxObject *workbooks = excel.querySubObject("WorkBooks");  // The following operations are all in here
    QString initFile=QDir::currentPath();   // File current path
    initFile+="/debug/Table.xlsx";
  //initFile+="/Table.xlsx";
    workbooks->dynamicCall("Open (const QString&)",initFile);    // Open file
    QAxObject *workbook = excel.querySubObject("ActiveWorkBook");// Get active workbook
    QAxObject *worksheet=workbook->querySubObject("WorkSheets(int)",1);// The first worksheet
    QAxObject *used_range = worksheet->querySubObject("UsedRange");
    QAxObject *rows = used_range->querySubObject("Rows");
    QAxObject *columns = used_range->querySubObject("Columns");
    int row_start = used_range->property("Row").toInt();  // Get the starting line
    int column_start = used_range->property("Column").toInt();  // Get the starting column
    int row_count = rows->property("Count").toInt();  // Get the number of lines
    int column_count = columns->property("Count").toInt();  // Get the number of columns
    qDebug()<<" Start line :"<<row_start<<" Start column :"<<column_start<<" Row number :"<<row_count<<" Number of columns :"<<column_count;
Read the file
QAxObject *rangeData = worksheet->querySubObject("Cells(int,int)",row,1); // obtain cell Value    row,1 Is the coordinate
QString DataVal = rangeData->dynamicCall("Value2()").toString();   // Format
Data[row-1]=DataVal;   // Take out
Close document end excel Threads
// Close document end excel Threads
    workbooks->dynamicCall("Close(Boolean)",false);           // close document
    excel.dynamicCall("Quit(void)");                            // sign out excel Threads
    //delete excel; // If you create excel When using a pointer, you need to delete the pointer   QAxObject *excel = new QAxObject(this);
4. Rewrite the file
Establish process and open file , Get table attributes as above
Rewrite the file
QAxObject *cell = worksheet->querySubObject("Cells(int,int)", row, 1);
cell->setProperty("Value", Data[row-1]);  // Set cell values
Save the file
excel.setProperty("DisplayAlerts", false);/* Do not display any warning messages , If true, Then when it is closed, something like “ Whether to save the changes to XX file ”*/
workbook->dynamicCall("Save()");  // Save the active workbook file    This sentence can't be wrong

// Close document end excel Threads
workbooks->dynamicCall("Close(Boolean)",false);           // close document
excel.dynamicCall("Quit(void)");                            // sign out excel Threads
5. Summary routine
void MainWindow::writeToFile(QString *Data,QString *name,int len)
{
  // establish excel Process and get the total number of columns in the table
    QAxObject excel("Excel.Application");
    excel.setProperty("Visible",false);
    QAxObject *workbooks = excel.querySubObject("WorkBooks");
    QString initFile=QDir::currentPath();
    initFile+="/debug/Table.xlsx";
  //initFile+="/Table.xlsx";
    workbooks->dynamicCall("Open (const QString&)",initFile);
    QAxObject *workbook = excel.querySubObject("ActiveWorkBook");// Get active workbook
    QAxObject *worksheet=workbook->querySubObject("WorkSheets(int)",1);// The first worksheet
    int row_count=Data->length();
     // Read and extract the contents of the form into the program
    for(int row=1;row<row_count+1;row++)
      {
        QAxObject *cell = worksheet->querySubObject("Cells(int,int)", row, 1);
        cell->setProperty("Value", Data[row-1]);  // Set cell values
        cell = worksheet->querySubObject("Cells(int,int)", row, 2);
        cell->setProperty("Value", name[row-1]);  // Set cell values
        qDebug()<<row<<Data[row-1]<<"  "<<name[row-1];
      }
    excel.setProperty("DisplayAlerts", false);/* Do not display any warning messages , If true, Then when it is closed, something like “ Whether to save the changes to XX file ”*/
    workbook->dynamicCall("Save()");  // Save the active workbook file
    // Close document end excel Threads
    workbooks->dynamicCall("Close(Boolean)",false);           // close document
    excel.dynamicCall("Quit(void)");                            // sign out excel Threads

}
void MainWindow::readfromFile(QString *Data,QString *name,int len)
{
  // establish excel Process and get the total number of columns in the table
    QAxObject excel("Excel.Application");
    excel.setProperty("Visible",false);
    QAxObject *workbooks = excel.querySubObject("WorkBooks");
    QString initFile=QDir::currentPath();
    initFile+="/debug/Table.xlsx";
  //initFile+="/Table.xlsx";
    workbooks->dynamicCall("Open (const QString&)",initFile);
    QAxObject *workbook = excel.querySubObject("ActiveWorkBook");// Get active workbook
    QAxObject *worksheet=workbook->querySubObject("WorkSheets(int)",1);// The first worksheet
    QAxObject *used_range = worksheet->querySubObject("UsedRange");
    QAxObject *rows = used_range->querySubObject("Rows");
    QAxObject *columns = used_range->querySubObject("Columns");
    int row_start = used_range->property("Row").toInt();  // Get the starting line
    int column_start = used_range->property("Column").toInt();  // Get the starting column
    int row_count = rows->property("Count").toInt();  // Get the number of lines
    int column_count = columns->property("Count").toInt();  // Get the number of columns
    qDebug()<<" Start line :"<<row_start<<" Start column :"<<column_start<<" Row number :"<<row_count<<" Number of columns :"<<column_count;
   // Redefine the cache array size according to the table size
    Data->resize(row_count);
    name->resize(row_count);
     // Read and extract the contents of the form into the program
    for(int row=row_start;row<row_count+1;row++)
      {
        QAxObject *rangeData = worksheet->querySubObject("Cells(int,int)",row,1); // obtain cell Value
        QAxObject *rangeName = worksheet->querySubObject("Cells(int,int)",row,2); // obtain cell Value
        QString DataVal = rangeData->dynamicCall("Value2()").toString();
        QString NameVal = rangeName->dynamicCall("Value2()").toString();
        Data[row-1]=DataVal;
        name[row-1]=NameVal;
        qDebug()<<row<<Data[row-1]<<"  "<<name[row-1];
        delete rangeData;delete rangeName;
      }
    // Close document end excel Threads
    workbooks->dynamicCall("Close(Boolean)",false);           // close document
    excel.dynamicCall("Quit(void)");                            // sign out excel Threads
}
Show the curve chart
1. Basic display
1.pro File to add
QT += charts
2. To use chart Of the file H File to add
#include <QChartView>
#include <QLineSeries>
#include <QPieSeries>

QT_CHARTS_USE_NAMESPACE
3 ui Add... To the file interface Widget Control or Graphics View Control , And promoted to QChartView
In ascension Widget The base class is QWidget,Graphics View The base class is GraphicsView. If in mainwindow In the constructor chart, as long as mainwindow.h If there is a file in step 2, you don't need to care about the operation during promotion , If the file is not included, the error will be reported all the time .
4. Show
The final implementation shows
ui->graphicsView->setChart(c);
//ui->graphicsView    Is the promoted control
//setChart    Used for display
//c   It's a QChart The pointer to    There's... In it QLineSeries Type of curve data
From the definition order
QLineSeries* line1 = new QLineSeries();  // Used to store graphic data
  for(double x=0;x<10;x+=0.1)
    {
      line1->append(x,sin(x));   // Write data
    }
  QChart* c = new QChart();     // Displayed image parameters
  c->addSeries(line1);          // Fill in image data
  ui->graphicsView->setChart(c);// Display images
Basic composition
Axis -QAbstractAxis:
In the chart , Generally there are X、Y Axis , The more complicated ones also have Z Axis . Corresponding to Qt The chart also has X、Y Axis objects . But today , Let's not introduce . If we don't create the object corresponding to the axis coordinates , have access to Qt The default axis object for . Later we will introduce the usage .
series -QAbstractSeries:
Whether it's a curve 、 The pie chart 、 Bar chart or other charts , The essence of the content displayed is data . A curve is a set of data , A pie chart also corresponds to a set of data . stay Qt Charts in , These sets of data are called series . Corresponding to different types of charts Qt Different series are available . In addition to being responsible for storage 、 Access data , It should also provide the drawing method of data , For example, the line chart and curve chart correspond to QLineSerie and QSPLineSerie. We can use different series to achieve different display purposes .
legend -Legend:
Be similar to Excel,Qt Charts Legend is also provided in , And you can also show or hide the legend .
Chart -QChart:
Qt Provides QChart Class to encapsulate the content mentioned above , Like the axis 、 series 、 Legend, etc .QChart Took on an organization 、 The role of Management .QChart Derive from QGraphicsObject, So it's actually an element item. We can QChart Get the axis object 、 Data series objects 、 Legend and so on , And you can set the theme of the chart 、 Background color and other style information .
View -QChartView:
be responsible for QChart The exhibition of .QChart It is only responsible for the organization of chart content 、 management . The display of the chart is the responsibility of the view , This view is QChartView.QChartView Derive from QGraphicsView, It just provides several special services for QChart The interface of , such as setChart(QChart*) etc. .
XY Axis
1. Automatically display all values of the curve (XY)
  connect(timer,&QTimer::timeout,[=](){
      static int num=0;
      num++;
      //*line1<<QPointF(num,num/10);
      line1->append(num,num/10);
// Scheme 1 : You know how many numbers are put in
//      lineChart->axes(Qt::Horizontal).first()->setRange(0, num);
//      lineChart->axes(Qt::Vertical).first()->setRange(0, num/10+1);
// Option two : Read
      QList<QAbstractAxis*> listxAxis = lineChart->axes(Qt::Horizontal,line1); //X Axis
      QList<QAbstractAxis*> listyAxis = lineChart->axes(Qt::Vertical,line1);//Y Axis
      QValueAxis* xAxis=dynamic_cast<QValueAxis*>(listxAxis[0]);
      QValueAxis* yAxis=dynamic_cast<QValueAxis*>(listyAxis[0]);
qDebug()<<xAxis->max()<<xAxis->min()<<yAxis->max()<<yAxis->min()<<listxAxis.size();
       xAxis->setMax(num);
       yAxis->setMax(num/10+1);
    });

  m_serieslist[m_SeriesNum]->attachAxis(axisX);  // Compare the value with XY Connect the shafts
  m_serieslist[m_SeriesNum]->attachAxis(axisY);
programme 2 The focus is on reading the data that has been put in ,axes function , The parameter determines which axis to read axes(Qt::Horizontal,line1); //X Axis ,axes(Qt::Vertical,line1);//Y Axis line1 Which curve is it . The read axis data defaults to QList QAbstractAxis* Of , Change to QValueAxis perhaps QDateTimeAxis.
2. Show the designated area
ditto
2.1 X The range of values remains unchanged ,Y The range of values changes
2.2 Y The range of values remains unchanged ,X The range of values changes
3. Modify the displayed interval in real time
// Used to read existing XY The shaft , Not yet
QList<QAbstractAxis *> XY=lineChart->axes(Qt::Horizontal|Qt::Vertical);
Click the legend to hide the curve
Don't know how There are three functions Call in use connectMarkers That is to say
  void connectMarkers();     // Connect
  void disconnectMarkers();  // disconnect
  void handleMarkerClicked(); // Functions executed after connection
It's all written in Mychart Next
void Mychart::connectMarkers()
{
    // Connect all markers to handler
    const auto markers = m_Chart->legend()->markers();
    for (QLegendMarker *marker : markers) {
        // Disconnect possible existing connection to avoid multiple connections
        QObject::disconnect(marker, &QLegendMarker::clicked,
                            this, &Mychart::handleMarkerClicked);
        QObject::connect(marker, &QLegendMarker::clicked, this, &Mychart::handleMarkerClicked);
    }
}
void Mychart::disconnectMarkers()
{
    const auto markers = m_Chart->legend()->markers();
    for (QLegendMarker *marker : markers) {
        QObject::disconnect(marker, &QLegendMarker::clicked,
                            this, &Mychart::handleMarkerClicked);
    }
}
void Mychart::handleMarkerClicked()
{
    QLegendMarker* marker = qobject_cast<QLegendMarker*> (sender());
    Q_ASSERT(marker);
    switch (marker->type())
    {
        case QLegendMarker::LegendMarkerTypeXY:
        {
        // Toggle visibility of series
        marker->series()->setVisible(!marker->series()->isVisible());
        // Turn legend marker back to visible, since hiding series also hides the marker
        // and we don't want it to happen now.
        marker->setVisible(true);
        // Dim the marker, if series is not visible
        qreal alpha = 1.0;

        if (!marker->series()->isVisible())
            alpha = 0.5;

        QColor color;
        QBrush brush = marker->labelBrush();
        color = brush.color();
        color.setAlphaF(alpha);
        brush.setColor(color);
        marker->setLabelBrush(brush);

        brush = marker->brush();
        color = brush.color();
        color.setAlphaF(alpha);
        brush.setColor(color);
        marker->setBrush(brush);

        QPen pen = marker->pen();
        color = pen.color();
        color.setAlphaF(alpha);
        pen.setColor(color);
        marker->setPen(pen);
        break;
        }
    default:
        {
        qDebug() << "Unknown marker type";
        break;
        }
    }
}
Tips
ui->graphicsView->setRenderHint(QPainter::Antialiasing);// Set view antialiasing
lineChart->createDefaultAxes();// According to the dataset , Automatically create axes , The interval of the coordinate axis just fully accommodates the existing data set
axisX->setTickCount(100);// grid
take QT The default control is promoted to a custom control
With Weight Control is promoted to a custom parent class of QChartView Of MychartView For example .
1、Weight Base class or QWeight, Therefore, the base class selection during promotion QWeight.
2、 The class name is consistent with its own class .
3、 The most important point , You need your own class to provide an interface , Constructors .
stay UI The document is about weight The code of the control is as follows
widget = new MychartView(centralwidget);
widget->setObjectName(QString::fromUtf8("widget"));
centralwidget It's a new QWidget(MainWindow);, Therefore, you need to provide an interface for your own class , Form the following
MychartView(QWidget *parent = 0);
// Constructors
MychartView::MychartView(QWidget *parent) :
  QChartView(parent), m_isTouching(false)
{
    setRubberBand(QChartView::RectangleRubberBand);  // To zoom in and out of the chart with the mouse area, you must use this sentence
}
Save configuration file
Use profile (.ini)
INI File format (Initialization File) Is an informal standard for configuration files on certain platforms or software , By the festival (section) Sum key (key) constitute , Used to initialize or set parameters for an operating system or a specific program . Often used in Microsoft Windows operating system , But in addition to windows Now many applications under other operating systems also have .ini file . Reading and writing INI An example of the file is :
/***  Write the configuration text  ***/
//QSettings The first argument to the constructor is ini Path to file , The second parameter is for ini file , The third parameter can default to
CustomPlot::~CustomPlot()
{
    QSettings *IniWrite = new QSettings("config_S.ini", QSettings::IniFormat);
    // Value input   IniWrite->setValue("spinBox_485_03IDAddr",ui->spinBox_485_03IDAddr->value());
    // Radio buttons     IniWrite->setValue("checkBoxHexDis",ui->checkBoxHexDis->checkState());
    // The drop-down      IniWrite->setValue("comboBox",ui->comboBox->currentIndex());
    // Text     IniWrite->setValue("lineEdit_485_10RegData_HEX",ui->lineEdit_485_10RegData_HEX->text());
    IniWrite->setValue("spinBox_Check_Frist_Data",ui->spinBox_Check_Frist_Data->value());
    delete IniWrite;
    delete ui;
}

/***  Read configuration file ***/
void CustomPlot::Get_Conf()
{
    QSettings *iniRead = new QSettings("config_S.ini", QSettings::IniFormat);
    // Value input 	ui->spinBox_485_03IDAddr->setValue(iniRead->value("spinBox_485_03IDAddr").toInt());
    // Radio buttons  	ui->checkBoxHexDis->setCheckState(Qt::CheckState(iniRead->value("checkBoxHexDis").toInt()));
    // The drop-down 	 ui->comboBox_2->setCurrentIndex(iniRead->value("comboBox_2").toInt());
    // Text  ui->lineEdit_485_10RegData_HEX->setText(iniRead->value("lineEdit_485_10RegData_HEX").toString());
    ui->checkBox_Check_Frist->setCheckState(Qt::CheckState(iniRead->value("checkBox_Check_Frist").toInt()));
    delete iniRead;
}
Generated config.ini The contents of the document are as follows :
[General]
passwd=123456
lockTime=4
If the setValue Function time , A with the same name already exists key, Then the new value will overwrite the original value .
Set up sub windows , And automatically release memory after the sub window is closed
You can create a new UI file , After the MainWindows Contained in the H file , Be careful not to use... When creating windows static Create by means of equal variables , To use new Pointer creation .
void MainWindow::ToolMenu_CRC_Check_Task()
{
  Form *CRC_Check_Window=new Form;
  CRC_Check_Window->show();
  CRC_Check_Window->setAttribute(Qt::WA_DeleteOnClose);// Free memory immediately after closing the window
  qDebug()<<"CRC Check";
}
And then run ToolMenu_CRC_Check_Task function , A new window will appear
Change the title
setWindowTitle("CRC check ");
error: no matching member function for call to ‘connect’
Include connect This error can also occur in functions other than , An error encountered at present , example :
  // Error function
connect(ui->spinBox_HEX,&QSpinBox::valueChanged,[=](){
    });
//QSpinBox::valueChanged Function declaration
Q_SIGNALS:
    void valueChanged(int);
    void valueChanged(const QString &);
There is no problem with such a signal connection format , however QSpinBox::valueChanged Function has overload , The compiler doesn't know which overload to use , It's a mistake . We use void valueChanged(const QString &); Format , So in connect Casts are used in
// After cast
connect(ui->spinBox_HEX,static_cast<void (QSpinBox::*)(const QString &)>(&QSpinBox::valueChanged),[=](){
 });//static_cast<void (QSpinBox::*)(const QString &)>(&QSpinBox::valueChanged)
The parent window passes parameters to the child window
Both data types are QByteArray For example
The main idea is to transfer data through signal and slot function
The inheritance relationship is that the parent window file must have the of the child window H file , Just as the parent window controls the creation of child windows , In other words, the premise of passing parameters is that the parent window can pass the child window , because connect You need to know the objects of the parent window and the child window .
1、 Create a signal with parameters in the parent window file
2、 Create a slot function with the same signal parameters as the parent window in the child window
3、 After the child window is created in the parent window function, add connect function , The signal of the parent window and the slot function of the child window .
4、 The parent window function signals at the right time , The sub window automatically runs the slot function .
Source code : The child window here is an inheritance QWidget The object of , And the parent window MainWindow There's a difference .
child window :
/*H file */
class Translation_MOD_Data : public QWidget
{
    Q_OBJECT
//...
private slots:
    void getStr(QByteArray);//2、 Create a slot function with the same signal parameters as the parent window in the child window
};
/*cpp file */
//2、 Create a slot function with the same signal parameters as the parent window in the child window
void Translation_MOD_Data::getStr(QByteArray str)
{
        Word=str;
        qDebug()<<Word.length()<<Word;

}
The parent window
/*H file */
class MainWindow : public QMainWindow
{
  Q_OBJECT
public:
signals:
    void RE_Word(QByteArray);//1、 Create a signal with parameters in the parent window file
}
/*cpp file */
#include "translation_mod_data.h"// In order to create a sub window, you need to call the... Of the sub window H file
void MainWindow::ToolMenu_Translation_MOD_data_Task()
{
    // First create a sub window
    Translation_MOD_Data *Translation_MOD_Data_Window =new Translation_MOD_Data;
    Translation_MOD_Data_Window->show();
    Translation_MOD_Data_Window->setAttribute(Qt::WA_DeleteOnClose);
    //3、 After the child window is created in the parent window function, add connect function , The signal of the parent window and the slot function of the child window . Note the number of parentheses and parameters
    connect(this,SIGNAL(RE_Word(QByteArray)),Translation_MOD_Data_Window,SLOT(getStr(QByteArray)));
}
void MainWindow::Send_Signl()
{
    QByteArray re_Datas=QByteArray("123456");
    // The parent window function signals at the right time , The sub window automatically runs the slot function .
    emit RE_Word(re_Datas);
}
Window top
    connect(ui->pushButton_Window_Topping,&QPushButton::clicked,[=](){
        static bool Top_EN=false;
        if(!Top_EN)
        {
            Top_EN=true;
            ui->pushButton_Window_Topping->setText(" Cancel topping ");
            Qt::WindowFlags m_flags = windowFlags();
              setWindowFlags(m_flags | Qt::WindowStaysOnTopHint);  // Window top
              show();  // Without this, it will be directly hidden
        }else{
            Top_EN=false;
            ui->pushButton_Window_Topping->setText(" Window top ");
            Qt::WindowFlags m_flags = NULL;
              setWindowFlags(m_flags);    // The window is not topped
              show();// Without this, it will be directly hidden
        }
    });
/* Window top */
Qt::WindowFlags m_flags = windowFlags();
setWindowFlags(m_flags | Qt::WindowStaysOnTopHint);  // Window top
show();  // Without this, it will be directly hidden
/* Window UN topping */
Qt::WindowFlags m_flags = NULL;
setWindowFlags(m_flags);    // The window is not topped
show();// Without this, it will be directly hidden
Qt Realize fuzzy search
1.UI Drag an interface combox and lineEdit
2…h file
#ifndef MAINWINDOW_H
#define MAINWINDOW_H

#include <QMainWindow>

namespace Ui {
class MainWindow;
}

class MainWindow : public QMainWindow
{
    Q_OBJECT

public:
    explicit MainWindow(QWidget *parent = nullptr);
    ~MainWindow();

    void FuzzySearch();  // Add a function that combines the two controls

private:
    Ui::MainWindow *ui;
};

#endif // MAINWINDOW_H
3…cpp file
#include "MainWindow.h"
#include "ui_MainWindow.h"
#include <QCompleter>
#include <QListView>

MainWindow::MainWindow(QWidget *parent) :
    QMainWindow(parent),
    ui(new Ui::MainWindow)
{
    ui->setupUi(this);
    FuzzySearch();
}

MainWindow::~MainWindow()
{
    delete ui;
}
// A function that combines two controls
void MainWindow::FuzzySearch()
{
    QStringList wordList;
    wordList << "alpha" << "omega" << "omicron" << "zeta";
    ui->comboBox->addItems(wordList);

    ui->comboBox->setView(new QListView());
    ui->comboBox->setEditable(true);
    ui->comboBox->setLineEdit(ui->lineEdit);
    ui->comboBox->setMaxVisibleItems(5);// The drop-down list shows item Count

    QCompleter *pCompleter = new QCompleter(wordList, this);
    ui->lineEdit->setCompleter(pCompleter);
    pCompleter->setCaseSensitivity(Qt::CaseInsensitive);
    ui->comboBox->setCompleter(pCompleter);

    ui->lineEdit->clear();
}
Upgradeable custom classes
You can directly add an existing file or re create a file named Fuzzy_Search Class
1.H file
#ifndef FUZZY_SEARCH_H
#define FUZZY_SEARCH_H

#include <QComboBox>
#include <QListView>
#include <QLineEdit>

class Fuzzy_Search : public QComboBox
{
public:
    explicit Fuzzy_Search(QWidget *parent = nullptr);
    ~Fuzzy_Search();
    // Custom features
    void Link_List();// Link to the list to enter the alternative
    void Add_List(QStringList AddList);// What's new
    void Clear_List();// Clear item
    void Set_List(QStringList SetList);// Clear the original item and add
private:
    QStringList List;
    QLineEdit *lineEdit=new QLineEdit;
};

#endif // FUZZY_SEARCH_H
2.Cpp file
#include "fuzzy_search.h"
#include <QCompleter>
#include <QListView>
#include <QLineEdit>
#include <QComboBox>

Fuzzy_Search::Fuzzy_Search(QWidget *parent):QComboBox (parent)
{

//    QStringList wordList;
//    wordList << "alpha" << "omega" << "omicron" << "zeta";
//    this->addItems(wordList);

    this->setView(new QListView());
    this->setEditable(true);
    this->setLineEdit(lineEdit);
    this->setMaxVisibleItems(5);// The drop-down list shows item Count

//    QCompleter *pCompleter = new QCompleter(wordList, this);
//    lineEdit->setCompleter(pCompleter);
//    pCompleter->setCaseSensitivity(Qt::CaseInsensitive);
//    this->setCompleter(pCompleter);

    lineEdit->clear();
}
void Fuzzy_Search::Link_List()
{
    // link
    QCompleter *pCompleter = new QCompleter(List, this);
    lineEdit->setCompleter(pCompleter);
    pCompleter->setCaseSensitivity(Qt::CaseInsensitive);
    this->setCompleter(pCompleter);
    lineEdit->clear();
}
void Fuzzy_Search::Add_List(QStringList AddList)
{

    List<<AddList;  // Add new items to the list , because Link_List The link is List, Therefore, new items must be added to List Can appear in the alternate
    this->addItems(List);
    Link_List();
}
void Fuzzy_Search::Clear_List()
{
    List.clear();
    this->clear();
    Link_List();
}
void Fuzzy_Search::Set_List(QStringList SetList)
{
    Clear_List();
    Add_List(SetList);
}
Fuzzy_Search::~Fuzzy_Search()
{

}
3.UI Drag in QCombox Control , Upgrade to Fuzzy_Search. At this time, the item is empty , Need to add .
Modify window icons and application icons
1、 Window icons
Put any picture ,
QString StrPath=QApplication::applicationDirPath();// obtain exe File folder
StrPath+="/Icon.ico";// Add pictures relative to exe File path
setWindowIcon(QIcon(StrPath));// Executable icon
2、 Modify the application icon
Create a ico Suffix picture , Be careful not to change the suffix directly with files in other formats , There are generation tools .
Create a new one myapp.rc Resource files for ( The name can be customized ), Through text editor , Modify the content of the resource file to IDI_ICON1 ICON DISCARDABLE “test.ico”, among "test.ico" Consistent with the actual picture name
Copy myapp.rc and test.ico To qt In the project
modify pro file , Add resource files
RC_FILE = myapp.rc
perform qmake, Then compile again !!!!!! perform qmake Very important !!!!
If you don't implement it, you will report an error , Wrong and nonstandard .ICO file , The lack of .o file
Generated after compilation exe The icon has changed
版权声明
本文为[Things will turn when they reach the extreme 1024]所创,转载请带上原文链接,感谢
https://yzsam.com/2022/04/202204210610057372.html
边栏推荐
- JD freefuck Jingdong HaoMao control panel background Command Execution Vulnerability
- Daily CISSP certification common mistakes (April 12, 2022)
- Realization of consumer gray scale
- Feign requests the log to be printed uniformly
- Software test summary
- Crawling mobile game website game details and comments (MQ + multithreading)
- MATLAB从入门到精通(二)
- Dock installation redis
- The difference between deep copy and shallow copy
- Queue solving Joseph problem
猜你喜欢
【ACM】70. climb stairs
深度学习经典网络解析目标检测篇(一):R-CNN
【ACM】509. Fibonacci number (DP Trilogy)
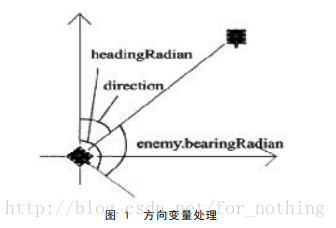
Robocode tutorial 5 - enemy class
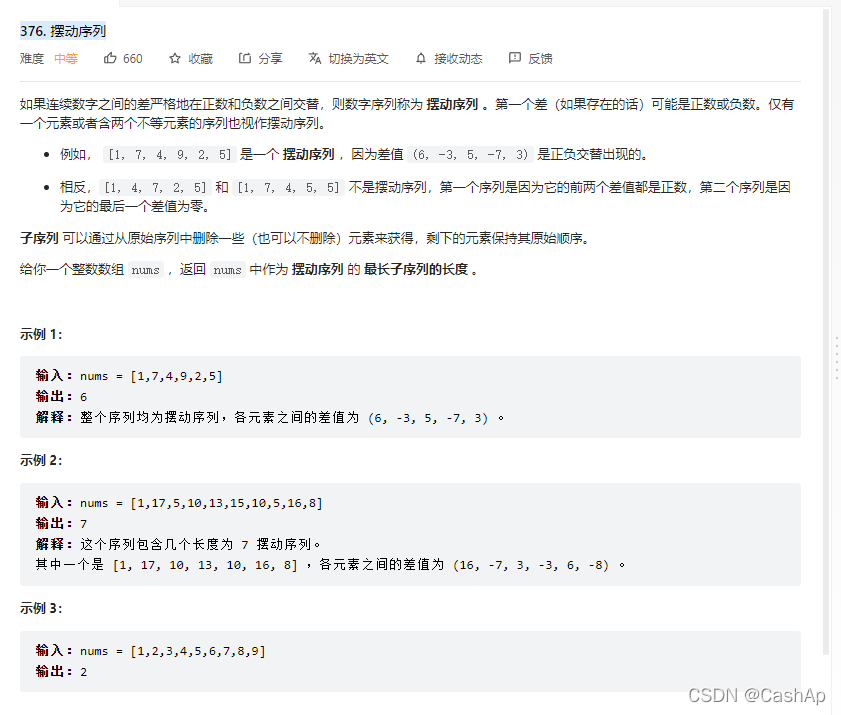
【ACM】376. Swing sequence
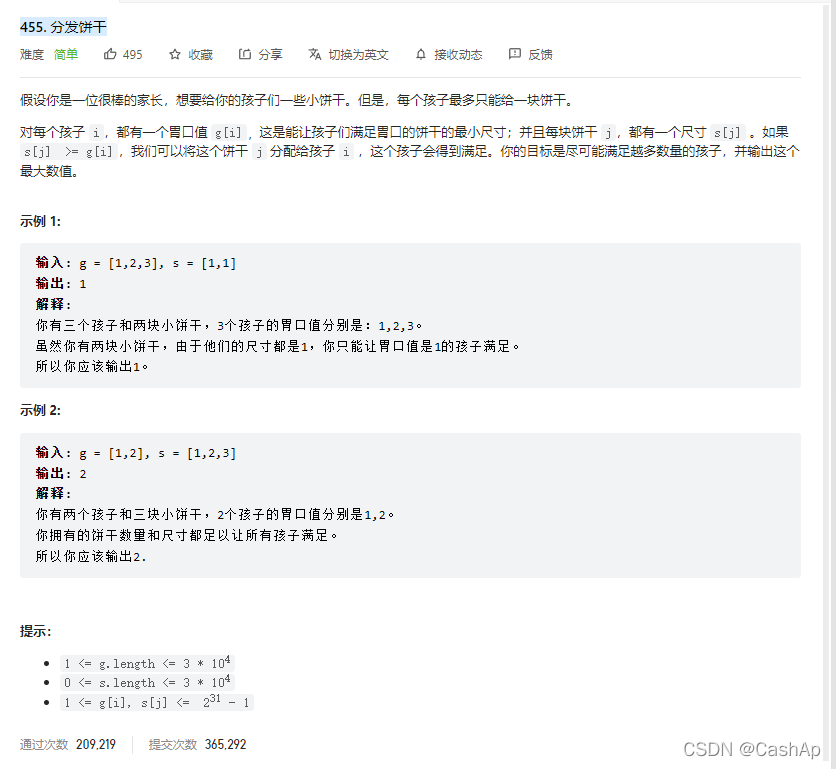
【ACM】455. Distribute Biscuits (1. Give priority to big biscuits to big appetite; 2. Traverse two arrays with only one for loop (use subscript index -- to traverse another array))
【ACM】455. 分发饼干(1. 大饼干优先喂给大胃口;2. 遍历两个数组可以只用一个for循环(用下标索引--来遍历另一个数组))

From introduction to mastery of MATLAB (2)
Install pyshp Library
Jenkspy package installation
随机推荐
Notepad + + replaces tabs with spaces
CISSP certified daily knowledge points (April 15, 2022)
Multi thread crawling Marco Polo network supplier data
Resolve the error Max virtual memory areas VM max_ map_ count [65530] is too low, increase to at least [262144]
硬核解析Promise對象(這七個必會的常用API和七個關鍵問題你都了解嗎?)
14 py games source code share the second bullet
QT tablewidget insert qcombobox drop-down box
Analysez l'objet promise avec le noyau dur (Connaissez - vous les sept API communes obligatoires et les sept questions clés?)
Arcpy adds fields and loop assignments to vector data
Dock installation redis
From source code to executable file
ArcGIS table to excel exceeds the upper limit, conversion failed
C language to achieve 2048 small game direction merging logic
Rust: shared variable in thread pool
According to the result set queried by SQL statement, it is encapsulated as JSON
Pointers in rust: box, RC, cell, refcell
Hard core parsing promise object (do you know these seven common APIs and seven key questions?)
Format problems encountered in word typesetting
Introduction to quantexa CDI syneo platform
Crawling mobile game website game details and comments (MQ + multithreading)