当前位置:网站首页>mysql数据库安装教程(超级超级详细)
mysql数据库安装教程(超级超级详细)
2022-08-11 05:32:00 【欢喜躲在眉梢里】
目录
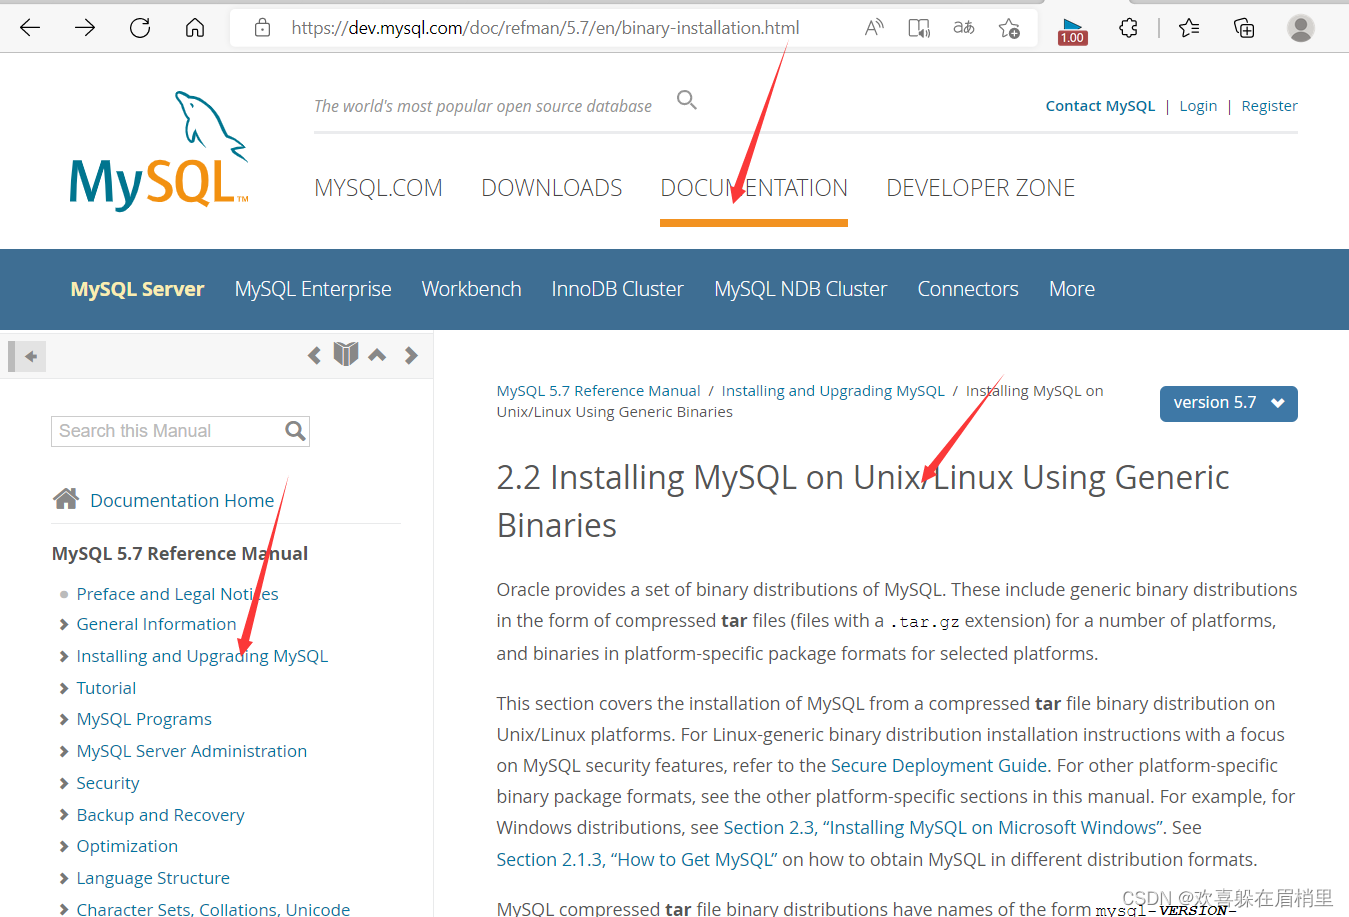
一、首先安装可以根据官方文档进行安装
1、先安装到Windows中:
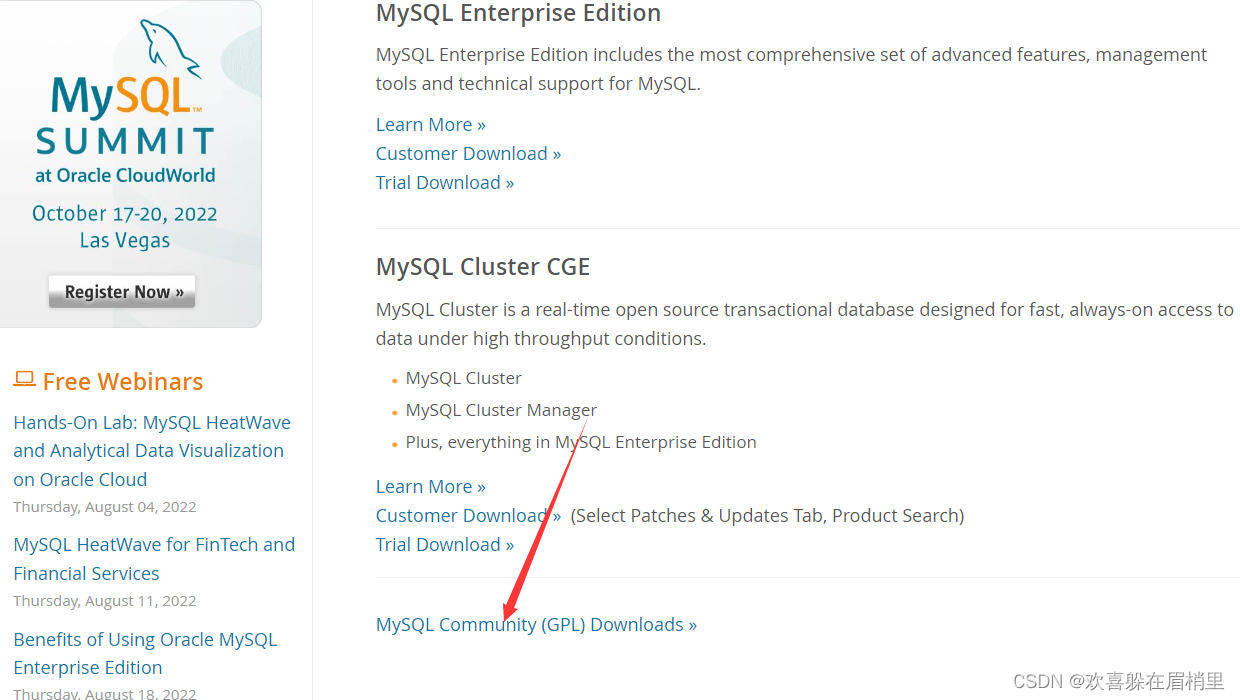
2、选择mysql community server。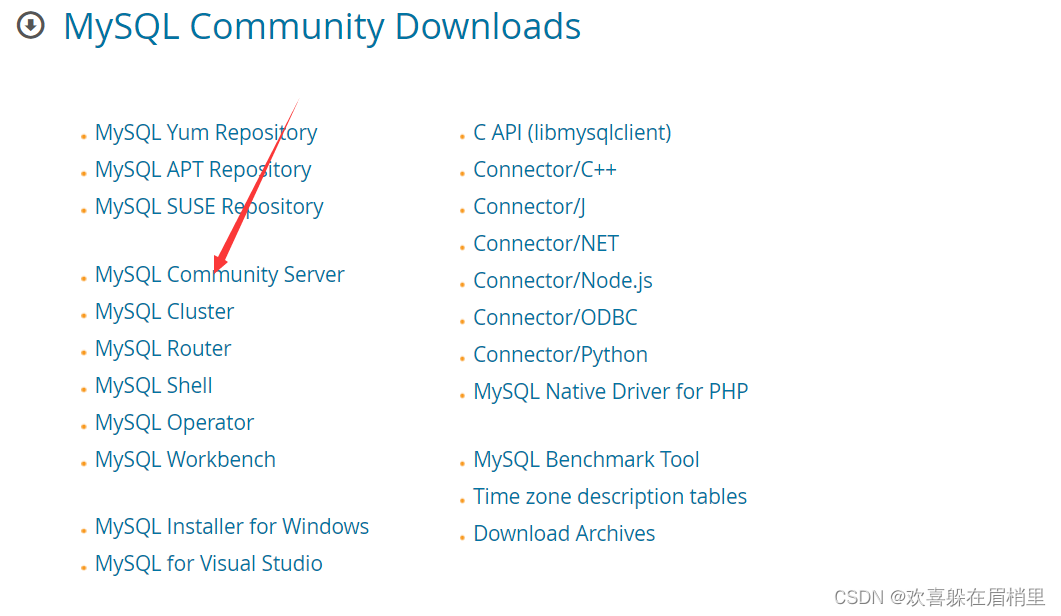
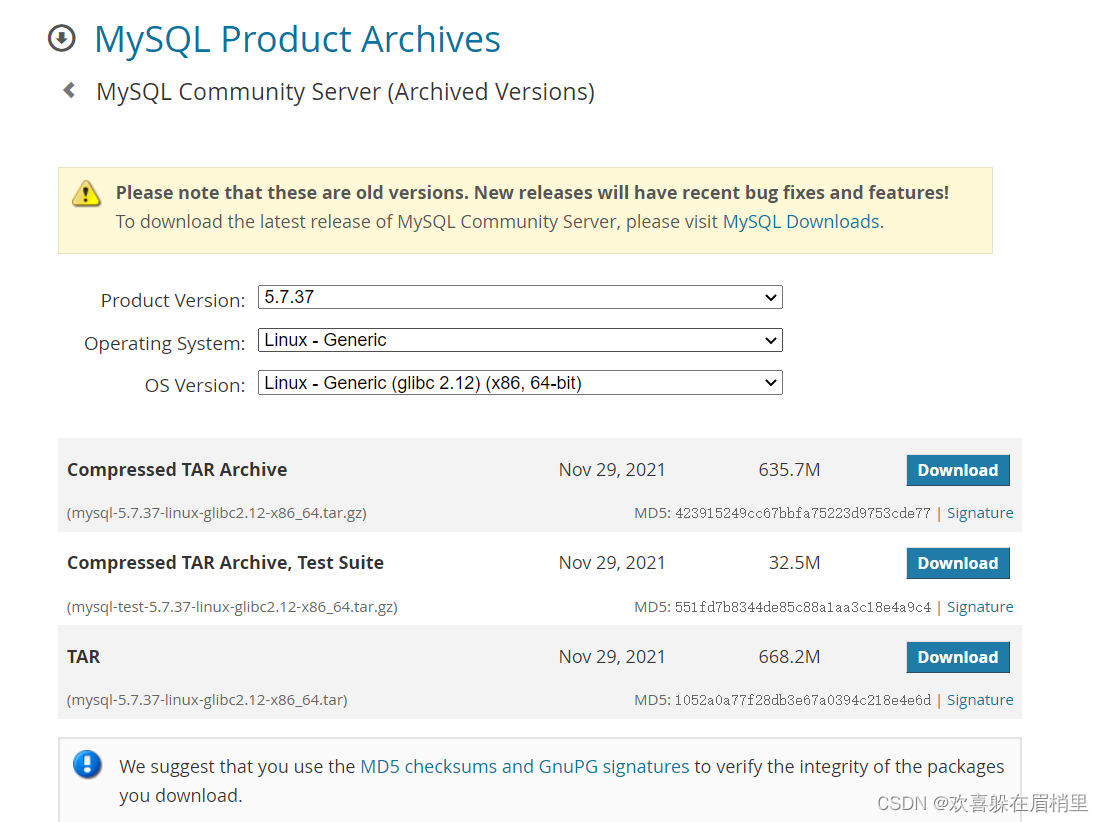
3、 选择要下载的版本,到时候使用Linux中的ftp软件上传。推荐选择5.7版本的,因为老,稳定,很多公司都在使用。
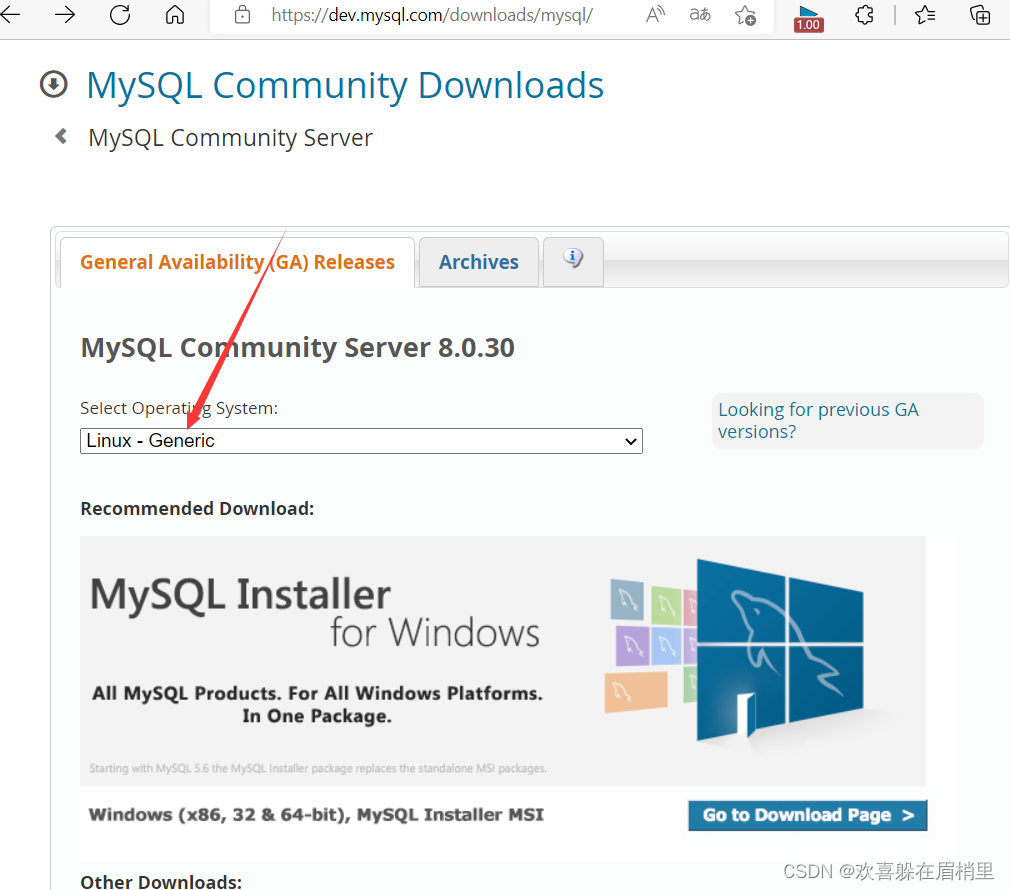
4、 然后接下来是可以根据官方文档安装到Linux中:
二、Linux中安装mysql
1、安装mysql:准备一台新的虚拟机,没有安装过mysql的。然后先使用xfs将mysql的压缩包下载到Linux中(随便的路径都可以)
2、然后先使用xfs将mysql的压缩包下载到Linux中(随便的路径都可以)。我们是实现二进制文件进行安装:也有一个脚本文件的安装。那我们待会就可以准备一台克隆机来使用脚本安装。
1、首先执行二进制文件的安装

1、修改主机名:为了方便识别
[[email protected] opt]# hostnamectl set-hostname sc-mysql
[[email protected] opt]# su - root  切换用户进行生效
上一次登录:五 7月 29 09:19:53 CST 2022从 192.168.2.118pts/0 上
2、解决软件的依赖关系。
yum install cmake ncurses-devel gcc gcc-c++ vim lsof bzip2 openssl-devel ncurses-compat-libs -y
[[email protected] ~]# yum  install cmake ncurses-devel gcc  gcc-c++  vim  lsof bzip2 openssl-devel ncurses-compat-libs -y
已加载插件:fastestmirror
Determining fastest mirrors
epel/x86_64/metalink                                                 | 6.2 kB  00:00:00
 * base: mirrors.nju.edu.cn
 * epel: mirror.sjtu.edu.cn
 * extras: mirrors.nju.edu.cn
 * updates: mirrors.nju.edu.cn
base
...
弄克隆机的时候需要先将原始机器关机,然后创建克隆机:
原始机器关机:init 0
创建好克隆机之后重新连接上。
3、安装网络工具
[[email protected] ~]# yum install net-tools -y4、解压压缩包
 tar -xf  mysql-5.7.37-linux-glibc2.12-x86_64.tar.gz
[[email protected] opt]# tar -xf  mysql-5.7.37-linux-glibc2.12-x86_64.tar.gz
[[email protected] opt]# ls
apache-zookeeper-3.6.3-bin         kafka_2.12-2.8.1.tgz
apache-zookeeper-3.6.3-bin.tar.gz  mysql-5.7.37-linux-glibc2.12-x86_64
kafka_2.12-2.8.1                   mysql-5.7.37-linux-glibc2.12-x86_64.tar.gz
5、移动mysql解压后的文件
移动mysql解压后的文件到/usr/local下改名叫mysqlusr/local/mysql 是mysql的安装目录 --门店
[[email protected] opt]#mv mysql-5.7.34-linux-glibc2.12-x86_64 /usr/local/mysql6、新建组和用户 mysql
mysql这个用户的shell 是/bin/false 属于mysql组。
useradd -r:是指创建系统用户,也就是 UID 在 1~499 之间,供系统程序使用的用户。由于系统用户主要用于运行系统所需服务的权限配置,因此系统用户的创建默认不会创建主目录。
-g 组名:手工指定用户的初始组。一般以和用户名相同的组作为用户的初始值,在创建用户会默认建立初始组。一旦手动指定,系统将不会在创建此默认的初始组目录。
[[email protected] opt]# groupadd mysql
[[email protected] opt]# useradd -r -g mysql -s /bin/false mysql
[[email protected] opt]# ll -d /data/mysql
drwxr-xr-x 2 root root 6 7月  29 11:32 /data/mysql
7、关闭firewalld防火墙服务,并且设置开机不要启动
[[email protected] opt]# service firewalld stop
Redirecting to /bin/systemctl stop firewalld.service
[[email protected] opt]# systemctl disable firewalld
8、临时关闭selinux
[[email protected] opt]# setenforce 0
setenforce: SELinux is disabled
也可以永久关闭selinux。
sed -i '/^SELINUX=/ s/enforcing/disabled/'  /etc/selinux/config
[[email protected] opt]# sed -i '/^SELINUX=/ s/enforcing/disabled/'  /etc/selinux/config
9、新建存放数据的目录 为:/data/mysql
[[email protected] opt]# mkdir  /data/mysql -p
[[email protected] opt]# ll -d /data/mysql
drwxr-xr-x 2 root root 6 7月  29 11:32 /data/mysql
10、修改/data/mysql目录的权限
修改权限归mysql用户和mysql组所有,这样mysql用户启动的mysql进程可以对这个文件夹进行读写了。只是允许mysql这个用户和mysql组可以访问,其他人都不能访问。
[[email protected] opt]#chown mysql:mysql /data/mysql/
[[email protected] opt]#chmod 750 /data/mysql/
进入/usr/local/mysql/bin目录。
[[email protected] opt]#cd /usr/local/mysql/bin/11、初始化mysql
--initialize :初始化 --- basedir:基地 将生成的临时密码重定向到 &>passwd.txt
./mysqld --initialize --user=mysql --basedir=/usr/local/mysql/ --datadir=/data/mysql &>passwd.txt
一定要记住自己的临时密码:密码为最后一行。
[[email protected] bin]# ./mysqld  --initialize --user=mysql --basedir=/usr/local/mysql/  --datadir=/data/mysql
2022-07-29T03:36:45.934736Z 0 [Warning] TIMESTAMP with implicit DEFAULT value is deprecated. Please use --explicit_defaults_for_timestamp server option (see documentation for more details).
........
2022-07-29T03:36:47.113350Z 1 [Note] A temporary password is generated for [email protected]: ptogEfkPM8:f扩展知识:[email protected]: mysql里的超级用户root只能在本机上登录
比如[email protected] sc这个用户只能在192.168.2.132 sc这台服务器上登录进入mysql
12、让mysql支持ssl方式登录的设置
./mysql_ssl_rsa_setup --datadir=/data/mysql/
[[email protected] bin]# ./mysql_ssl_rsa_setup --datadir=/data/mysql/
13、修改PATH变量
进入mysql bin目录的路径。
临时修改PATH变量的值:
export PATH=/usr/local/mysql/bin/:$PATH
[[email protected] bin]# export PATH=/usr/local/mysql/bin/:$PATH
重新启动linux系统后也生效,永久修改,让root用户也能使用。
[[email protected] bin]# echo  'PATH=/usr/local/mysql/bin:$PATH' >>/root/.bashrc
[[email protected] bin]# pwd
/usr/local/mysql/bin
14、复制support-files里的mysql.server文件到/etc/init.d/目录下叫mysqld
[[email protected] bin]# cp ../support-files/mysql.server /etc/init.d/mysqld修改/etc/init.d/mysqld脚本文件里的datadir目录的值。
[[email protected] bin]# vim /etc/init.d/mysqld   #手动修改
[[email protected] bin]# sed  -i '70c  datadir=/data/mysql'  /etc/init.d/mysqld  #直接命令修改
15、生成/etc/my.cnf配置文件
[[email protected] bin]# cat  >/etc/my.cnf  <<EOF
> [mysqld_safe]
>
> [client]
> socket=/data/mysql/mysql.sock
>
> [mysqld]
> socket=/data/mysql/mysql.sock
> port = 3306
> open_files_limit = 8192
> innodb_buffer_pool_size = 512M
> character-set-server=utf8
>
> [mysql]
> auto-rehash
> prompt=\\[email protected]\\d \\R:\\m  mysql>
> EOF
16、修改内核的open file的数量
[[email protected] bin]#ulimit -n 1000000扩展: ulimit -a 查看内核的open file的数量。
[[email protected] bin]# ulimit -a  查看内核的open file的数量
core file size          (blocks, -c) 0
data seg size           (kbytes, -d) unlimited
scheduling priority             (-e) 0
file size               (blocks, -f) unlimited
pending signals                 (-i) 3795
max locked memory       (kbytes, -l) 64
max memory size         (kbytes, -m) unlimited
open files                      (-n) 1024
pipe size            (512 bytes, -p) 8
POSIX message queues     (bytes, -q) 819200
real-time priority              (-r) 0
stack size              (kbytes, -s) 8192
cpu time               (seconds, -t) unlimited
max user processes              (-u) 3795
virtual memory          (kbytes, -v) unlimited
file locks                      (-x) unlimited
17、设置开机启动的时候也配置生效
[[email protected] bin]# echo "ulimit -n 1000000" >>/etc/rc.local
[[email protected] bin]# chmod +x /etc/rc.d/rc.local
18、将mysqld添加到linux系统里服务管理名单里
/sbin/chkconfig --add mysqld
[[email protected] bin]# chkconfig --add mysqld
19、 设置mysqld服务开机启动
/sbin/chkconfig mysqld on
[[email protected] bin]# chkconfig mysqld on
#新式chkconfig mysql on
#chkconfig --list可以查看
[[email protected] bin]# chkconfig --list
注:该输出结果只显示 SysV 服务,并不包含
原生 systemd 服务。SysV 配置数据
可能被原生 systemd 配置覆盖。

      要列出 systemd 服务,请执行 'systemctl list-unit-files'。
      查看在具体 target 启用的服务请执行
      'systemctl list-dependencies [target]'。

mysqld         	0:关	1:关	2:开	3:开	4:开	5:开	6:关
netconsole     	0:关	1:关	2:关	3:关	4:关	5:关	6:关
network        	0:关	1:关	2:开	3:开	4:开	5:开	6:关
20、启动mysqld进程
service mysqld start
[[email protected] bin]# service mysqld start
Starting MySQL.Logging to '/data/mysql/sc-mysql.err'.
 SUCCESS!
查看进程是否启动:
[[email protected] bin]# ps -ef|grep mysql21、进入mysql,使用刚刚的临时密码
[[email protected] bin]# mysql -uroot -p'ptogEfkPM8:f'
mysql: [Warning] Using a password on the command line interface can be insecure.
Welcome to the MySQL monitor.  Commands end with ; or \g.
Your MySQL connection id is 2
Server version: 5.7.37
22、进入数据之后修改密码
set password='Sanchuang123#';
修改root用户的密码为Sanchuang123#
[email protected](none) 11:59  mysql>set password='Sanchuang123#';
Query OK, 0 rows affected (0.00 sec)
检验上一步修改密码是否成功,如果有输出能看到mysql里的数据库。
[email protected](none) 12:01  mysql>show databases;
+--------------------+
| Database           |
+--------------------+
| information_schema |
| mysql              |
| performance_schema |
| sys                |
+--------------------+
4 rows in set (0.00 sec)
然后使用init 6 重新启动机器,然后使用修改后的密码进行登录,如果成功登录。那就说明密码修改成功:
[[email protected] ~]# mysql -uroot -p'Sanchuang123#'
mysql: [Warning] Using a password on the command line interface can be insecure.
Welcome to the MySQL monitor.  Commands end with ; or \g.
Your MySQL connection id is 2
Server version: 5.7.37 MySQL Community Server (GPL)
查看数据库中的有哪些数据库:
[email protected](none) 12:03  mysql> show databases;
+--------------------+
| Database           |
+--------------------+
| information_schema |
| mysql              |
| performance_schema |
| sys                |
+--------------------+
4 rows in set (0.00 sec)
如果出现这样就说明安装成功了。
如果觉得在命令行执行命令安装步骤比较多的话,可以通过编写一个脚本来执行安装:
边栏推荐
猜你喜欢

随机推荐
无胁科技-TVD每日漏洞情报-2022-7-26
Unity的程序集Assembly 与 加快代码编译速度
【LeetCode-69】x的平方根
OpenGL中glGenBuffers glBindBuffer glBufferData的理解
【剑指offer系列】面试题日记(前期题)
2022年全国职业技能大赛网络安全竞赛试题B模块自己解析思路(3)
Vulnhub靶机--DC8
stegano
【转】Unity 内置渲染管线、SRP、URP、HDRP区别
[HTB]渗透Backdoor靶机
Lua 协同程序(coroutine)
Threatless Technology-TVD Daily Vulnerability Intelligence-2022-7-22
2022年全国职业技能大赛网络安全竞赛试题B模块自己解析思路(7)
vulnhub靶机--6Day_Lab-v1.0.1
Deep Learning Matlab Toolbox Code Comments
C# 基础之字典——Dictionary(二)
Django QuerySet.order_by() SQL注入漏洞复现
SSL证书为什么要选付费?
Lua 快速入门(四)——多脚本执行
【LeetCode-278】第一个错误的版本