当前位置:网站首页>Maykel Studio - Django Web Application Framework + MySQL Database Fourth Training
Maykel Studio - Django Web Application Framework + MySQL Database Fourth Training
2022-08-11 06:16:00 【C_yyy89】
前言
本文记录梅科尔工作室IoT组DjangoWeb 应用框架+MySQLDatabase fourth training notes,主要包括DJangoProject catalogue,以及前后端交互的实现.这里感谢潘学姐的讲解!Invincible thanks!
1、DJangoProject document sorting
这里使用的是MySQL数据库,So it needs to be in the main folder__init__.py导入pymysql
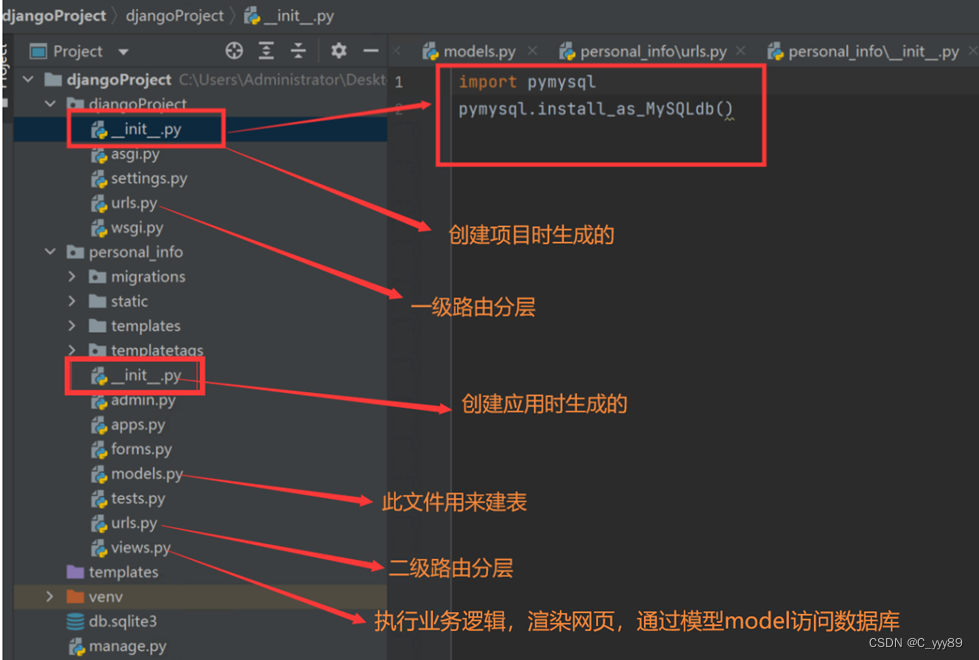
- settings.py 是项目的整体配置文件
- urls.py 是项目的URL配置文件
- wsgi.py 是项目与WSGI兼容的Web服务器入口
- manage.py 是项目管理文件,通过它管理项目
其中settings.pyThe file is the configuration connectionmysql数据库的文件,如下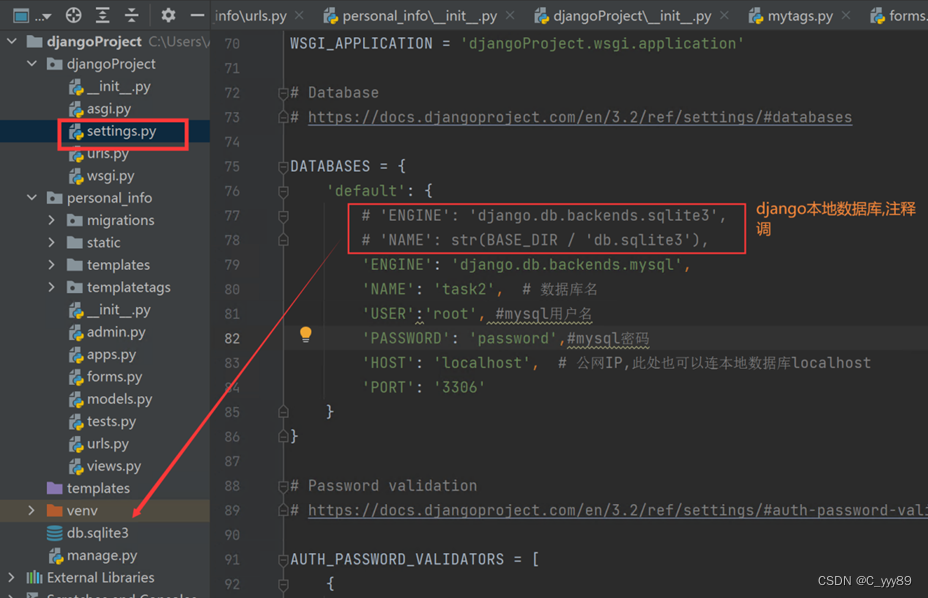
1.1 ALLOWED_HOSTS =[‘*’]
ALLOWED_HOSTS =[‘*’]可以使所有的网址都能访问Django项目了,during project testing,可以这么干,但是安全性差,下面是解决办法,参考此链接
(17条消息) Django设置ALLOWED_HOSTS后,依然不能被其他电脑通过ip访问_南国韭菜的博客-CSDN博客_allowed_hosts django
其他需要注意的细节:
1.Remember to put the createdappadd onsettings里面,In this way, the table can be built normally.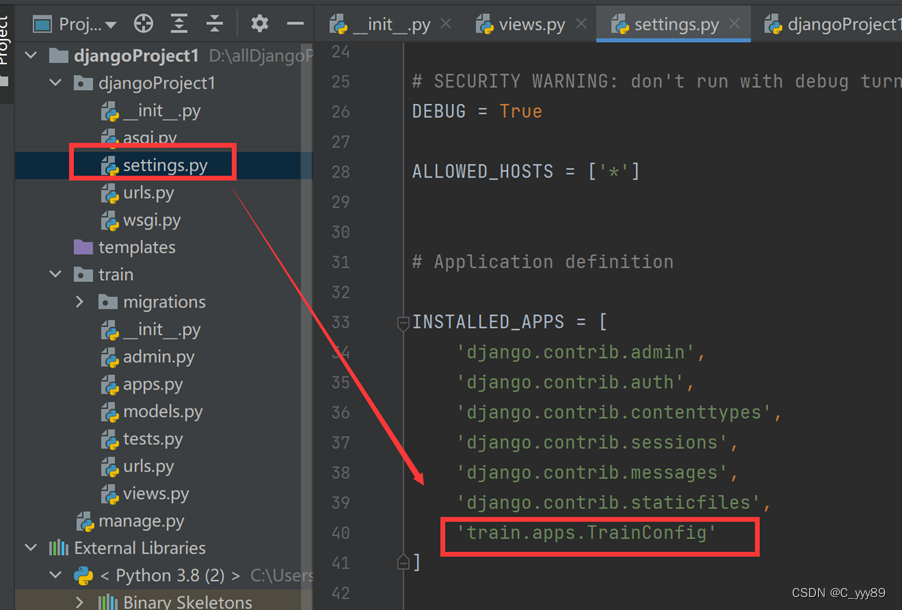
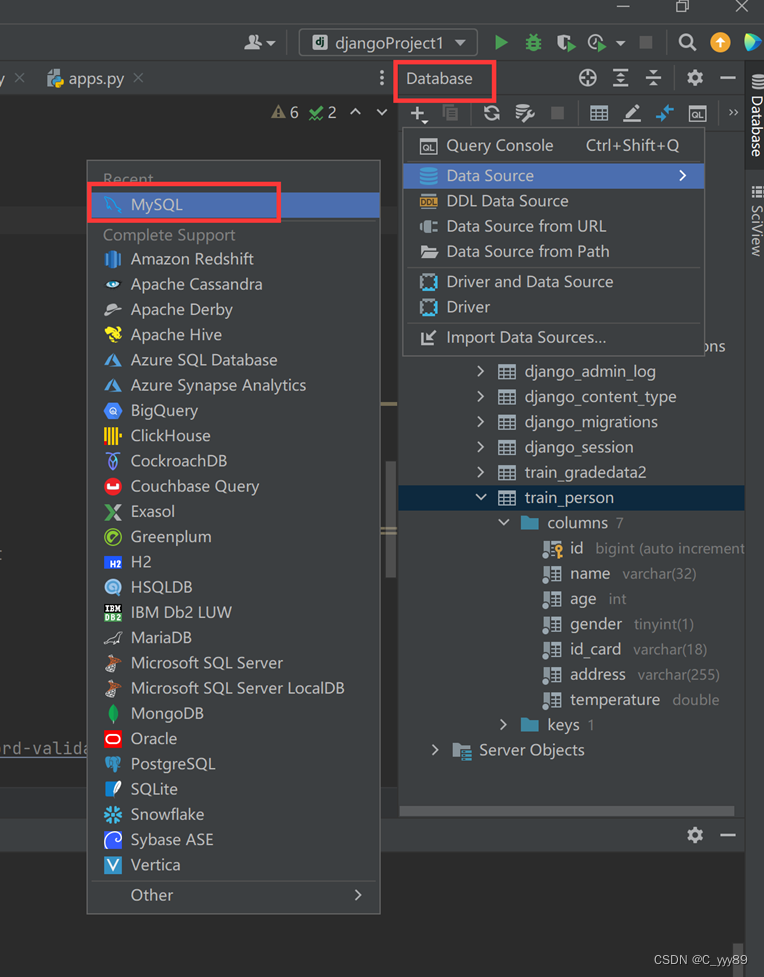
可以使用pycharm直接连接 MySQL
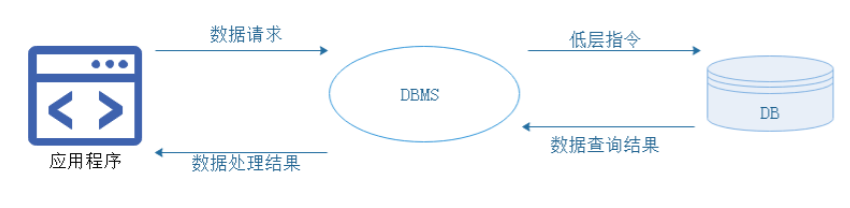
2. 前后端交互
2.1.前端的实现
准备工作,安装node.js,参考下面的文章
(17条消息) nodejs安装和环境配置-Windows_Seven-Dimensional Brain Blog-CSDN博客_nodejs安装及环境配置
Mainly because of the installationqs.stringify,所以装上node.js
安装qs.stringify
npm install qs 和 npm install querystringFirst run as administratorcmd,The second source of data is foreign countries,So use kitty.
qs.stringify和JSON.parse()的不同:
qs.stringify把一个参数对象格式化为一个字符串,将对象 序列化成 URL 的形式(a=b&c=d),以&进行拼接
JSON.parse() 方法用来解析JSON字符串,将JSON字符串转换为JSON对象(把key=value连接字符串转成对象,如:name=hehe&ange=10==>{name:'hehe', ange:10}
2.2.Config.json配置
The following two places need to be modified,Open the network request configuration
1.
"deviceConfig": {
  "default": {
    "process": "com.huawei.hiworld.example",
    "supportBackup": false,
    "network": {
      "cleartextTraffic": true
    }

2.
"reqPermissions": [
  {
    "name": "ohos.permission.GET_NETWORK_INFO"
  },
  {
    "name": "ohos.permission.SET_NETWORK_INFO"
  },
  {
    "name": "ohos.permission.INTERNET"
  }
],
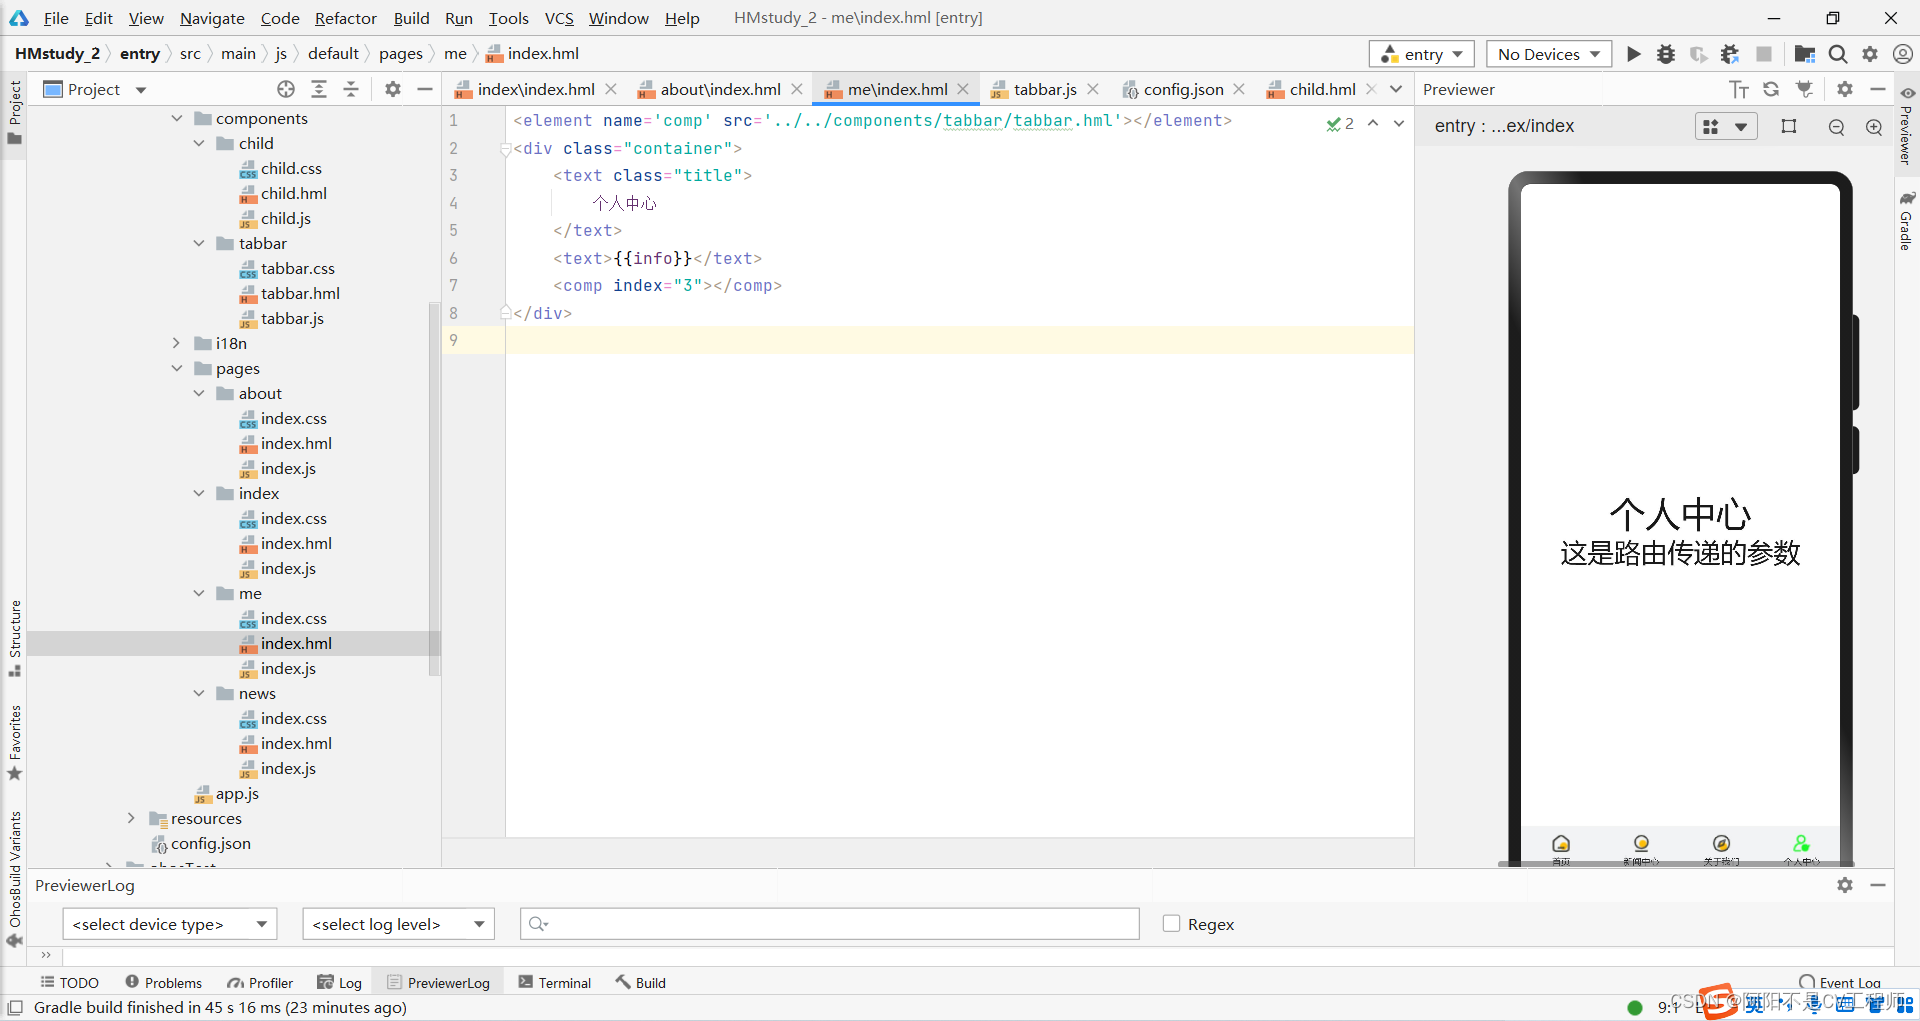
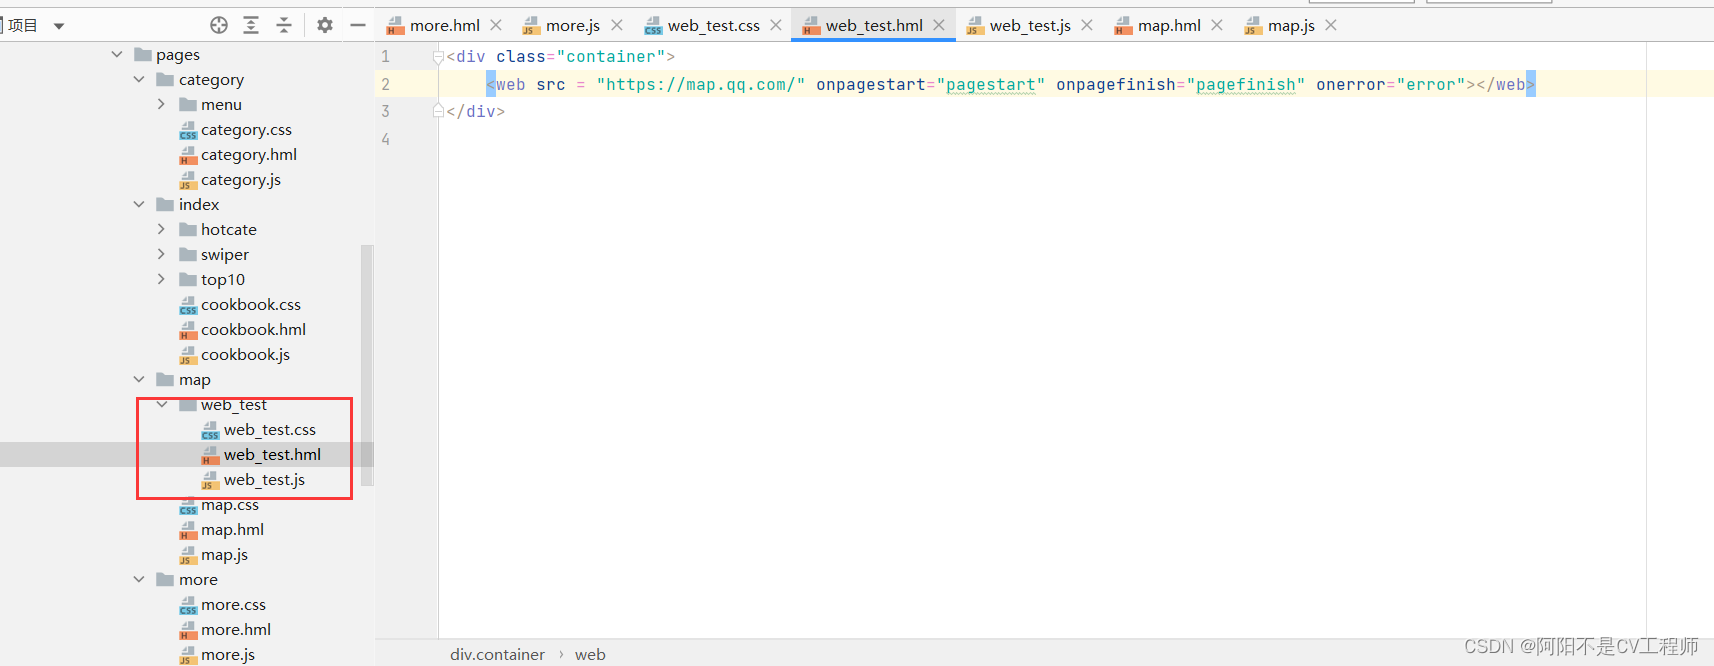
2.3.前端JS代码
主要是onClickThe back-end data acquisition in the method,路径一定要和DjangoCorresponds to what is written in!
import router from '@system.router';
import fetch from '@system.fetch';
import qs from 'querystring';

export default {
    data:{
        winfo:""
    },
    onClick(){
        fetch.fetch({
            url:'', //后端路径
            data: qs.stringify({'id':'1'}),//验证,将字符串转发给后端,后端会受到这个请求
            responseType:"json",//请求的参数类型
            method:"POST",
            success:(resp)=>
            {
                this.winfo = resp.data;//令获取到的后端数据赋给winfo
                console.log("返回的数据:"+this.winfo);//打印出数据

            },
            fail:(resp)=>
            {
                this.winfo = resp.data;
                console.log("获取数据失败:"+this.winfo)
            }

        });
    }
}
注意:DevEco所需node.js版本是14.19-15.00,Other versions cannot be used,另外,DevEcoIf the environment is not configured properly,Solve it by creating a new project file,The environment is very important.
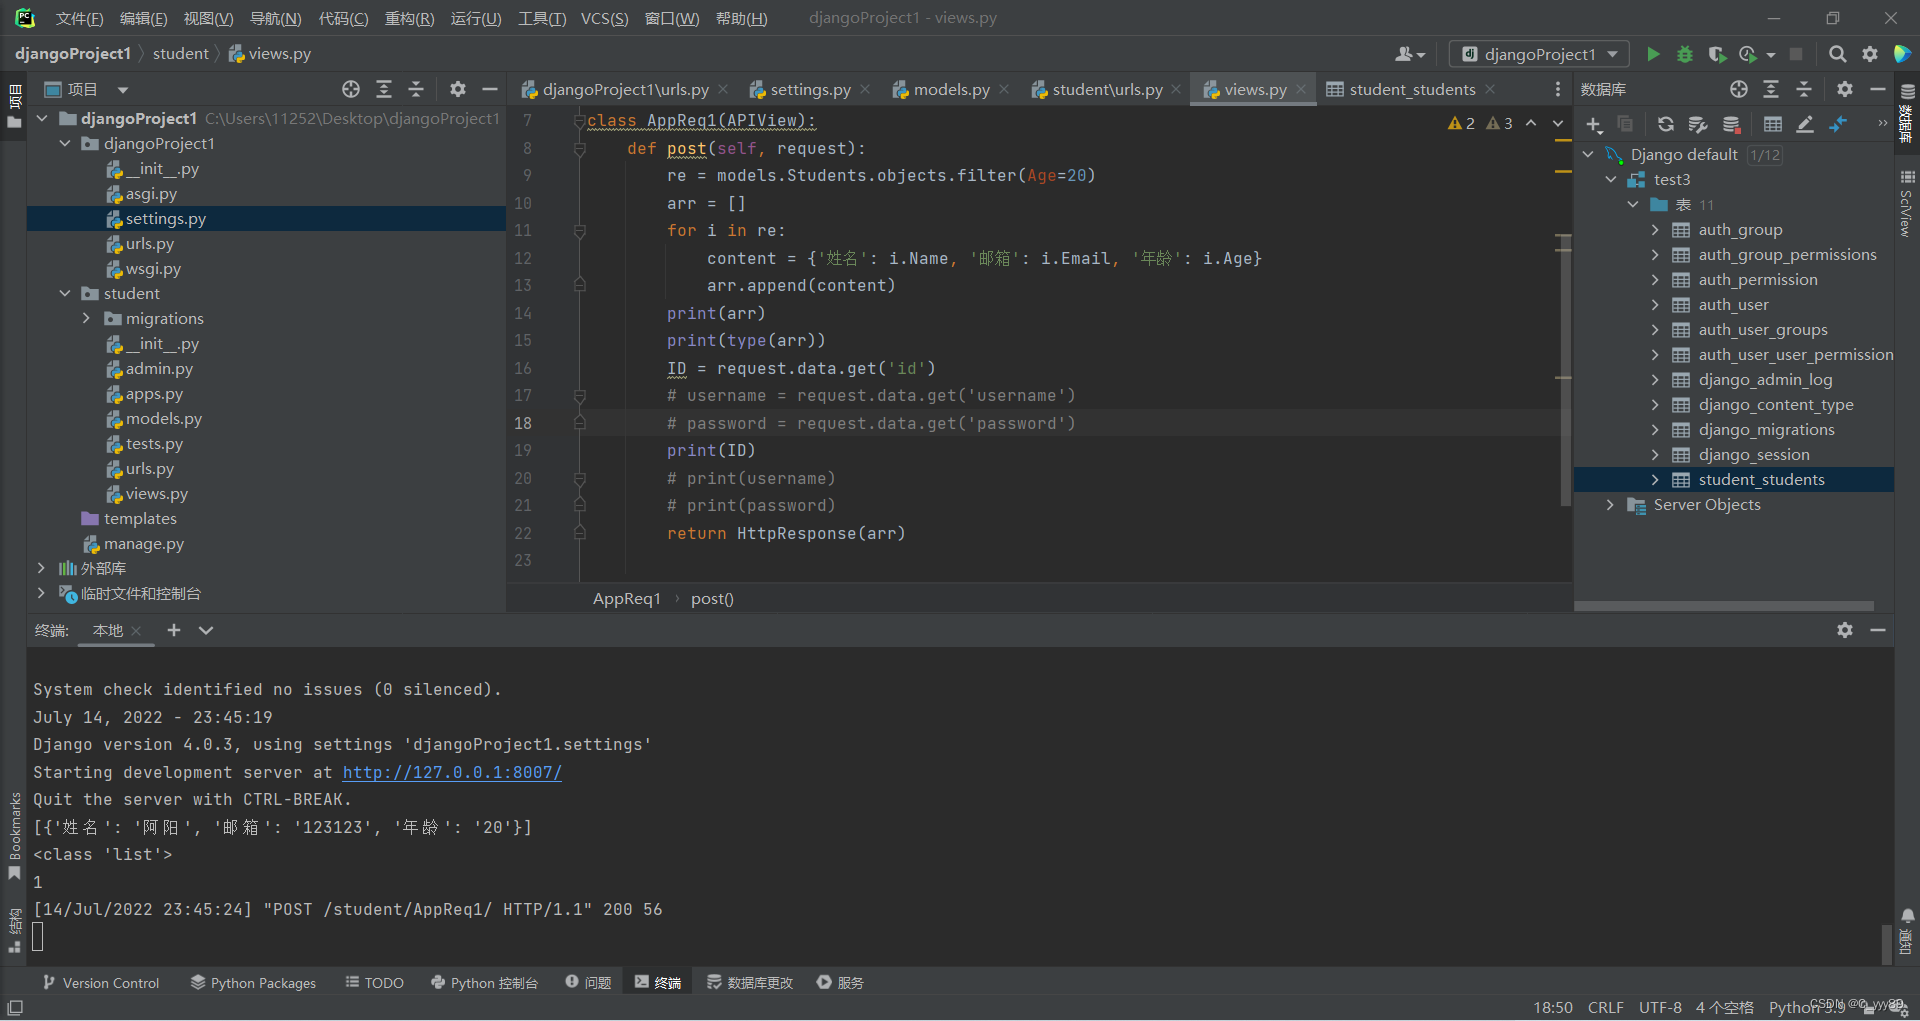
2.4.后端Django代码
student app下的views.pyclass for file writing,Be careful when getting datamodels.py对应上
from django.shortcuts import render
from django.http import HttpResponse
from django.shortcuts import render
from student import models
from rest_framework.views import APIView

class AppReq1(APIView):
    def post(self, request):
        re = models.Students.objects.filter(Age=20)//注意re不能写成request,会报错
        arr = []
        for i in re:
            content = {'姓名': i.Name, '邮箱': i.Email, '年龄': i.Age}
            arr.append(content)
        print(arr)
        print(type(arr))
        ID = request.data.get('id')
        # username = request.data.get('username')
        # password = request.data.get('password')
        print(ID)
        # print(username)
        # print(password)
        return HttpResponse(arr)
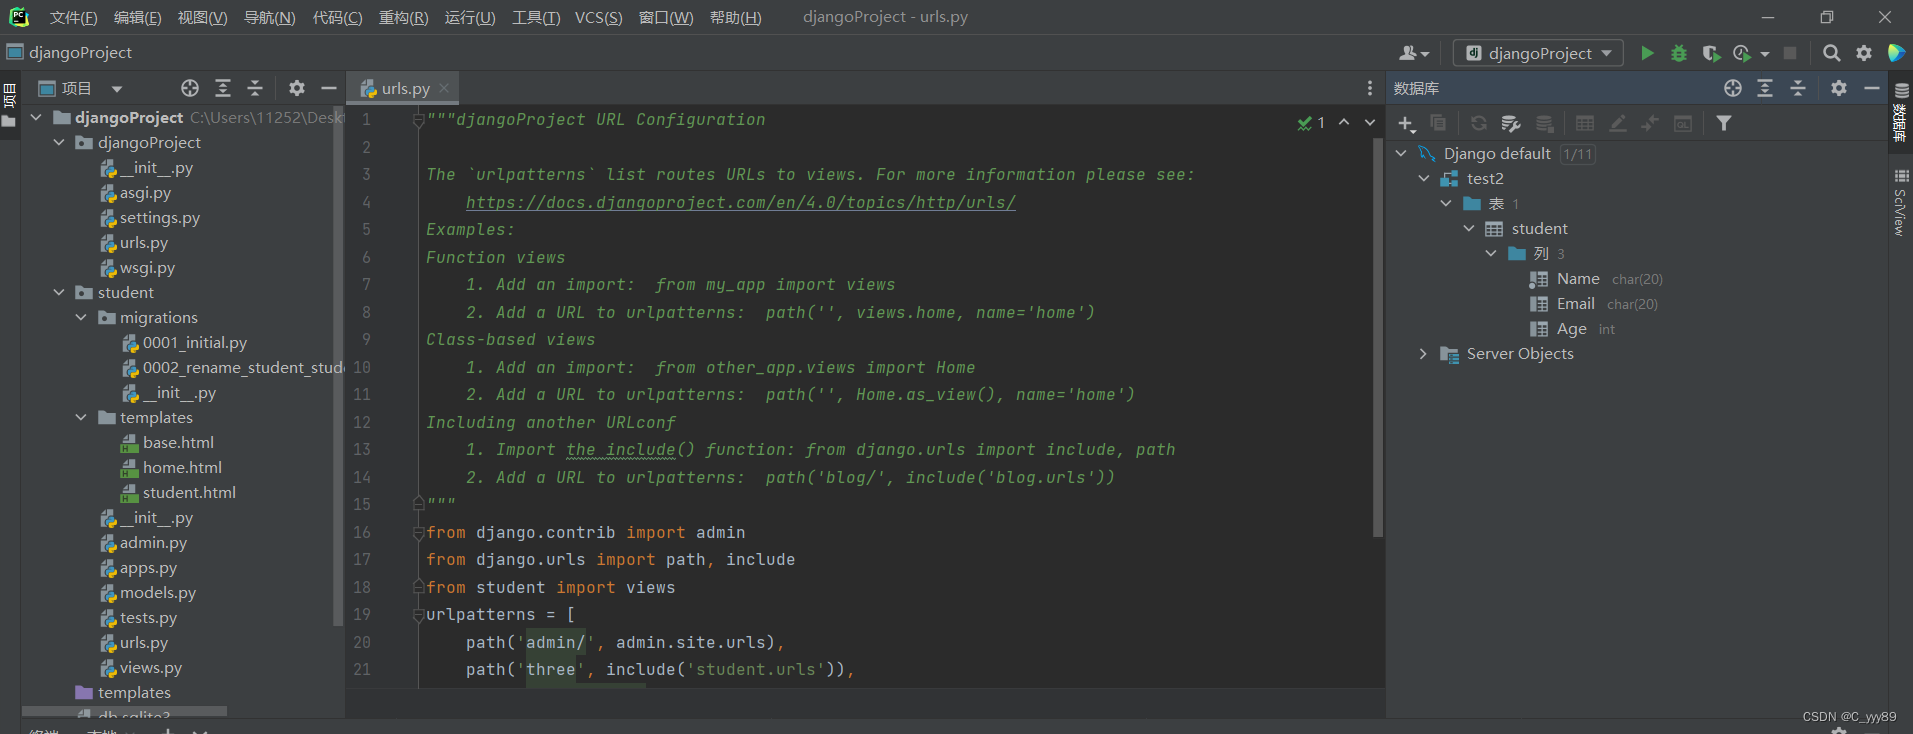
under the main fileurls.py文件代码
from django.contrib import admin
from django.urls import path
from django.contrib import admin
from django.urls import path, include
from student import views
from student import urls as student_urls
urlpatterns = [
    path('admin/', admin.site.urls),
    path('student/', include(student_urls, namespace='student')),

]
student app下的urls.py文件
from django.urls import path
from . import views
from student.views import AppReq1
app_name ='student'
urlpatterns = [
    path('AppReq1/', AppReq1.as_view()),

]
效果展示如下: 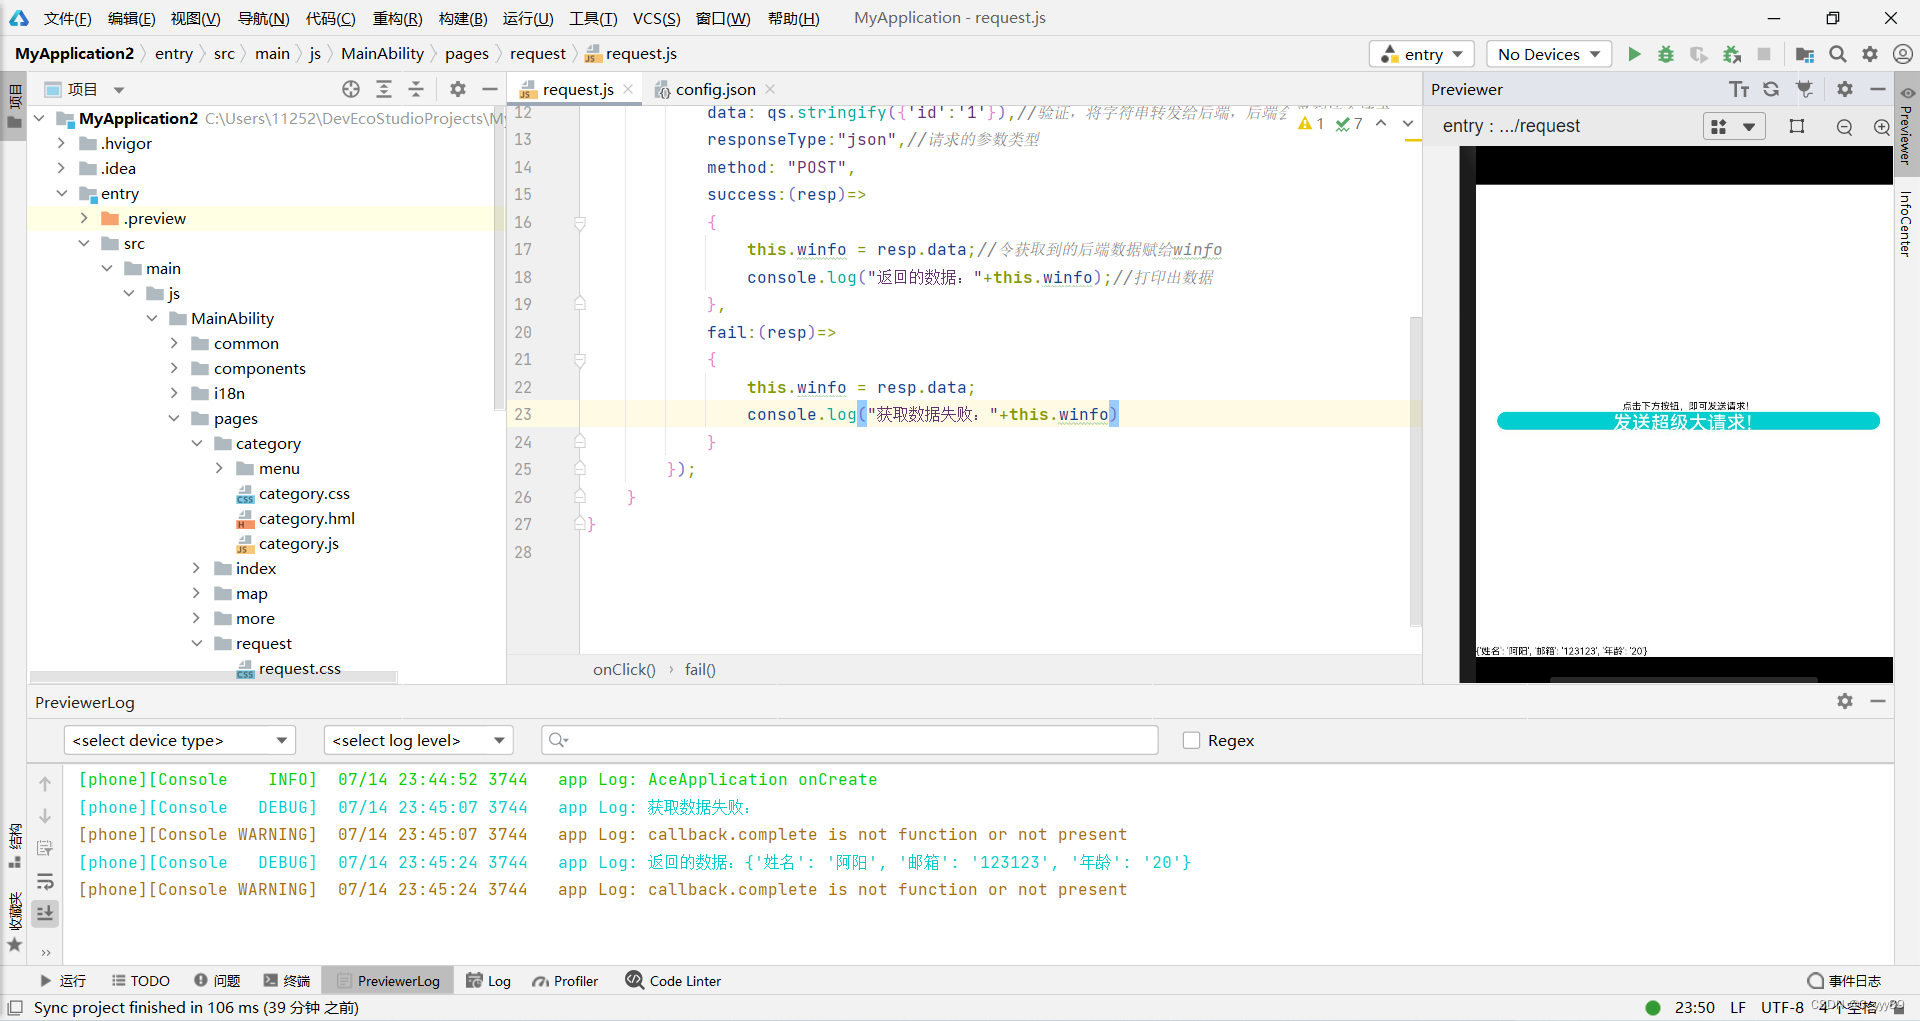
总结
今日踩坑,Don't step on it tomorrow,Thanks to my sister Pan for helping!
边栏推荐
猜你喜欢
CVPR2022——A VERSATILE MULTI-VIEW FRAMEWORK

【转载】图表:数读2022年上半年国民经济
Severe Weather 3D Object Detection Dataset Collection
数据库基础-入门看这篇

梅科尔工作室-DjangoWeb 应用框架+MySQL数据库第五次培训

SQL注入
Reconstruction and Synthesis of Lidar Point Clouds of Spray
Maykle Studio - Second Training in HarmonyOS App Development
梅科尔工作室-HarmonyOS应用开发第四次培训
安全帽识别
随机推荐
Redis分布式锁
梅科尔工作室-HarmonyOS应用开发第一次培训
emqx创建规则引擎写入tDengine
TAMNet: A loss-balanced multi-task model for simultaneous detection and segmentation
RecycleView
CNN-based Point Cloud De-Noising
>>技术应用:*aaS服务定义
梅科尔工作室-深度学习第二讲 BP神经网络
Joint 3D Instance Segmentation and Object Detection for Autonomous Driving
mysql 间隙锁(GAP-LOCK)演示
Pay “Attention” to Adverse Weather
SQL注入
经纬度距离
Nodered系列—写入tDengine超级表,自动创建子表
NodeRed系列—创建mqtt broker(mqtt服务器),并使用mqttx进行消息发送验证
GBase数据库监控
OSI TCP/IP学习笔记
通过字符设备虚拟文件系统实现kernel和userspace数据交换(基于kernel 5.8测试通过)
AI-based intelligent image recognition: 4 different industry applications
华为adb wifi调试断线问题解决