当前位置:网站首页>Robocode tutorial 7 - Radar locking
Robocode tutorial 7 - Radar locking
2022-04-23 18:08:00 【dawnsun001】
In this tutorial , We're going to write such a code , It will keep the enemy from escaping our eyes . Radar locking is the basis of an efficient combat robot , because robot Only execute onScannedRobot Method , We can get information about the enemy , and onScannedRobot The method will only be called after our radar scans the enemy , Of course , The procedure called is automatic .
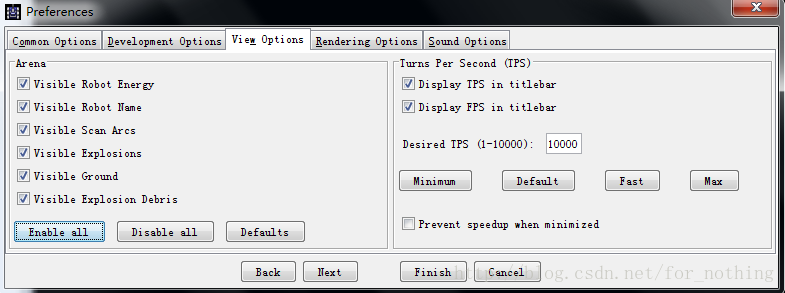
Radar is a ray centered on a robot , In order to be more intuitive , We'd better turn on the radar graphic display , The method is :
Get into robocode, open Options-> Preferences->viewoptions, Check Visible Scan Arcs
Remember ours Enemy Class? ? It plays a vital role in our robot . So if you're not familiar with it class Enemy You'd better go and have a look first .
stay Enemy There is one in the class direction Variable , Its value is :
direction= bearingRadian+ me.getHeadingRadians();

As this picture shows , I understand direction Variable , Radar locking is simple .
The radar scan is actually a line , When the scan line reaches the target , Trigger onScannedRobot event , Update current data , Include direction. When the program is executed to onScannedRobot Code in , The angle of the radar scan line getRadarHeadingRadians() Has been and direction Deviate from . In order to lock the target , We can scan the radar in the opposite direction . Because the radar rotates very fast , and getRadarHeadingRadians() and direction The offset of is not large , Robots are of a certain size . So the scanning line sweeps back and forth on the target , Radar locking is realized .
public voidonScannedRobot(ScannedRobotEvent e) {
enemy.update(e,this);
doubleOffset = rectify( enemy.direction-getRadarHeadingRadians() );
setTurnRadarRightRadians( Offset * 1.5);
}
This is ours onScannedRobot Method ,enemy.updata(e,this); Is to call our enemy Methods in objects , Update enemy information , Of course , Forget a little , before this , We need to generate a enemy object , The specific method is :
Enemy enemy = new Enemy();
Let's explain here rectify Method , Its function is to correct the angle , because direction Minus the orientation of our radar , It may be greater than 180 Degrees or less -180 degree , For example, when it is greater than 180 When the degree of , The angle of rotation we need is not that big , Just turn the direction by an angle . This rectify It's easy , When applied a lot later . Its code is :
public double rectify ( doubleangle )
{
if ( angle < -Math.PI )
angle += 2*Math.PI;
if ( angle > Math.PI )
angle -= 2*Math.PI;
return angle;
}
In the code ,enemy.direction -getRadarHeadingRadians() Is the offset that the radar needs to rotate . Suppose the radar scans clockwise before , that enemy.direction slightly smaller than getRadarHeadingRadians(), Negative . the rectify() After the method is corrected, it is the value to be rotated . And then use setTurnRadarRightRadians Rotating radar , The degree of rotation is offset 1.5 times , because RadarOffset Negative , So scan in the opposite direction , Ensure that whatever the goal
How to move , The scan line is always on the target . above 1.5 You can change to 2,3 Equal number . When you are in Options Open in Visible Scan Arcs After the options , You can see the Green fan , The multiple is 1.5 When , Like a line , And the multiple is 2,3 You can see that it looks like a fan .
In addition, let's talk about two other pieces of code :
setAdjustGunForRobotTurn( true );
setAdjustRadarForGunTurn( true );
Their function is to make the radar 、 artillery 、 Body movement is independent , Specific reference API manual .
At this point, our radar scanning code is completed , Run and try our “ Observer ” Well !!

attach : Observer complete code :
package cm;
import java.awt.*;
import robocode.*;
public class ObserverRobo extends AdvancedRobot
{
Enemy enemy= newEnemy();
public static double PI = Math.PI;
public void run()
{
setAdjustGunForRobotTurn(true);
setAdjustRadarForGunTurn( true );
this.setColors(Color.red, Color.blue, Color.yellow, Color.black, Color.green);
while(true){
if(enemy.name == null){
setTurnRadarRightRadians(2*PI);
execute();
}
else{
execute();
}
}
}
public void onScannedRobot(ScannedRobotEvent e)
{
enemy.update(e,this);
double Offset = rectify( enemy.direction -getRadarHeadingRadians() );
setTurnRadarRightRadians( Offset *1.5);
}
// Angle correction method , important
public double rectify ( doubleangle )
{
if ( angle < -Math.PI )
angle += 2*Math.PI;
if ( angle > Math.PI )
angle -= 2*Math.PI;
return angle;
}
public class Enemy {
public double x,y;
public String name = null;
public double headingRadian = 0.0D;
public double bearingRadian = 0.0D;
public double distance = 1000D;
public double direction = 0.0D;
public double velocity = 0.0D;
public double prevHeadingRadian = 0.0D;
public double energy = 100.0D;
public void update(ScannedRobotEvent e,AdvancedRobotme){
name = e.getName();
headingRadian =e.getHeadingRadians();
bearingRadian = e.getBearingRadians();
this.energy = e.getEnergy();
this.velocity = e.getVelocity();
this.distance = e.getDistance();
direction = bearingRadian +me.getHeadingRadians();
x = me.getX() + Math.sin( direction ) * distance;
y= me.getY() + Math.cos( direction ) * distance;
}
}
}
版权声明
本文为[dawnsun001]所创,转载请带上原文链接,感谢
https://yzsam.com/2022/04/202204230544289419.html
边栏推荐
- PowerDesigner various font settings; Preview font setting; SQL font settings
- cv_ Solution of mismatch between bridge and opencv
- 7-21 wrong questions involve knowledge points.
- NVIDIA Jetson: GStreamer and openmax (GST OMX) plug-ins
- Array rotation
- Clion installation tutorial
- Reptile efficiency improvement method
- Excel opens large CSV format data
- From source code to executable file
- powerdesigner各种字体设置;preview字体设置;sql字体设置
猜你喜欢
C network related operations
Transfer learning of five categories of pictures based on VGg

2022江西光伏展,中国分布式光伏展会,南昌太阳能利用展
Using files to save data (C language)
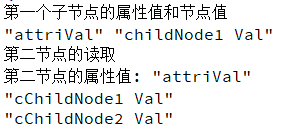
Qt读写XML文件(含源码+注释)

.105Location
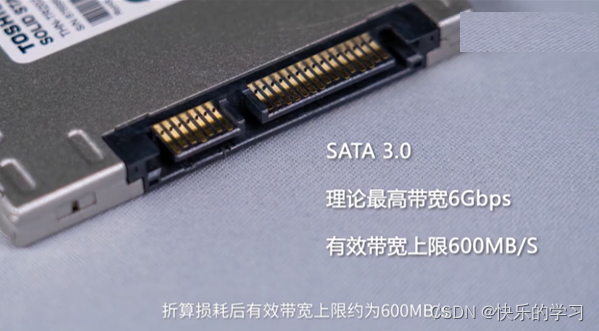
SSD硬盘SATA接口和M.2接口区别(详细)总结

Implementation of image recognition code based on VGg convolutional neural network
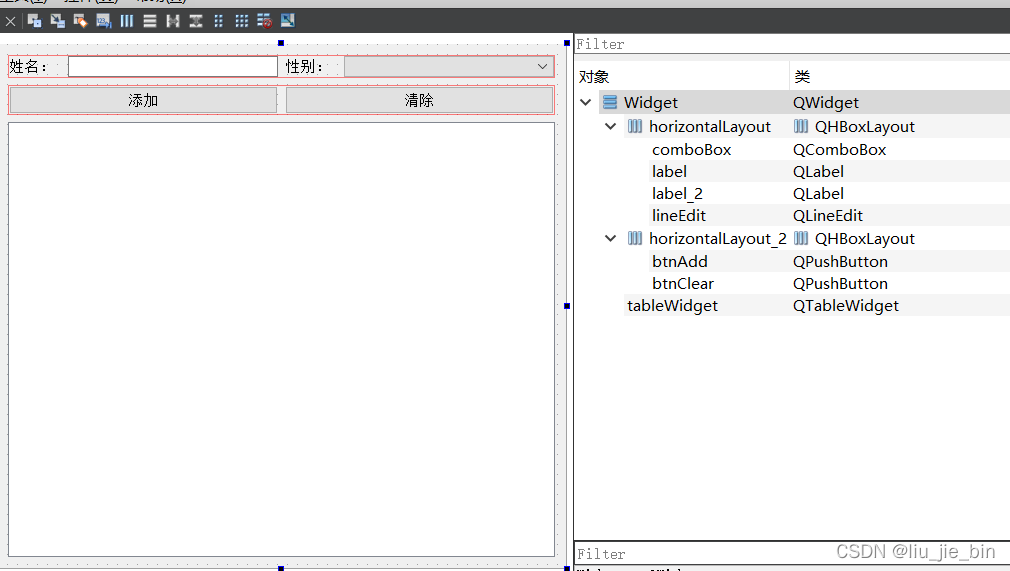
QTableWidget使用讲解

Romance in C language
随机推荐
C language array processing batch data
GDAL + ogr learning
Selenium + webdriver + chrome realize Baidu to search for pictures
Crack sliding verification code
Nat Commun|在生物科学领域应用深度学习的当前进展和开放挑战
Crawler for querying nicknames and avatars based on qqwebapi
Yolov4 pruning [with code]
2022江西光伏展,中国分布式光伏展会,南昌太阳能利用展
Go language JSON package usage
Nanotechnology + AI enabled proteomics | Luomi life technology completed nearly ten million US dollars of financing
Using files to save data (C language)
Selenium + phantom JS crack sliding verification 2
Data stream encryption and decryption of C
2022 Jiangxi energy storage technology exhibition, China Battery exhibition, power battery exhibition and fuel cell Exhibition
C byte array (byte []) and string are converted to each other
Crawl lottery data
.105Location
The difference between deep copy and shallow copy
Go的Gin框架学习
C network related operations