当前位置:网站首页>How does matlab draw the curve of known formula and how does excel draw the function curve image?
How does matlab draw the curve of known formula and how does excel draw the function curve image?
2022-04-23 17:09:00 【Hua Weiyun】
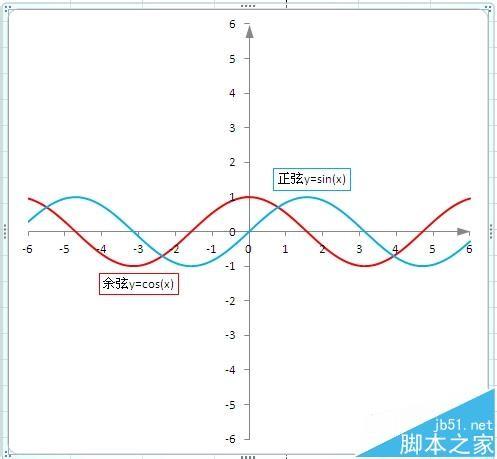
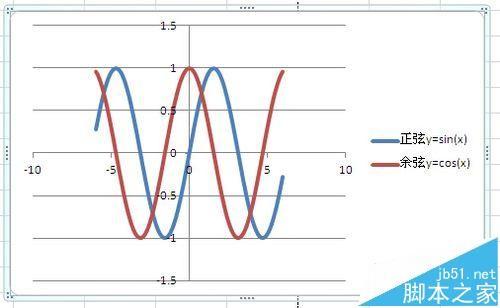
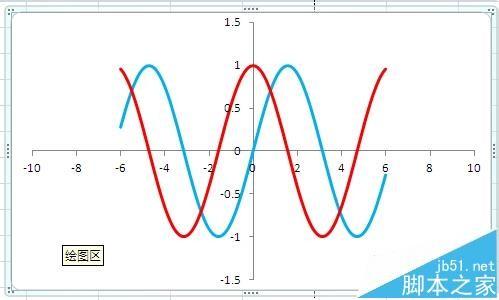
Friends must encounter the problem of drawing function curves ! If you want to draw a function curve quickly and accurately , Can use EXCEL The chart function of , It can make your curves both standard and beautiful . You can also put multiple function images into the same chart for comparison . As shown in the figure below, it is in Excel Positive drawn in 、 Cosine function image :
One 、 Prepare the data
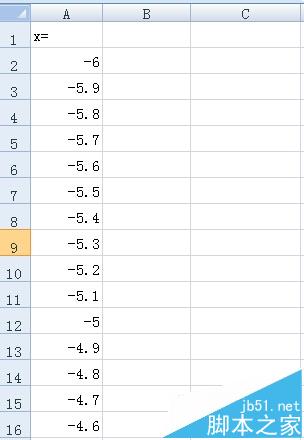
1、 First, according to the function expression Prepare a set of data , Then use the data to draw the function image in the chart . In this example, the data is placed in the area A:C In the column , among A The value in the column is the value of the function argument , stay A Column A1 Cell input "X=", Indicates that this is an independent variable ,A2、A3 And the following cells, input each value of the independent variable from small to large , When actually entering , The input method of equal difference sequence is usually used . How to determine the initial value of the independent variable , Value range , What is the step size between data points , This is to judge according to the specific characteristics of the function . If you want to quickly find the extreme value of the function or see its development trend , The given data points do not have to be equal difference , Can be given as needed . Pictured , The value range I use for drawing is [-6,6], The interval between values is “0.1”.
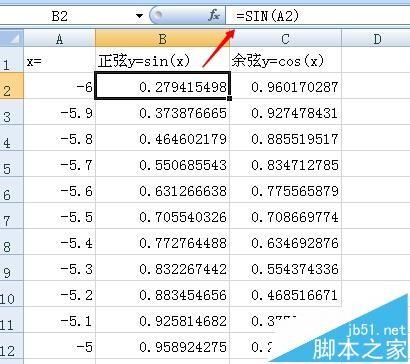
2、B Column sum C List the values of the two function variables . stay B Column B1 General written expression of cell input function ,y=sin(x), You can add some descriptive characters ; stay B2 Enter the formula according to the function expression in the cell “=SIN(A2)” Then select B2 Cell , Fill drop-down . Also in C Column input function expression and formula . Pictured , So the data is ready .
Two 、 Draw function image
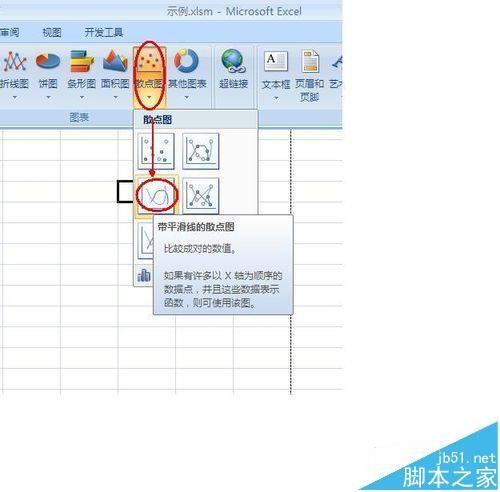
1、 Select... In the ribbon “ Insert ” tab , stay “ Chart ” Click... In the group “ Scatter plot → Scatter with smooth lines ”.
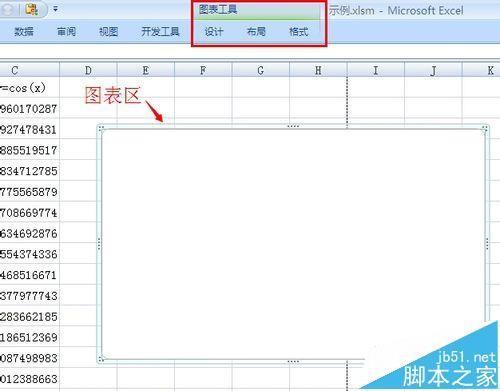
2、Excel Insert into the chart area as shown in the figure below , And add the function of chart tool in the function area “ Design ”、“ Layout ”“ Format ” tab .
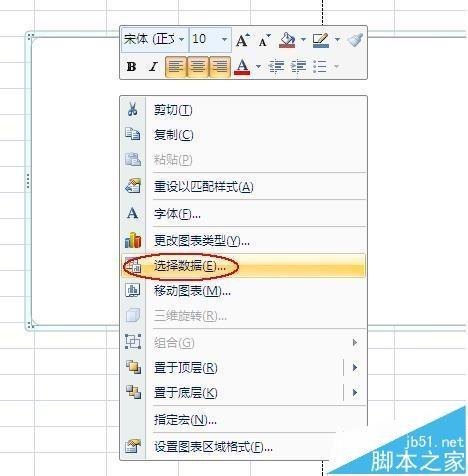
3、 First, select the data of the chart , Right click in the chart area , Choose... From the shortcut menu that pops up “ Select data ”.
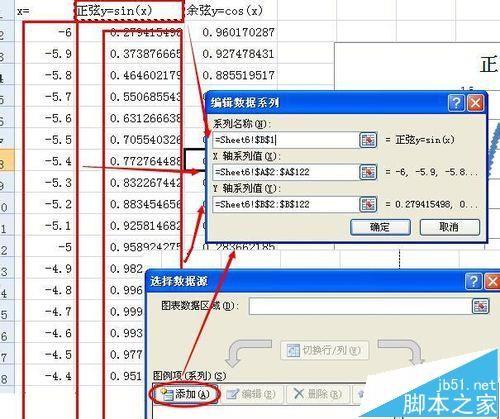
4、 In the pop-up “ Select data source ” Select... In the dialog box “ add to ”, eject “ Edit data series ” Dialog box , Pictured , Choose the data we have prepared , spot “ determine ”. So the sine function image is added , Also add the cosine function .
5、 After adding the data function, the image will come out , Pictured , We found that there were many places that didn't meet the requirements , What needs to be revised .
6、 First, the legend and grid lines , We don't need to , You can delete . Select the legend in the chart , Press Delete Key delete , Then select the grid line , Press Delete Key delete .
7、 Secondly, the scale of the two coordinate axes does not meet the requirements , In order to better adjust the coordinate axis , First, set the chart area to square , stay “ Format ” tab “ size ” In the group , Adjust the height and width to the same .

8、 Right click on each coordinate axis , Choose... From the shortcut menu that pops up “ Format axis ”.
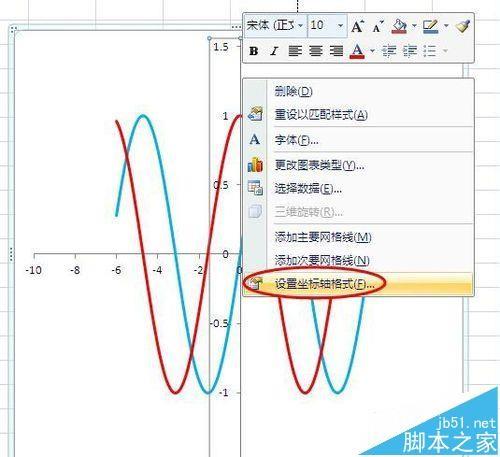
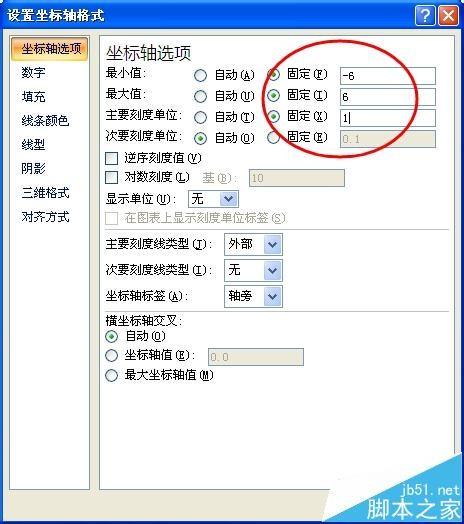
9、 In the pop-up “ Format axis ” In the dialog box “ Axis options ” In the column , take “ minimum value ”、“ Maximum ”、“ Main scale unit ” Is set to “ Fix ”, And enter... In the following text boxes “-6”、“6”、“1”, single click “ close ” Button . The two axes are set in the same way .
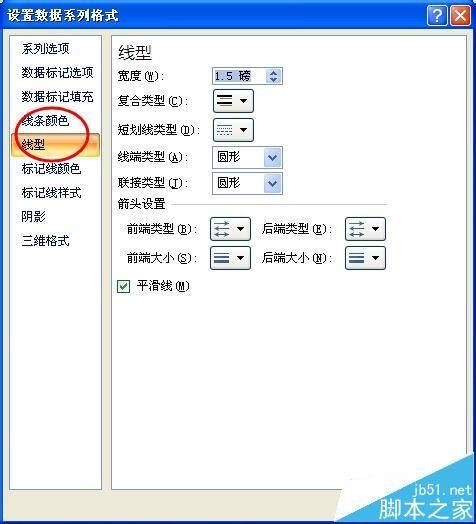
10、 then , After setting the line color and linetype of the function image , Right click the function image , Choose... From the shortcut menu that pops up “ Format data series ”.
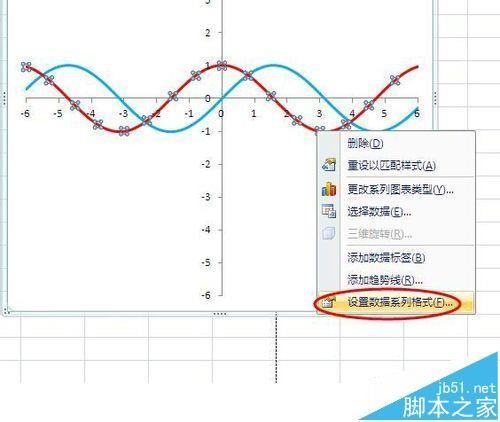
11、 In the pop-up “ Format data series ” In the dialog box “ line color ”、“ Linetype ” In the column , Set the line color and linetype of the function image respectively .
12、 Finally, add a function expression to each image , First click to select a function image , Then click on a data point to select a data point , Right click on the data point , Choose... From the shortcut menu that pops up “ Add data label ”.
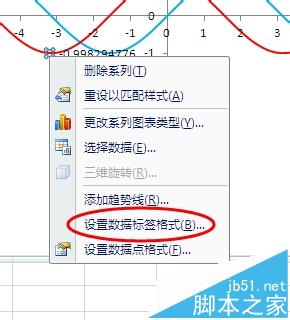
13、 Then right click on the data point , Choose... From the shortcut menu that pops up “ Format data labels ”.

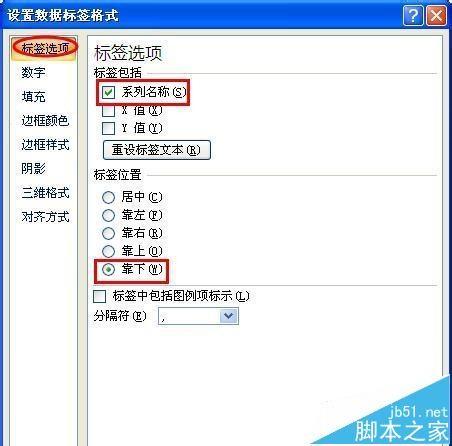
14、 In the pop-up “ Format data labels ” In the dialog box , Set the contents of the function label respectively 、 Position and border color, etc .

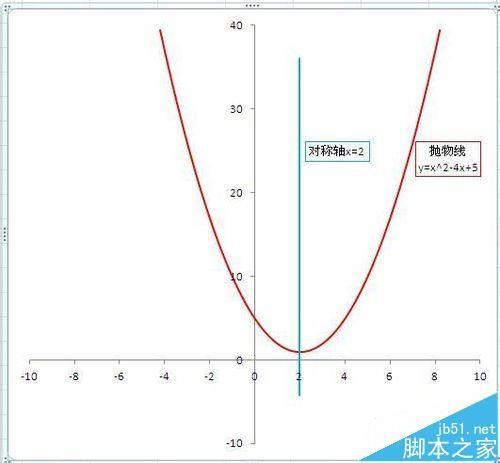
15、 At this point, the standard and beautiful function image is set up . The following is my parabola function image .
版权声明
本文为[Hua Weiyun]所创,转载请带上原文链接,感谢
https://yzsam.com/2022/04/202204231707302162.html
边栏推荐
- Conversion between hexadecimal numbers
- Baidu Map Case - Zoom component, map scale component
- Handwritten event publish subscribe framework
- Use of shell awk command
- About stream flow, write it down briefly------
- 自定义my_strcpy与库strcpy【模拟实现字符串相关函数】
- JS to find the character that appears three times in the string
- El date picker limits the selection range from the current time to two months ago
- Milvus 2.0 質量保障系統詳解
- ACL 2022 | dialogved: a pre trained implicit variable encoding decoding model for dialogue reply generation
猜你喜欢

Devexpress GridView add select all columns

CentOS MySQL multi instance deployment

线性代数感悟之1
groutine
Go language, array, string, slice

Deep understanding of control inversion and dependency injection

Lock锁

TypeError: set_ figure_ params() got an unexpected keyword argument ‘figsize‘

ASP. NET CORE3. 1. Solution to login failure after identity registers users
Change the password after installing MySQL in Linux
随机推荐
1-3 nodejs installation list configuration and project environment
Nodejs installation and environment configuration
The new MySQL table has a self increasing ID of 20 bits. The reason is
Shell-sort命令的使用
Expression "func" tSource, object "to expression" func "tSource, object" []
Clickhouse - data type
Collect blog posts
Production environment——
org. apache. parquet. schema. InvalidSchemaException: A group type can not be empty. Parquet does not su
RTKLIB 2.4.3源码笔记
Feign report 400 processing
Variable length parameter__ VA_ ARGS__ Macro definitions for and logging
ClickHouse-数据类型
1-4 configuration executable script of nodejs installation
Nodejs reads the local JSON file through require. Unexpected token / in JSON at position appears
Freecodecamp ---- budget & category exercise
SQL: How to parse Microsoft Transact-SQL Statements in C# and to match the column aliases of a view
Some problems encountered in recent programming 2021 / 9 / 8
[PROJECT] small hat takeout (8)
织梦DEDECMS安全设置指南