当前位置:网站首页>◰ GL shadow map core steps
◰ GL shadow map core steps
2022-04-23 16:41:00 【itzyjr】
The first round : Render the scene from the light angle
1. Create a custom framebuffer
glGenFramebuffers(1, &shadowBuffer);
2. Create and bind shadow textures , Set shadow map and parameters
glGenTextures(1, &shadowTex);
glBindTexture(GL_TEXTURE_2D, shadowTex);
// specify a two-dimensional texture image
glTexImage2D(GL_TEXTURE_2D, 0, GL_DEPTH_COMPONENT32,
		     screenW, screenH, 0, GL_DEPTH_COMPONENT, GL_FLOAT, 0);
glTexParameteri(GL_TEXTURE_2D, GL_TEXTURE_MIN_FILTER, GL_LINEAR);
glTexParameteri(GL_TEXTURE_2D, GL_TEXTURE_MAG_FILTER, GL_LINEAR);
glTexParameteri(GL_TEXTURE_2D, GL_TEXTURE_COMPARE_MODE, GL_COMPARE_REF_TO_TEXTURE);
glTexParameteri(GL_TEXTURE_2D, GL_TEXTURE_COMPARE_FUNC, GL_LEQUAL);
// may reduce shadow border artifacts
glTexParameteri(GL_TEXTURE_2D, GL_TEXTURE_WRAP_S, GL_CLAMP_TO_EDGE);
glTexParameteri(GL_TEXTURE_2D, GL_TEXTURE_WRAP_T, GL_CLAMP_TO_EDGE);
3. Bind frame buffer
glBindFramebuffer(GL_FRAMEBUFFER, shadowBuffer);
4. Attach the depth information to the shadow texture attachment of the frame buffer
If the image of the texture object is attached to the frame buffer ,OpenGL Will perform “ Render to texture ”, That is, the depth information is in the shadow texture , In this way, the depth information in the texture can be used to judge whether the point is in the shadow .
// attach a level of a texture object as a logical buffer of a framebuffer object
glFramebufferTexture(GL_FRAMEBUFFER, GL_DEPTH_ATTACHMENT, shadowTex, 0);
5. Disable color buffering ( That is, disable color output )
// GL_NONE:No color buffers are written
glDrawBuffer(GL_NONE);
6. Enable depth testing
glEnable(GL_DEPTH_TEST);
7. Draw two objects in light space ( One obscures the other )
glDrawArrays(..one.);
glDrawArrays(..two.);
8. Vertex shader Ⅰ: The normal output passes through the illumination space MVP Coordinates after matrix transformation .
Fragment Shader Ⅰ: Do nothing .
Because the depth test is performed after the fragment shader ,Alpha test -> Template testing -> Depth testing . Therefore, it must be output normally MVP Coordinates after matrix transformation . Because you don't need to paint , So fragment shaders 1 Nothing to do .
//  Vertex shader Ⅰ
gl_Position = shadowMVP * vec4(vertPos, 1.0);

//  Fragment Shader Ⅰ
void main(void) {
    }
The second round : Render the scene from the camera's perspective
1. Interrupt frame buffer
Since our frame buffer is not the default frame buffer , Rendering instructions will have no effect on the visual output of the window . For this reason , Rendering to a different frame buffer is called off screen rendering (Off-screen Rendering). Ensure that all rendering operations have visual effects in the main window , We need to activate again [ Default frame buffer ], Bind it to 0.
//  Switch back to the default frame buffer
glBindFramebuffer(GL_FRAMEBUFFER, 0);
2. Activate #0 Texture cells and bind shadow textures
At this point, the texture with depth information is copied to the shadow texture unit .
glActiveTexture(GL_TEXTURE0);
glBindTexture(GL_TEXTURE_2D, shadowTex);
3. Enable color buffer ( Color output is enabled )
// GL_FRONT:Only the front left and front right color buffers are written
glDrawBuffer(GL_FRONT);
4. Build two MVP Matrix as a unified variable : One is camera space MVP matrix , A light space BMVP matrix .
5. Draw two objects in camera space ( One obscures the other )
6. Vertex shader Ⅱ:
[out] shadow_coord = shadowBMVP * vec4(vertPos, 1.0);
[out] gl_Position = proj_matrix * mv_matrix * vec4(vertPos, 1.0);
Fragment Shader Ⅱ:
in vec4 shadow_coord;
layout(binding = 0) uniform sampler2DShadow shadowTex;
main() {

	// 0: In the shadow ,1: Not in the shadow
	float inShadow = textureProj(shadowTex, shadow_coord);
}
版权声明
本文为[itzyjr]所创,转载请带上原文链接,感谢
https://yzsam.com/2022/04/202204231639280838.html
边栏推荐
- PyMySQL
- MySql主从复制
- Set the color change of interlaced lines in cells in the sail software and the font becomes larger and red when the number is greater than 100
- 5-minute NLP: text to text transfer transformer (T5) unified text to text task model
- 漫画:什么是IaaS、PaaS、SaaS?
- Nacos detailed explanation, something
- 面试百分百问到的进程,你究竟了解多少
- 深度学习100例 | 第41天-卷积神经网络(CNN):UrbanSound8K音频分类(语音识别)
- Findstr is not an internal or external command workaround
- 关于 background-image 渐变gradient()那些事!
猜你喜欢
Dlib of face recognition framework
Ali developed three sides, and the interviewer's set of combined punches made me confused on the spot
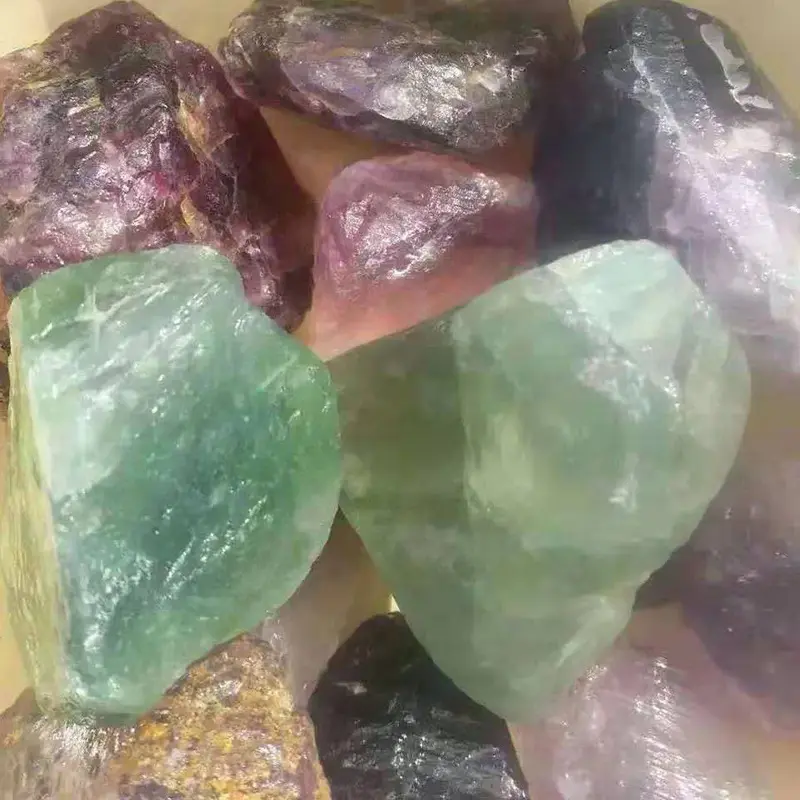
Zhongang Mining: Fluorite Flotation Process
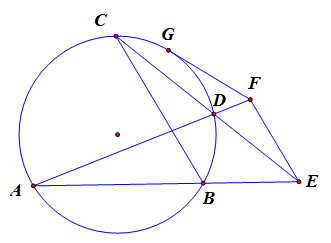
True math problems in 1959 college entrance examination

OMNeT学习之新建工程
PyMySQL
Do you really understand the principle of code scanning login?
面试百分百问到的进程,你究竟了解多少
On the security of key passing and digital signature

Questions about disaster recovery? Click here
随机推荐
众昂矿业:萤石浮选工艺
正则过滤内网地址和网段
深度学习100例 | 第41天-卷积神经网络(CNN):UrbanSound8K音频分类(语音识别)
Selenium IDE and XPath installation of chrome plug-in
How magical is the unsafe class used by all major frameworks?
MySQL master-slave synchronization pit avoidance version tutorial
面试百分百问到的进程,你究竟了解多少
DDT + Excel for interface test
JSP learning 1
扫码登录的原理你真的了解吗?
Construction of promtail + Loki + grafana log monitoring system
1959年高考数学真题
The solution of not displaying a whole line when the total value needs to be set to 0 in sail software
Use itextpdf to intercept the page to page of PDF document and divide it into pieces
文件操作详解(2)
English | day15, 16 x sentence true research daily sentence (clause disconnection, modification)
The first line and the last two lines are frozen when paging
New project of OMNeT learning
各大框架都在使用的Unsafe类,到底有多神奇?
Detailed explanation of gzip and gunzip decompression parameters