当前位置:网站首页>Getting Started with Chrome Plug-in Development - Nanny Level Raiders
Getting Started with Chrome Plug-in Development - Nanny Level Raiders
2022-08-11 10:44:00 【blue maple swing】
文章目录
Insert a message here first
Manifest version 2 is deprecated, and support will be removed in 2023. See https://developer.chrome.com/blog/mv2-transition/ for more details.
MV2版本的chrome插件在2023年停止支持
chromeWhat files and folders the plugin should contain
D:.
│  manifest.json
│
├─html
│      index.html
│
├─images
│      icon-128.png
│      icon-16.png
│
├─scripts
│      background.js
│
├─styles
│      main.css
│
└─_locales
    ├─en
    │      messages.json
    │
    └─zh_CN
            messages.json
- html:存放html页面
- images:存放插件图标
- scripts:存放js文件
- styles:存放样式
- _locales:存放多语言文件
- manifest.json:用来配置所有和插件相关的配置,作为chrome入口文件,必须放在根目录(
必须存在)
分析
- The directory structure is like oneweb网页,It is essentially a website application,是一个webapp
- 相对于普通的webapp,It is also possible to call more browser-level onesapi,Including counting money、历史记录、网络请求拦截、Intercept user input, etc
重要配置说明
manifest.json
See additional configurationhttps://blog.csdn.net/sysuzjz/article/details/51648163
{

    "manifest_version": 3, // Manifest version number,建议使用 版本 3,版本 1和2 是旧的,已弃用,不建议使用
    "name": "first-test-plugin", // 插件名称
    "version": "0.0.1", // 插件版本
    "description": "Here is the first test plugin", // 描述,可写可不写
    "icons":
    {

        "16": "images/custom/16x16.png",
        "48": "images/custom/48x48.png",
        "128": "images/custom/128x128.png"
    },
    // !!!browser_action和page_action只能添加一个
    "browser_action": //Browser level behavior,All pages are valid
    {

        "default_icon": "images/custom/16x16.png", // 图标的图片
        "default_title": "Hello lanfengqiuqian", // Move the mouse over the text displayed by the icon
        "default_popup": "html/popup.html" // Click the icon to pop up the page
    },
    "page_action": //Page-level behavior,It only takes effect under certain pages
    {

        "default_icon":
        {

            "24": "images/custom/24x24.png",
            "38": "images/custom/38x38.png"
        },
        "default_popup": "html/popup.html",
        "default_title": "Hello lanfengqiuqian"
    },
    "author": "lanfengqiuqian", // 可选填写
    "automation": false, // Whether to enable automation
    "background": // 背景页的脚本路径,一般为插件目录的相对地址
    {

        "scripts": [
            "scripts/background.js",
            "scripts/devtools-page.js"
        ]
    },
    "devtools_page": "html/devtools-page.html", // page in the dev tools
    "content_scripts": [ // 内容脚本一般植入会is embedded in the page中, 并且可以控制页面中的dom
        {

            "js": ["js/else-insert.js"], // There can be multiple arrays here
            "css": ["css/else-insert.css"],
            "matches": ["<all_urls>"] // is embedded in the page,Only under these sites content_scripts会运行
        }
    ],
    "permissions": [ // 安装的时候提示㤇的权限
        "cookies", // 使用cookies
        "webRequest", // 使用web请求
        "http://*", // 可以通过executeScript或者insertCSSThe address of the website to visit.如: https://*.google.com/
        "management", //
        "storage", // 使用本地存储
        "tabs", // 操作标签
        "contextMenus" //右键菜单
    ]
    "default_locale ": "zh_CN" //默认语言(比如"zh_CN")
}
Start a plugin by hand
准备工作
创建一个文件夹,如我的叫 extensions (The root directory mentioned later refers to this directory)
文件夹下创建一个 img 目录,用于存放一些logo之类的图片
放入一张图片,如logo.png
文件夹下创建一个 html 目录,用于存放html文件
文件夹下创建一个 js 目录,用于存放js文件
Here if you want to put one firstjqueryA file for loading is also possible,I use it later for conveniencescript引入
文件夹下创建一个 css 目录,用于存放css文件
文件夹根目录下创建一个 manifest.json 文件
{

    "manifest_version":3,
	"name":"This is the plugin name",
	"version":"0.0.1",
	"description":"Here is the plugin description",
    "action":{

		"default_title":"This is the prompt text when the mouse is moved up",
        "default_popup":"html/popup.html"
	},
	"icons":{

		"16":"img/logo.png",
		"32":"img/logo.png",
		"48":"img/logo.png",
		"128":"img/logo.png"
	}
}
然后chrome扩展程序【加载已解压的扩展程序】选择刚才创建的extensions目录
效果如下

pupup部分
在
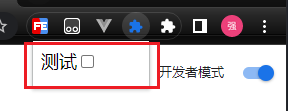
/html新建一个popup.html文件,然后在manifest.json中的action配置popup的路径"action":{ "default_title":"This is the prompt text when the mouse is moved up", "default_popup":"html/popup.html" }<!DOCTYPE html> <html> <head> <meta http-equiv="Content-Type" content="text/html; charset=utf-8" /> <link rel="stylesheet" type="text/css" href="../css/popup.css" /> </head> <body> <div class="btn"> 测试<input id="TEST" class="checkbtn" type="checkbox" /> </div> </body> <script src="https://cdn.bootcdn.net/ajax/libs/jquery/3.6.0/jquery.min.js"></script> <script src="../js/popup.js"></script> </html>在css和jsCreate a new directory separately
popup.css和popup.js文件/* popup.css */ .btn{ width: 100px; height: 30px; font-size: large; }//popup.js $(".checkbtn").click(function(){ alert($(this).attr('id')); });Then reload the extension
点击插件,效果如下
待解决问题
checked each timecheckboxwill be restored,So next you need to do a local storage to save itpopup的改变
background部分
在
manifest.json中加入service_workerconfig path andpermissions"background":{ "service_worker":"background.js" }, "permissions":["storage"]注意:
service_worker说明- This is a background script that runs with the plugin all the time
- 没有前端页面,不支持dom,所以不能引入jQuery和其他js
- All scripts that need to stay running need to be uninstalled directly
background.js文件里 - 同样也不支持
XMLHttpRequest,所以需要使用fetch来替代xhr请求 - 一定要放在
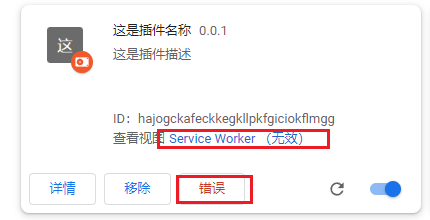
根目录(Extended file root directory,Not the root directory of the computer disk),Otherwise, it will appear when you use itservice worker(无效)提示 - 可以在
扩展程序=>查看视图Click the console that pops up to view the output
在根目录写
background.js文件//background.js chrome.runtime.onInstalled.addListener(() => { DBdata("clear");//Clears local data saved by the plugin }); //The data used by the plugin is stored in storage.local中 function DBdata(mode,callback,data){ //Functions that manipulate local storage if(mode=="set"){ //保存本地数据 console.log('set-LocalDB'); chrome.storage.local.set({ LocalDB: data}); }else if(mode=="get"){ //获取 chrome.storage.local.get('LocalDB', function(response) { typeof callback == 'function' ? callback(response) : null; }); }else if(mode=="clear"){ //清空 chrome.storage.local.clear(); } }打开
popup.js,Delete the original click event,Add initialization and connection to itservice_worker的脚本//popup.js window.bgCommunicationPort = chrome.runtime.connect();//初始化bgCommunicationPort $(".checkbtn").click(function(){ bgCommunicationPort.postMessage({ //发送到bg,The key value can be set freely Direct : $(this).attr('id'),//目标 Content : '测试内容',//内容 step : 0//步骤 }); }); $(document).ready(function(){ //打开popup时触发,Read previously stored parameters bgCommunicationPort.postMessage({ fromPopup:'getDB'});//向background发送消息 bgCommunicationPort.onMessage.addListener(function(receivedPortMsg) { //监听background console.log(receivedPortMsg);//这是background发来的内容 if(receivedPortMsg&&receivedPortMsg.Direct){ $(".checkbtn").prop({ 'checked': false});//初始化按钮 $("#"+receivedPortMsg.Direct).prop({ 'checked': true}); } }); });打开
background.js,Add monitoring to itpopup的脚本(Do not delete the original here,Can be added to the back)//background.js chrome.runtime.onConnect.addListener(function(port) { //接收到popup port.onMessage.addListener(function(receivedMsg) { //监听popup发来的内容receivedMsg if(receivedMsg.fromPopup&&receivedMsg.fromPopup=='getDB'){ //如果接收到了getDB,Here reading data and returning is equivalent to initializationpopup页面 DBdata('get',function(res){ port.postMessage(res.LocalDB);//发送到popup }); }else{ //如果不是,The description is received frompopupManually click the set data,Deposit to usepopupShow when opened DBdata('set','',receivedMsg) } }) });重载插件
At this time, two errors will be found
发现是用
script引入的jquery报跨域Then change it to file import
在js目录下新建
jquery.js到https://jquery.com/download/去下载
production版本的jsThen put his content
jquery.js中修改
popup.html文件中的jquery引入<script src="../js/jquery.js"></script>
重载插件,It's okay to find errors
测试
The problem with resetting the tick every time is gone
content部分
contentCan be injected into browsed web pages,操作dom,So many functions can be achieved
manifest.json中加入content的配置
"content_scripts":[{

    "js":["js/jquery.js","js/content.js"],/*contentcan be imported at willjs,Because its content will run directly on the web page being browsed*/
    "matches":["*://localhost/*"],/*Which pages to run on*/
    "run_at":"document_end"/* Runs when the page load is complete */
}]
Note that this is only matching nowlocalhost哦
新建
js/content.js,在content.js中写入//content.js manifestThe page that matches the address will directly execute the code here when it is refreshed chrome.runtime.sendMessage(chrome.runtime.id, { //Sent when the page refreshesbg fromContent: 'getDB' }); chrome.runtime.onMessage.addListener(function(senderRequest, sender, sendResponse) { //接收到bg console.log('demo已运行'); var LocalDB=senderRequest.LocalDB; console.log(LocalDB); switch(LocalDB.Direct){ case 'TEST': console.log(123123); break; default: break; } // 不写会报错 Unchecked runtime.lastError: The message port closed before a response was received. sendResponse('这里是content返回值'); });然后
background.jsadd monitoringcontent的代码//background.js chrome.runtime.onMessage.addListener(function (senderRequest, sender, sendResponse) { //接收到content // 不写会报错 Unchecked runtime.lastError: The message port closed before a response was received. sendResponse({ msg: '接收到content' }); console.log(senderRequest); if (senderRequest.fromContent && senderRequest.fromContent == 'getDB') { //接收到fromContent:getDB DBdata('get', function (res) { //Fetch data locally if (res.LocalDB) { var LocalDB = res.LocalDB; switch (LocalDB.Direct) { //If it is depositedTEST按钮 case 'TEST': chrome.tabs.query({ active: true, currentWindow: true }, function (tabs) { chrome.tabs.sendMessage(tabs[0].id, { LocalDB: LocalDB }, function (res) { console.log('接收content的回调', res); });//发送到content }); break; default: break; } } }); } });这里注意
sendResponse这个方法,Some do not add this parameter to the callback,导致找不到重载插件
代码执行顺序
Plugin initialization phase
- Execute the plugin initialization monitoring first
background.js中onInstalled,清除本地数据
- Execute the plugin initialization monitoring first
Manually click the plugin icon,勾选插件
- 执行
popue.js的ready方法进行初始化 - 点击按钮触发
clickmethod to modify local data
- 执行
Web page refresh phase
- 执行
content.js的sendMessage方法 - 执行
background.js的onMessage方法 - 读取本地数据
- Decide whether or not based on local data
sendMessage到content
- 执行
去广告插件
说明:The judgment for advertising here is类名为 .ad 的元素
如我的vue页面
<div>
    <h2 class="ad">The first ad</h2>
    <h2 class="ad">Second advertisement</h2>
    <h2 class="ad">The third advertisement</h2>
    <h2>Here is the normal data</h2>
</div>
在
popup.html中增加一个Go to the ad button<div class="btn"> 去广告<input id="removeAD" class="checkbtn" type="checkbox" /> </div>在
background.js中监听contentPartially added forremoveAD的判断//If it is depositedremoveAD按钮 case 'removeAD': chrome.tabs.query({ active: true, currentWindow: true }, function(tabs){ chrome.tabs.sendMessage(tabs[0].id, { LocalDB: LocalDB});//发送到content }); break;在
content.js中监听background.js部分增加removeAD的判断case 'removeAD': //hidden containsad的元素,to achieve the effect of advertising $(".ad").hide(); break;重载插件,勾选页面中的
去广告,然后刷新页面,Found that the ad is gone

页面跳转和cookie
和popup一样,contentData is also not saved after closing,当我们在AAfter the page gets the data, you want to put itB页面上去,在contentA direct jump will not pass the acquired data,所以和backgroundLinks to save local data come in handy
案例:将csdn的cookie的UserNick显示在localhost:8081中
在
manifest.json中配置【Domain script matching】、【权限】和【主机权限】"permissions":["storage", "cookies"], "host_permissions": [ "*://www.csdn.net/*" ], "content_scripts":[{ "js":["js/jquery.js","js/content.js"], "matches":["*://localhost/*", "*://www.csdn.net/*"], "run_at":"document_end" }]It is important to note here that it must be able to matchurl,否则可能引起
The page script is unresponsive或者获取不到cookie在
popup.html中增加按钮<div class="btn"> csdn<input id="checkCsdnUserNick" class="checkbtn" type="checkbox" /> </div>在
background.js中增加对于csdn按钮的判断case 'checkCsdnUserNick': console.log('LocalDB', LocalDB) //popupThere is one when setting the datastep属性,It comes into play when it comes to multi-step operations if(LocalDB.step==0){ LocalDB.step = 1;//将step设置成1 chrome.storage.local.set({ LocalDB: LocalDB//Save to local data },function() { chrome.tabs.update(null, { //Jump the front page to the settingurl // 这里的urlNo slashes are required / url: 'https://www.csdn.net' }); }); }else if(LocalDB.step==1){ //因为csdnThe address we also matched socontent在跳转到csdnWill come back later,不同的是step已经是1了 chrome.cookies.get({ //获取cookie 'url': "https://www.csdn.net", 'name': 'UserNick' }, function(cookie) { console.log('cookie', cookie); console.log(cookie.value);//获取到的值 LocalDB.cookie=cookie.value;//Put the obtained value into the local datacookie属性里 LocalDB.step = 2;//将step设置成2 chrome.storage.local.set({ //获取到cookieThen jump to the second page LocalDB: LocalDB//Save to local data },function() { chrome.tabs.update(null, { //Jump the front page to the settingurl url: 'http://localhost:8081/' }); }); }); }else if(LocalDB.step==2){ //第二步 chrome.tabs.query({ active: true, currentWindow: true}, function(tabs){ //发送到content chrome.tabs.sendMessage(tabs[0].id, { LocalDB: LocalDB}); }); } break;在
content.js中增加对于csdn按钮的判断case 'checkCsdnUserNick': if(LocalDB.step==2){ $("body").append('<h1>'+LocalDB.cookie+'</h1>'); } break;重载插件,到
csdn.net中开启插件,勾选csdn,Then refresh the page to see the effect会获取
csdn.net中cookienickname in ,然后跳转到localhost:8081,进行显示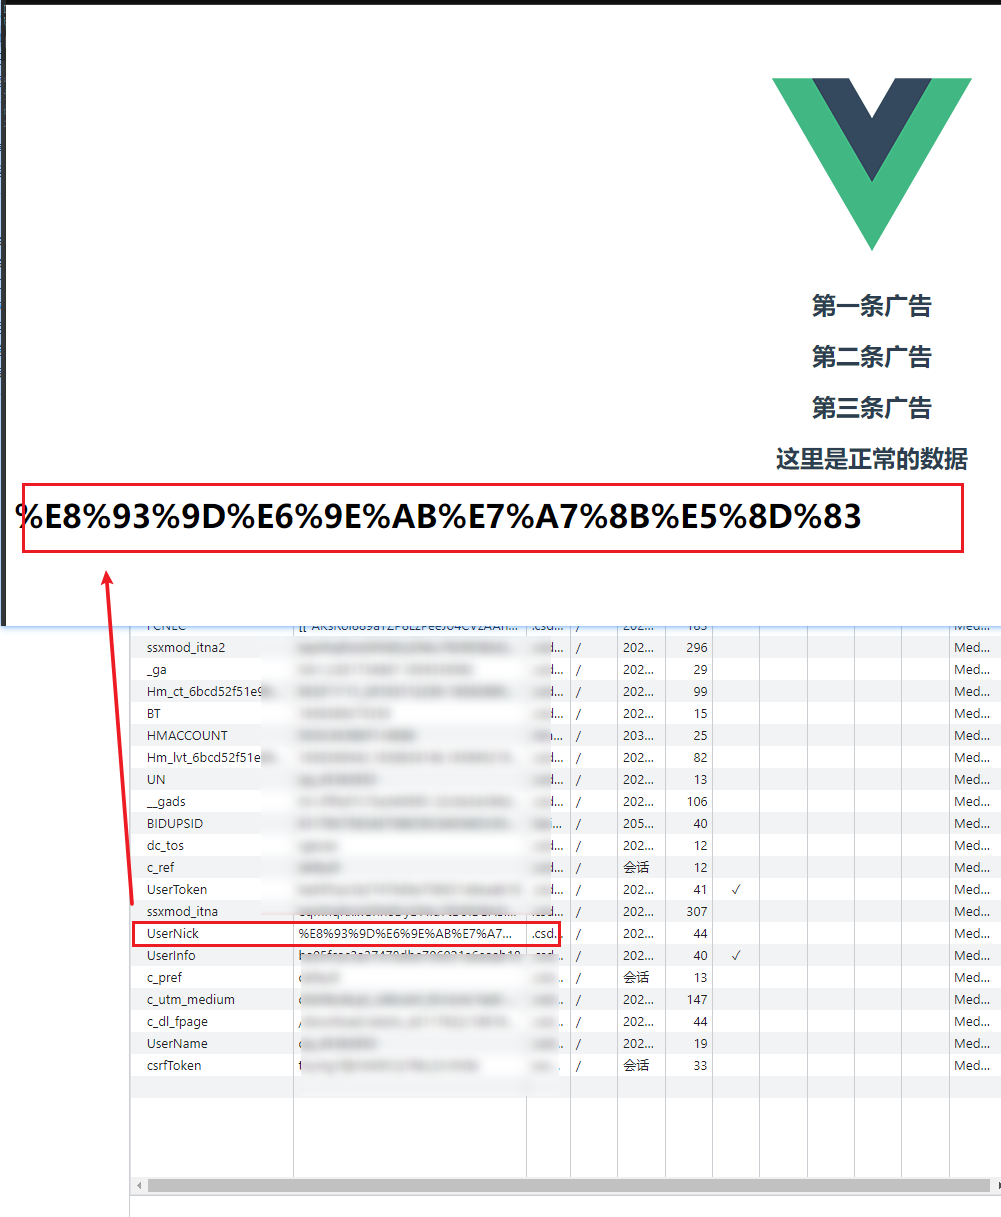
Problem records in the process
Unchecked runtime.lastError: The message port closed before a response was received.
This problem is usually caused by other plugins,注意排查,Find the affected plugins and disable them
Most people are due【迅雷】插件或者【油猴】插件引起的
扩展【移除】旁边多了一个【错误】的按钮
如果有错误提示,You can check according to the prompts
如果没有错误提示,Try removing and reloading the extension
Check if not put
sendMessage和sendResponse配套使用每一个
sendMessage都需要和sendResponse进行呼应也就是说,在每一个
chrome.runtime.onMessage.addListener的回调函数中,需要使用sendResponse进行返回可以参见https://blog.csdn.net/m0_37729058/article/details/89186257
service worker看不到
content.js的console.log原因是因为这个jsis embedded in the page,So you need to view it in the console of the web page you are using,而不是
service worker无法获取到cookie
可能原因如下
没有授权
host_permissions,控制台会报错Unchecked runtime.lastError: No host permissions for cookies at url: "https://www.csdn.net/".检查
manifest.json中的此项配置,Not adding or not matching can cause this problem检查
chrome.cookies.get这个方法中的url是否完全正确
代码地址
边栏推荐
- 二、第二章变量
- 10Super详解
- logstash/filebeat只接收最近一段时间的数据
- Qihua stores the future and interprets the origin of distributed
- STM32入门开发 LWIP网络协议栈移植(网卡采用DM9000)
- TIOBE - 2022年8月编程语言排行
- 大疆2022秋招笔试 —— 最小时间差、数组的最小偏移量
- LeetCode·每日一题·1417.重新格式化字符串·模拟
- Use Function Compute to package and download OSS files [Encounter Pit Collection]
- 【luogu CF1427F】Boring Card Game(贪心)(性质)
猜你喜欢
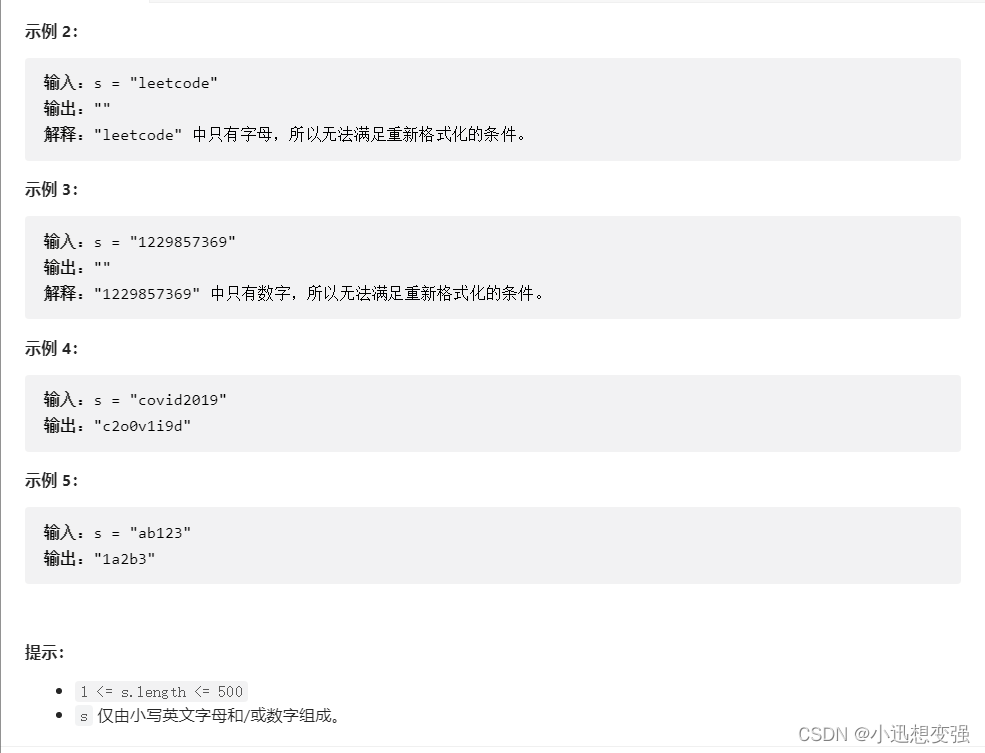
LeetCode · Question of the Day · 1417. Reformatting String · Simulation
OAK-FFC Series Product Getting Started Guide

期货开户最低的是交易所手续费不加佣金

人是怎么废掉的?人是怎么变强的?
Primavera P6 Professional 21.12 Login exception case sharing
![[Building a 2D rasterized map using SLAM technology]](/img/d3/2d5a7415cf3f9e965ef83fa90e6cc2.png)
[Building a 2D rasterized map using SLAM technology]
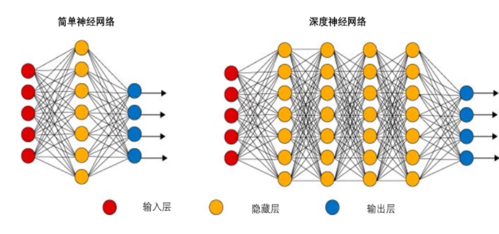
卷积神经网络梯度消失,神经网络中梯度的概念
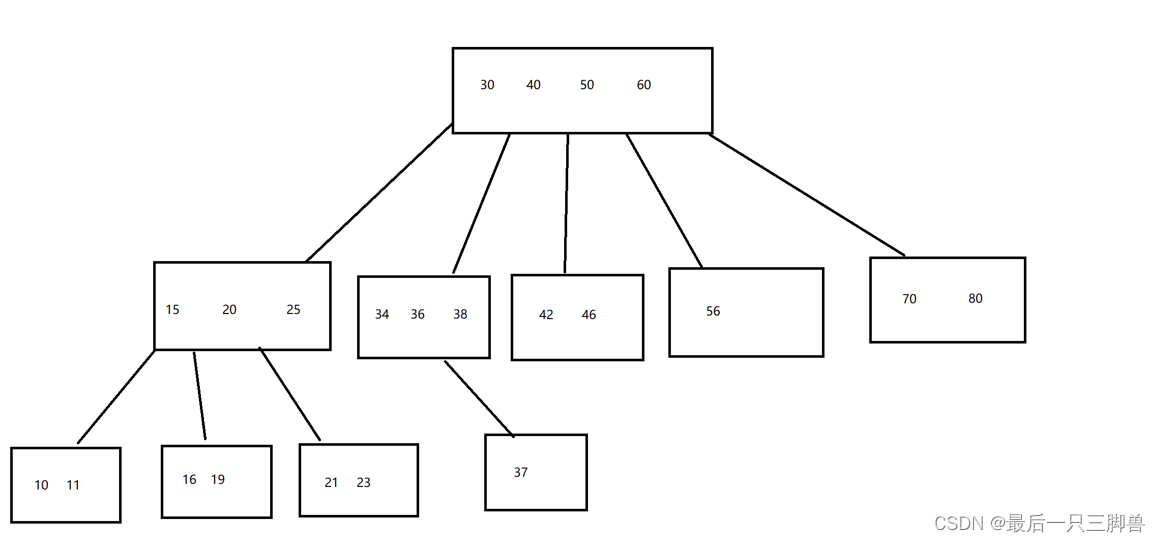
数据库的索引和其底层数据结构

如何开手续费低靠谱正规的期货账户呢?
【Mysql系列】03_系统设计
随机推荐
全新FIDE 编译简单评测
How to build programming ideas and improve programming ideas
fetch请求设置请求头错误导致无法跨域
【应用SLAM技术建立二维栅格化地图】
算法---跳跃游戏(Kotlin)
【Mask2Former】 解决代码中一些问题
Cholesterol-PEG-FITC,Fluorescein-PEG-CLS,胆固醇-聚乙二醇-荧光素水溶性
How to explain to my girlfriend what is cache penetration, cache breakdown, cache avalanche?
联想 U 盘装机后出现 start pxe over ipv4
idea plugin autofill setter
Adobe LiveCycle Designer report designer
Huawei WLAN Technology: AC/AP Experiment
数据库导出的csv文件纯数字被转为科学计数法
【每日一题】640. 求解方程
你觉得程序员是一个需要天赋的职业吗?
二、第二章变量
MySQL数据库基础_常用数据类型_表设计
大疆2022秋招笔试 —— 最小时间差、数组的最小偏移量
logstash/filebeat只接收最近一段时间的数据
03列中新增子行